
Plugin Manual – GAM Ad Inserter
Introduction
GAM Ad Inserter – Adx & Ad Manager Ads is a WordPress plugin that connects your website with Google Ad Manager (GAM), allowing you to create, control, and manage advertisements directly from your WordPress dashboard.
This plugin eliminates the need to manually insert ad scripts or edit theme files by providing a centralized ad management system fully integrated with your existing GAM setup.
Key Features
- Create and manage multiple ad formats including: Banner, Interstitial, Anchor, Floater, Popup, Push Down, Flying Carpet, Sticky, Rewarded, and Custom Ads
- Control ad placement using device targeting, position rules, alignment options, and display conditions
- Insert ads into posts, pages, widgets, or use predefined site-wide placements
- Manage ad lifecycle with built-in controls for Active, Paused, and Disabled states
- Works seamlessly with your existing Google Ad Manager (AdX) configuration
Requirements
- WordPress Version: 5.5 or higher
- PHP Version: 7.4 or higher
- Database: MySQL 5.7 or higher
- Ad Account: Active Google Ad Manager (AdX) account
- API Access: Enabled in Google Ad Manager
Installation
You can install the GAM Ad Inserter – Adx & Ad Manager Ads plugin using either the WordPress dashboard or by manually uploading the plugin files via FTP.
Method 1 — Install via WordPress Dashboard
Step 1: Log in to your WordPress Admin Panel.
Step 2: In the left-hand menu, go to Plugins → Add New.
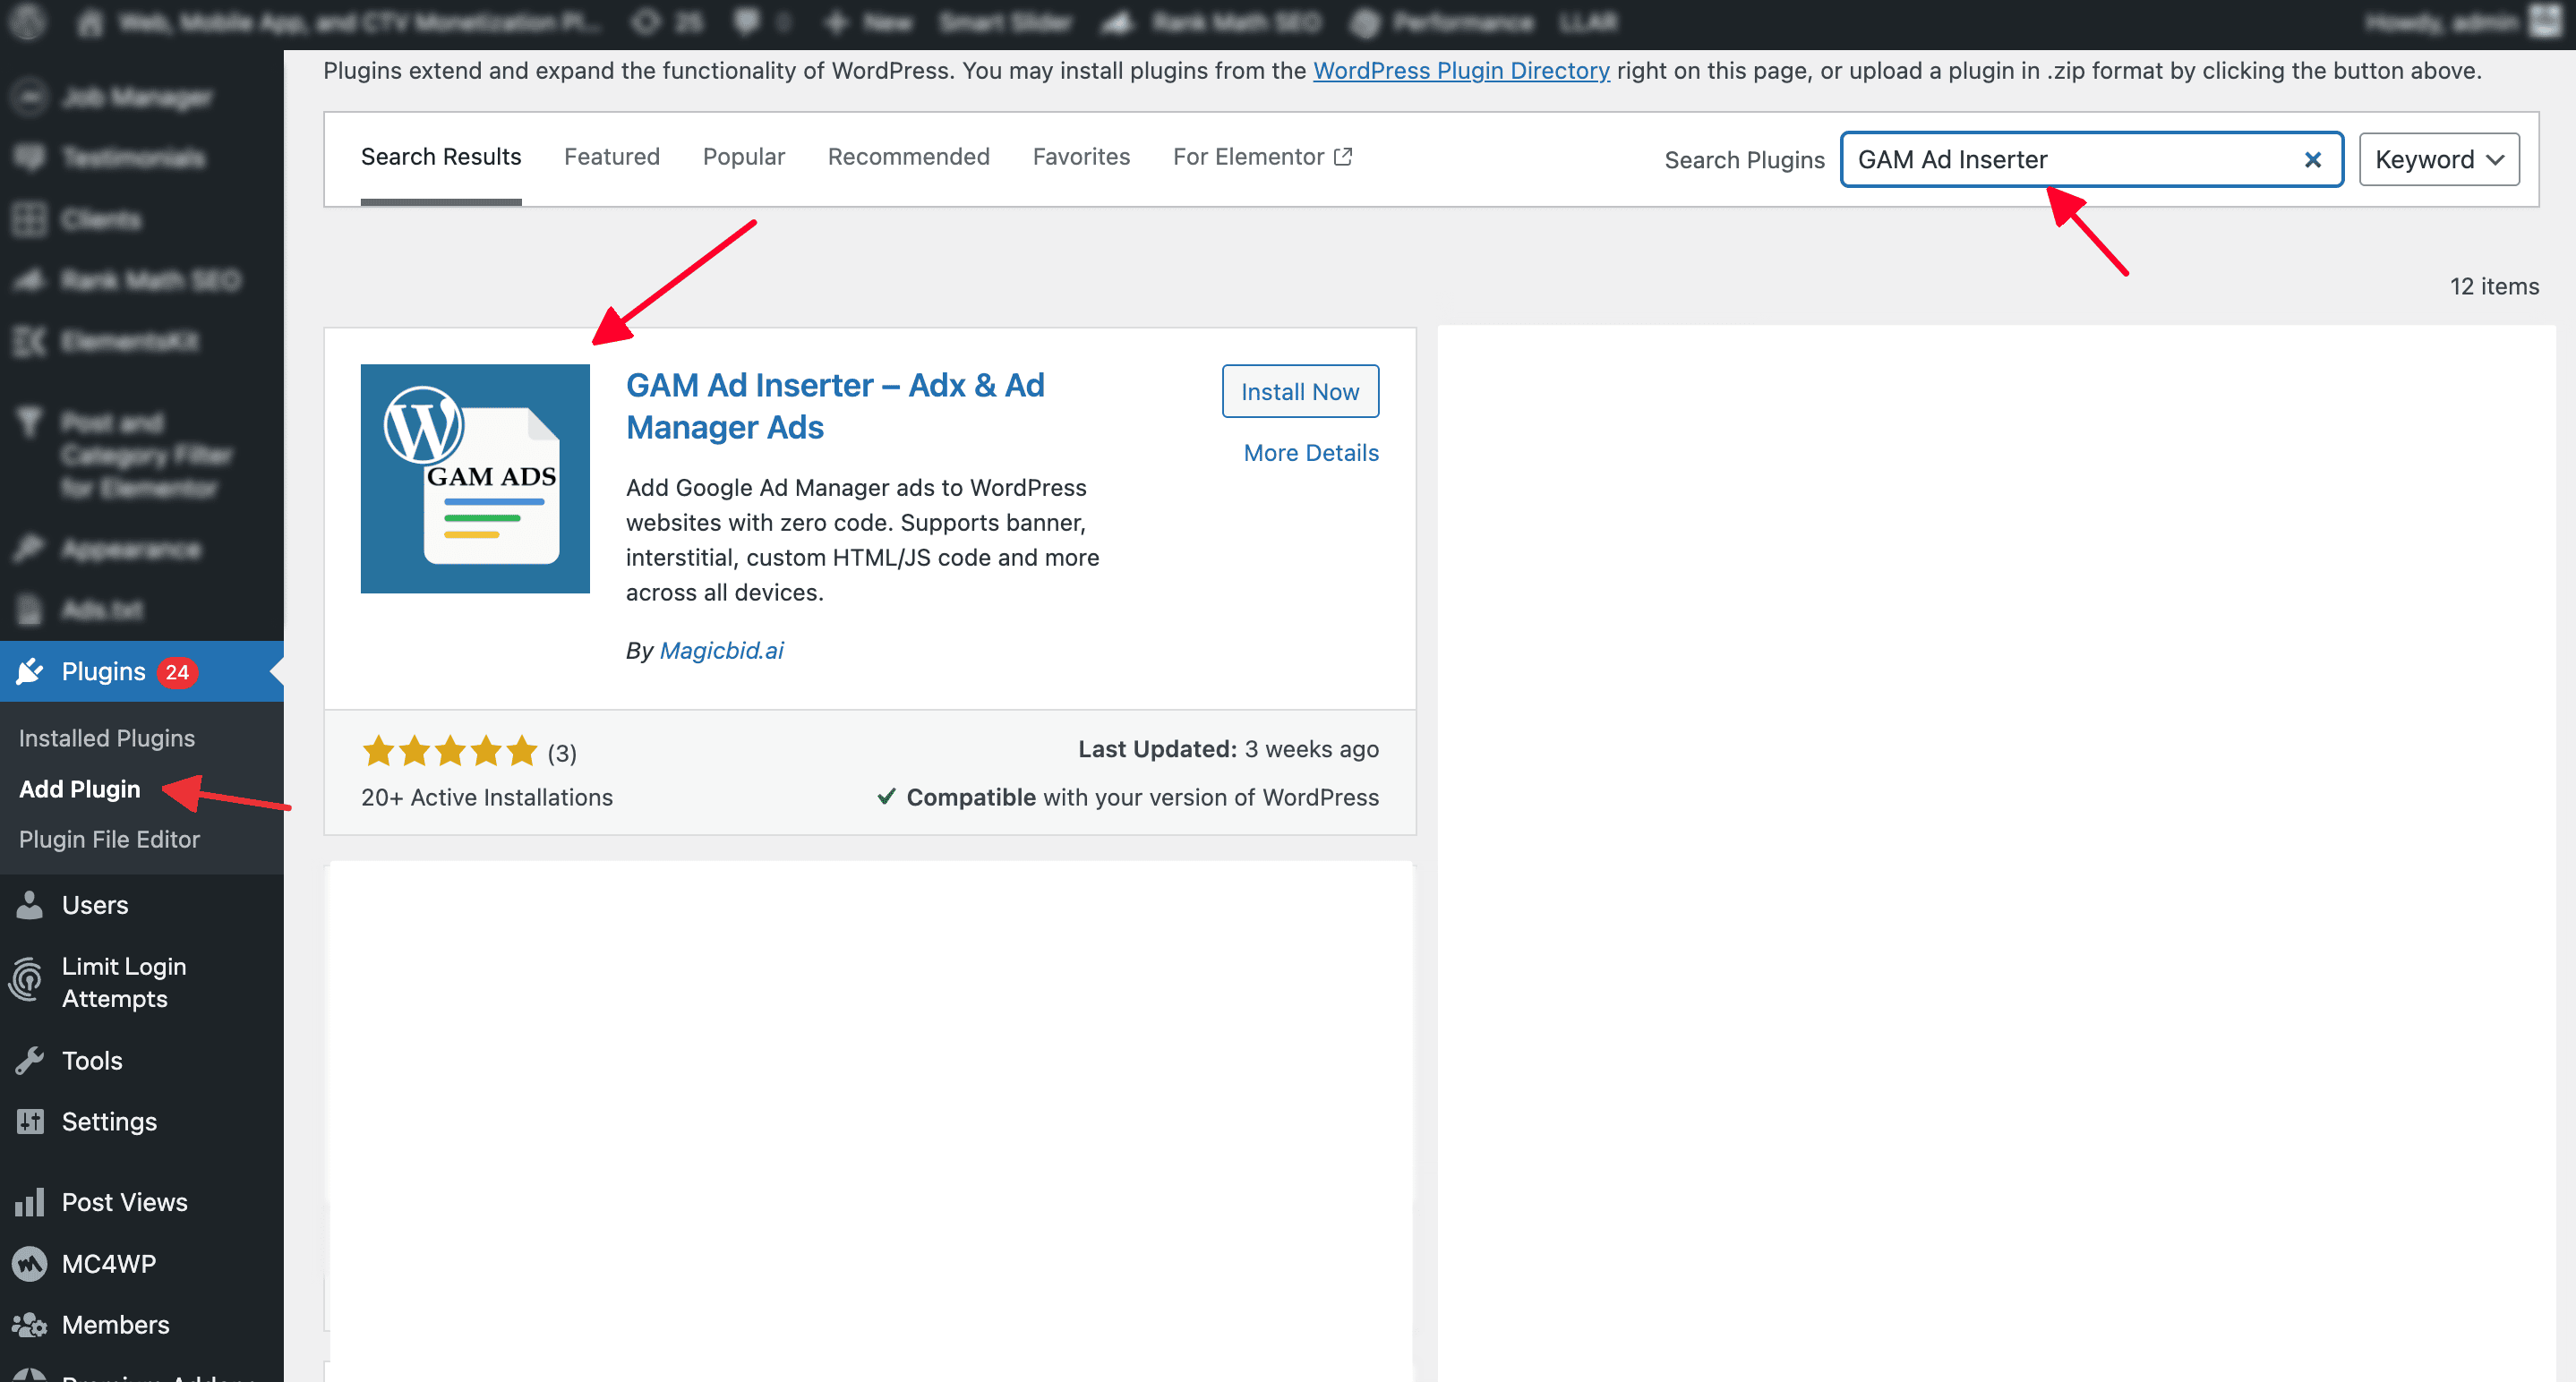
Step 3: In the search bar, type “GAM Ad Inserter”.
Step 4: Find the GAM Ad Inserter plugin and click Install Now.
Step 5: Once installed, click Activate.
Method 2 — Install via FTP Upload
Step 1: Extract the downloaded plugin .zip file.
Step 2: Upload the folder google-adx-gam-connect to
/wp-content/plugins/.
Step 3: Open your WordPress Dashboard.
Step 4: Go to Plugins and click Activate.
Getting Started
Access the Plugin
- After activation, a new menu item GAM ADS will appear in the WordPress admin sidebar.
Initial Setup
Step 1: Open the plugin in WordPress
In your WordPress dashboard, open the plugin from the left menu: GAM ADS.
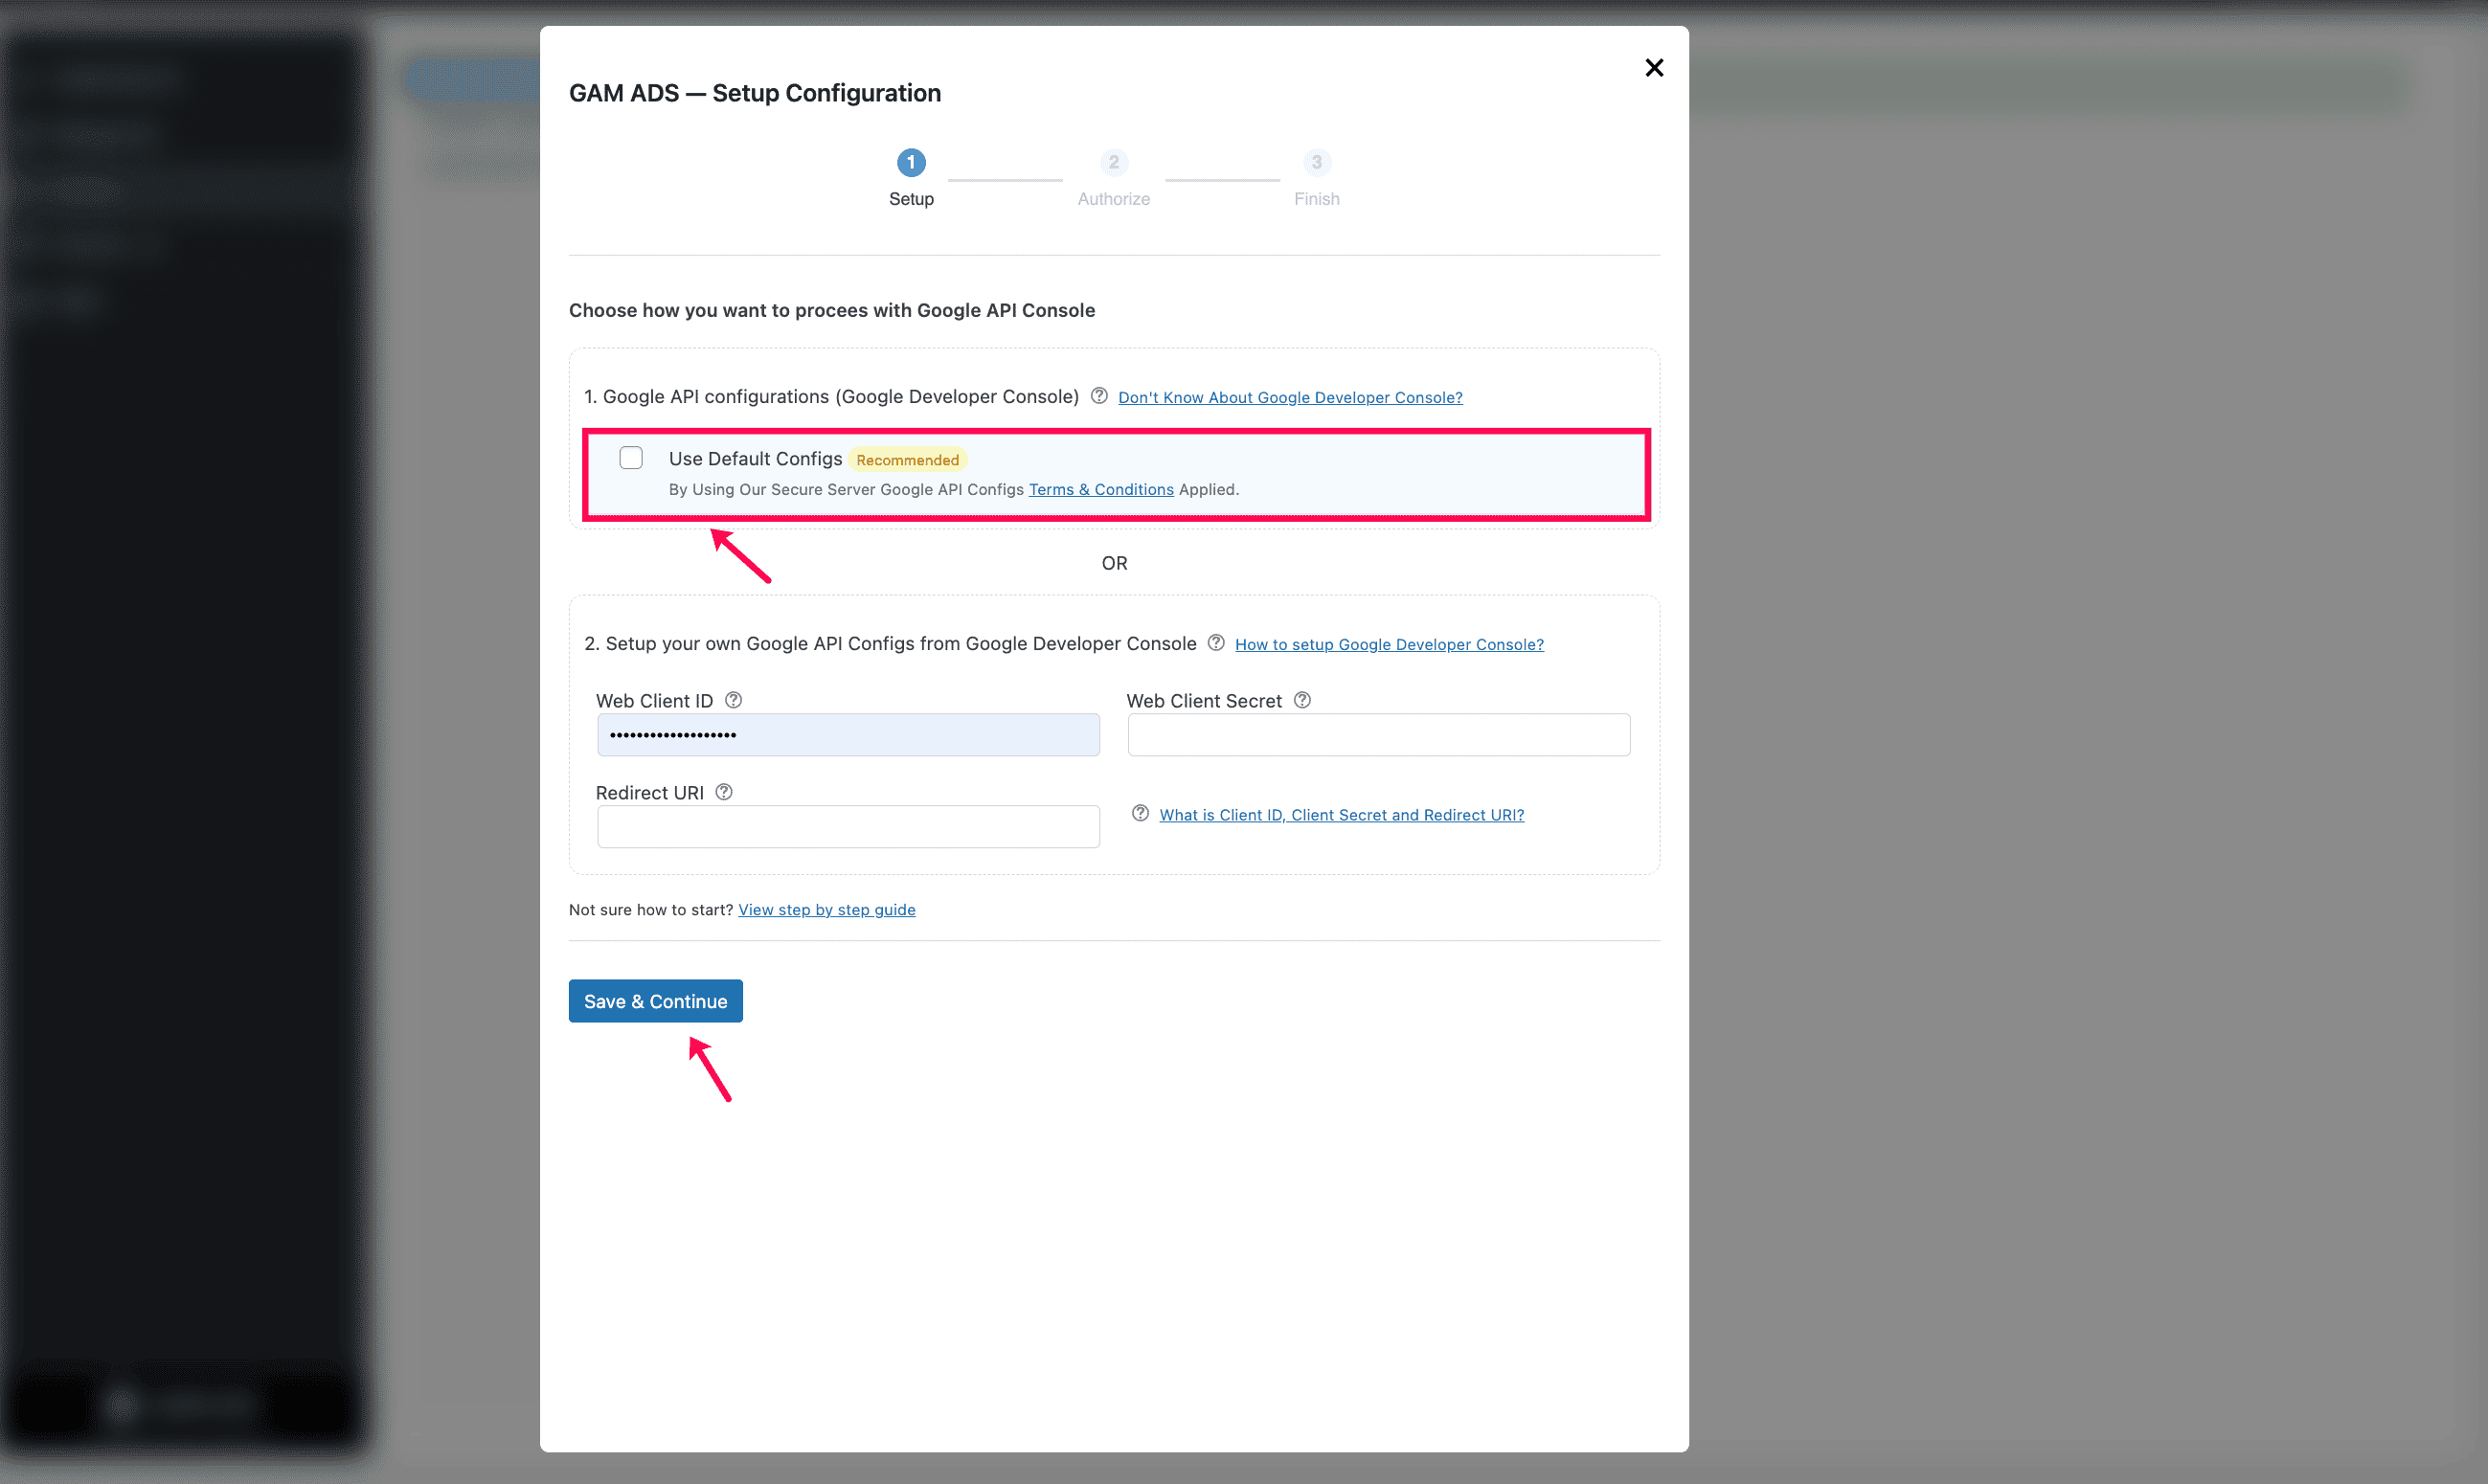
Step 2: Use Default Configuration
On the Setup Configuration screen, select Use Default Configs (Recommended), then click Save & Continue. You can change this later from Settings if needed.
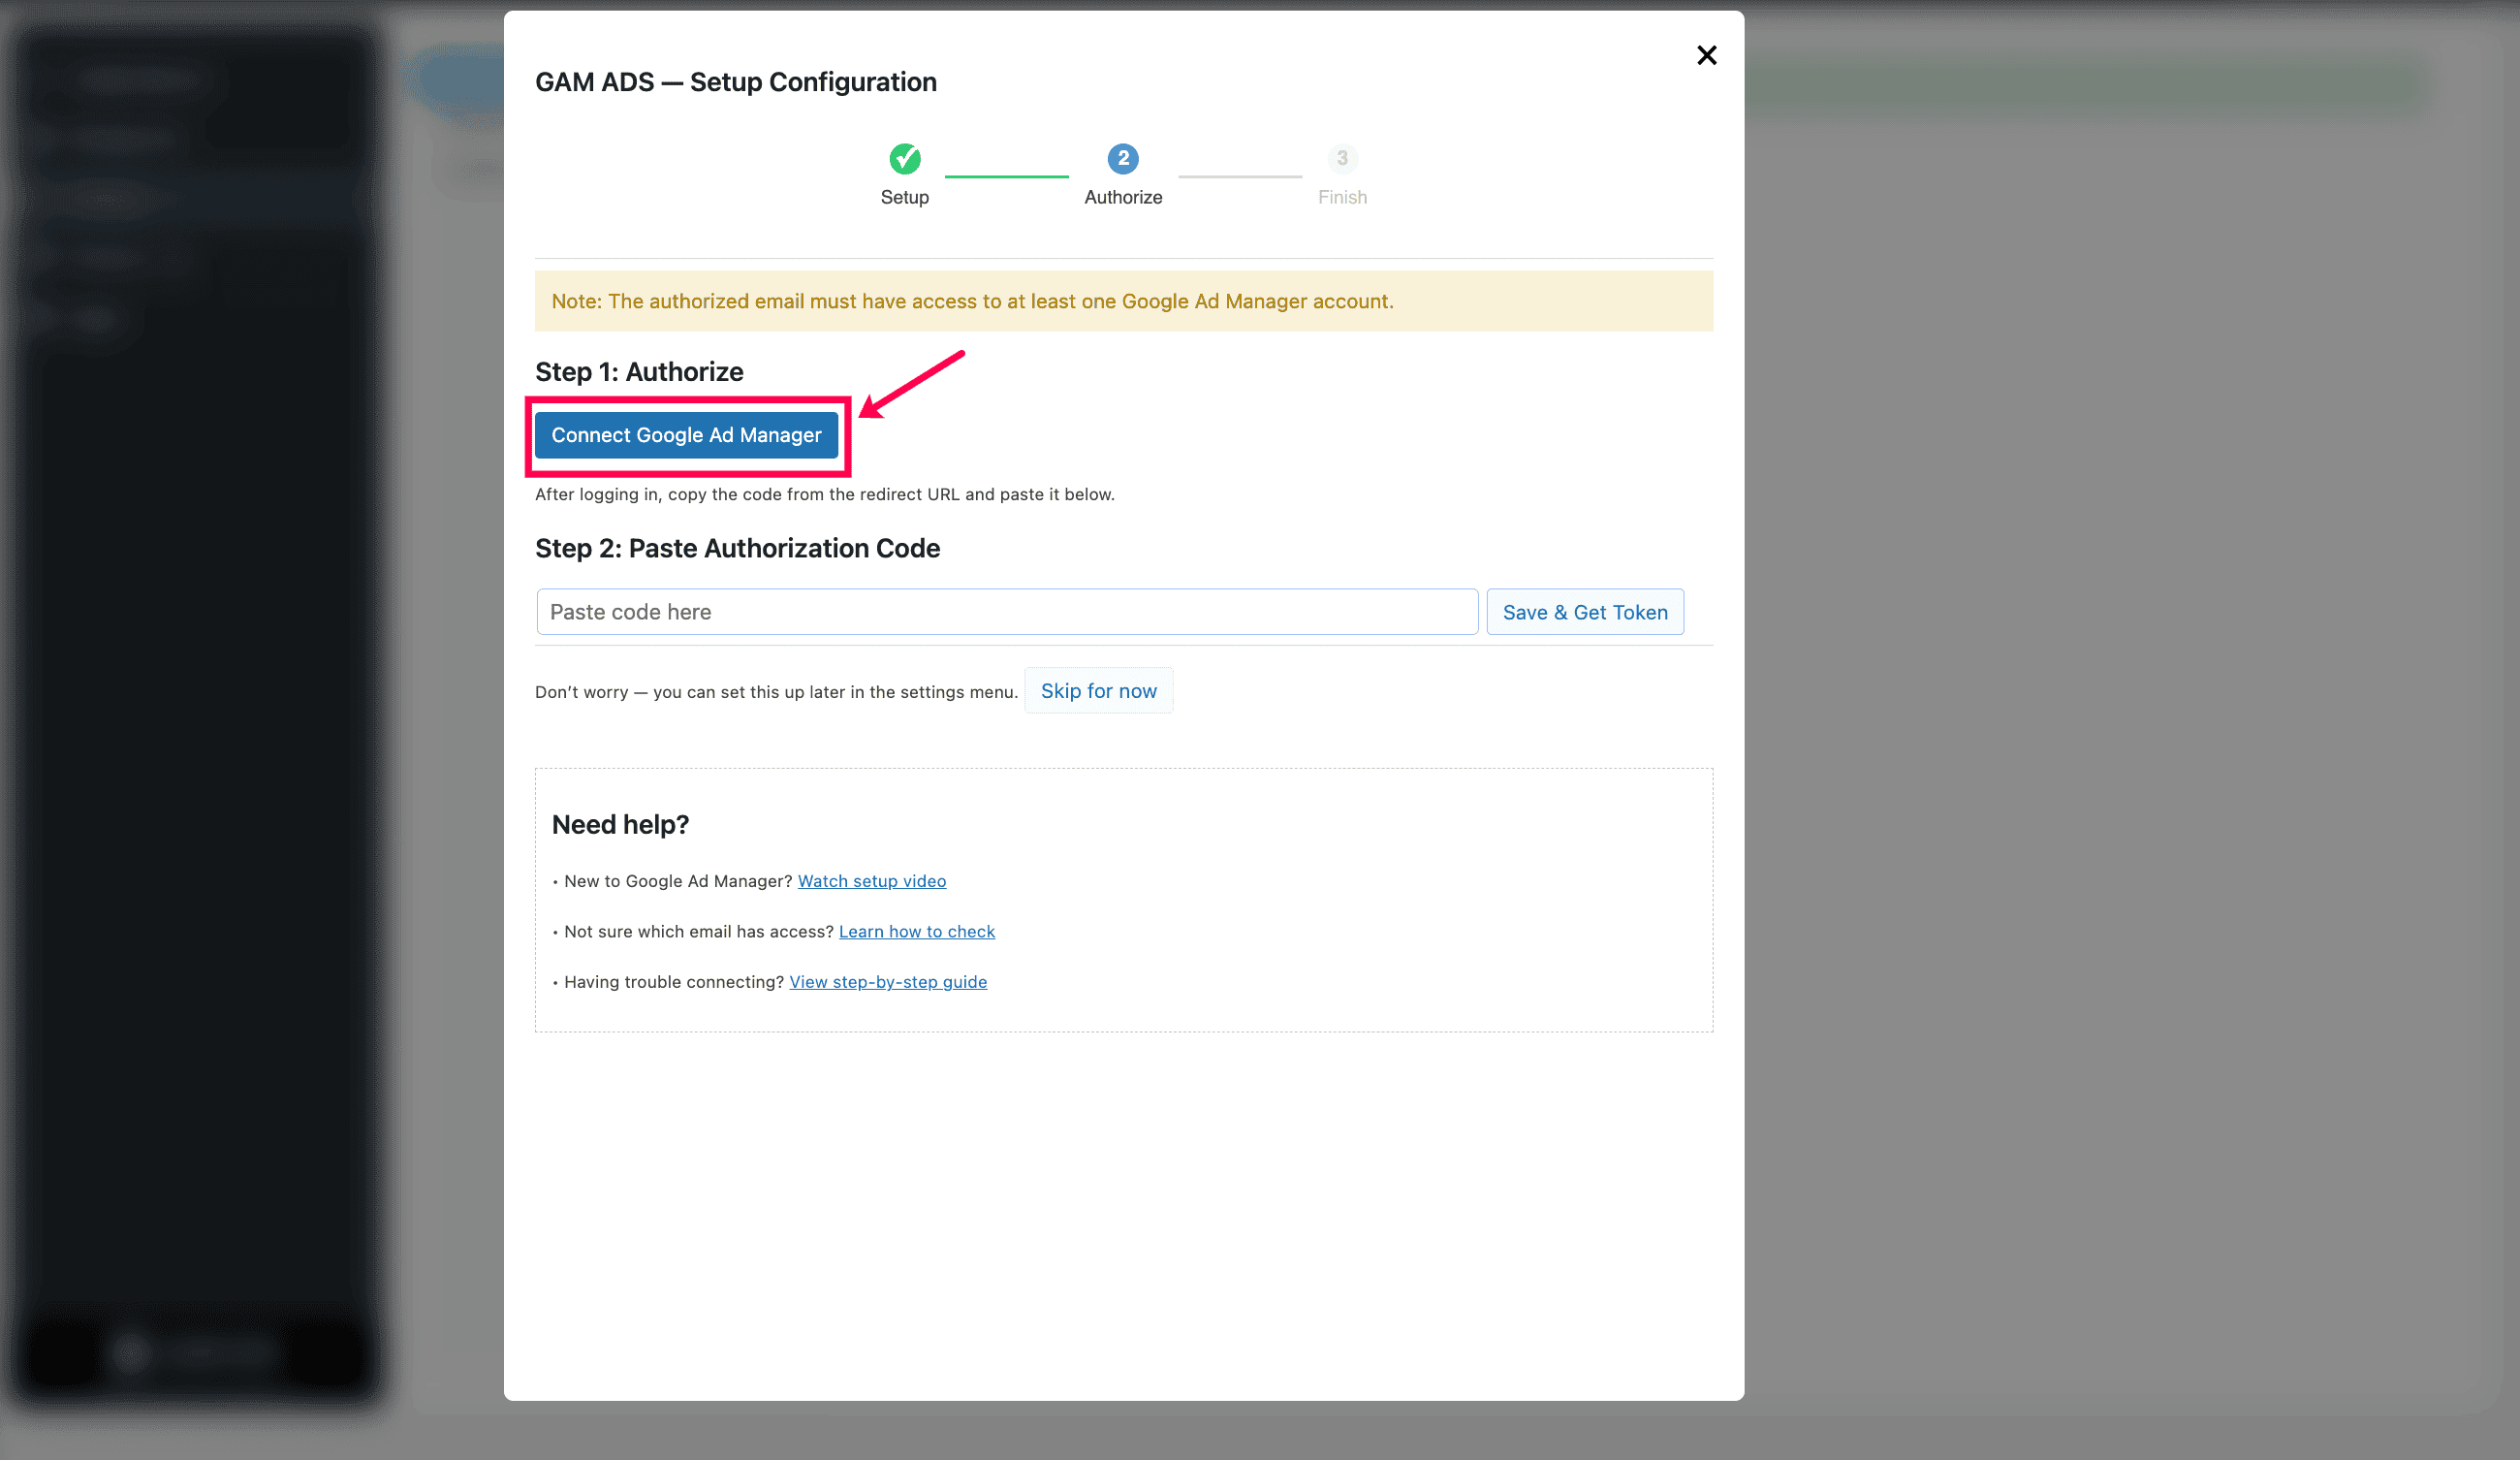
Step 3:Start authorization
On the Authorize step, Click Connect Google Ad Manager.
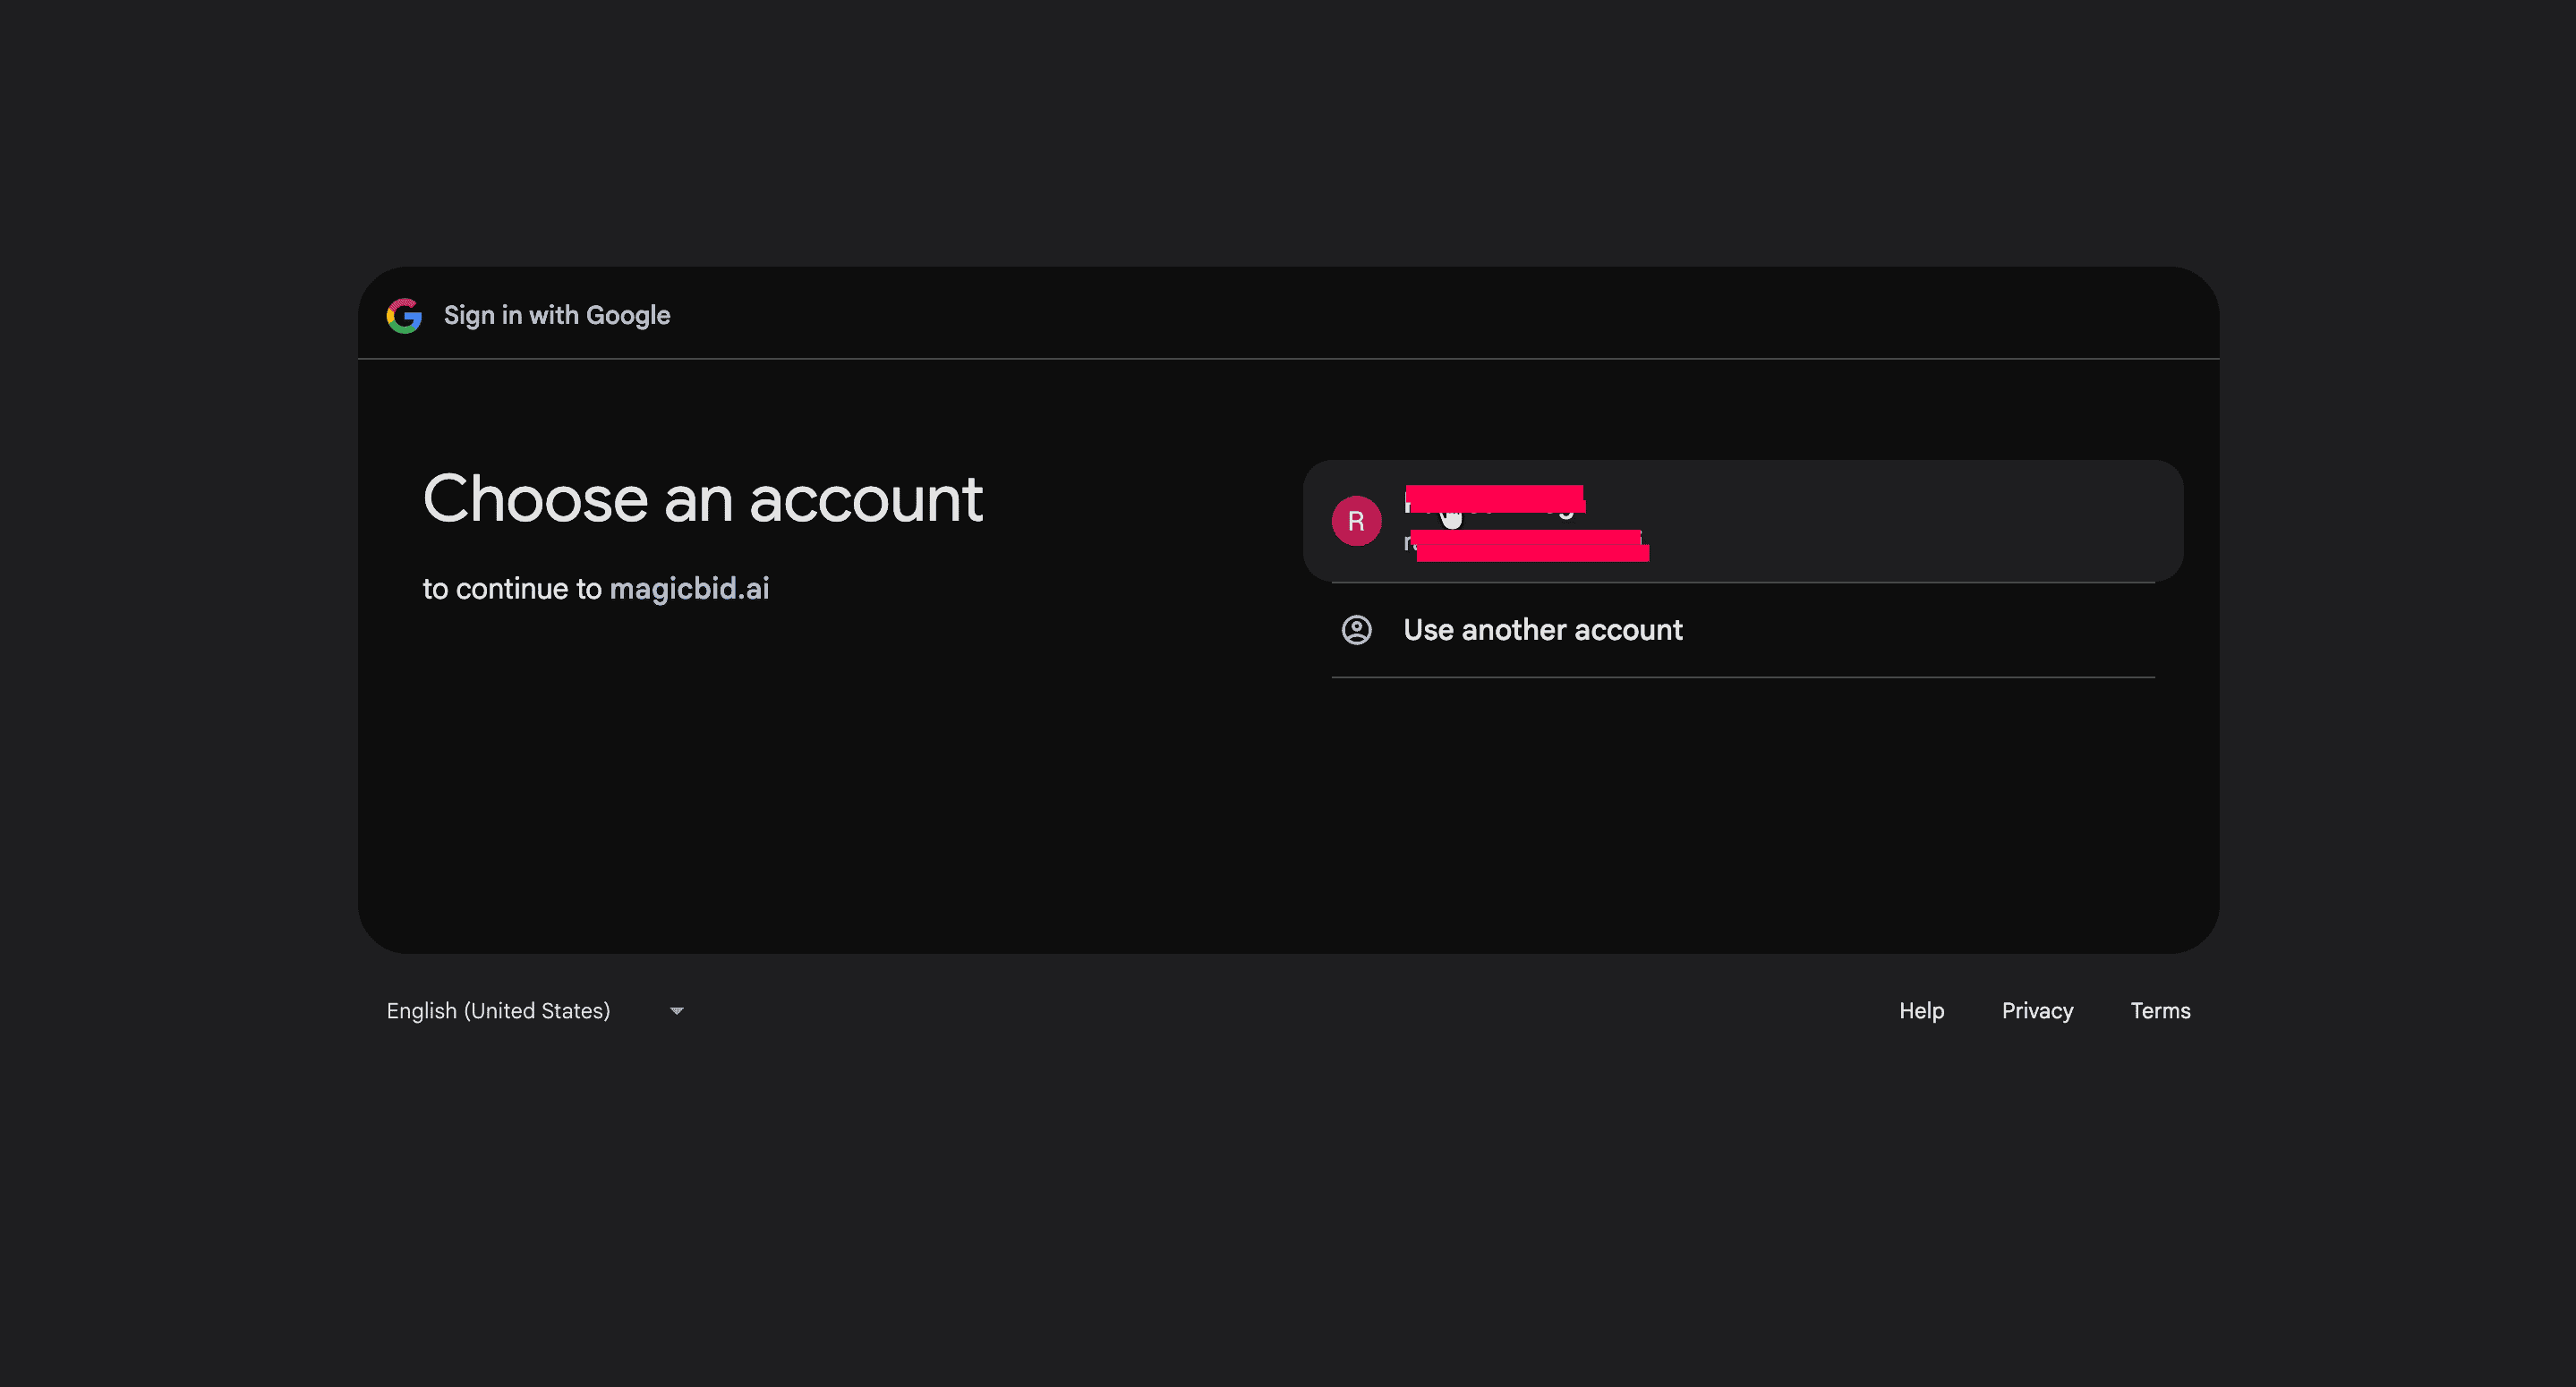
Step 4: Sign In
Sign in with the same Google account that has access to your Google Ad Manager (GAM) network.
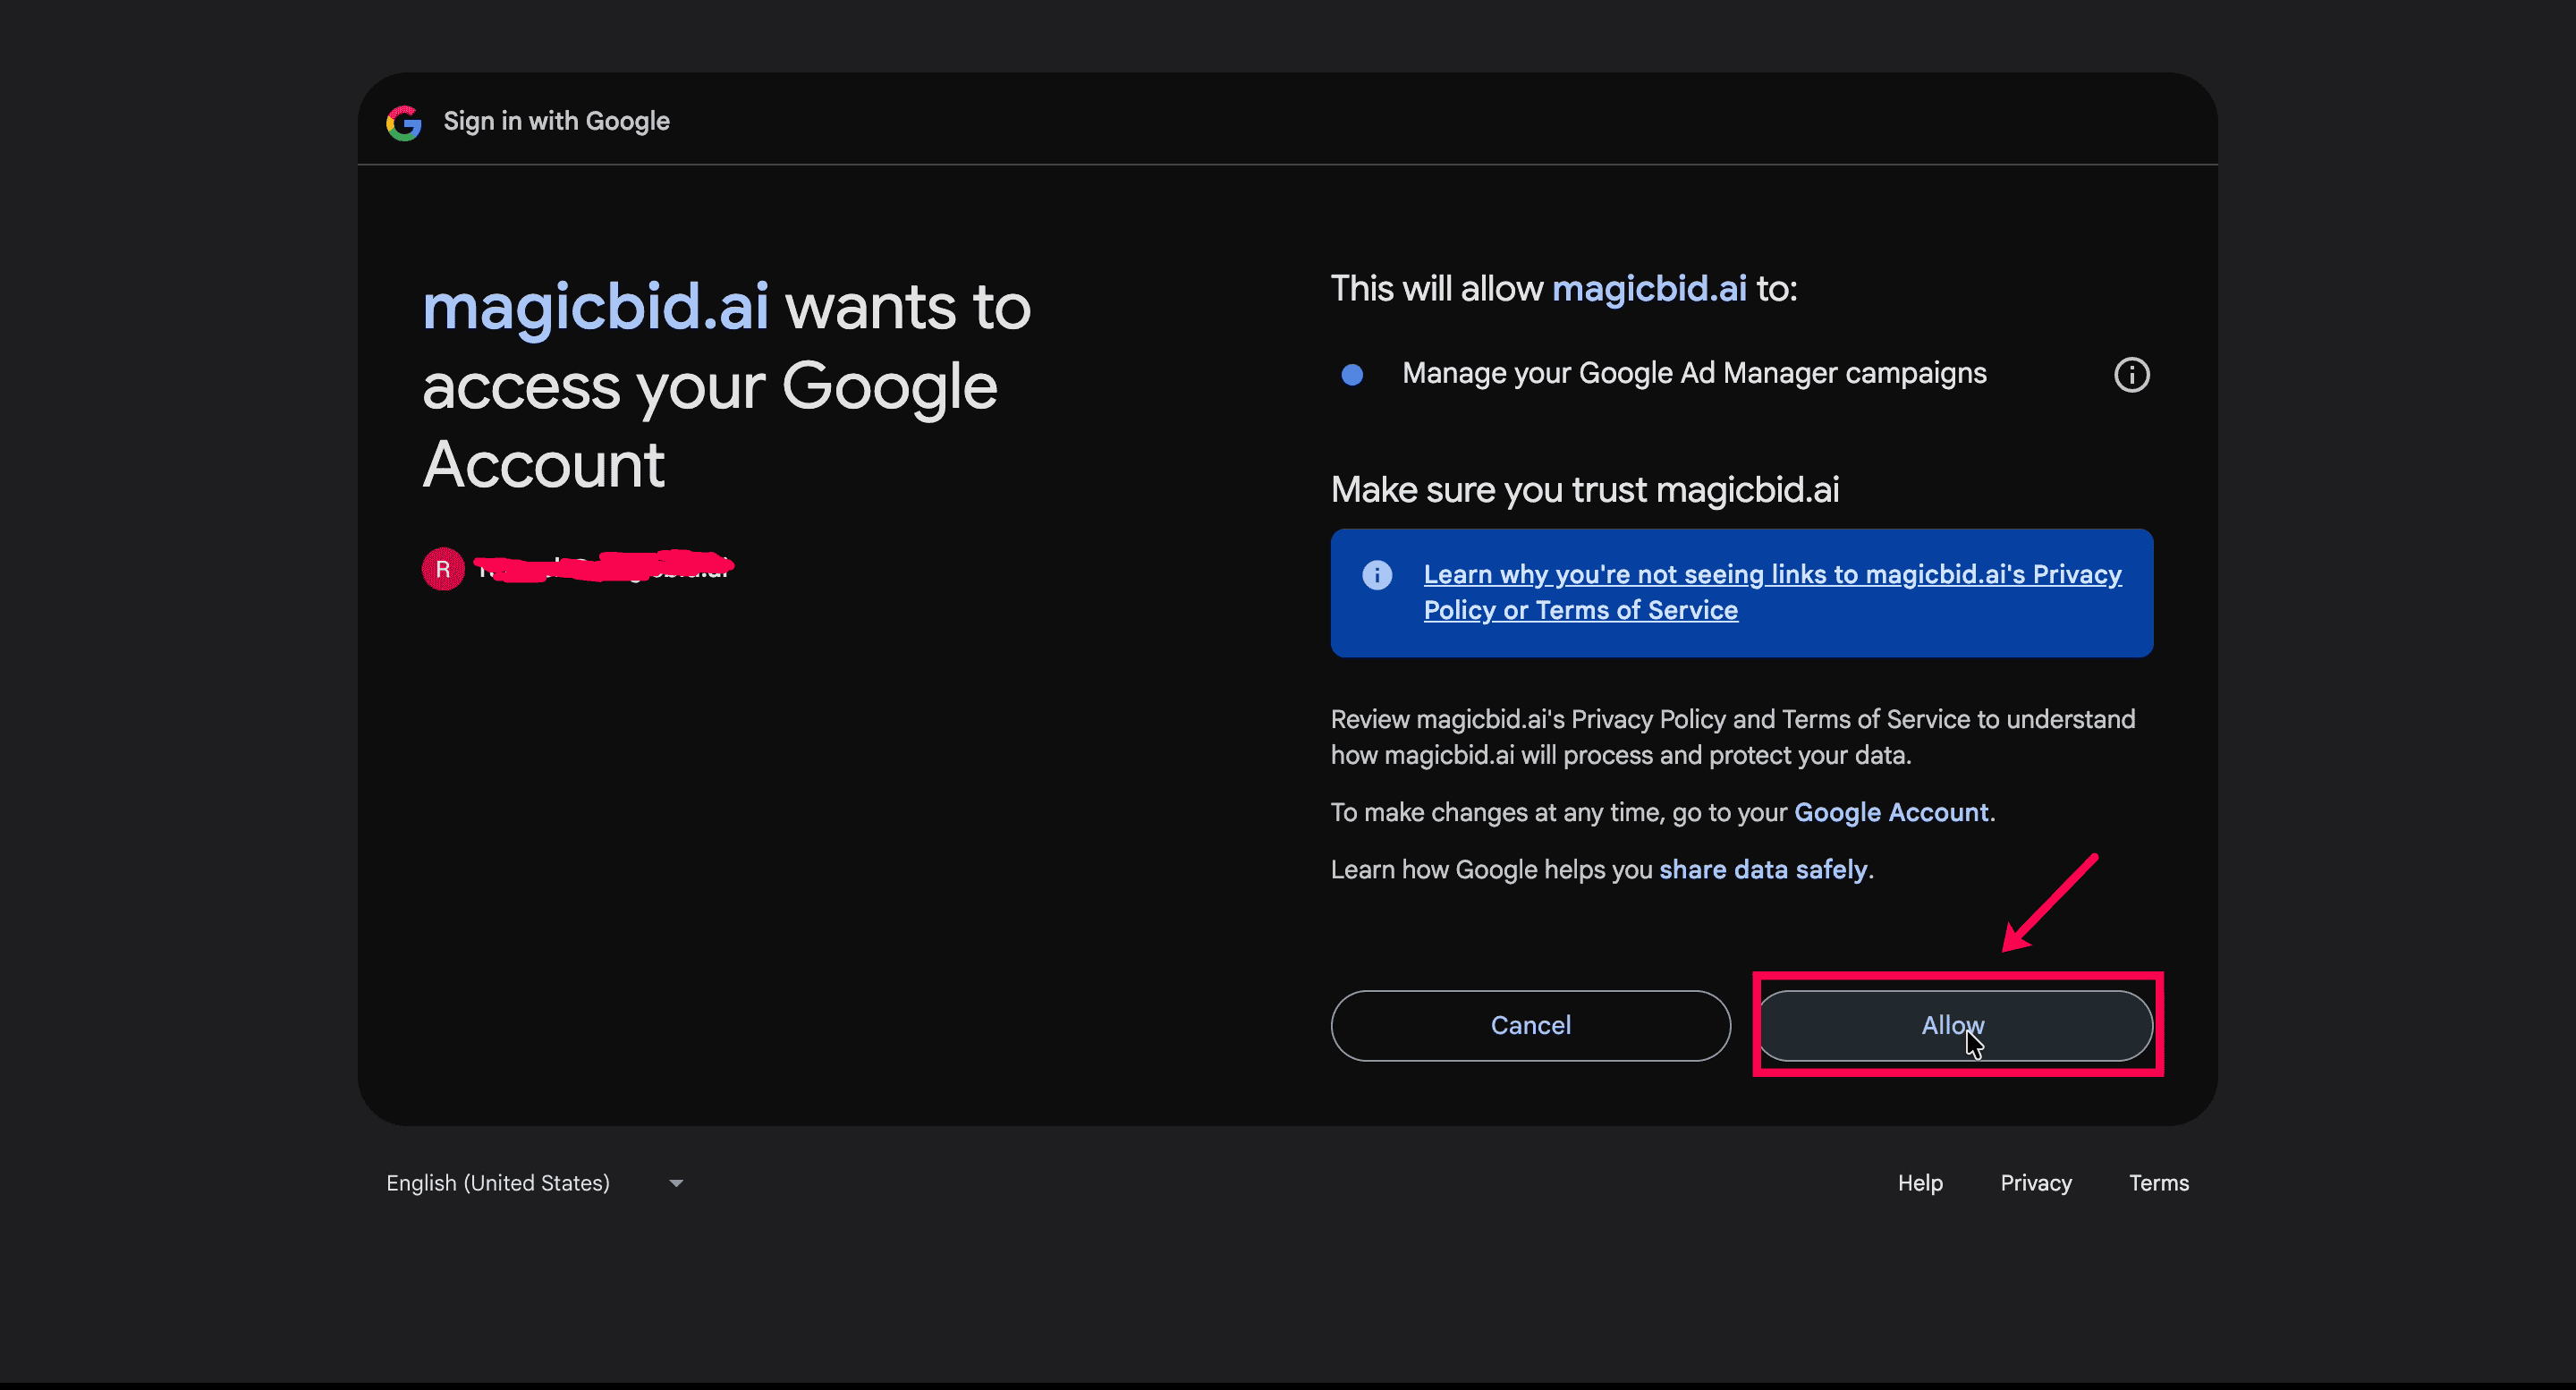
Step 5:Allow access
On the Google permission screen, click Allow to grant access.
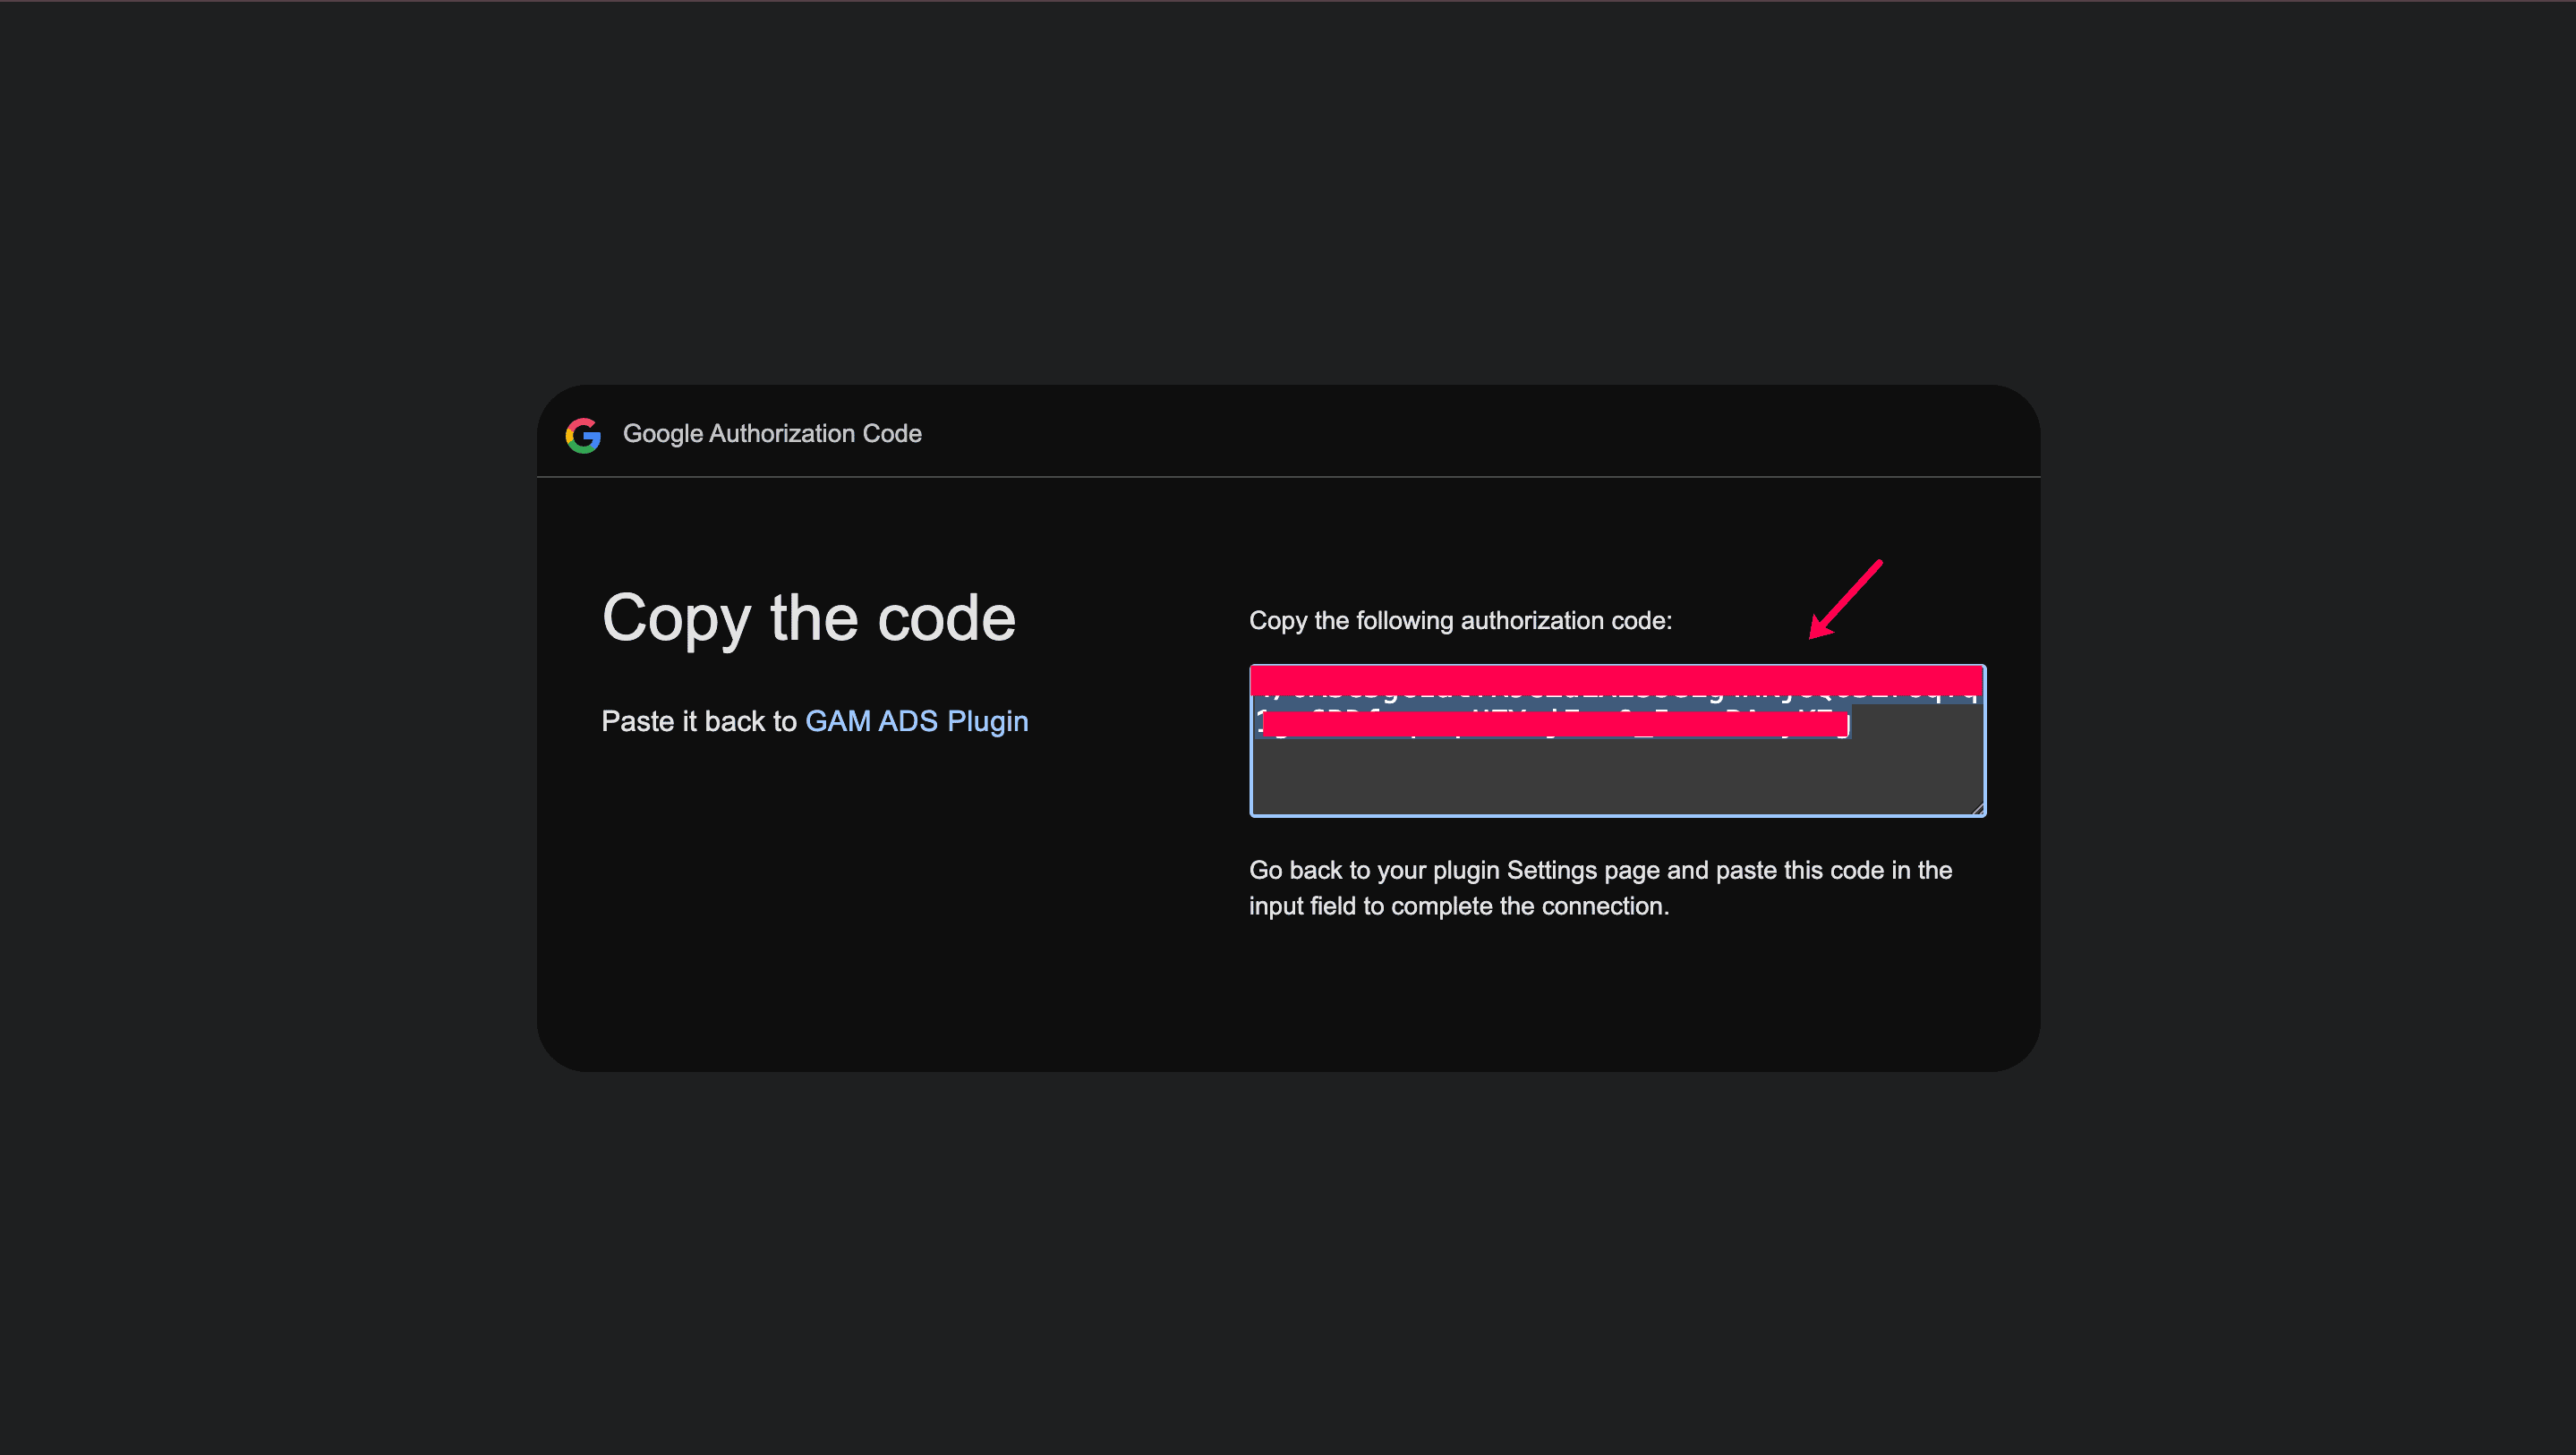
Step 6:Copy the authorization code
Google will show an Authorization Code. Copy that code
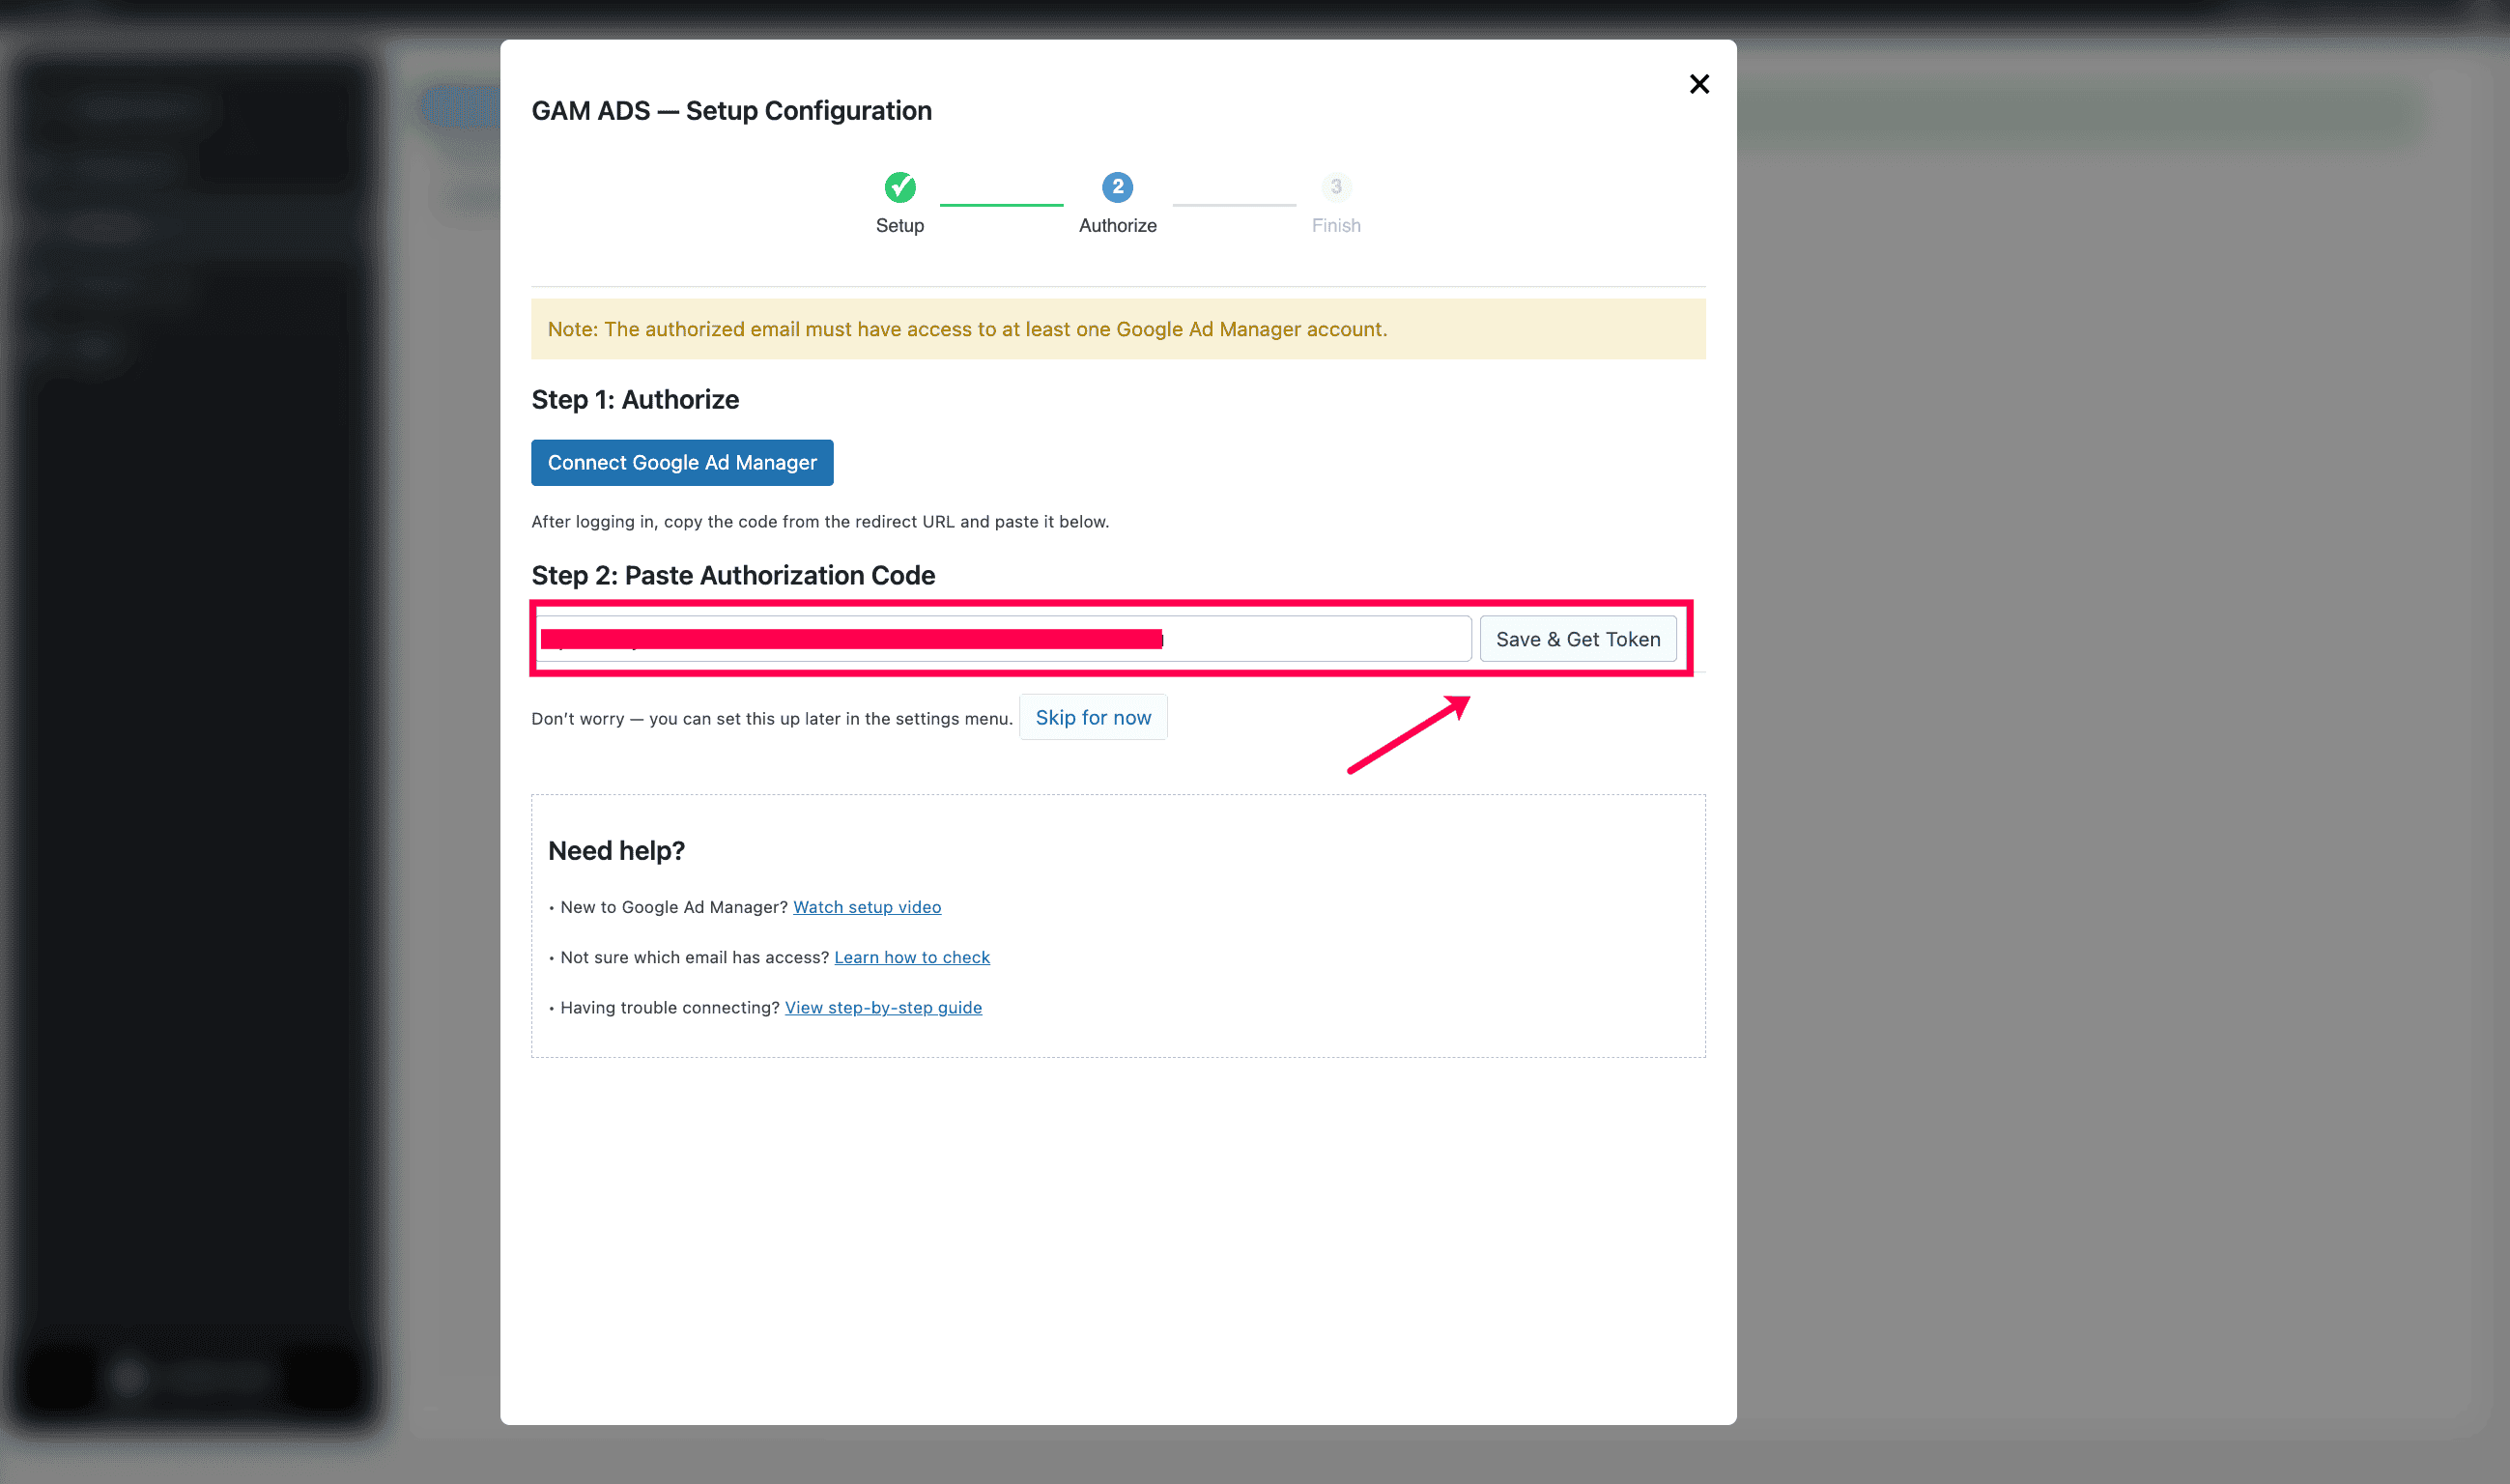
Step 7:Paste the code back into the plugin
Go back to the plugin screen and paste the code into Paste Authorization Code , then click Save & Get Token .
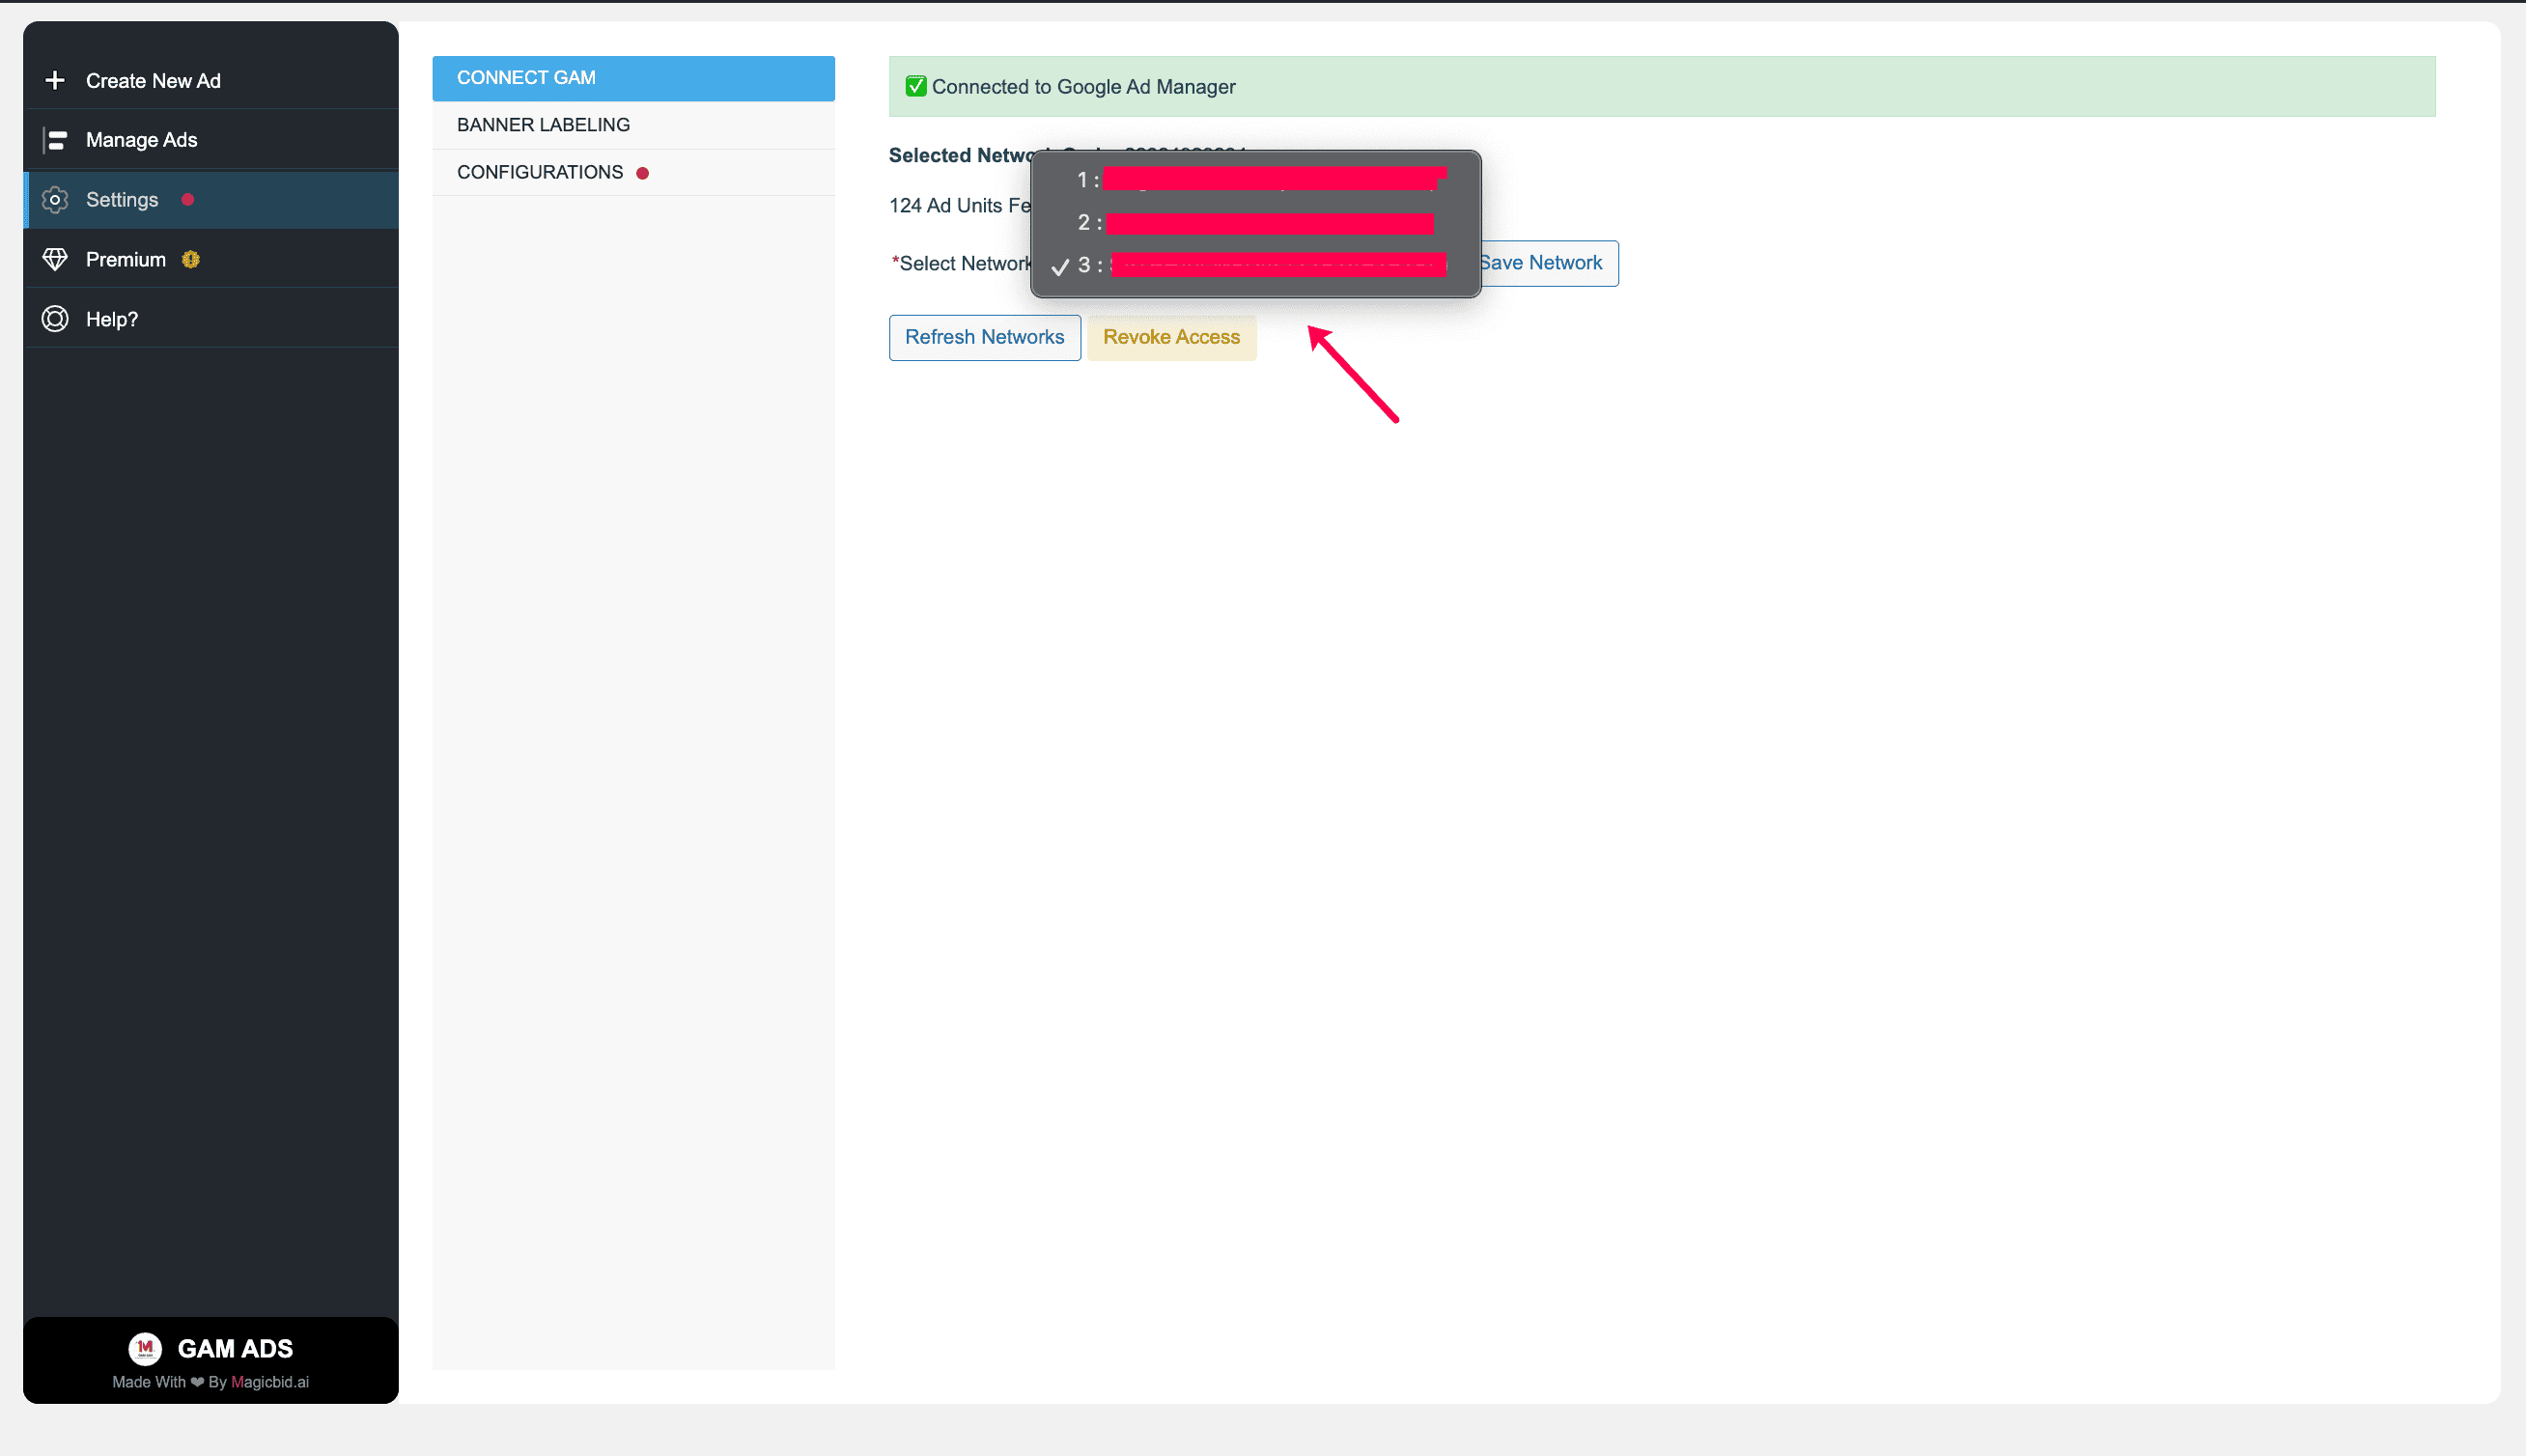
Step 8:Select the GAM Network
If you have multiple GAM networks, choose the correct one from Select Network, You will use that network to run the ads.
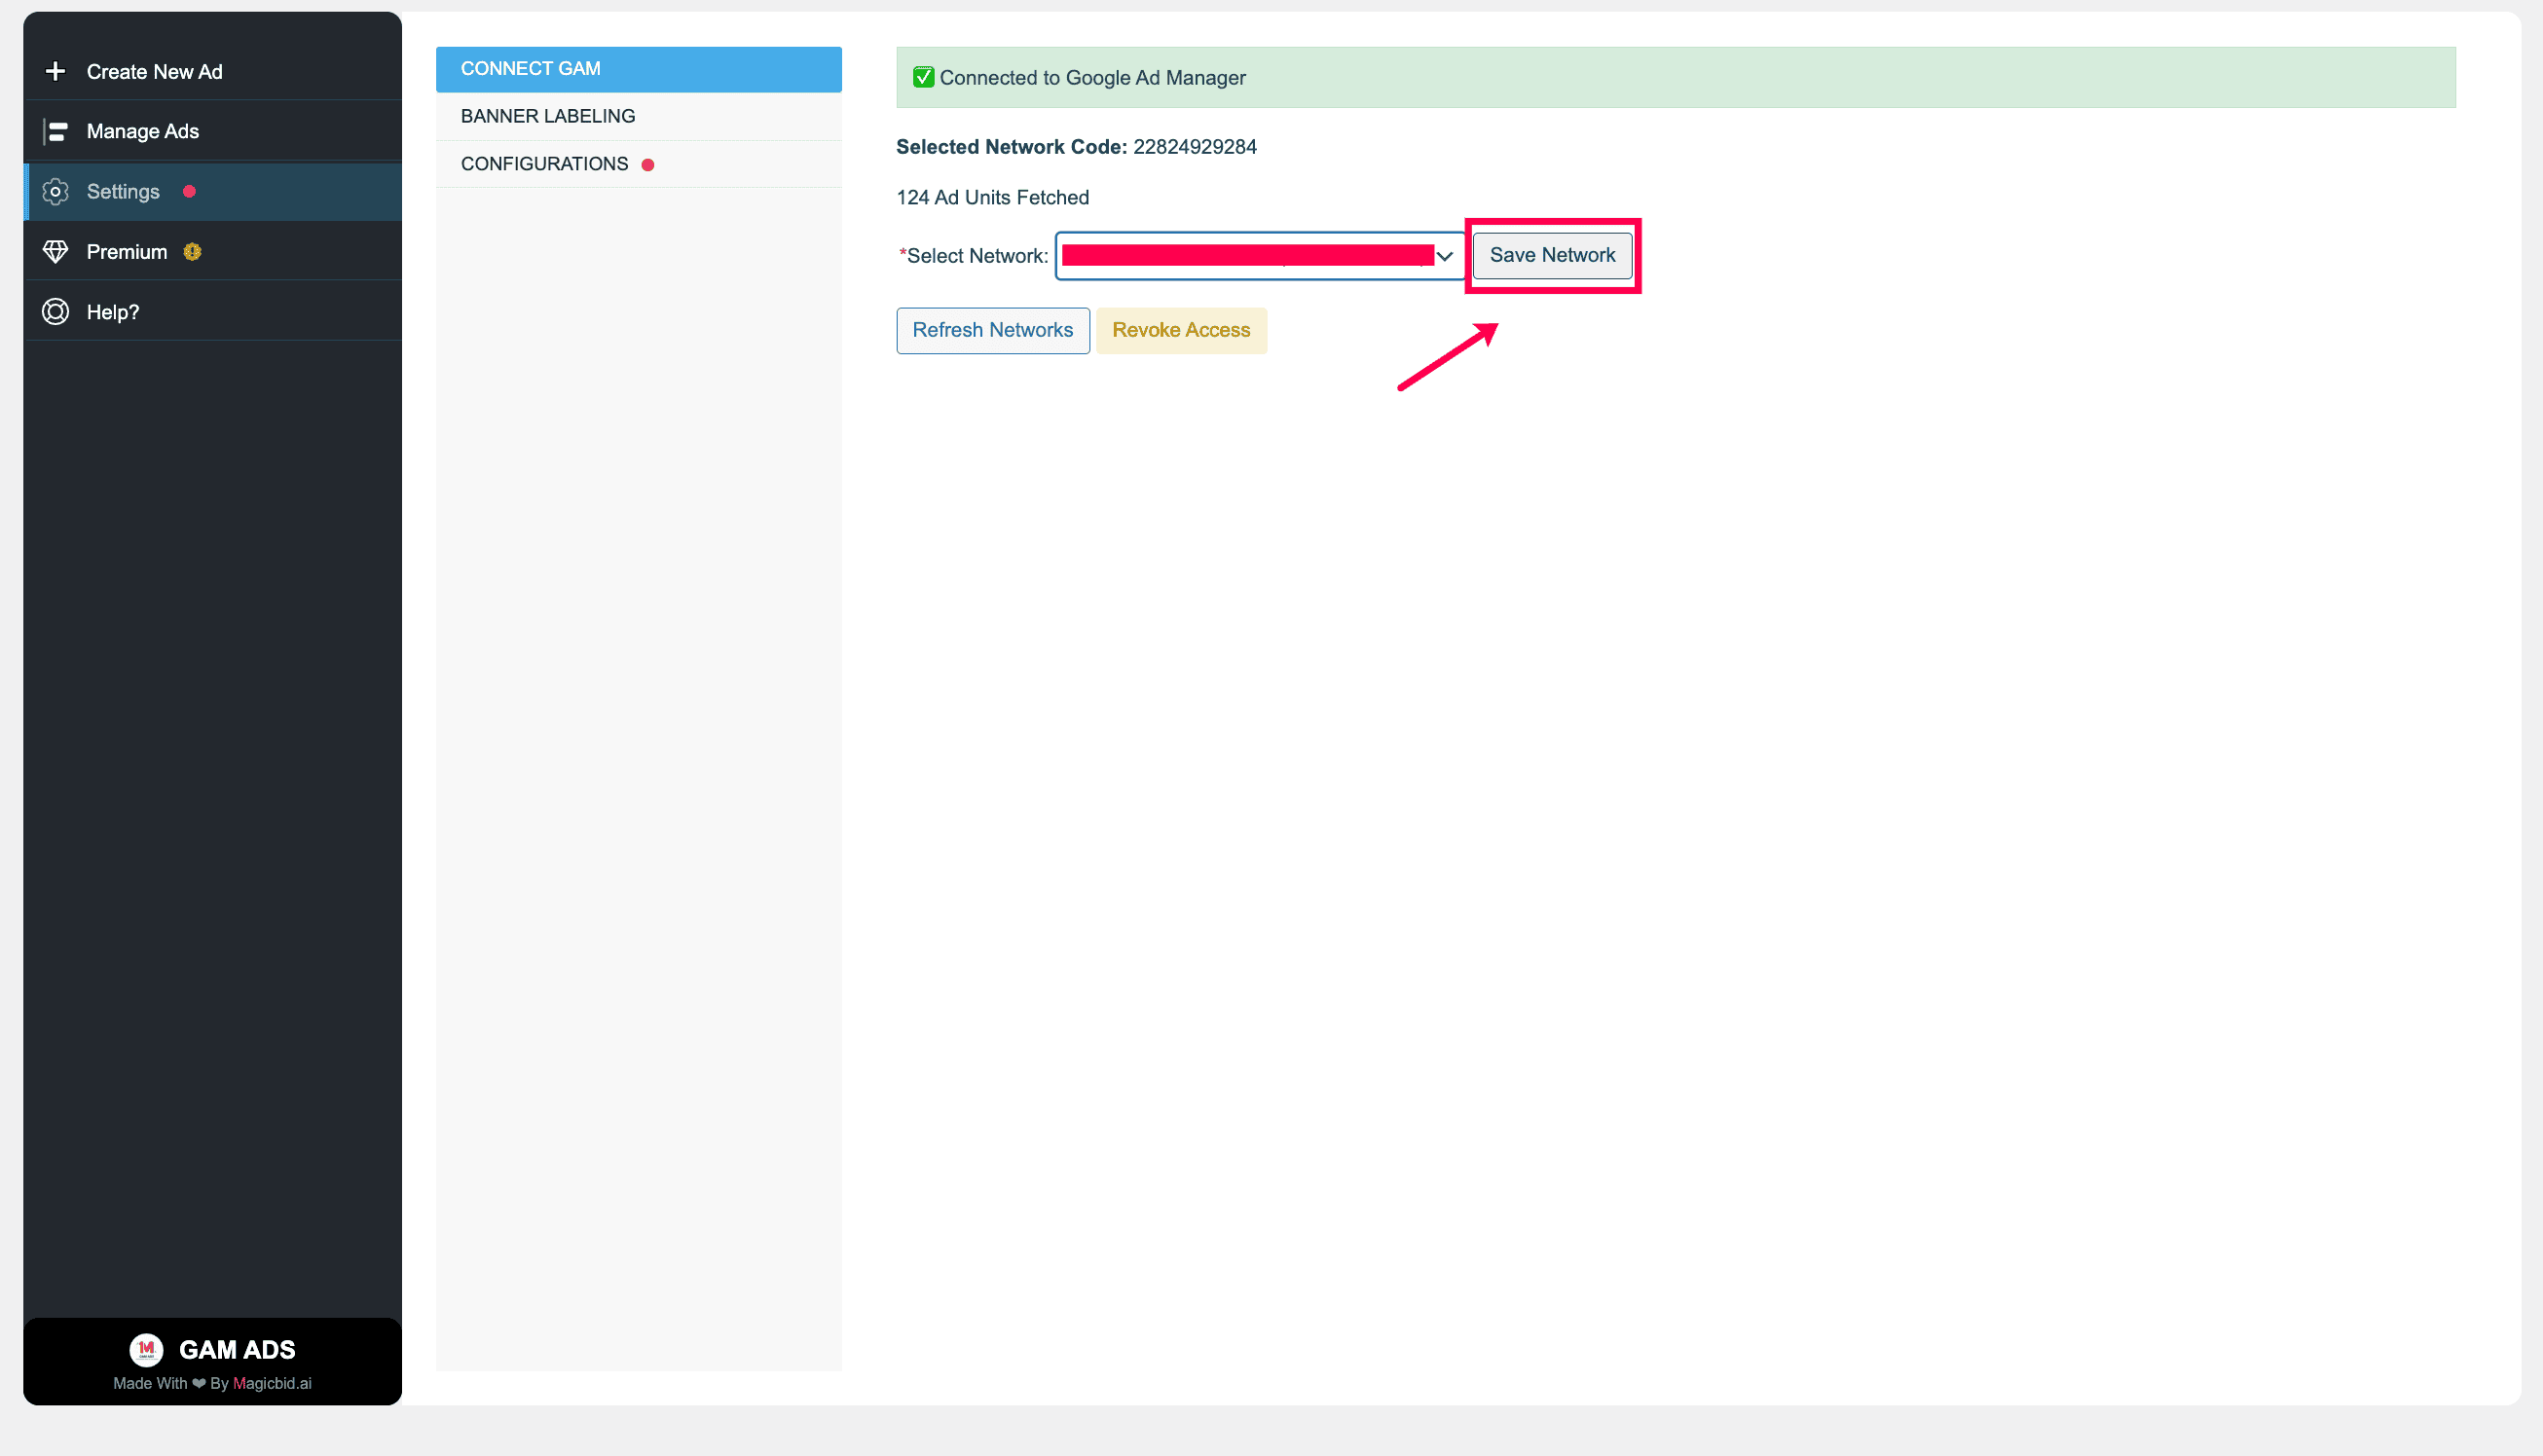
Step 9:Save Network
Once saved, you’ll see a confirmation message:
✅ Connected to Google Ad Manager
How to Get Your Google Web Client ID, Client Secret, and Redirect URL
Step 1:
Go to Google Cloud Console: https://console.cloud.google.com
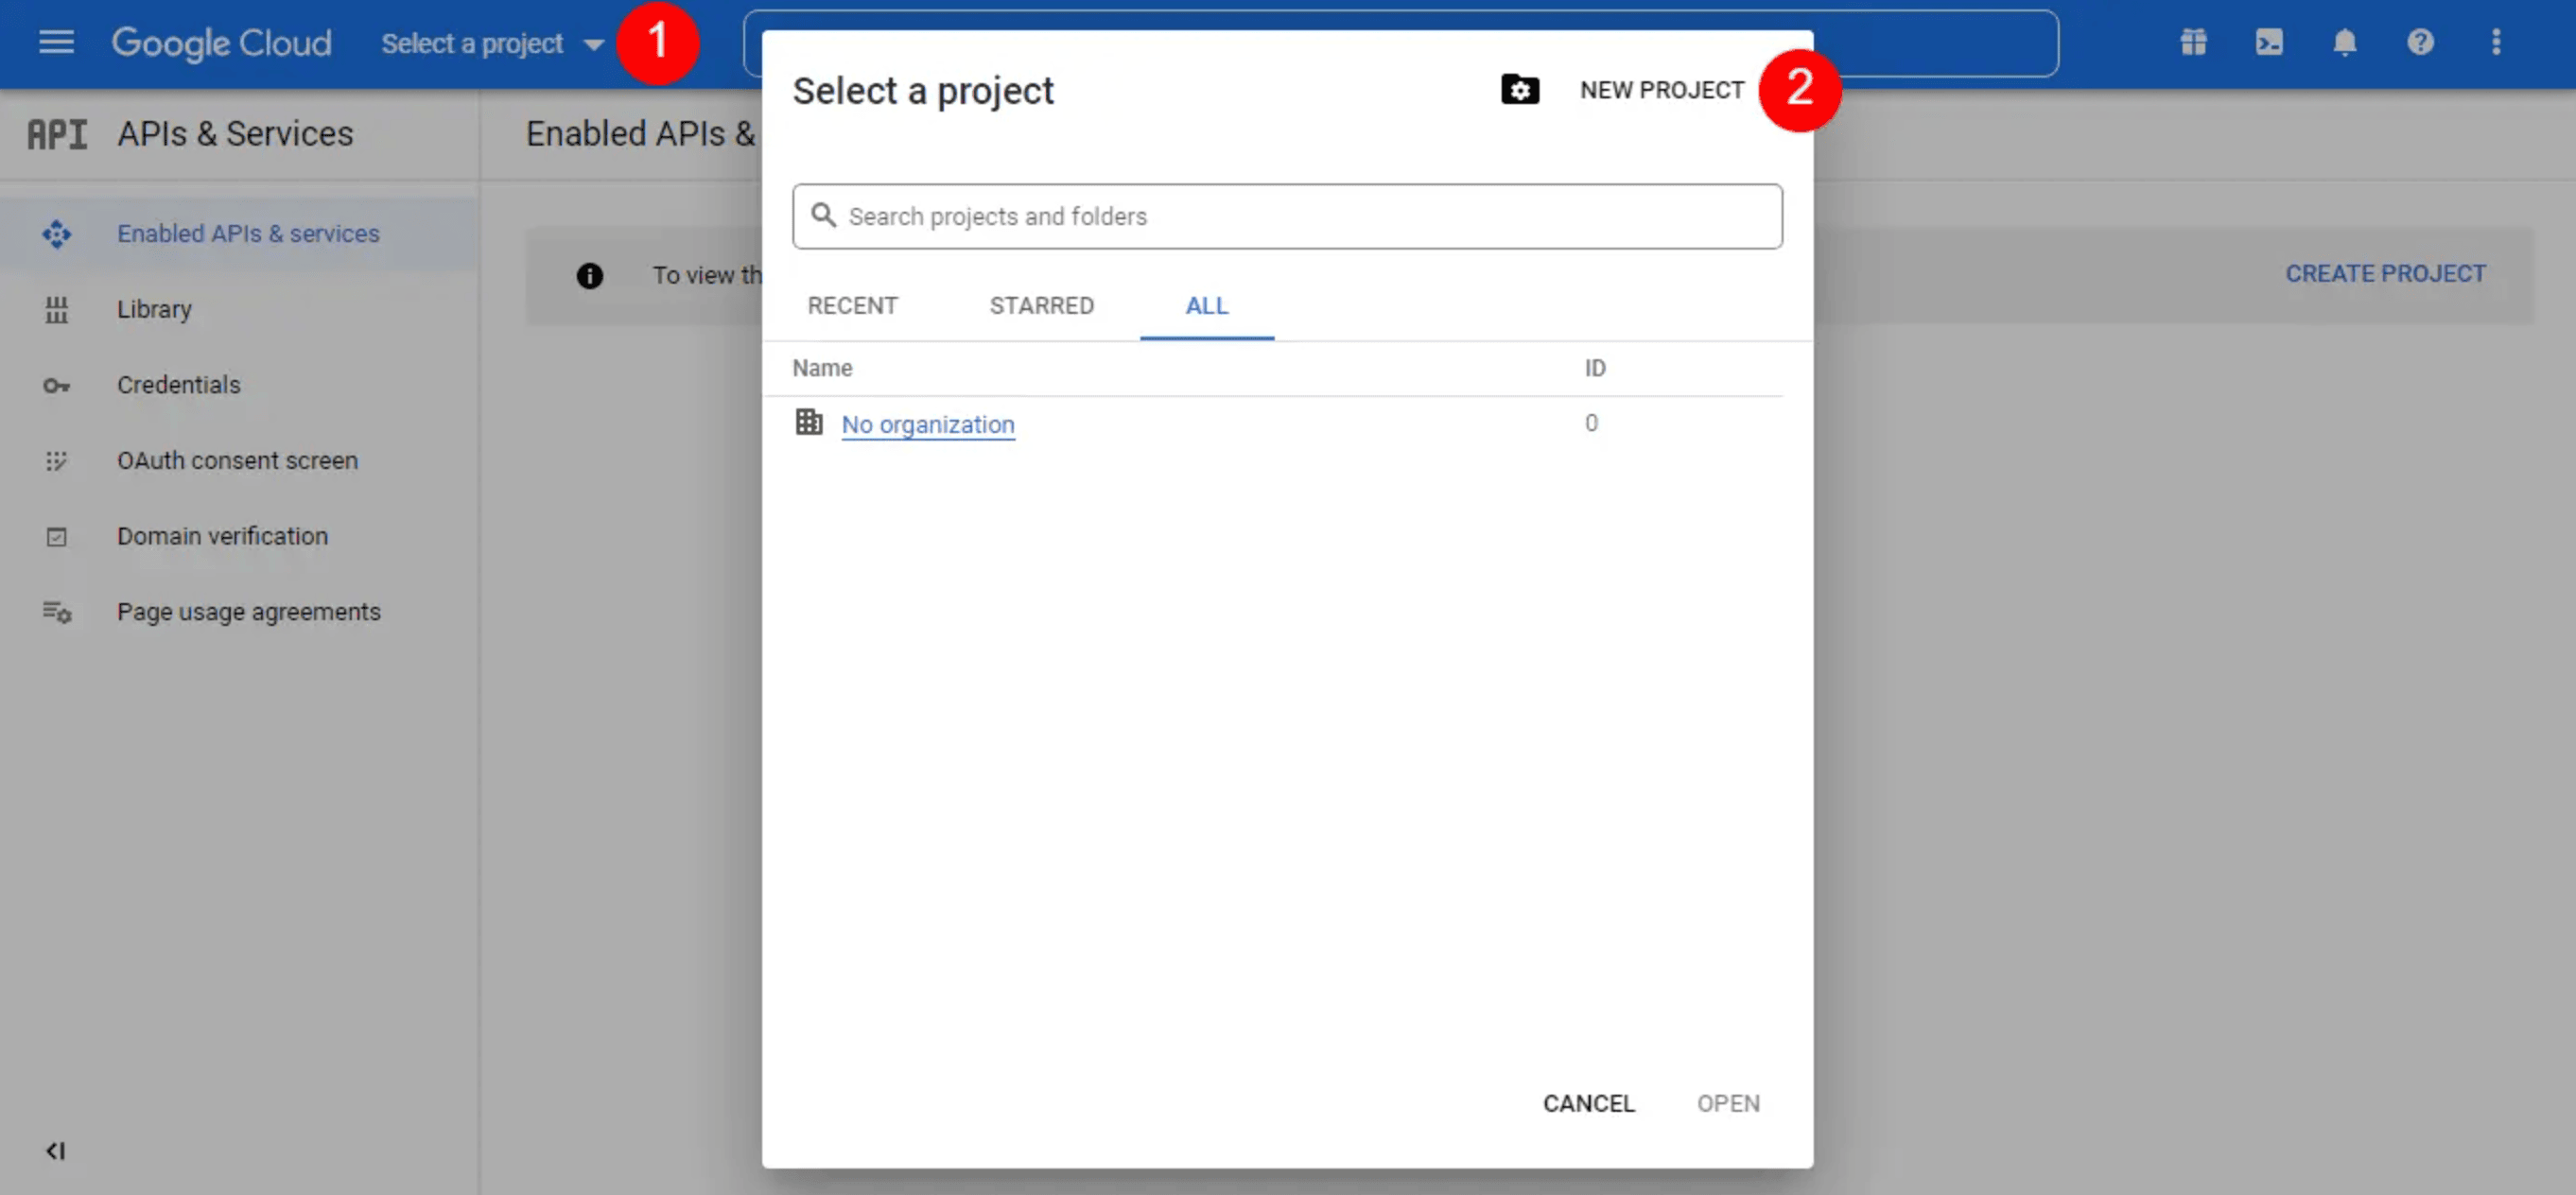
Step 2:
Click Select a project → New Project → Create.
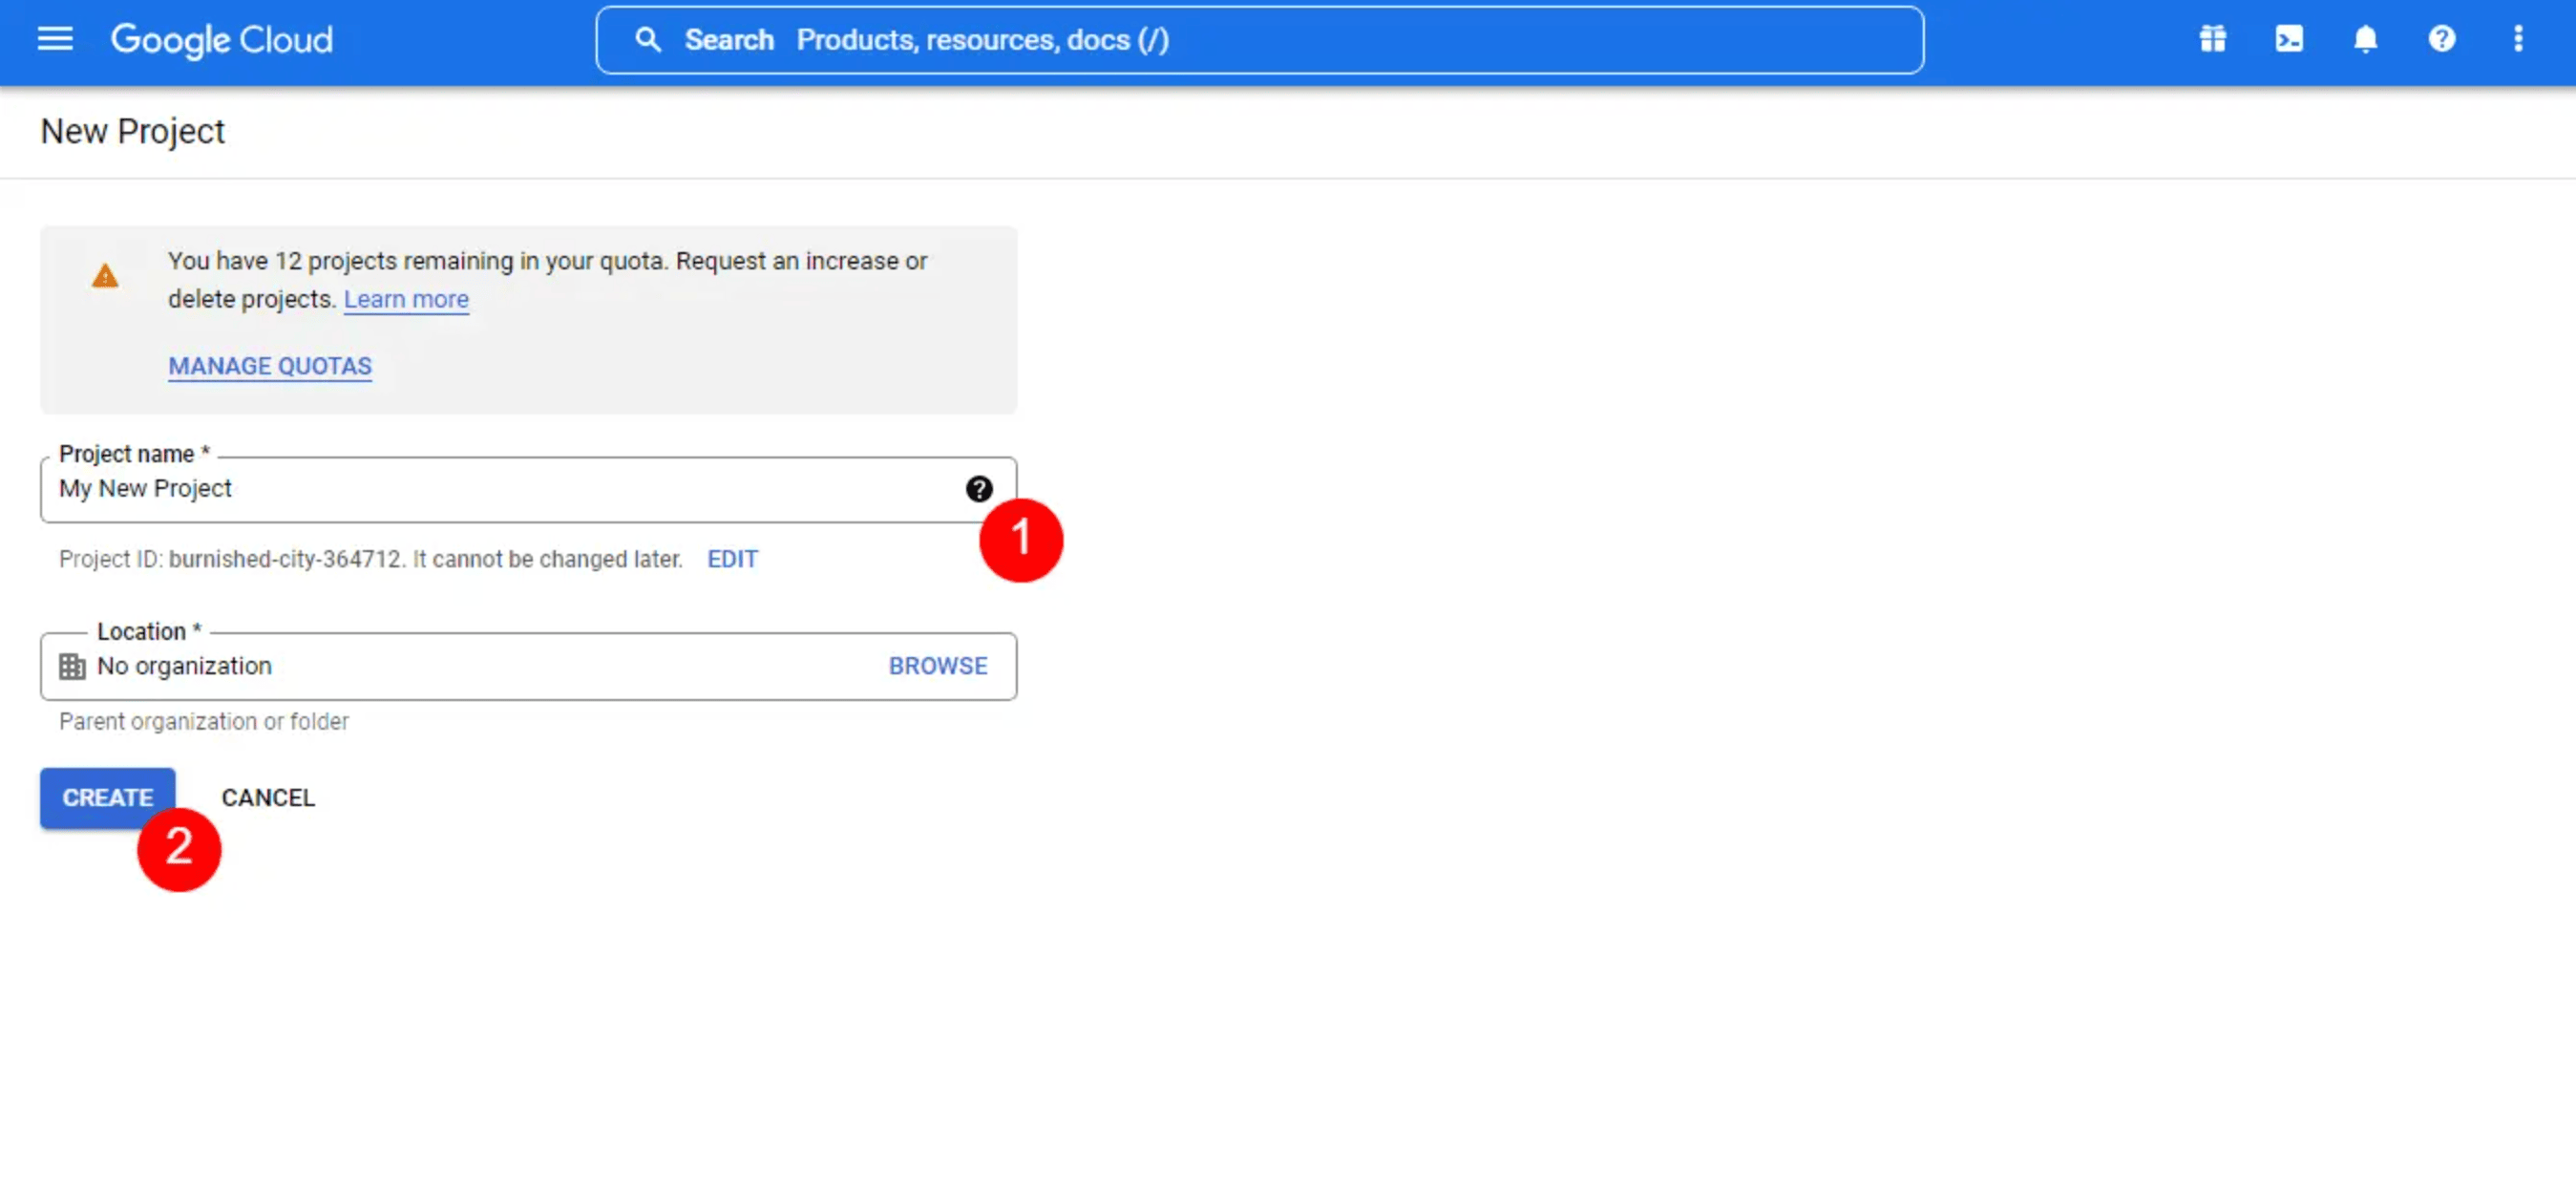
Step 3:
Enter your Project Name and click Create.
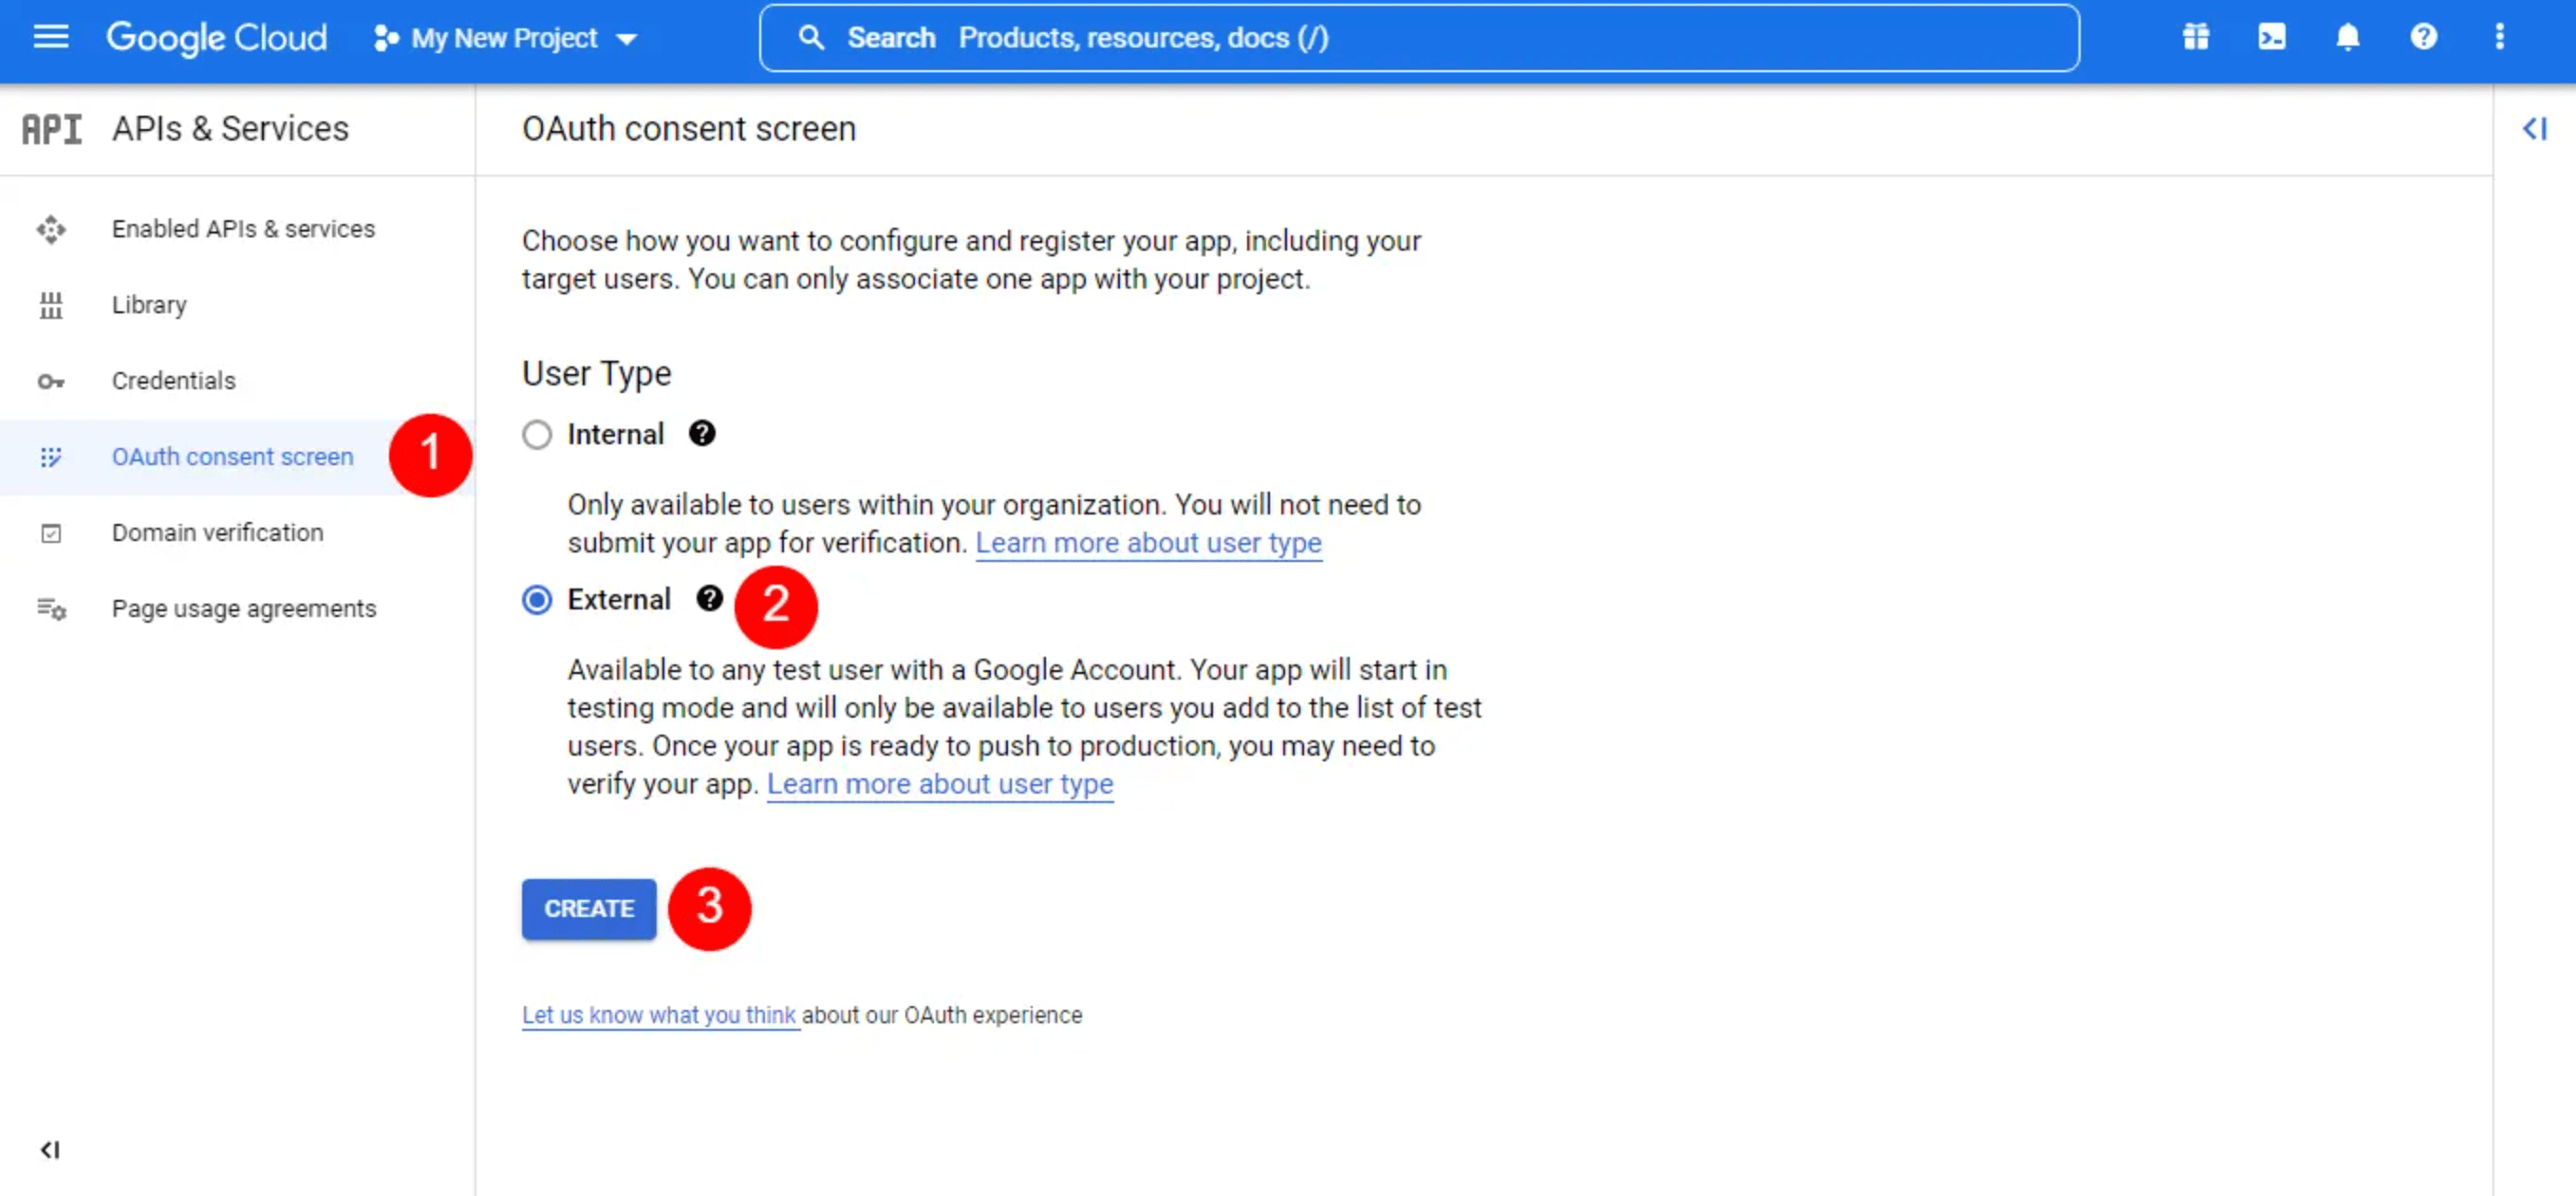
Step 4:
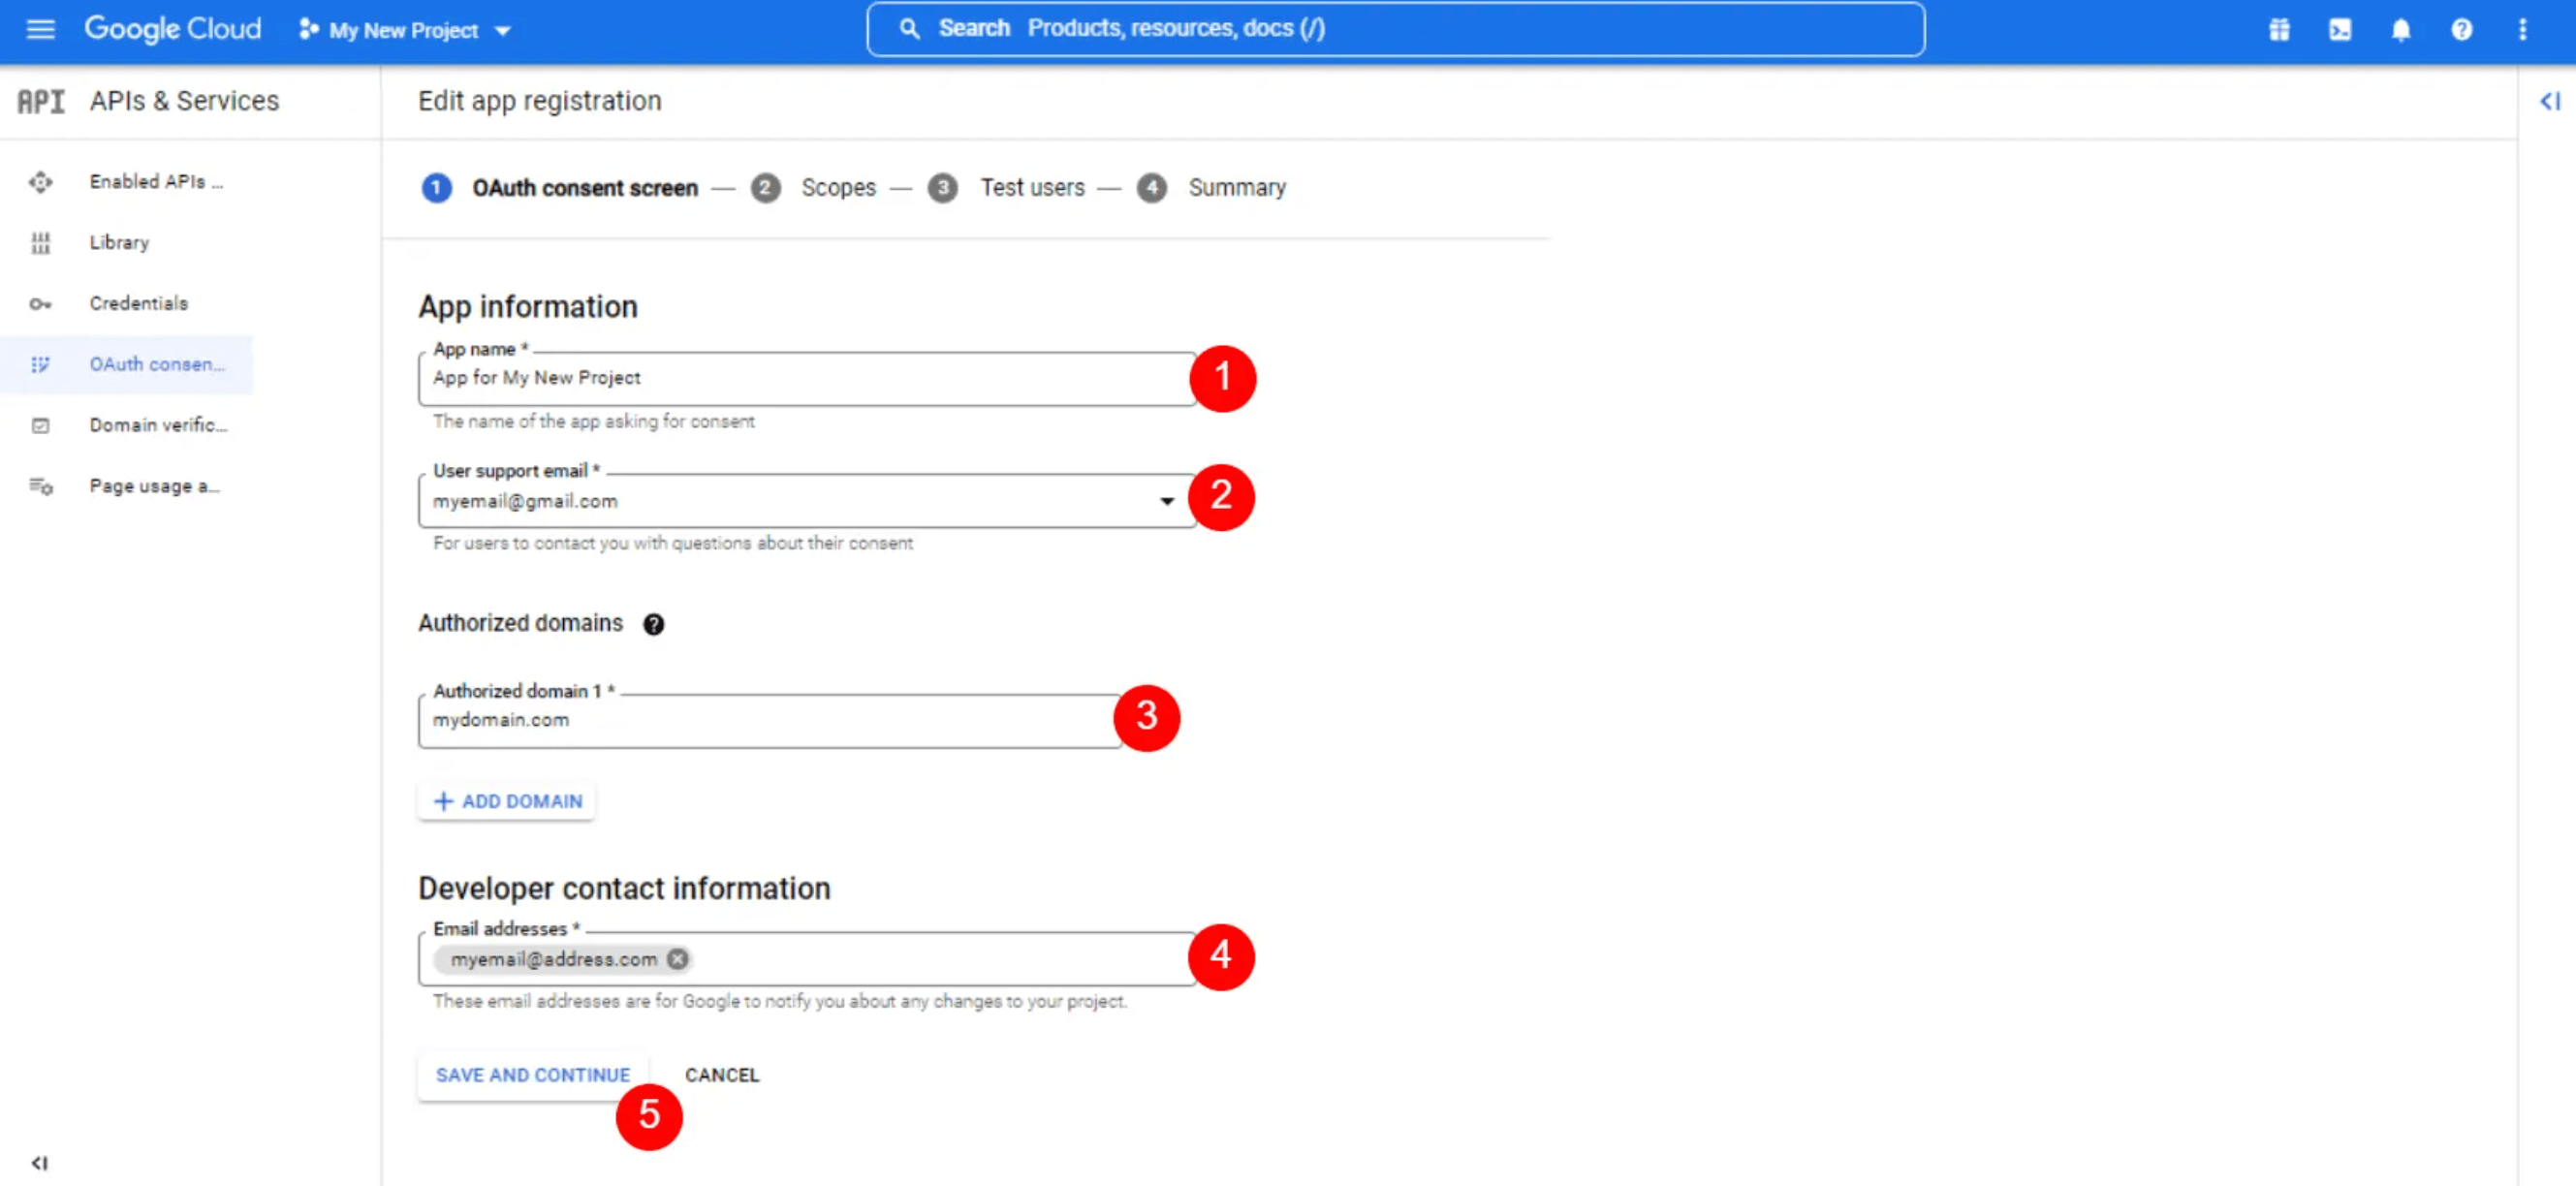
In the left menu, click OAuth consent screenChoose User Typeand click Create
Step 5:
Fill these fields:
- Application Name
- Support Email
- Authorized Domain
- Developer Contact Information. Then click Save and Continue.
Step 6:
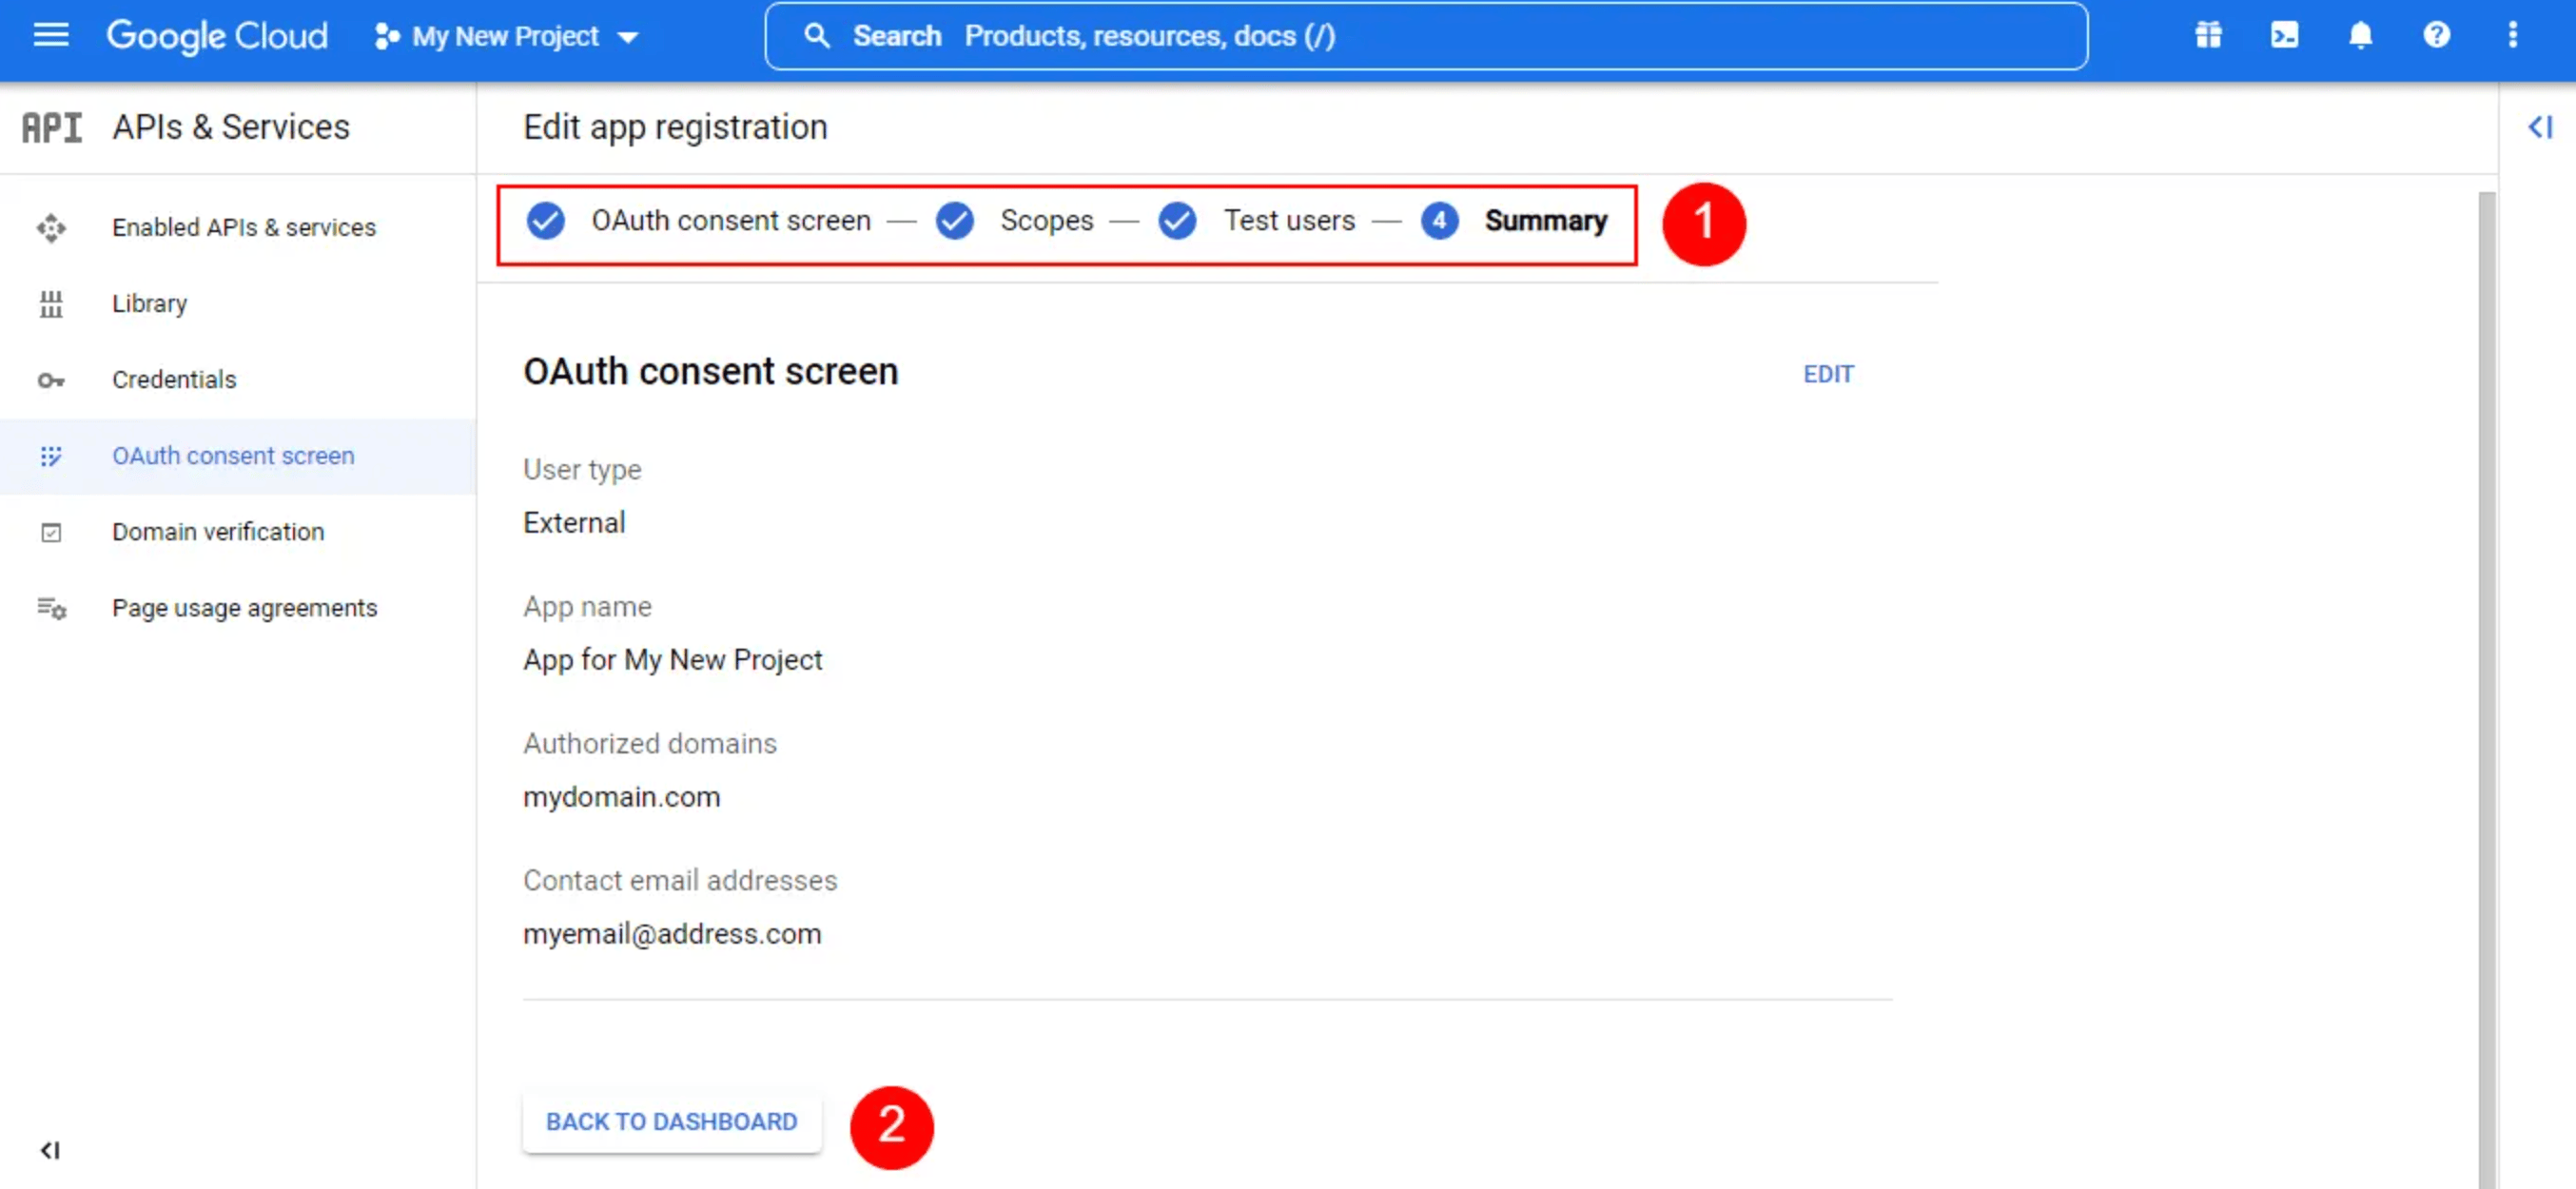
Complete all 4 sections of the OAuth consent setup. Click Back to Dashboard when finished.
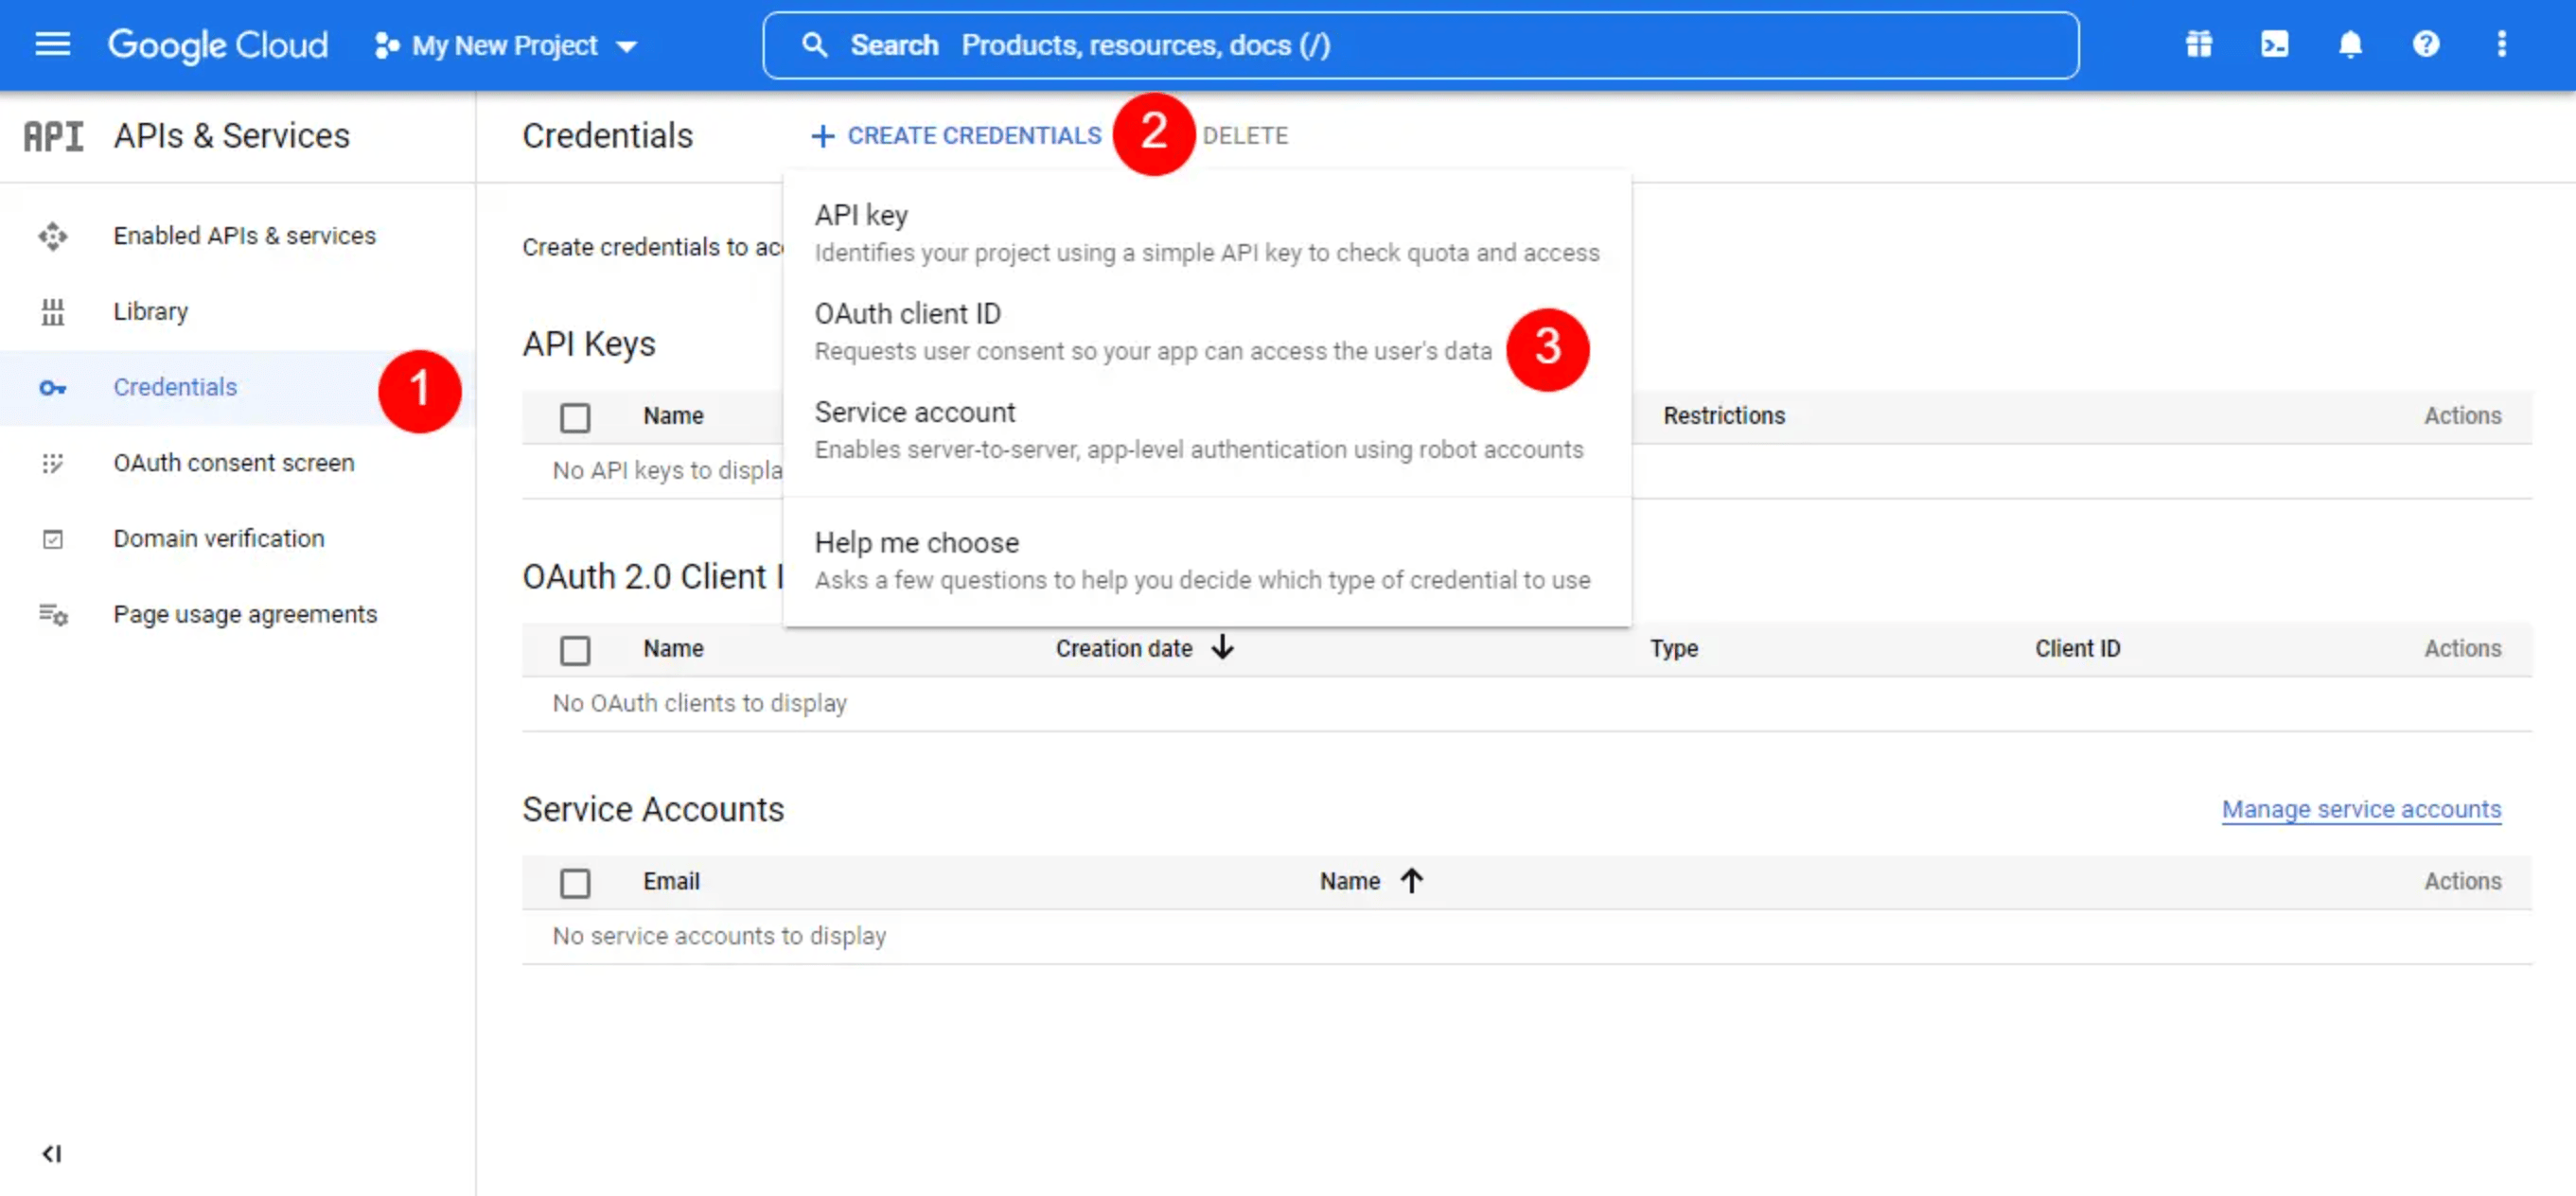
Step 7 :Go to Credentials → click Create Credentials → select OAuth Client ID.
Complete all 4 sections of the OAuth consent setup. Click Back to Dashboard when finished.
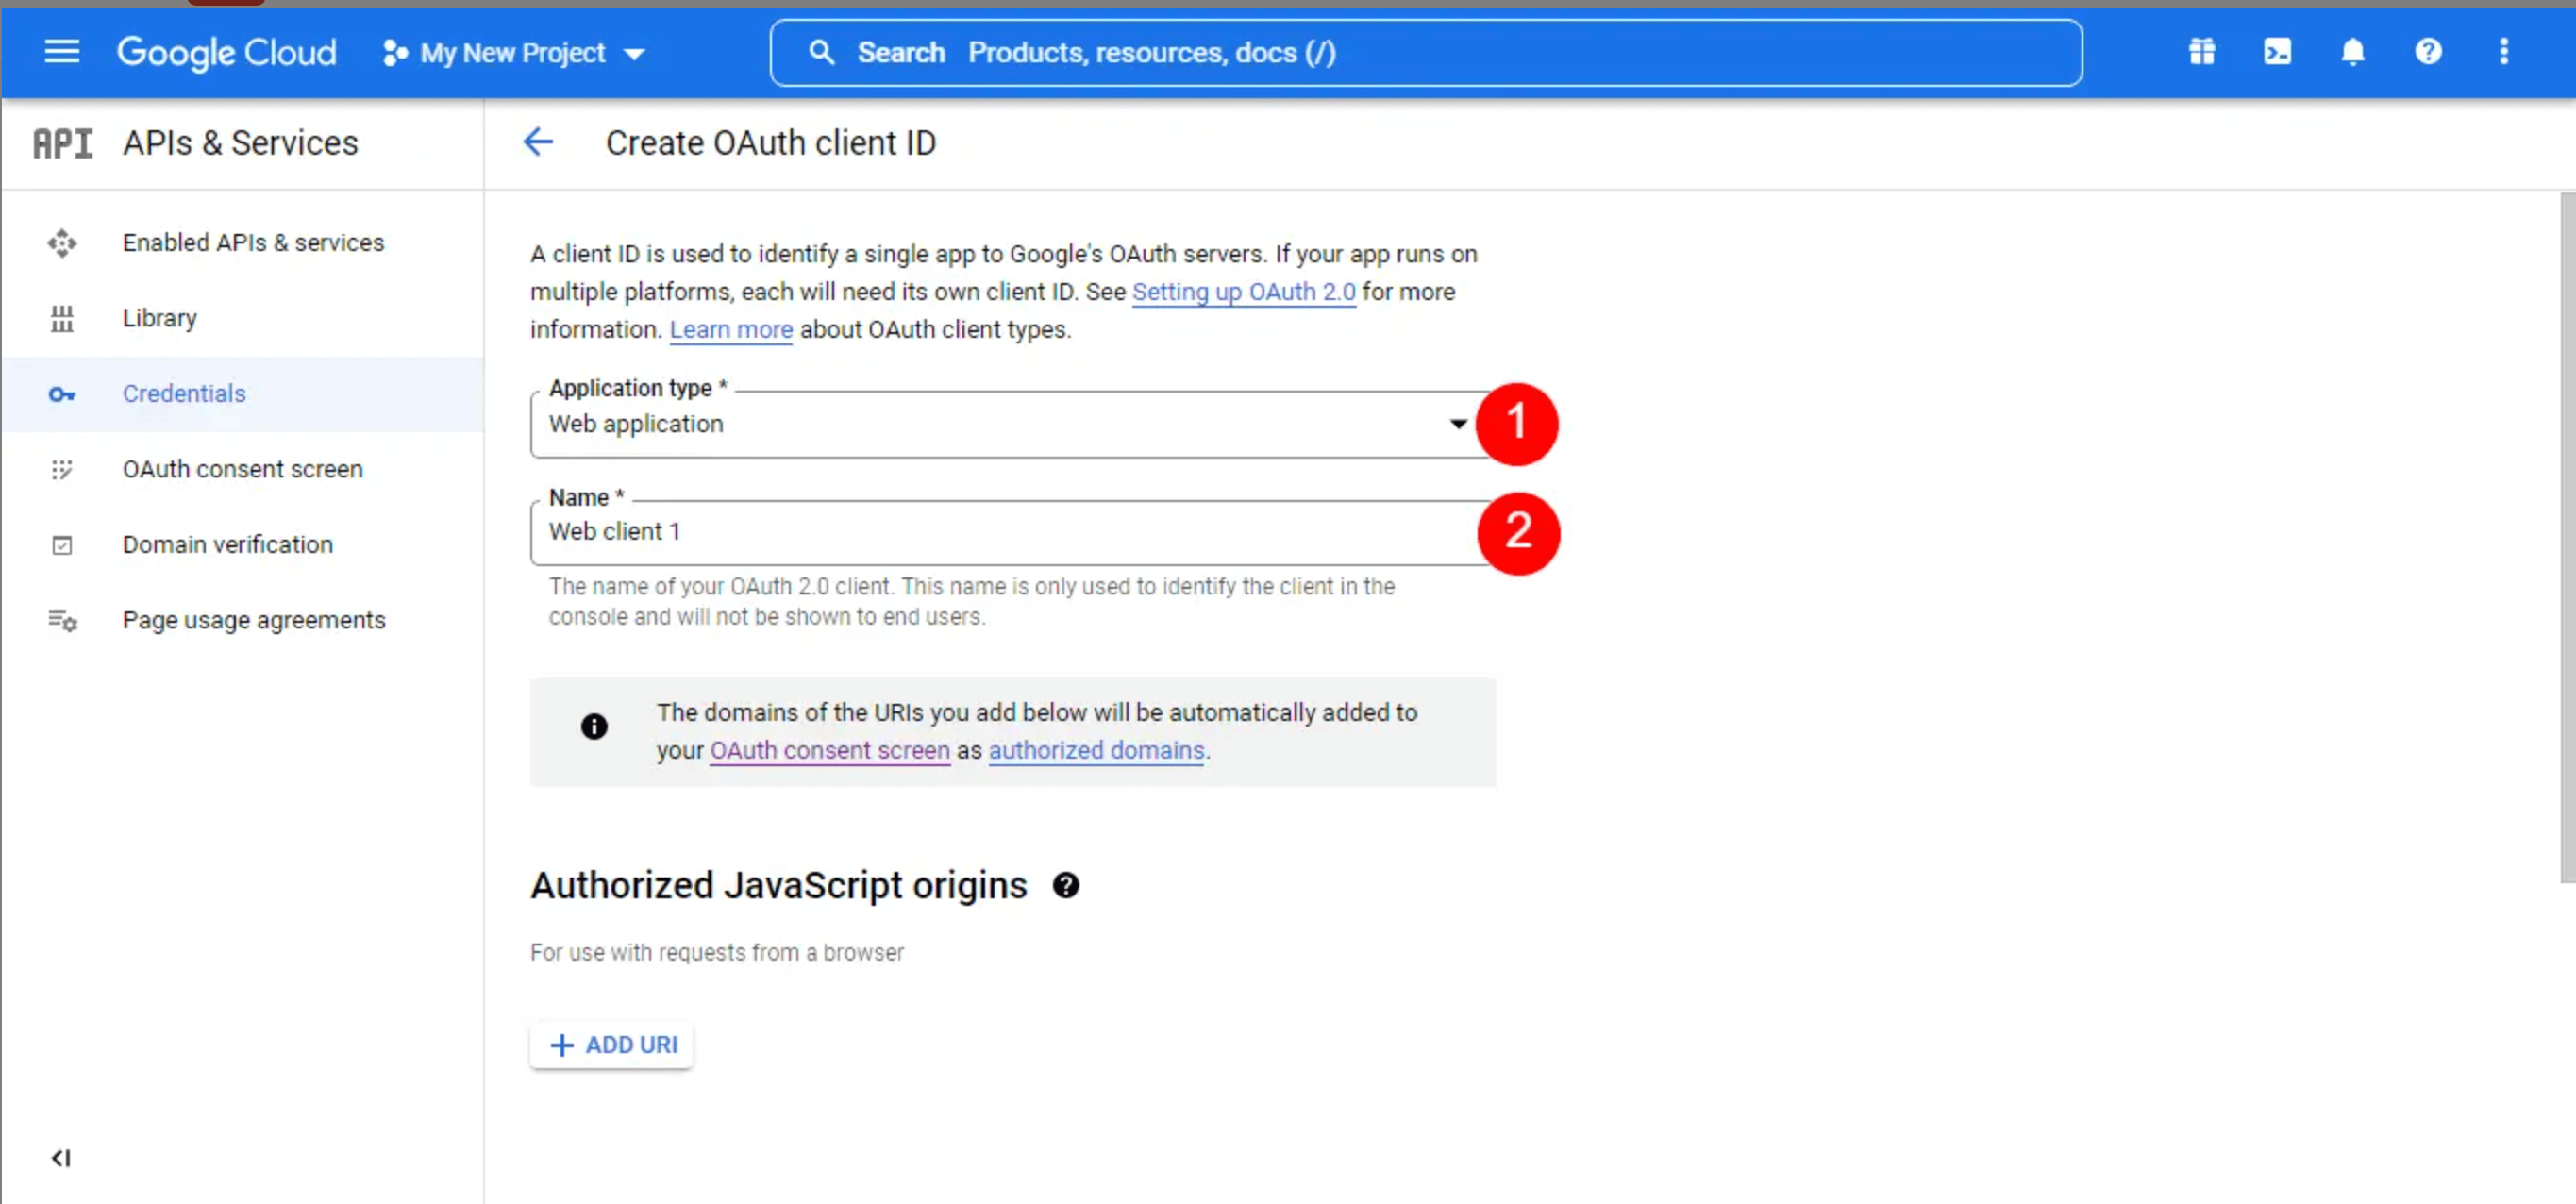
Step 8 :Open the dropdown list Application type ➝ select Web application → enter the name of your OAuth 2.0 client.
Complete all 4 sections of the OAuth consent setup. Click Back to Dashboard when finished.
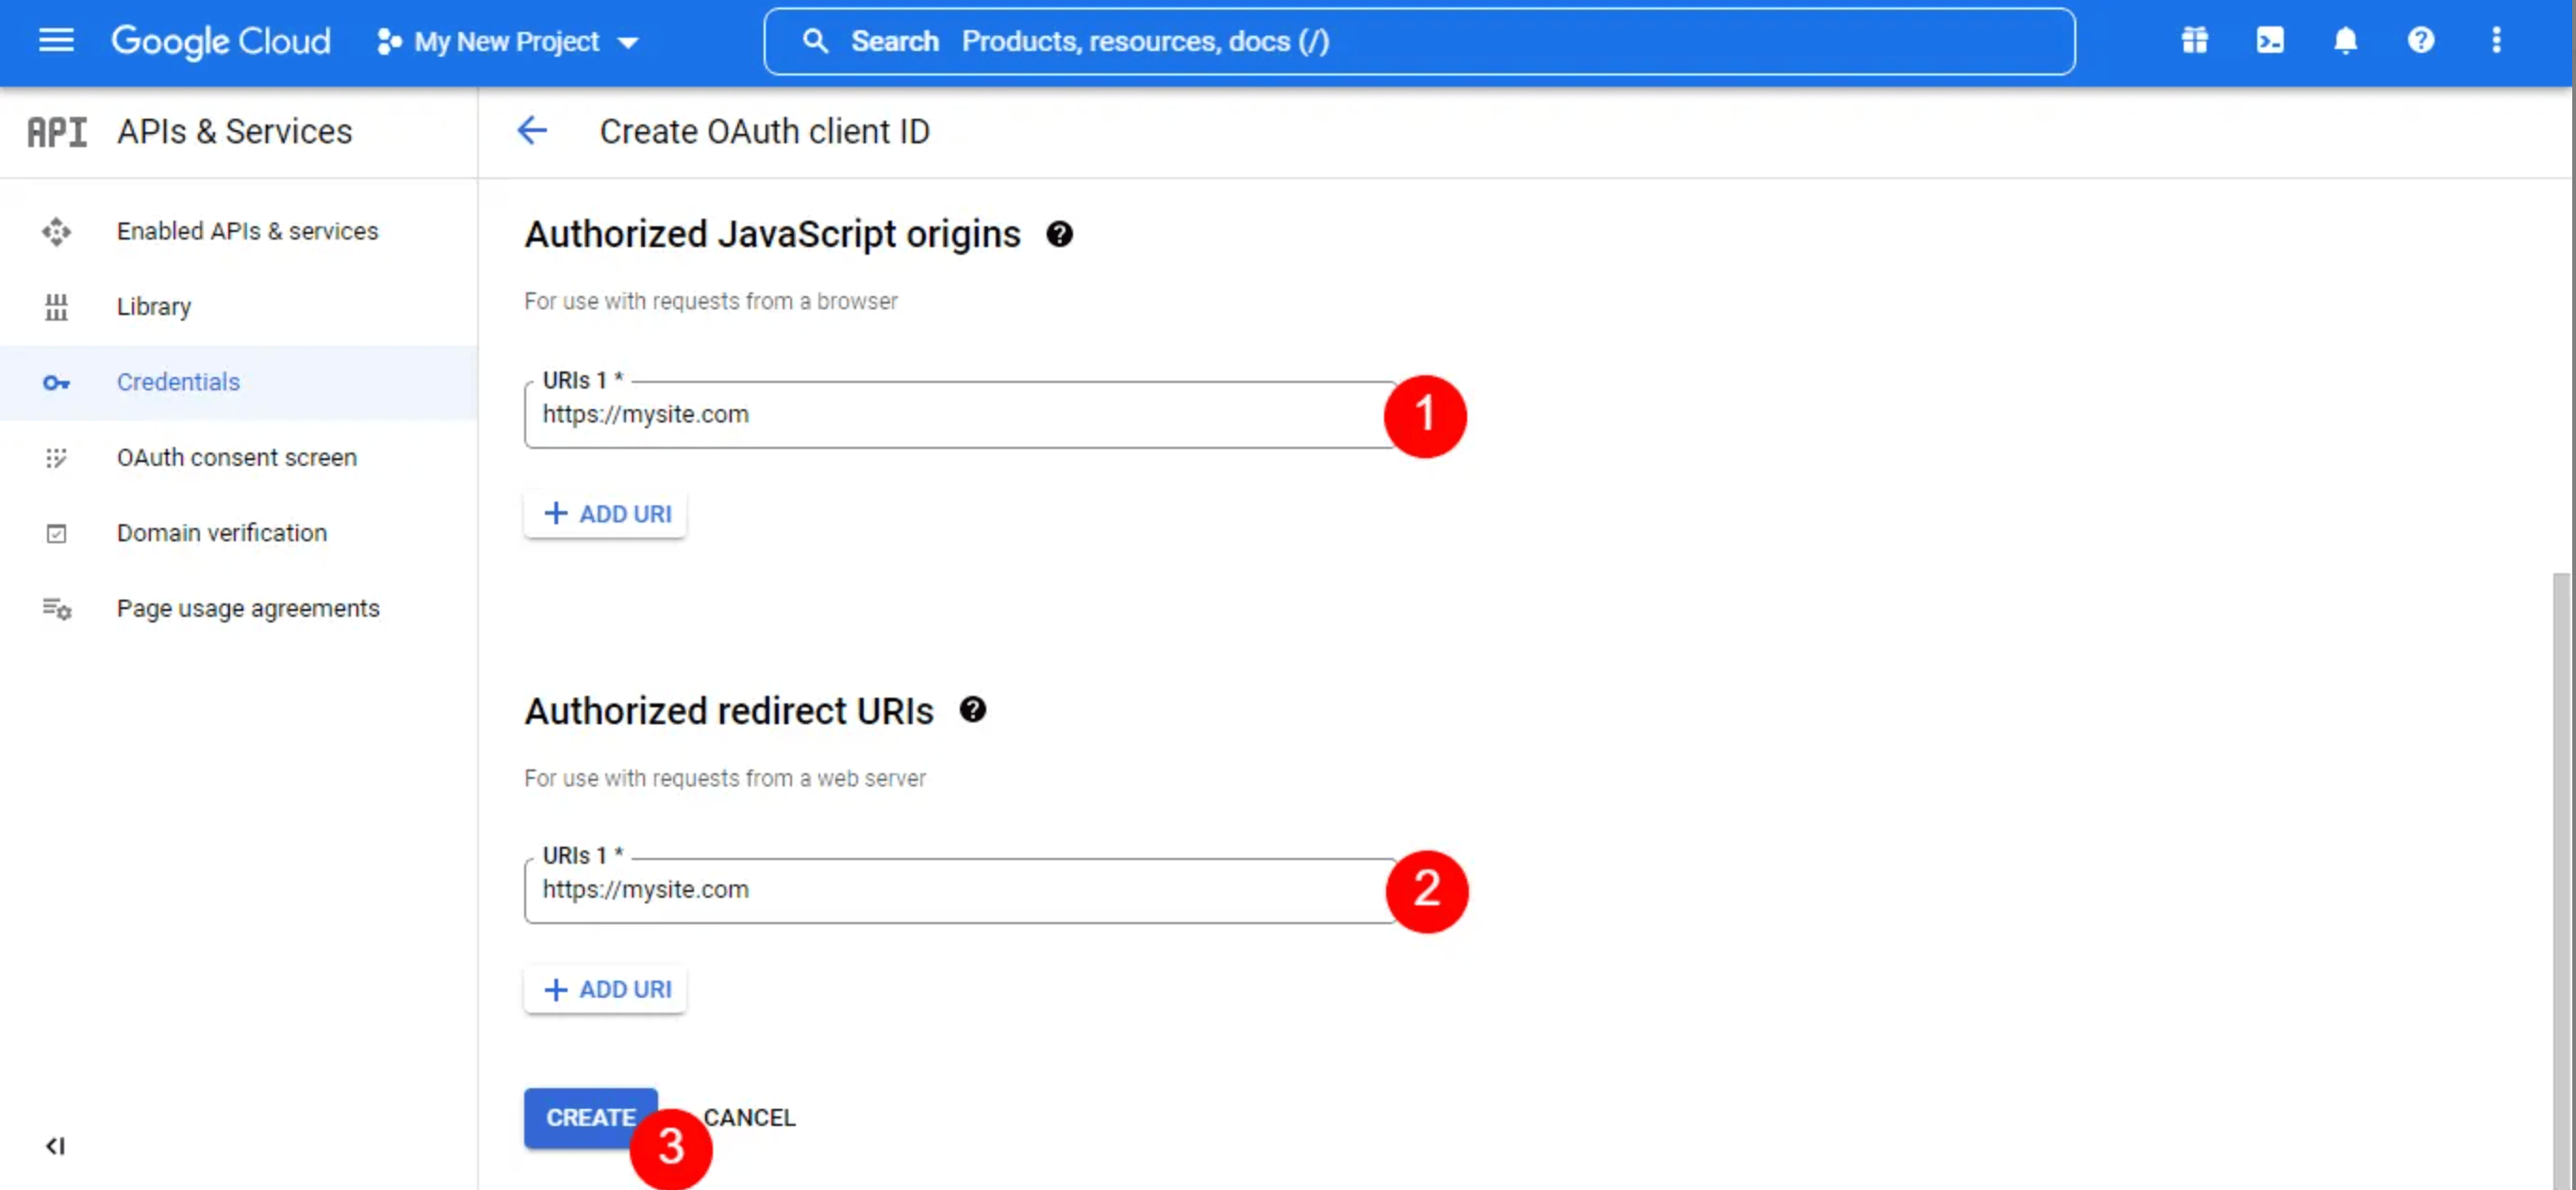
Step 9 :
Add your allowed URLs:
- Authorized JavaScript origin → your website URL
- Authorized Redirect URI → the page users return to after Google login.This is your Redirect URL copy and save it, as you will need it inside the plugin settings.
click Create
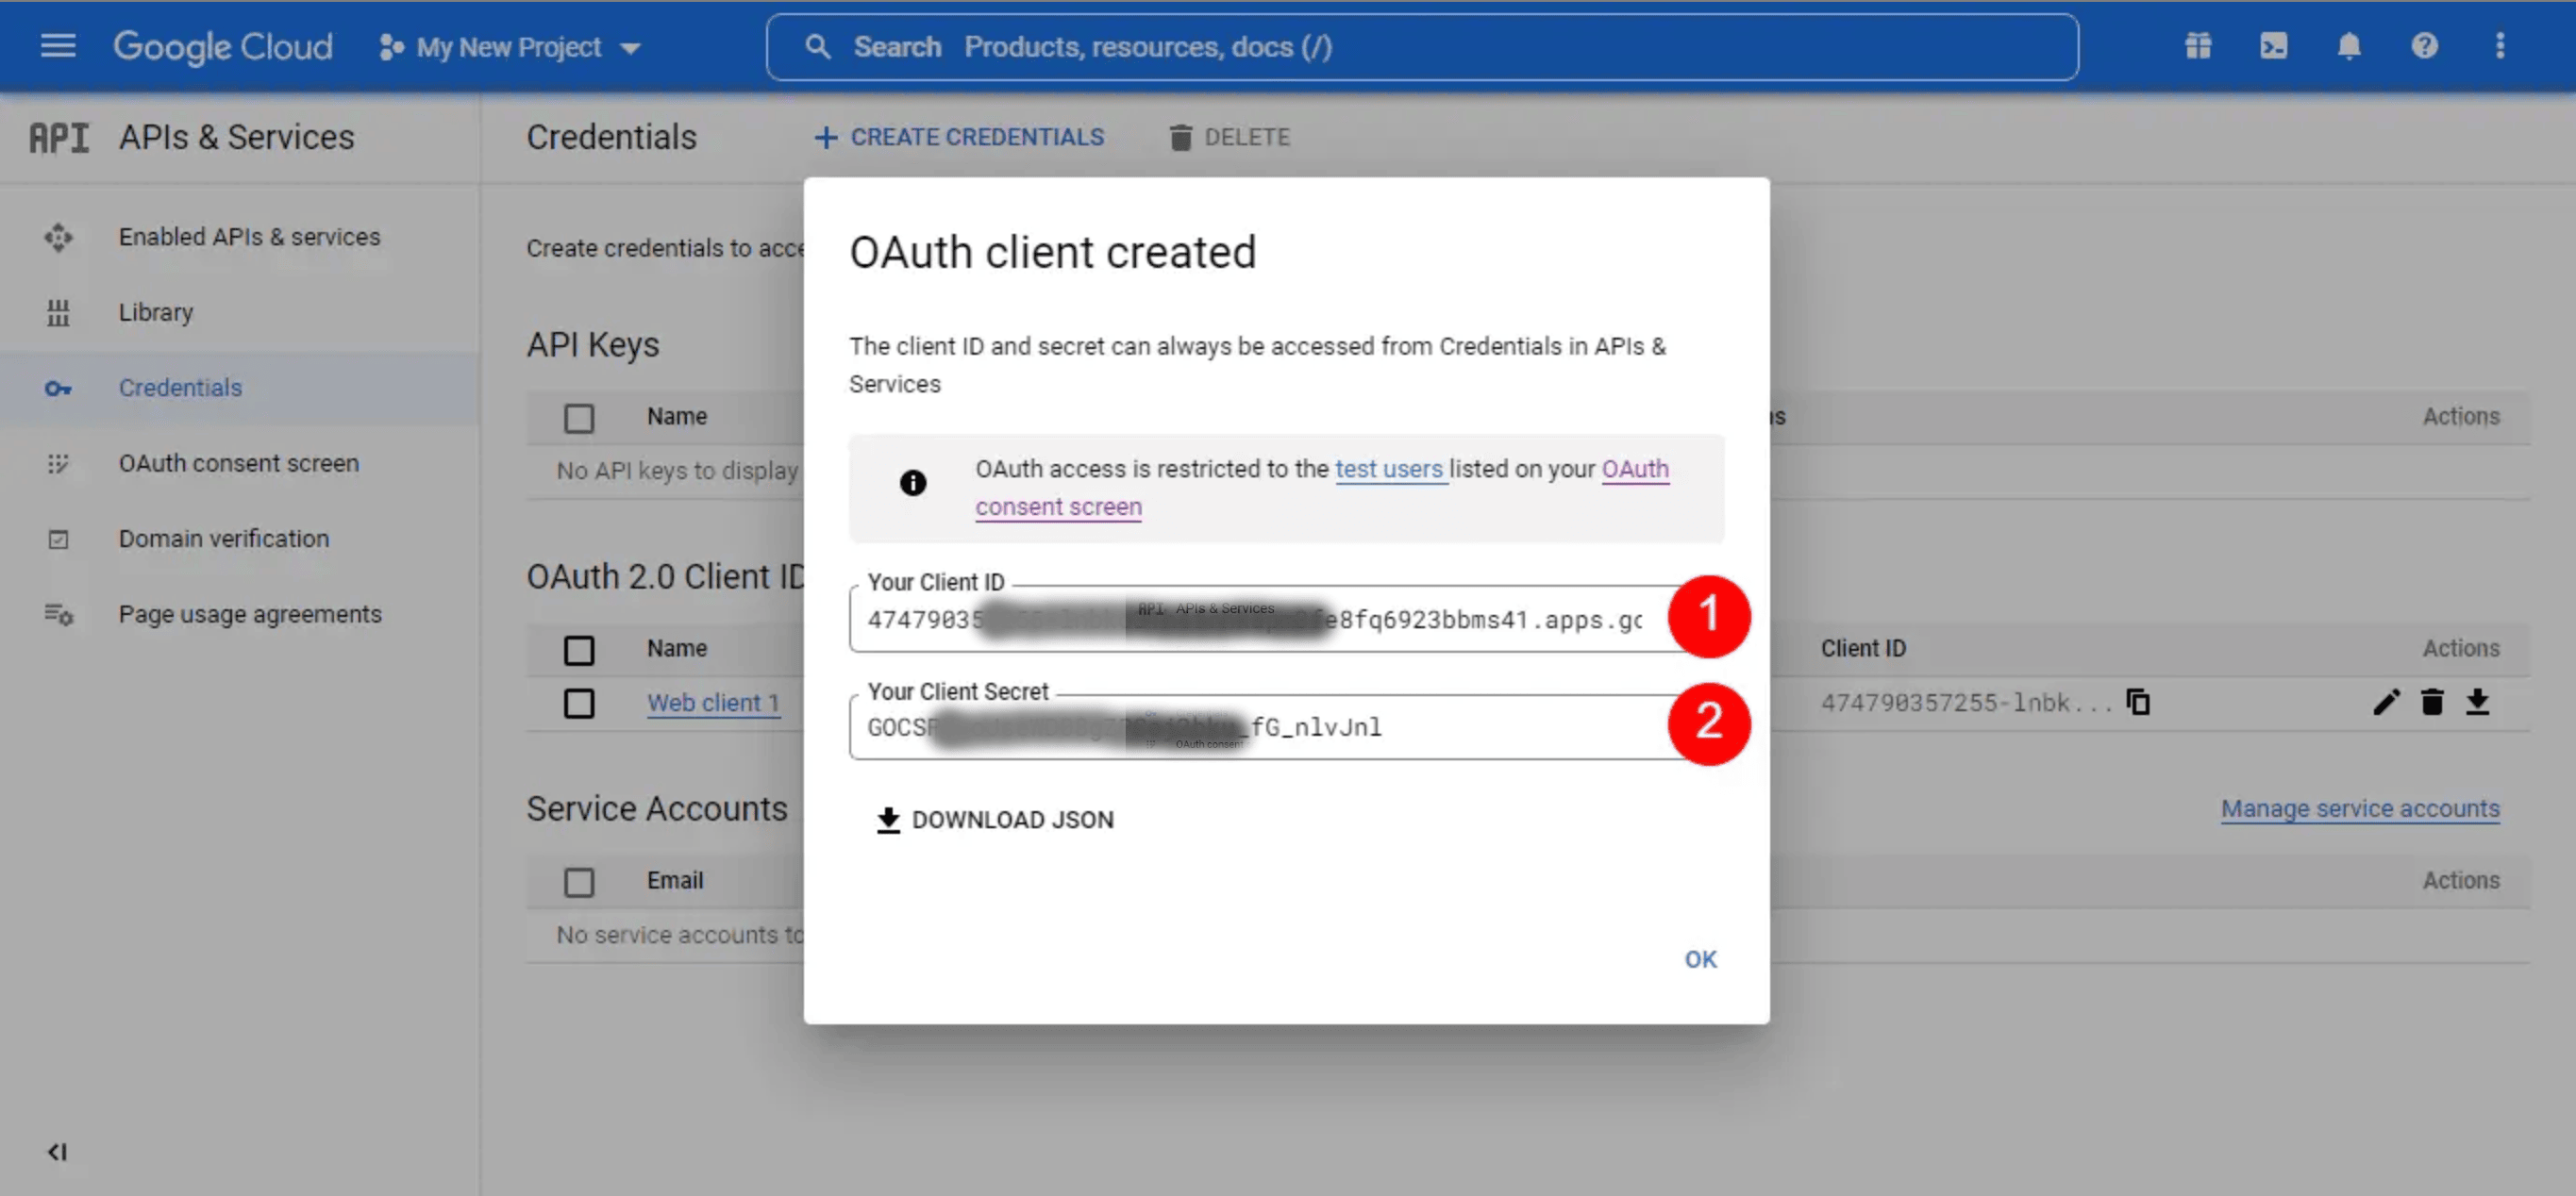
Step 10 :
Copy your Client ID and Client Secret.
Creating Ads
With the GAM Ad Inserter – Adx & Ad Manager Ads plugin, you can create and manage multiple ad formats, including Banner, Interstitial, Anchor, Floater, Popup, Push Down, Flying Carpet, Sticky, Rewarded, and Custom Ads.
In the following sections, you will see the step-by-step setup process for each ad type along with screenshots to guide you through the configuration.
Creating Banner Ads
Overview
- Select Banner as the ad type
- Choose where it runs (Desktop, Tablet, Mobile)
- Pick your Google Ad Manager ad unit
- Turn Responsive ON or OFF
- Choose ad sizes for each device
- Enable Ad Refresh if needed (Premium)
- Decide placement (Entire site or specific pages)
- Set position and alignment
- Save & Publish to make it live
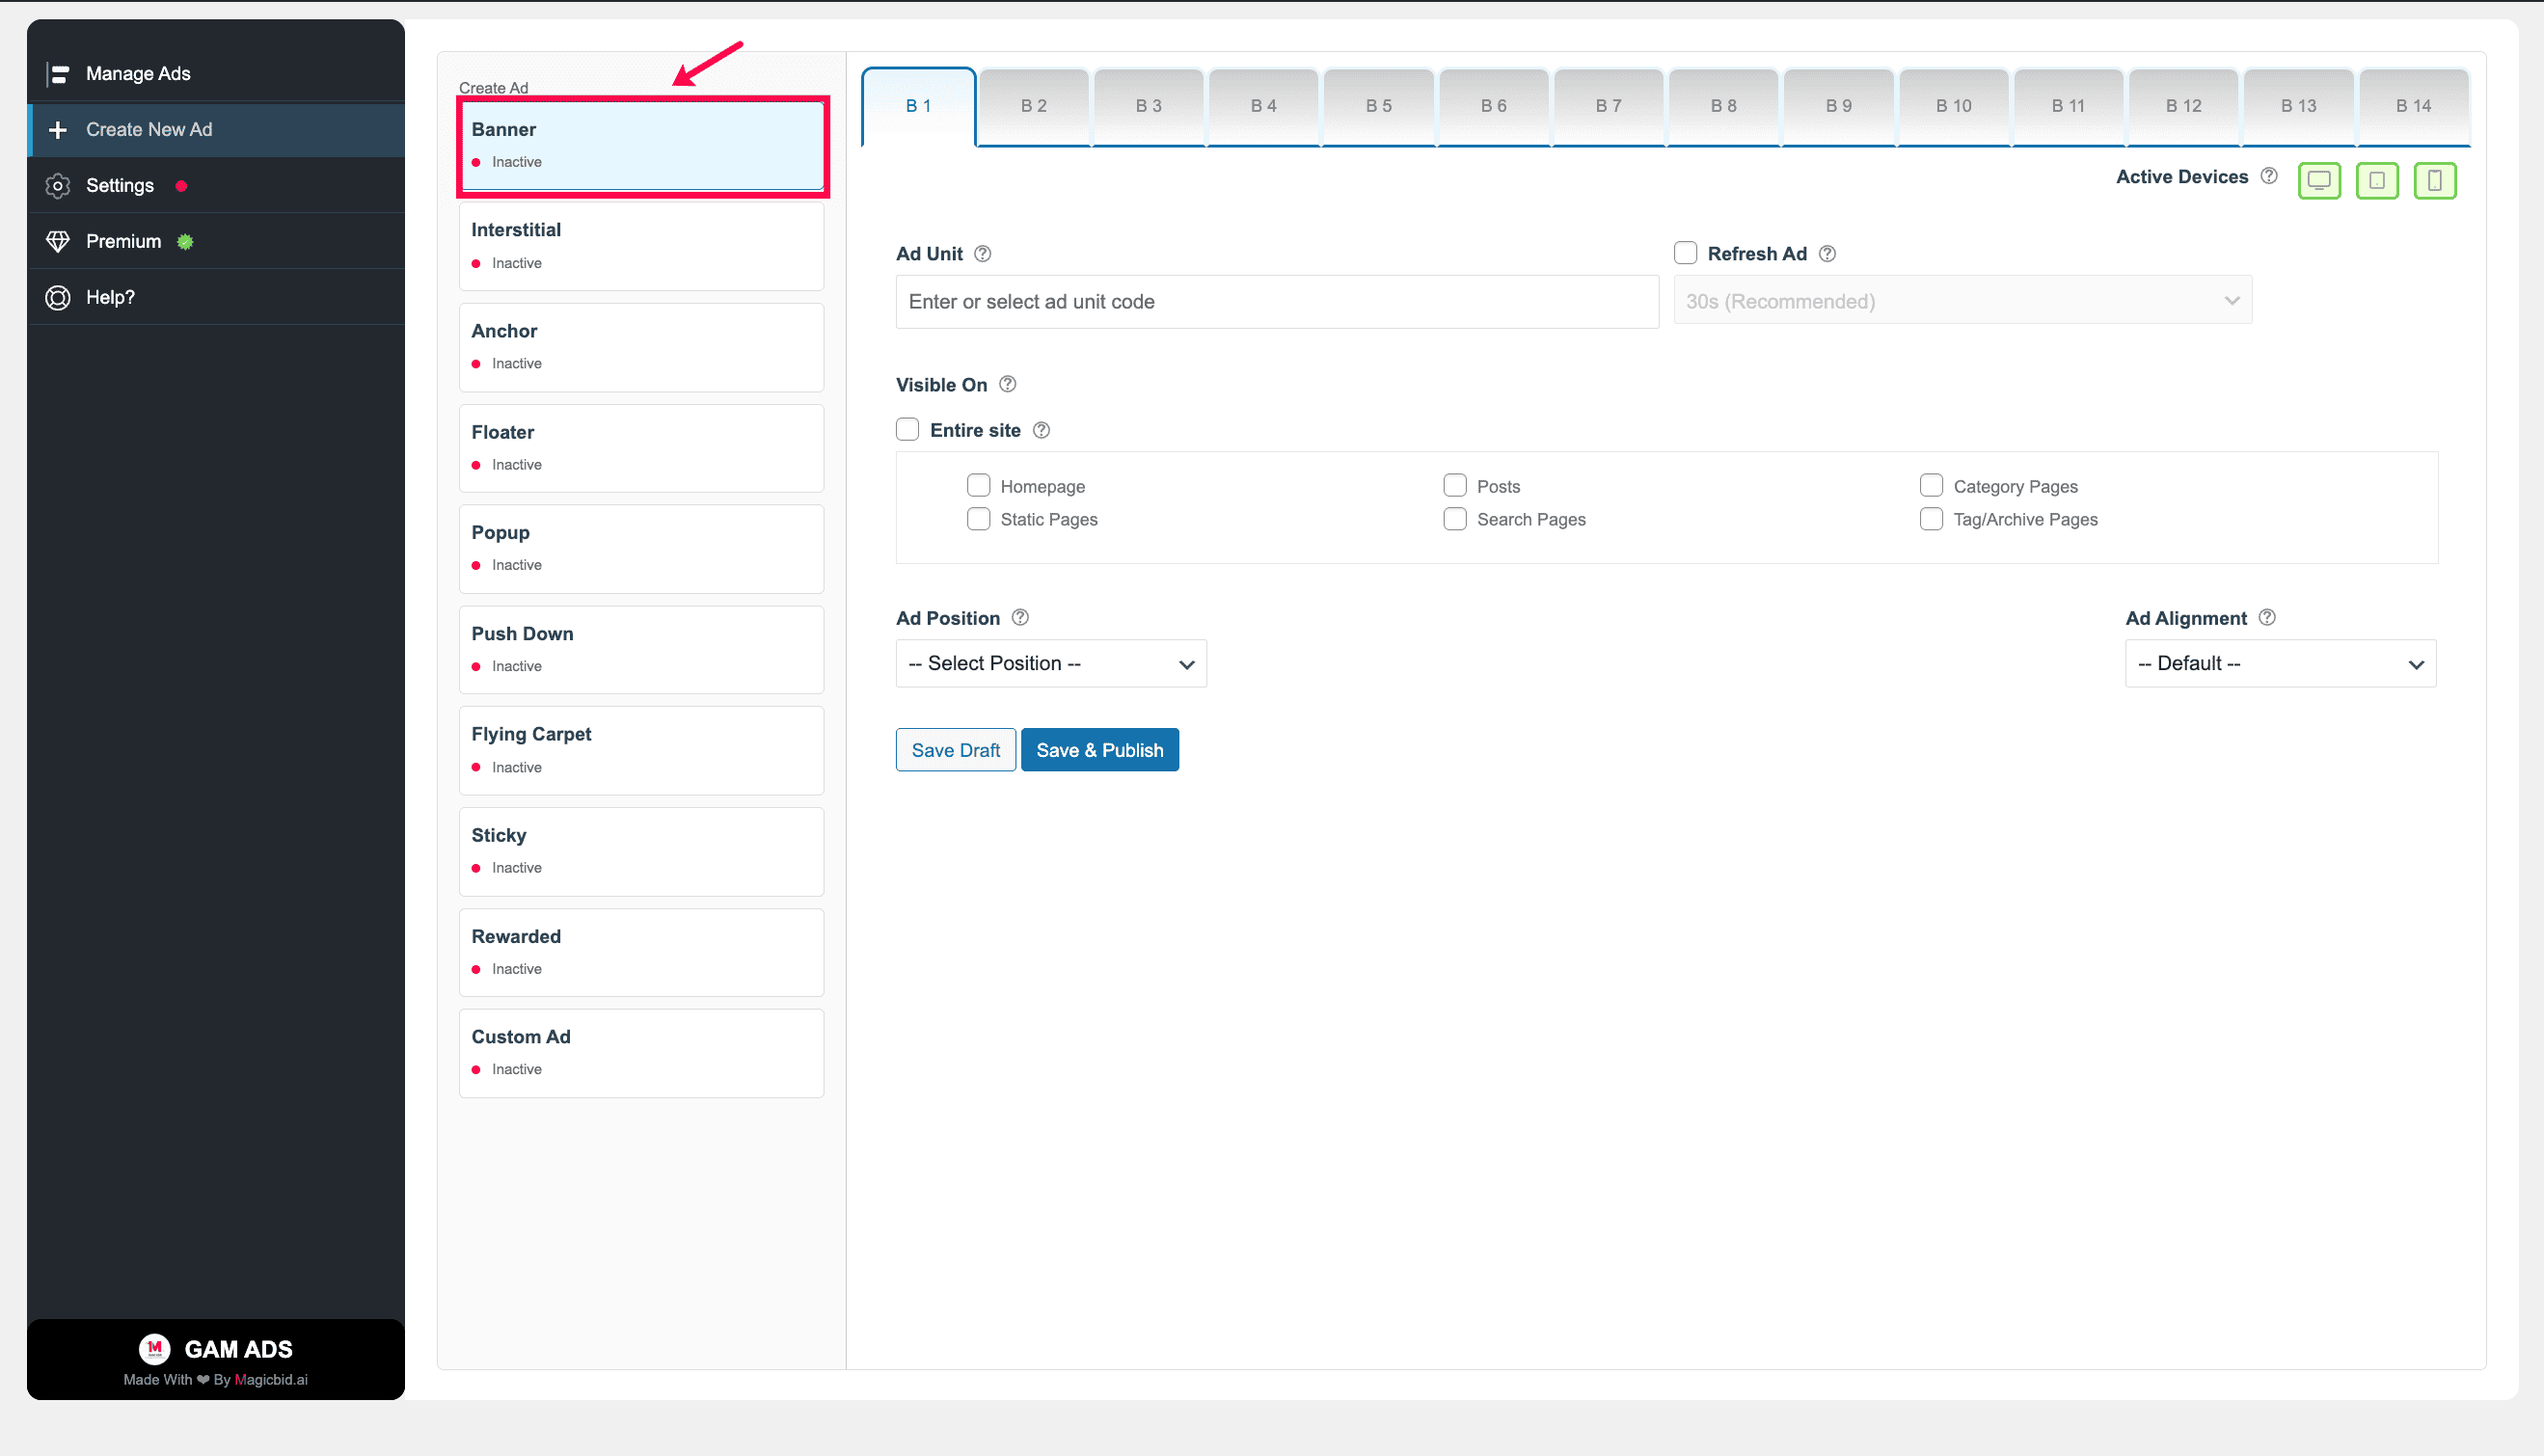
Step 1: Choose Ad Type
Go to Create New Ad and select Banner.
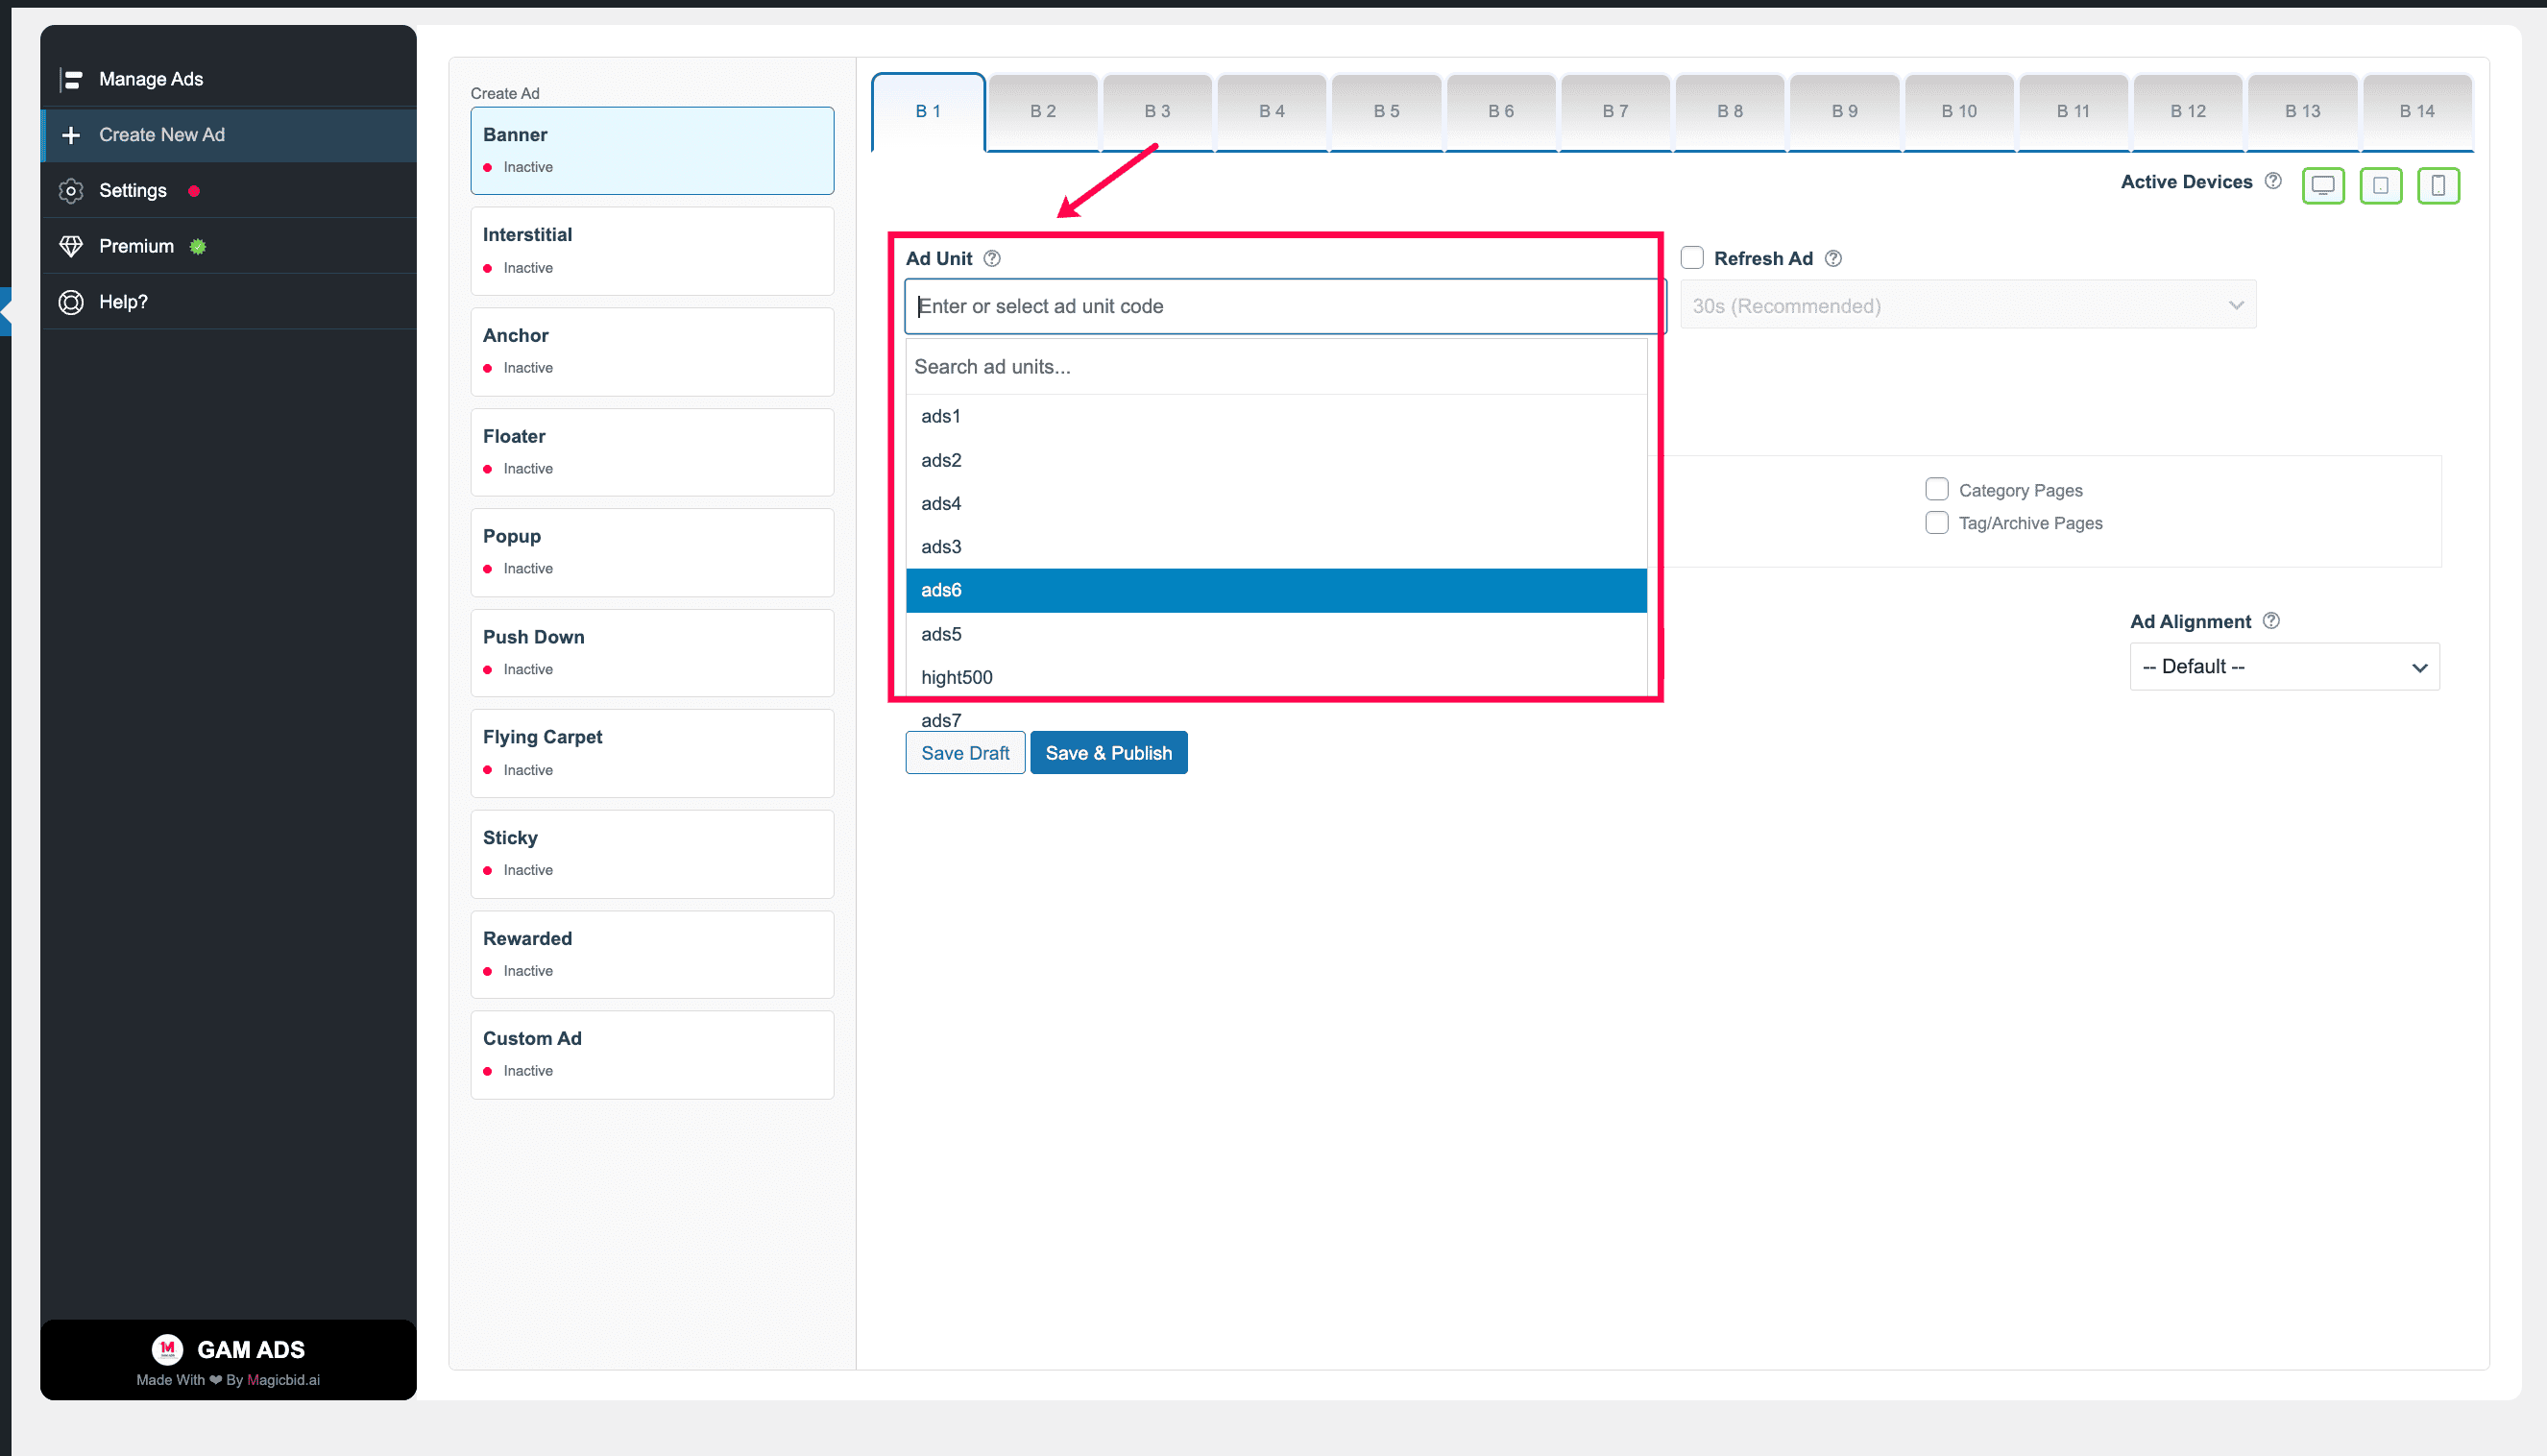
Step 2: Select Ad Unit
Choose the Google Ad Manager ad unit you want to serve.
Note: The ad unit must already exist in your Google Ad Manager account in order to appear in this list.
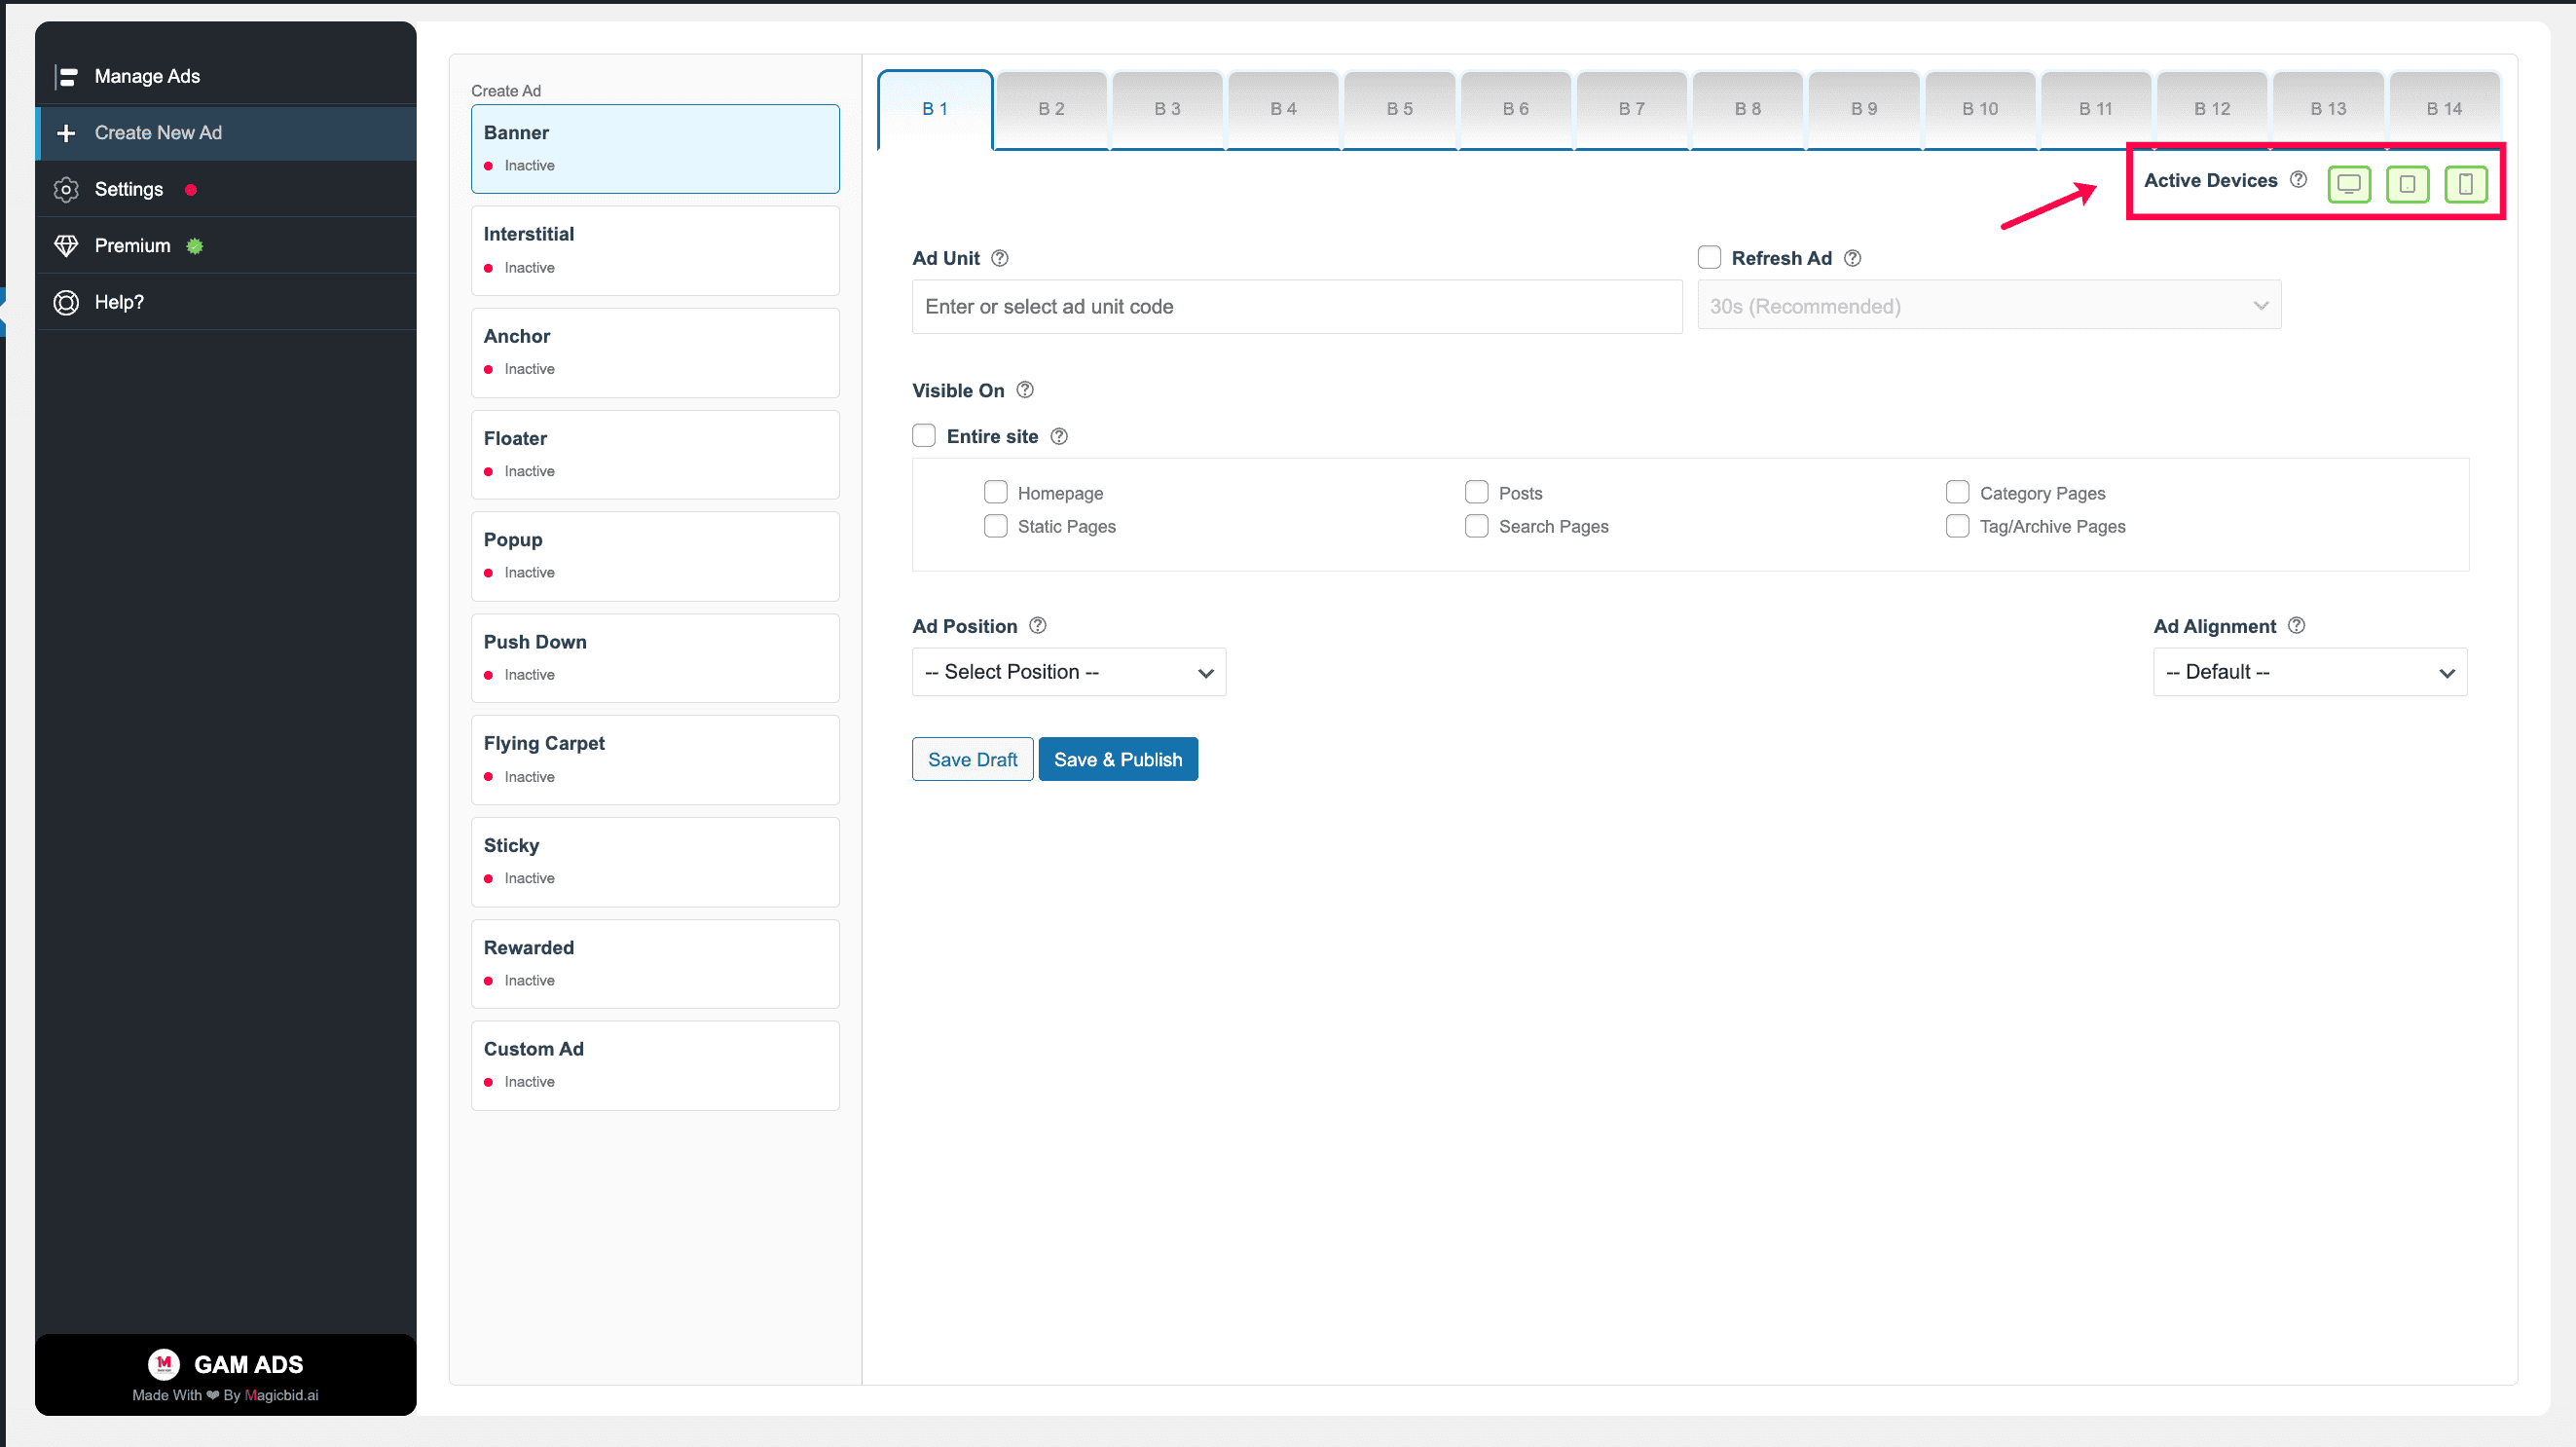
Step 3: Choose Devices
Under Active Devices, select where this ad should run:
- Desktop
- Tablet
- Mobile
You may enable one, two, or all three device types.
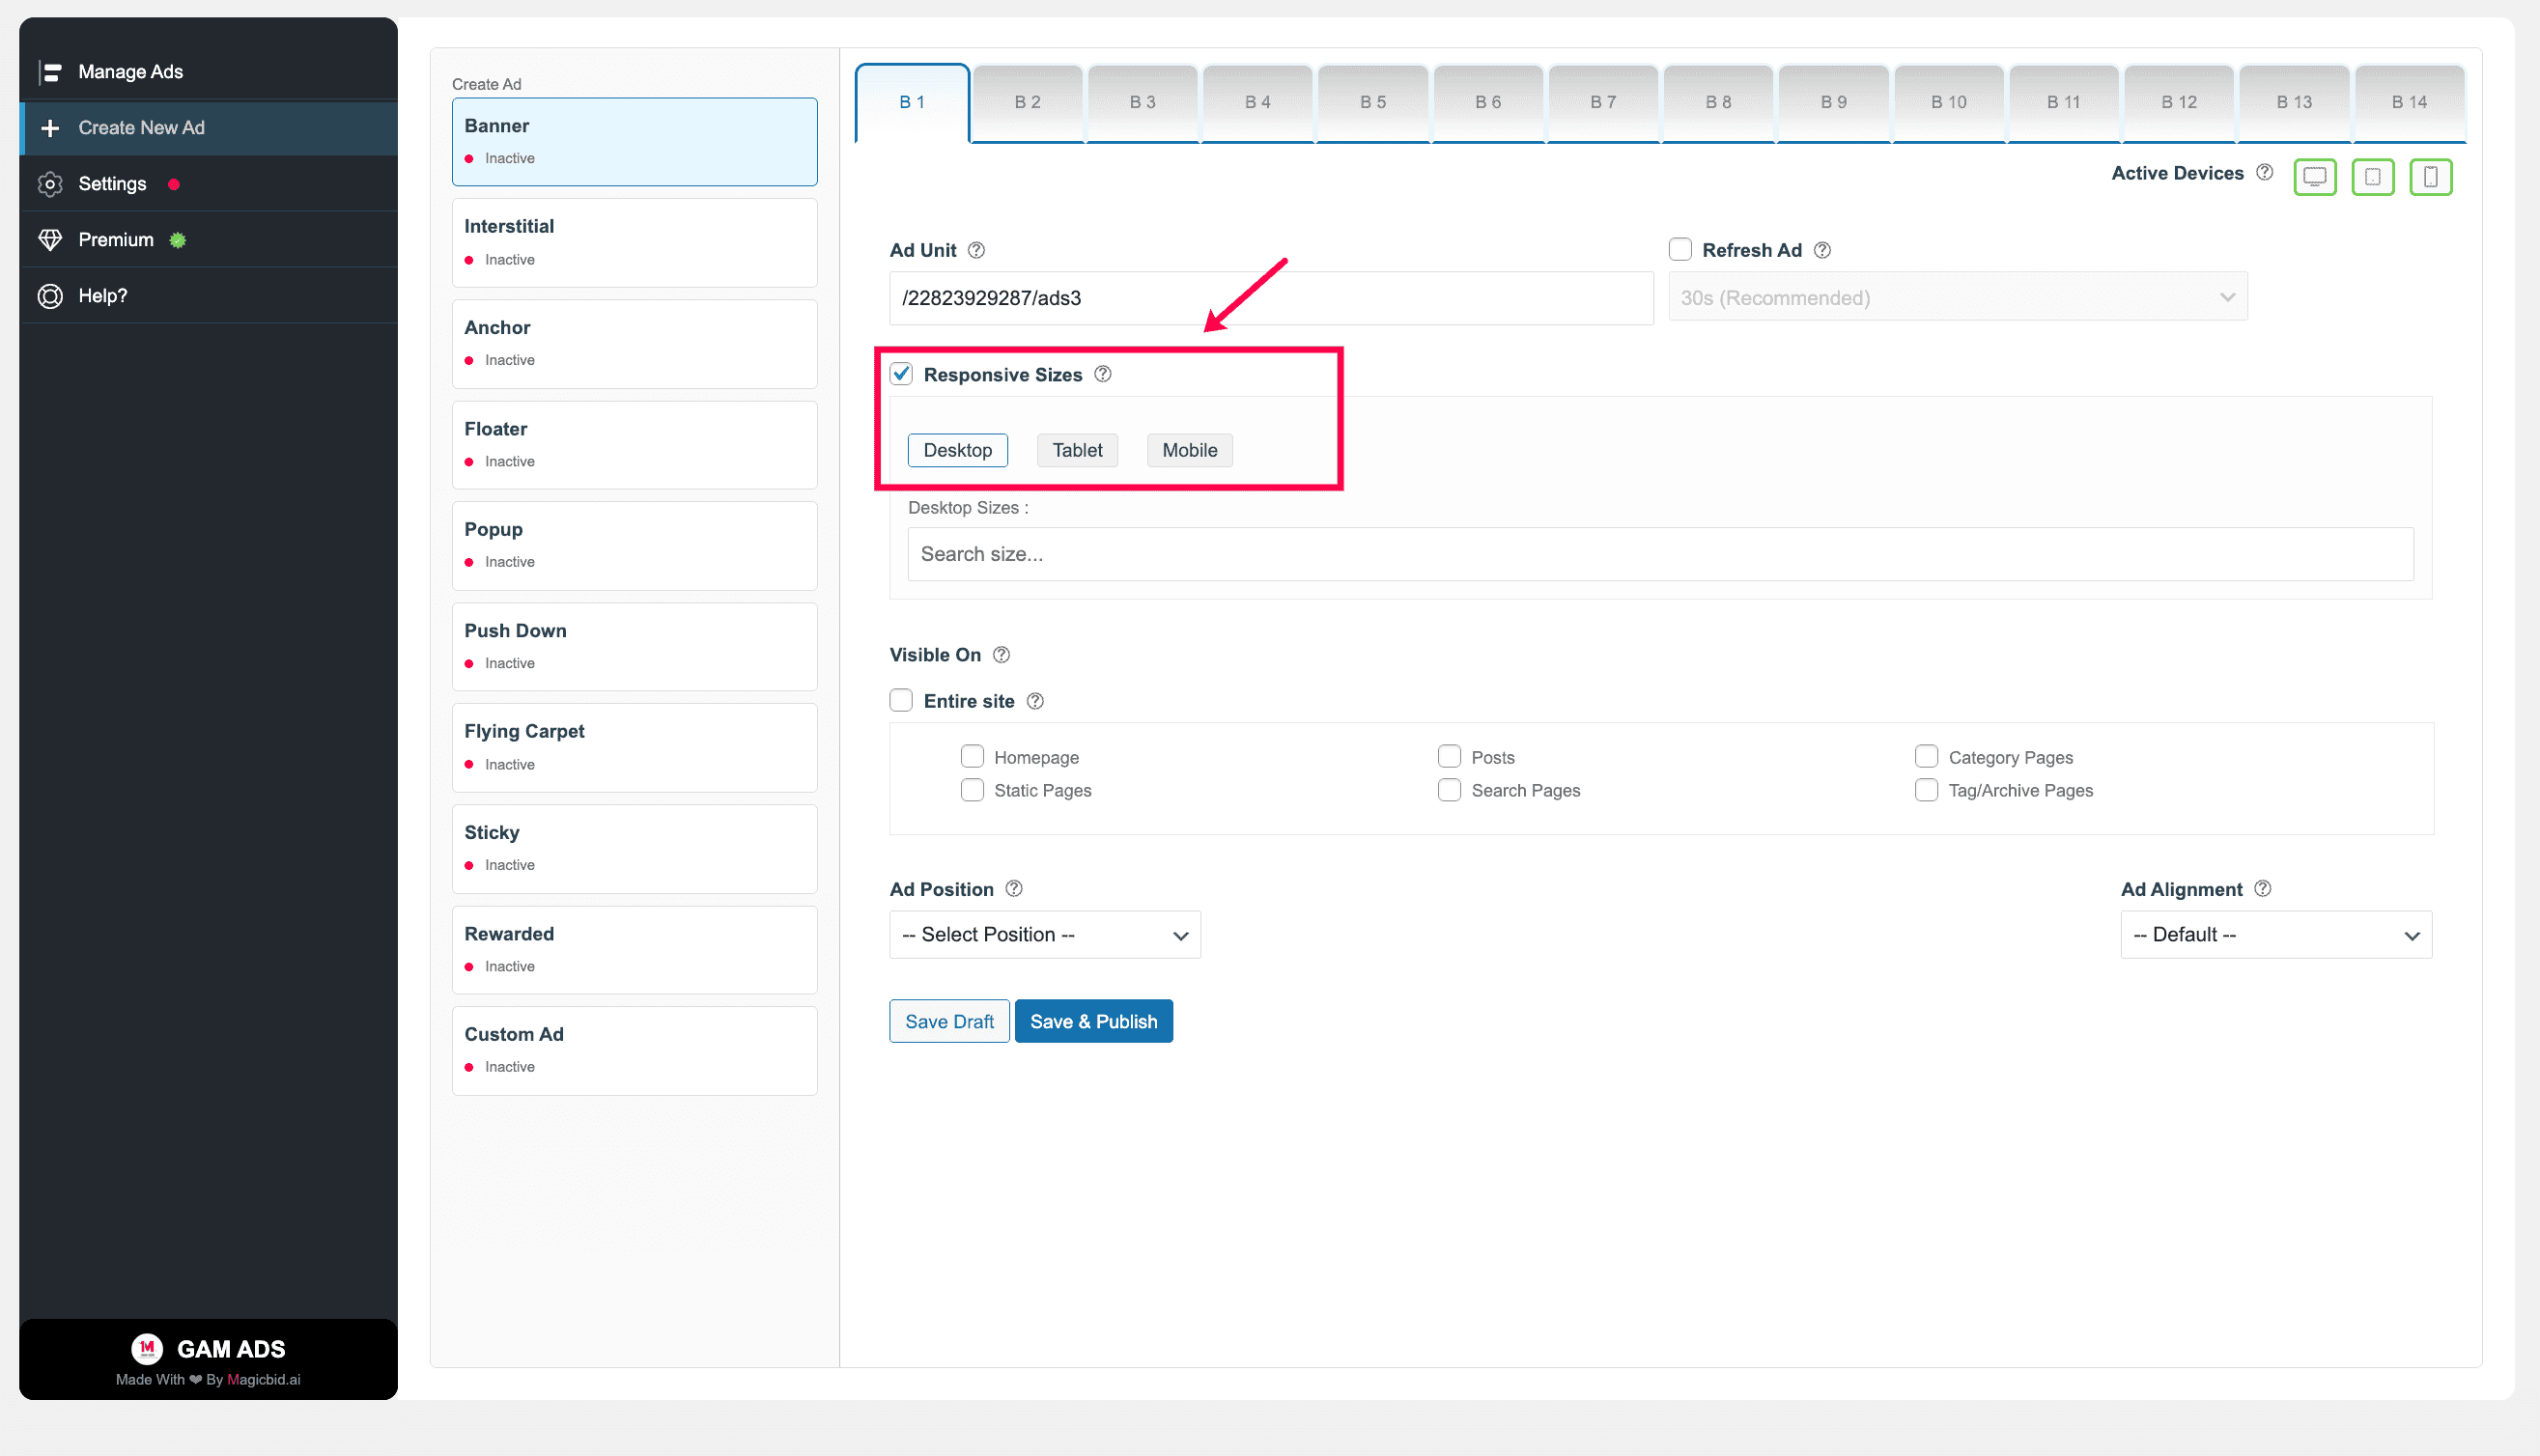
Step 4: Responsive Setting
Decide if the ad should be responsive.
- ON: Automatically adjusts to screen size
- OFF: Uses only fixed ad sizes
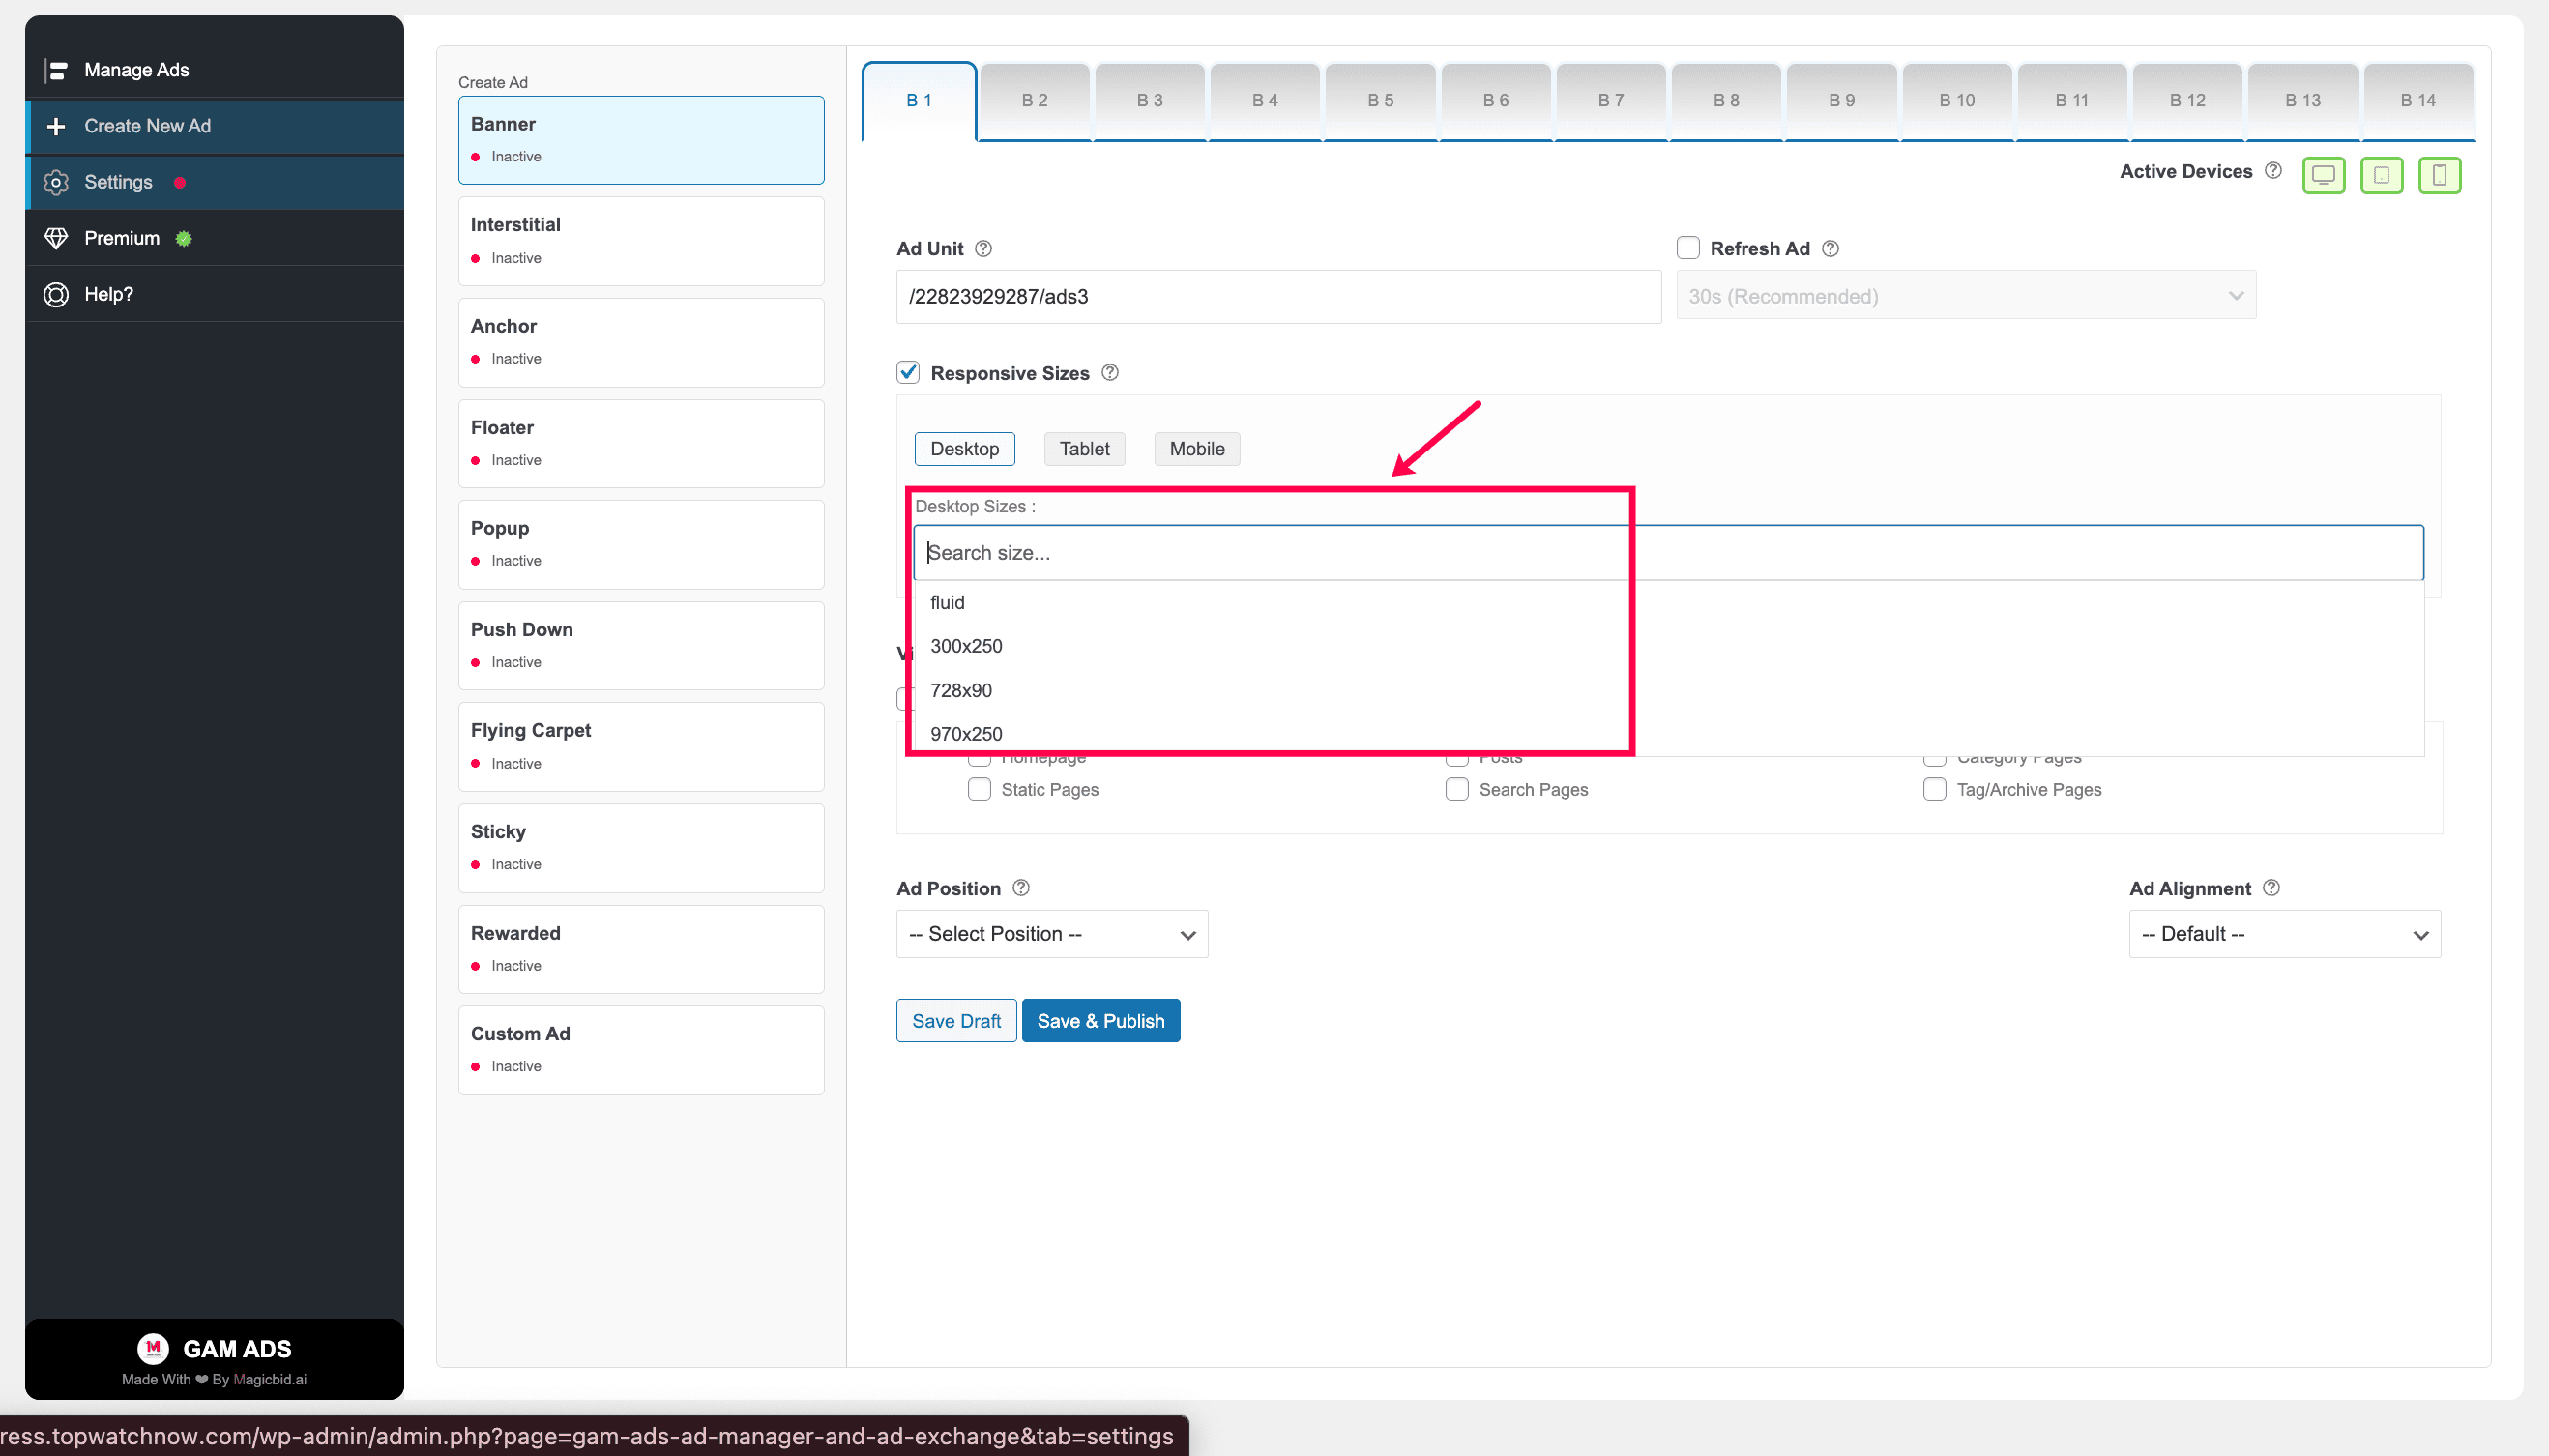
Step 5: Choose Ad Sizes
Select ad sizes for each device.
Example:
- Desktop: 728×90, 300×250
- Mobile: 320×50, 300×250
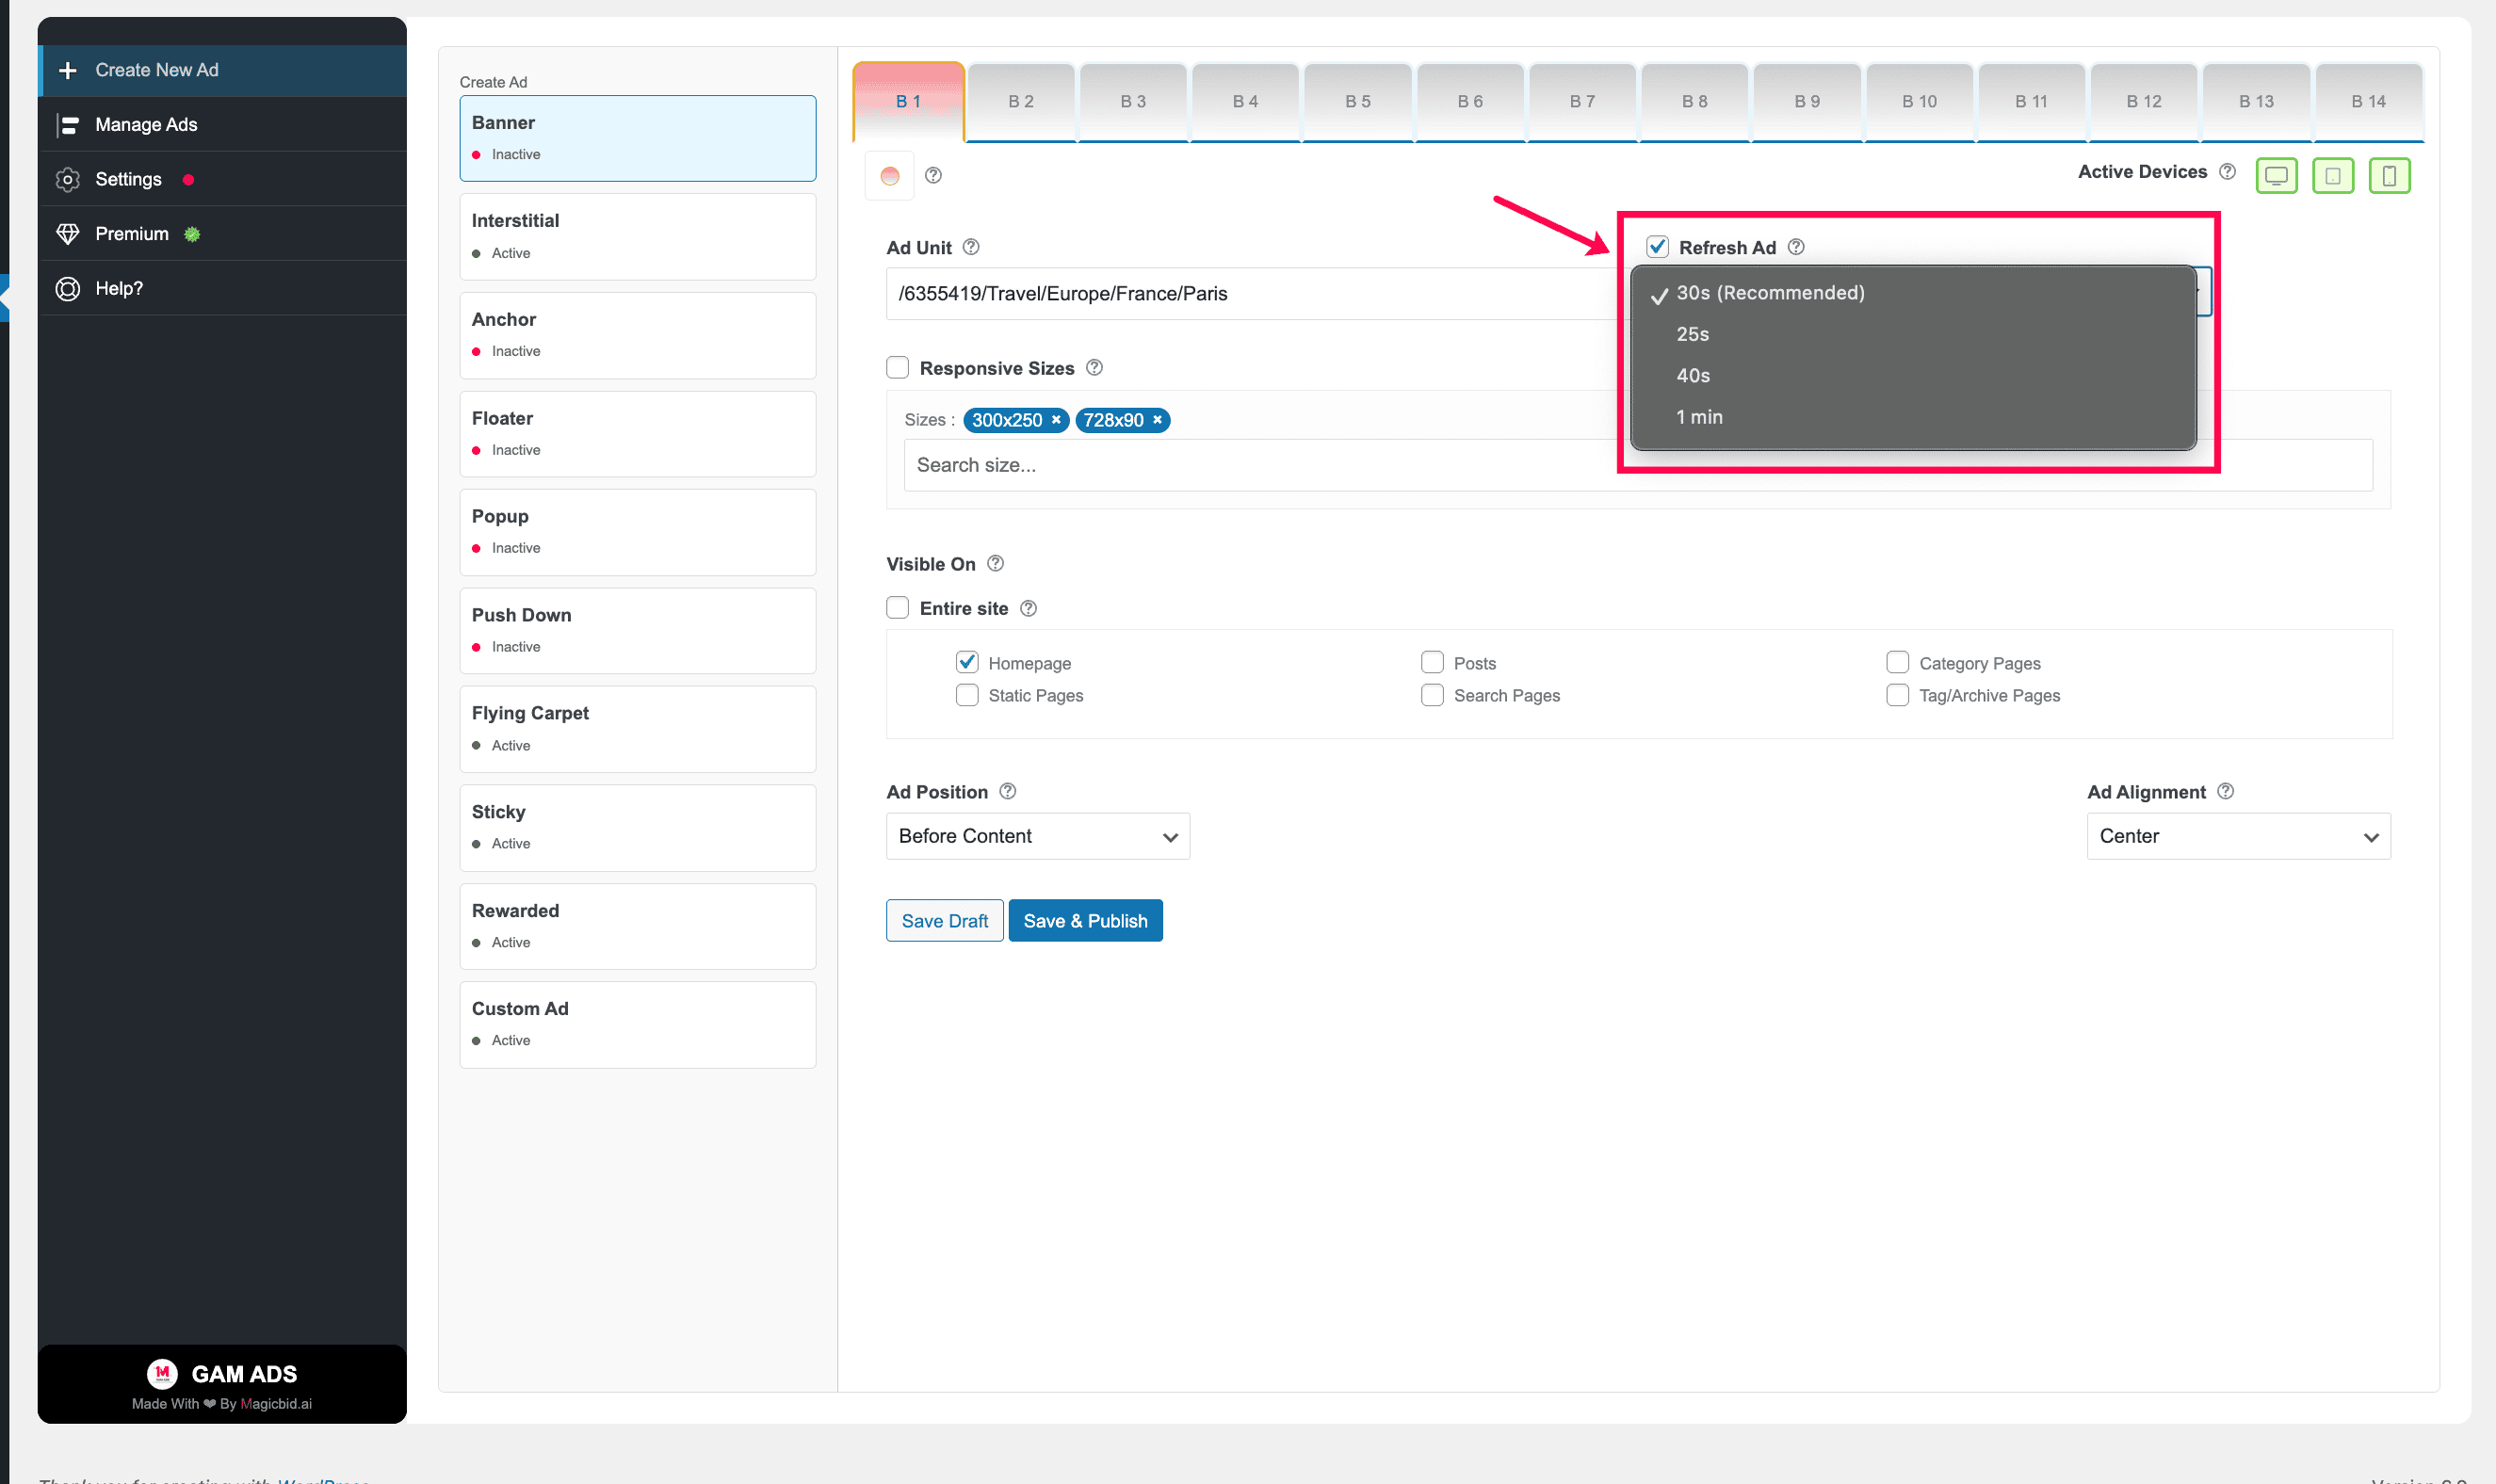
Step 6: Ad Refresh (Premium Feature)
Enable or disable ad refresh.
- ON: Reloads ads after a set interval
- OFF: Keeps the ad static
Note: This feature is available for premium users only.
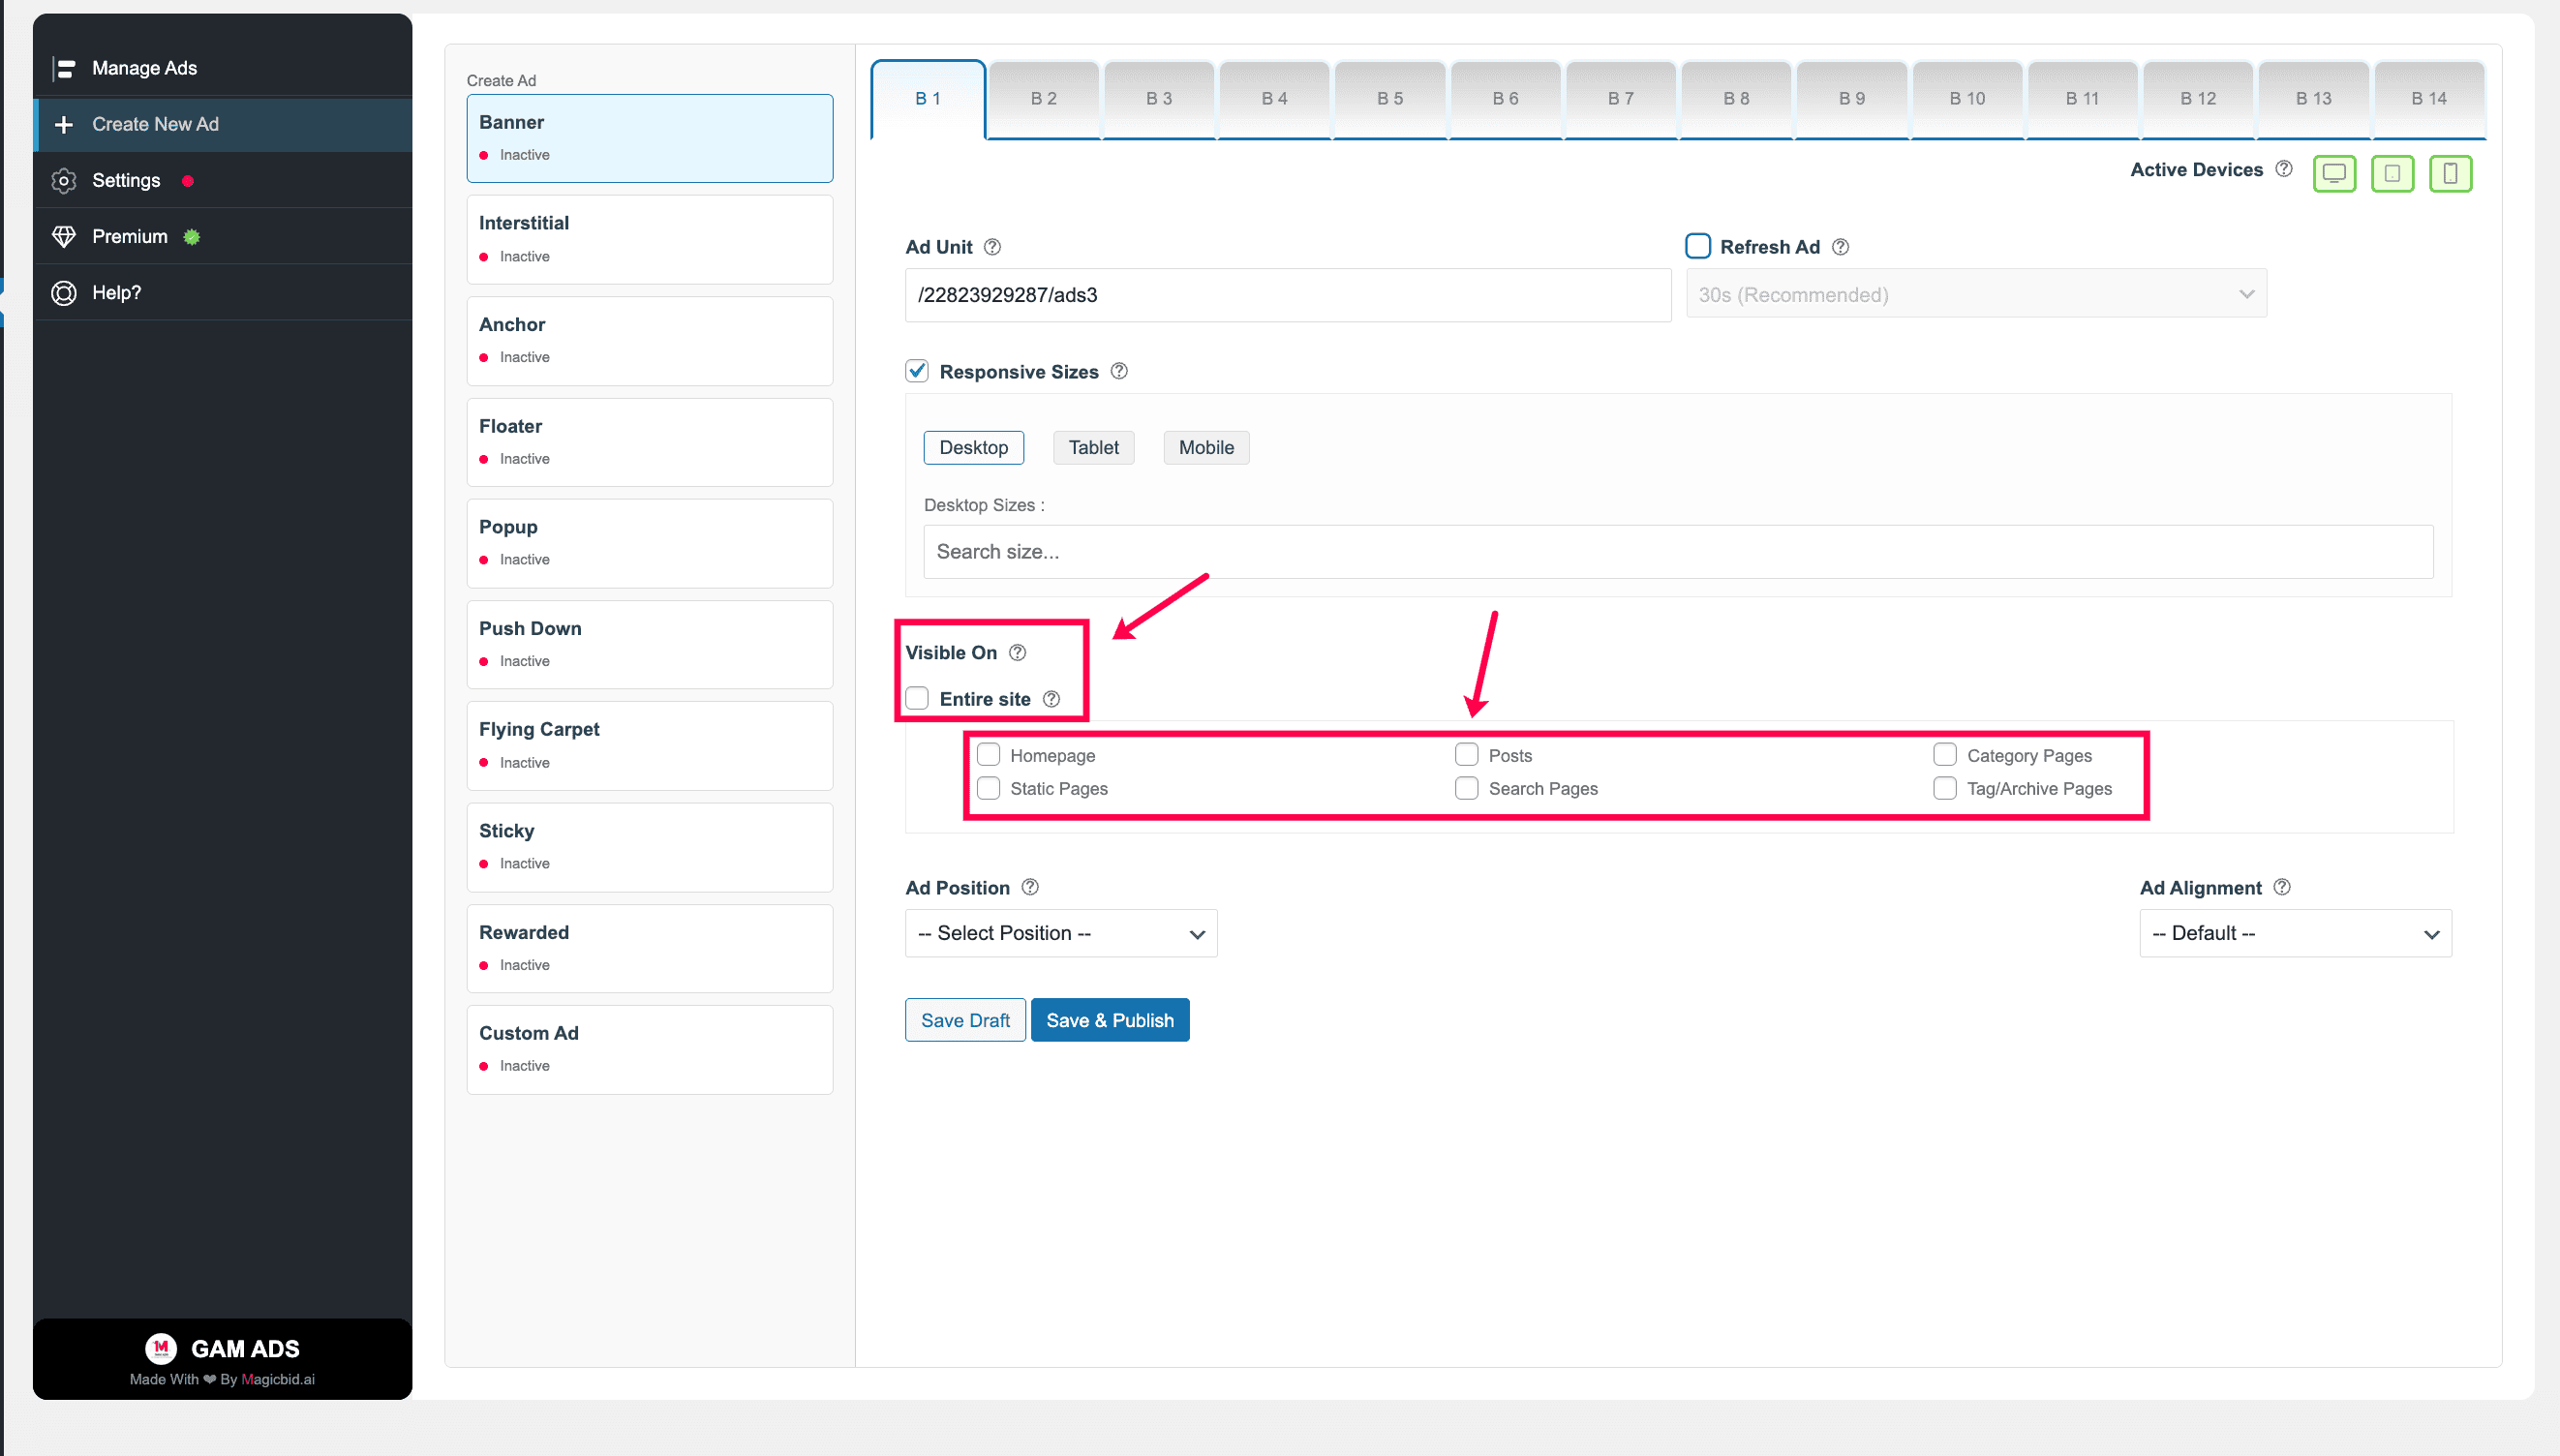
Step 7: Placement Rules
Choose where this ad should appear.
- Entire Site: Shows on all pages
- Specific Pages: Shows only on selected posts, pages, or categories
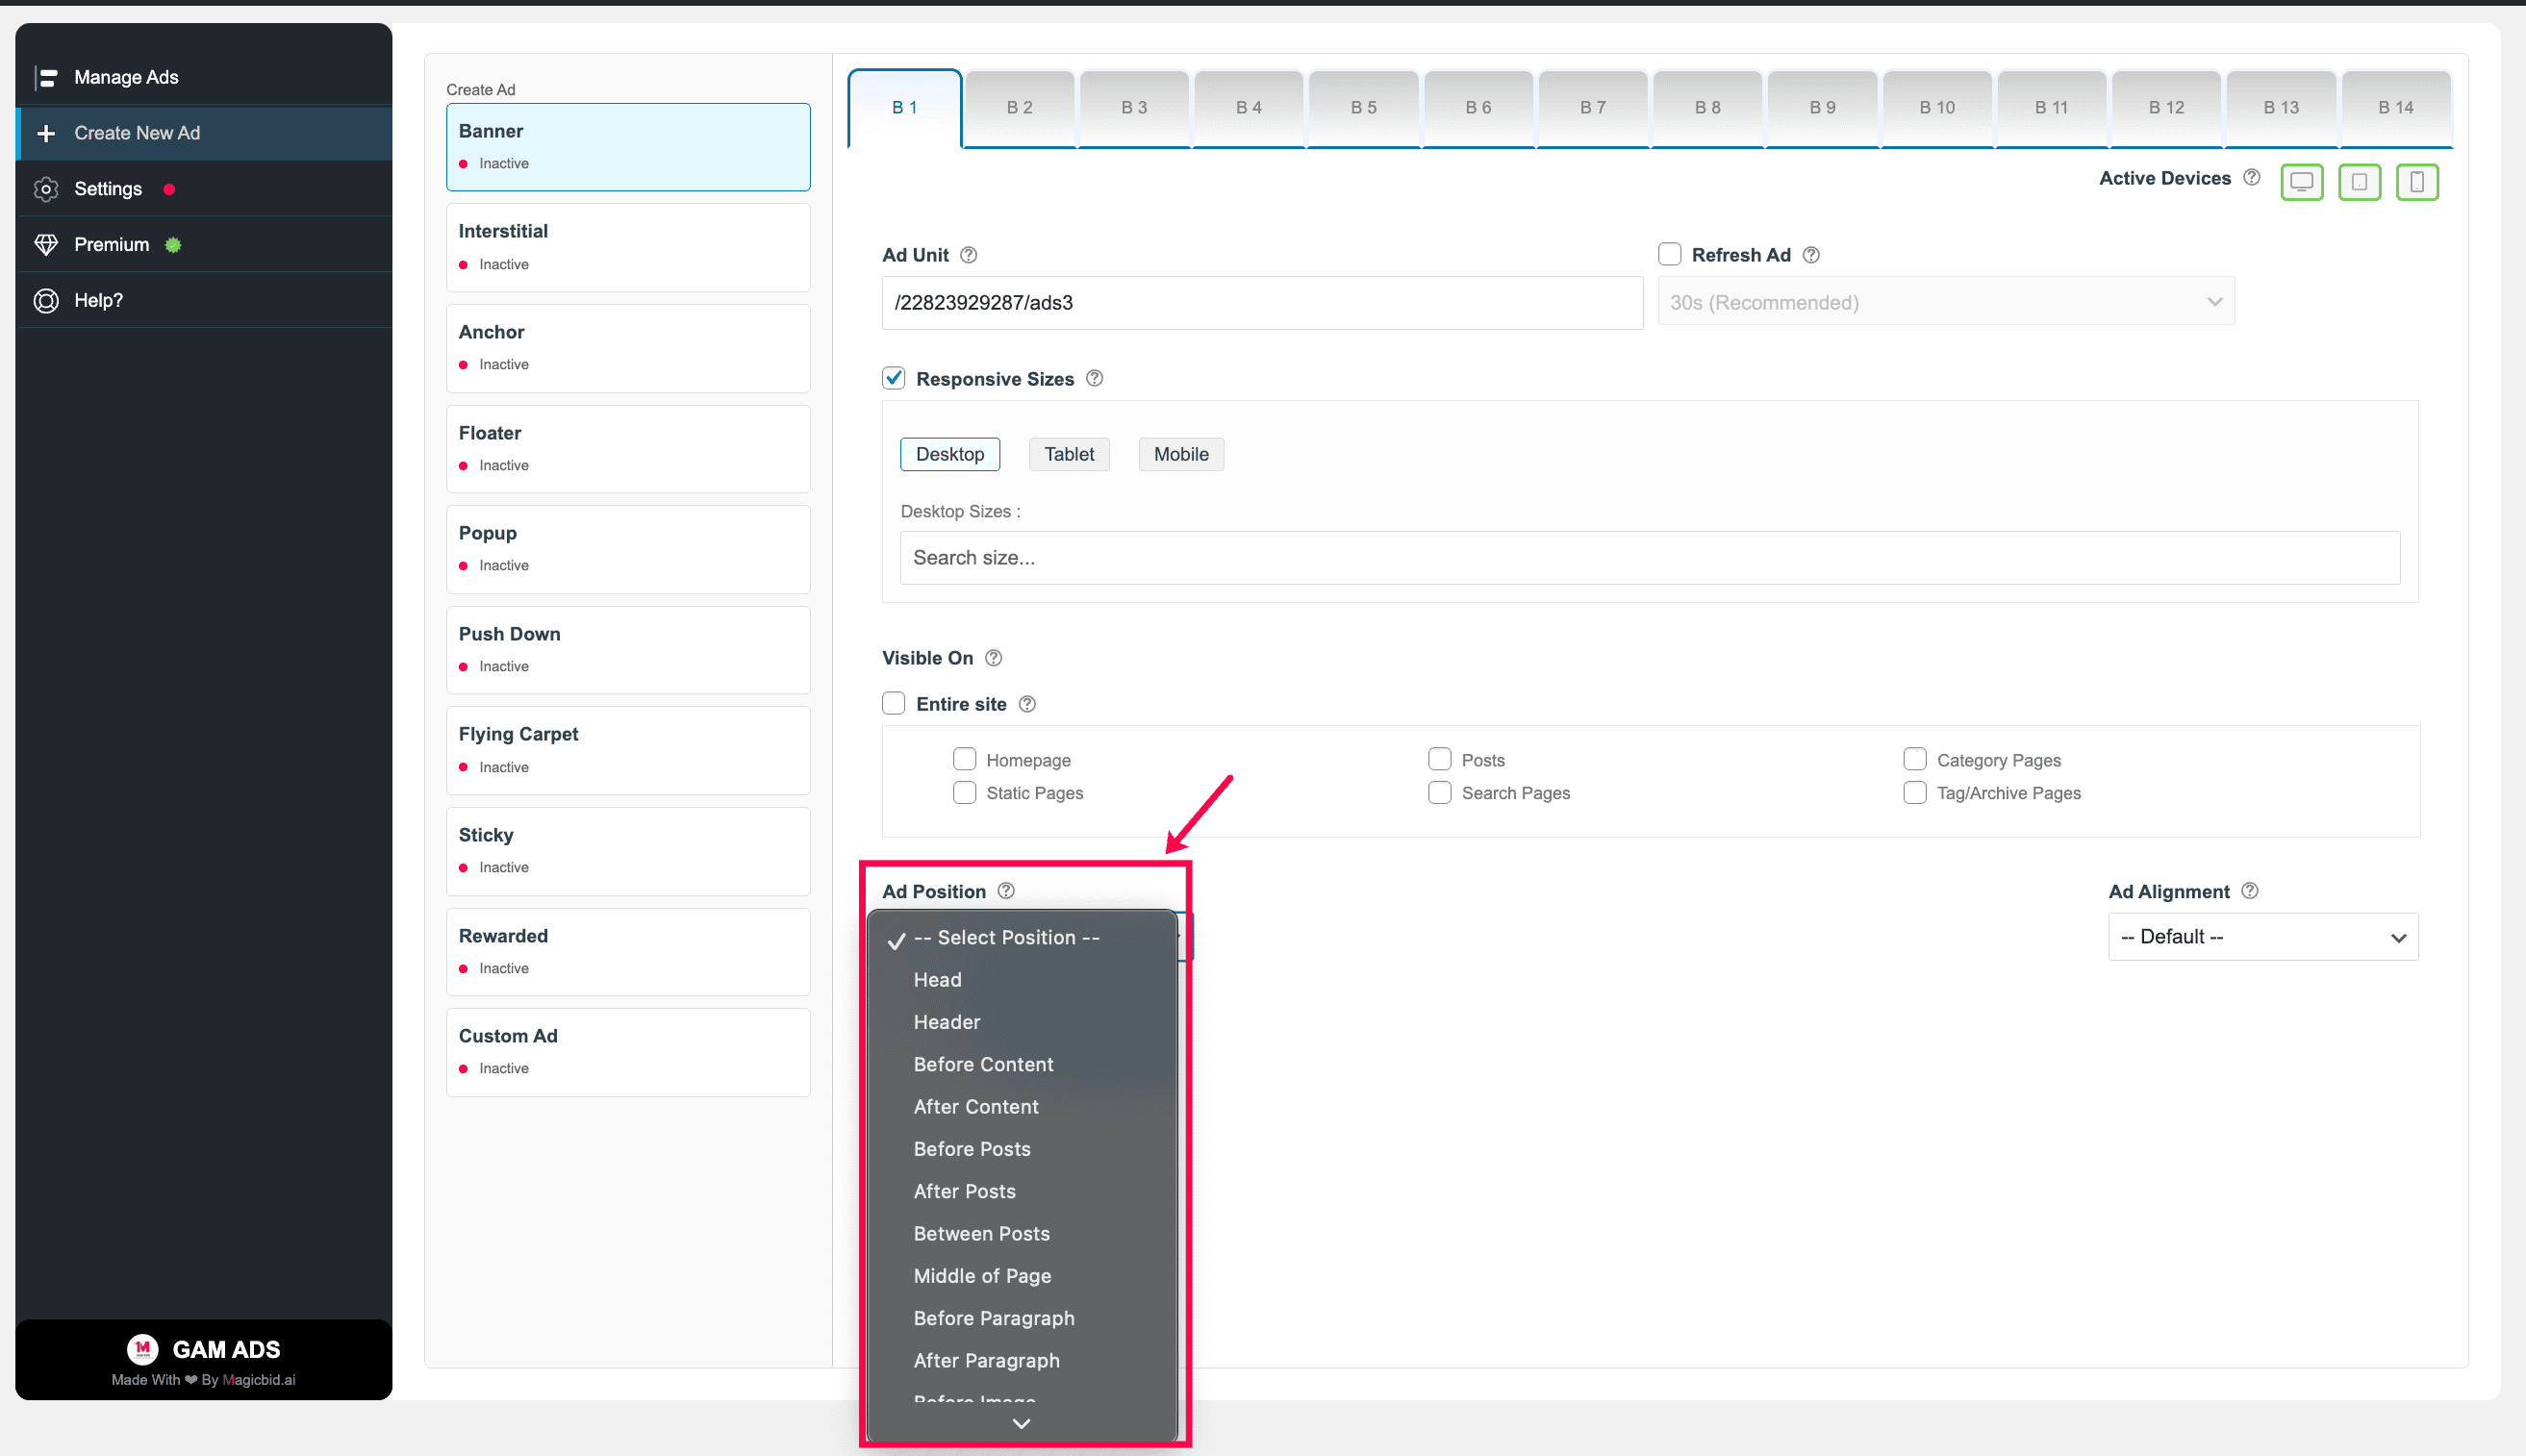
Step 8: Ad Position
Select where the banner should appear on the page.
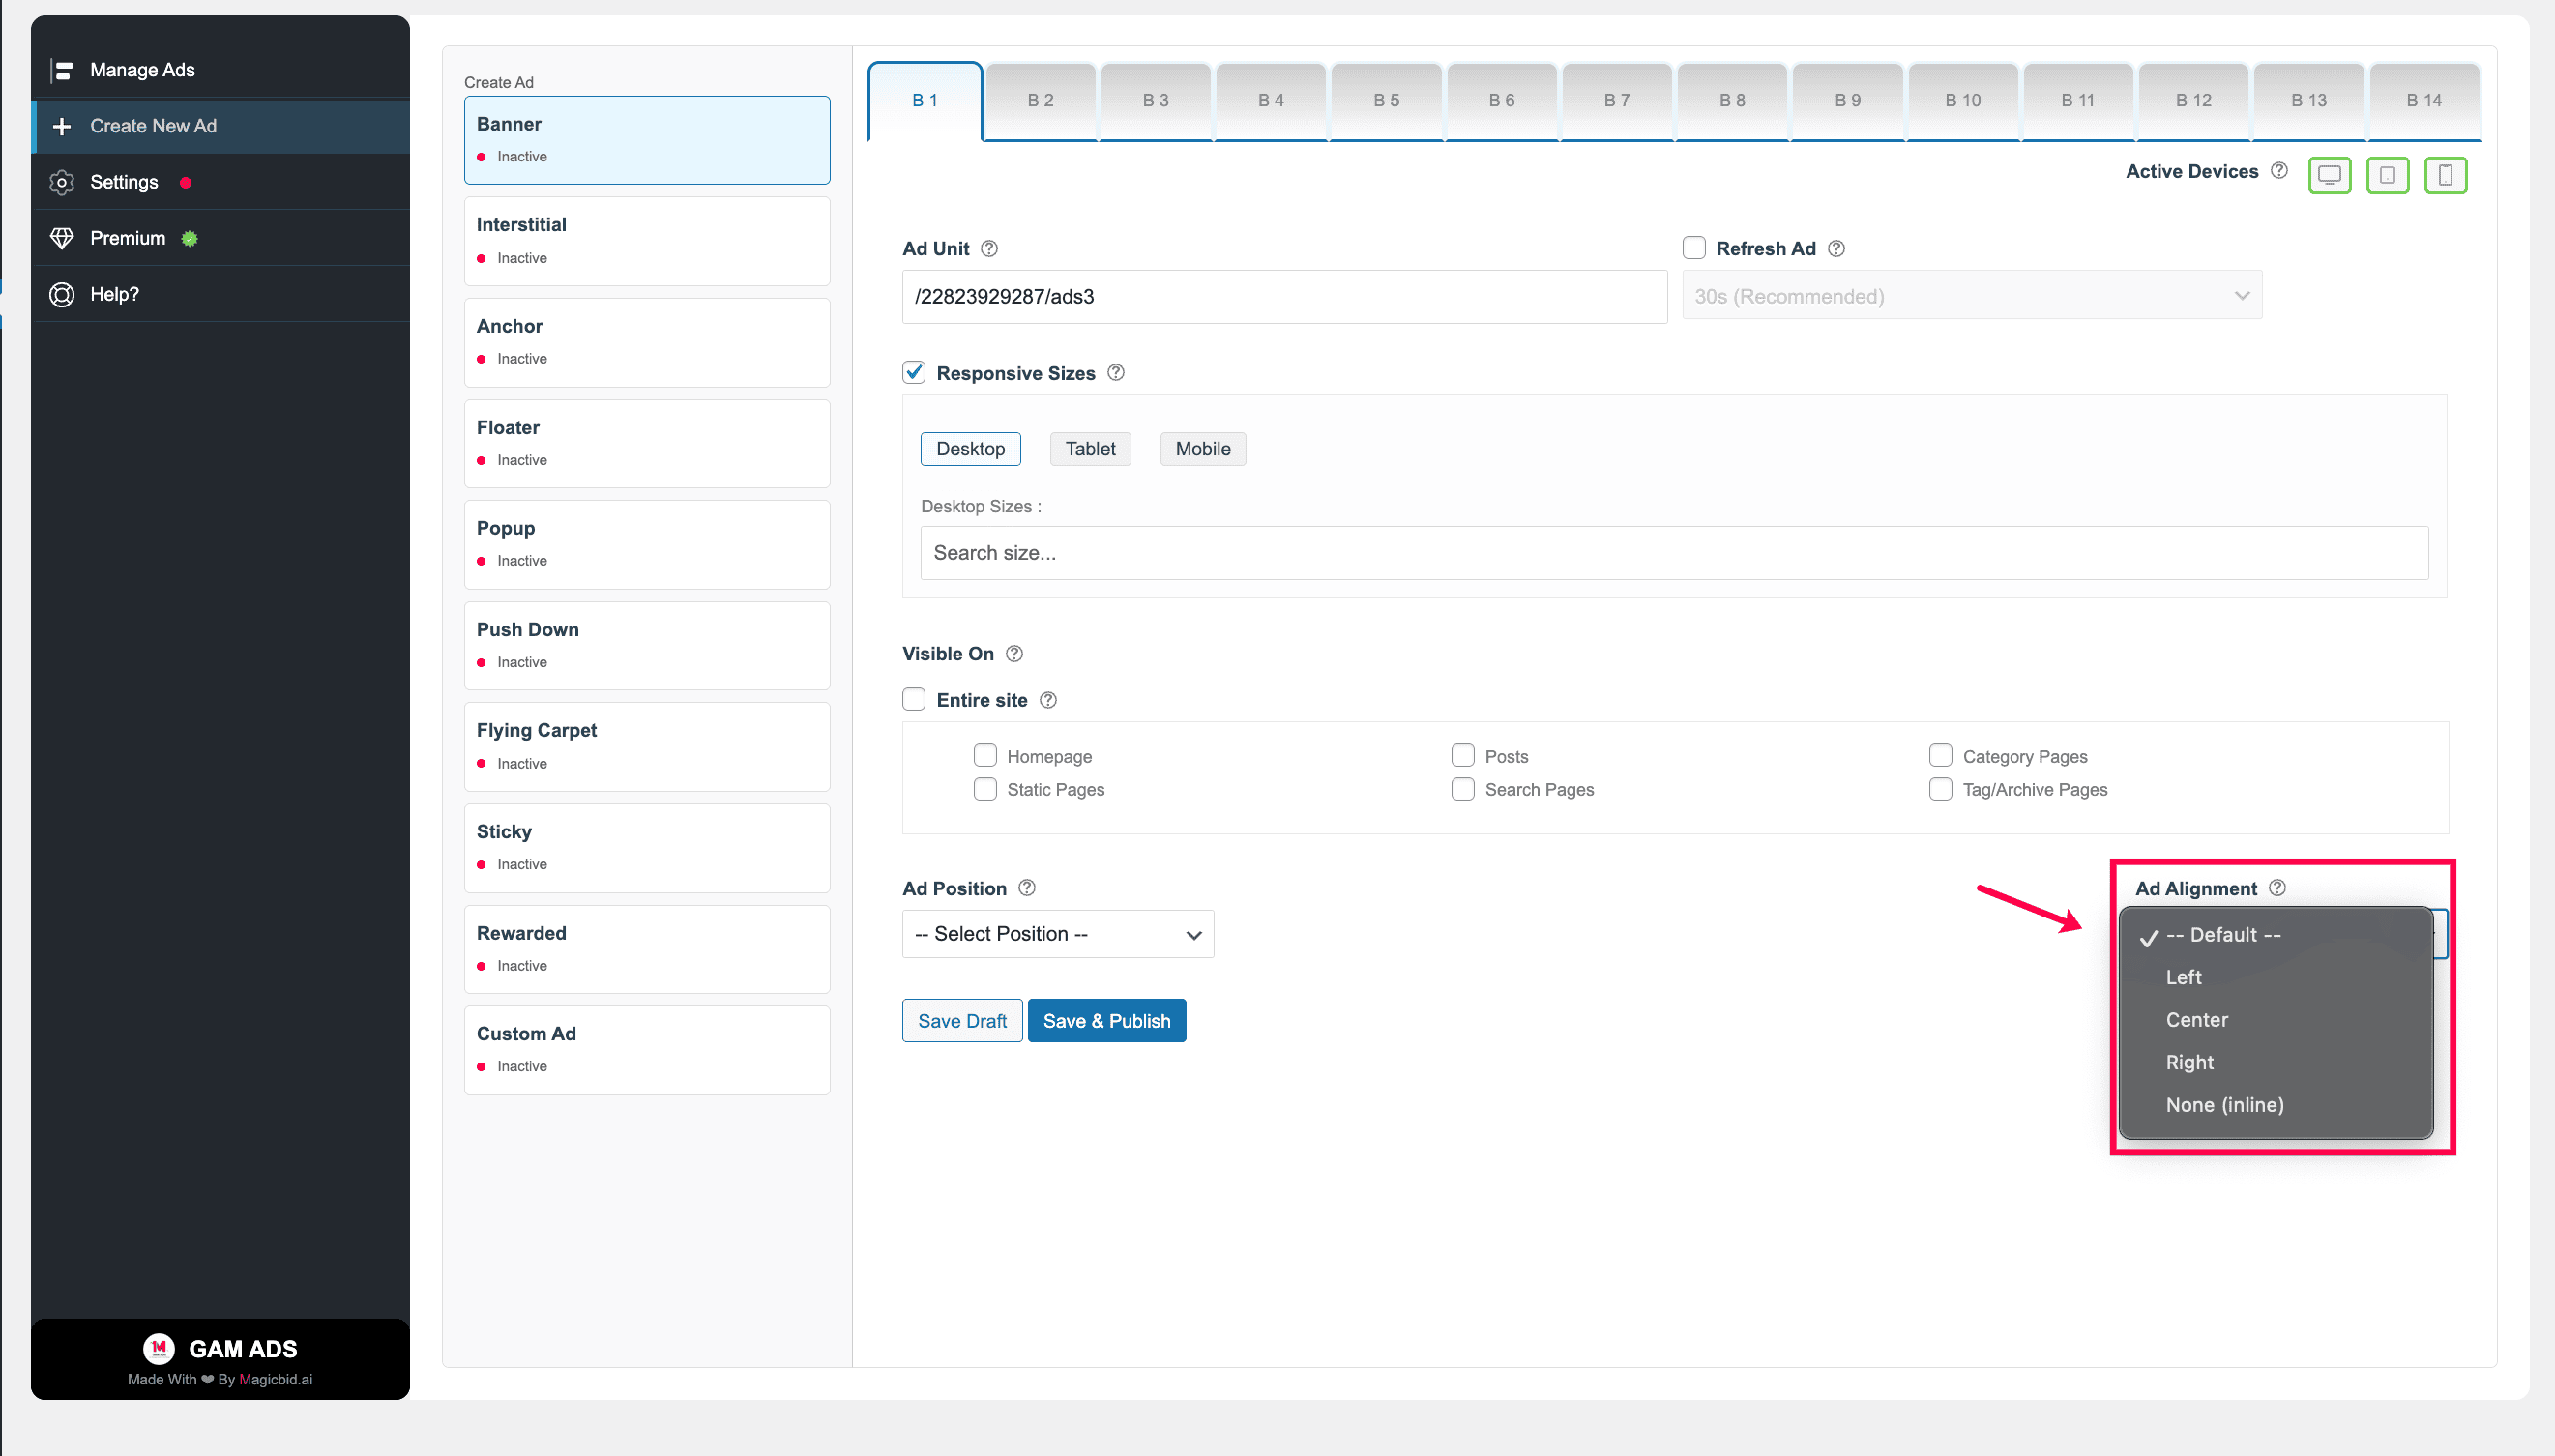
Step 9: Ad Alignment
Choose how the ad should align inside its placement container.
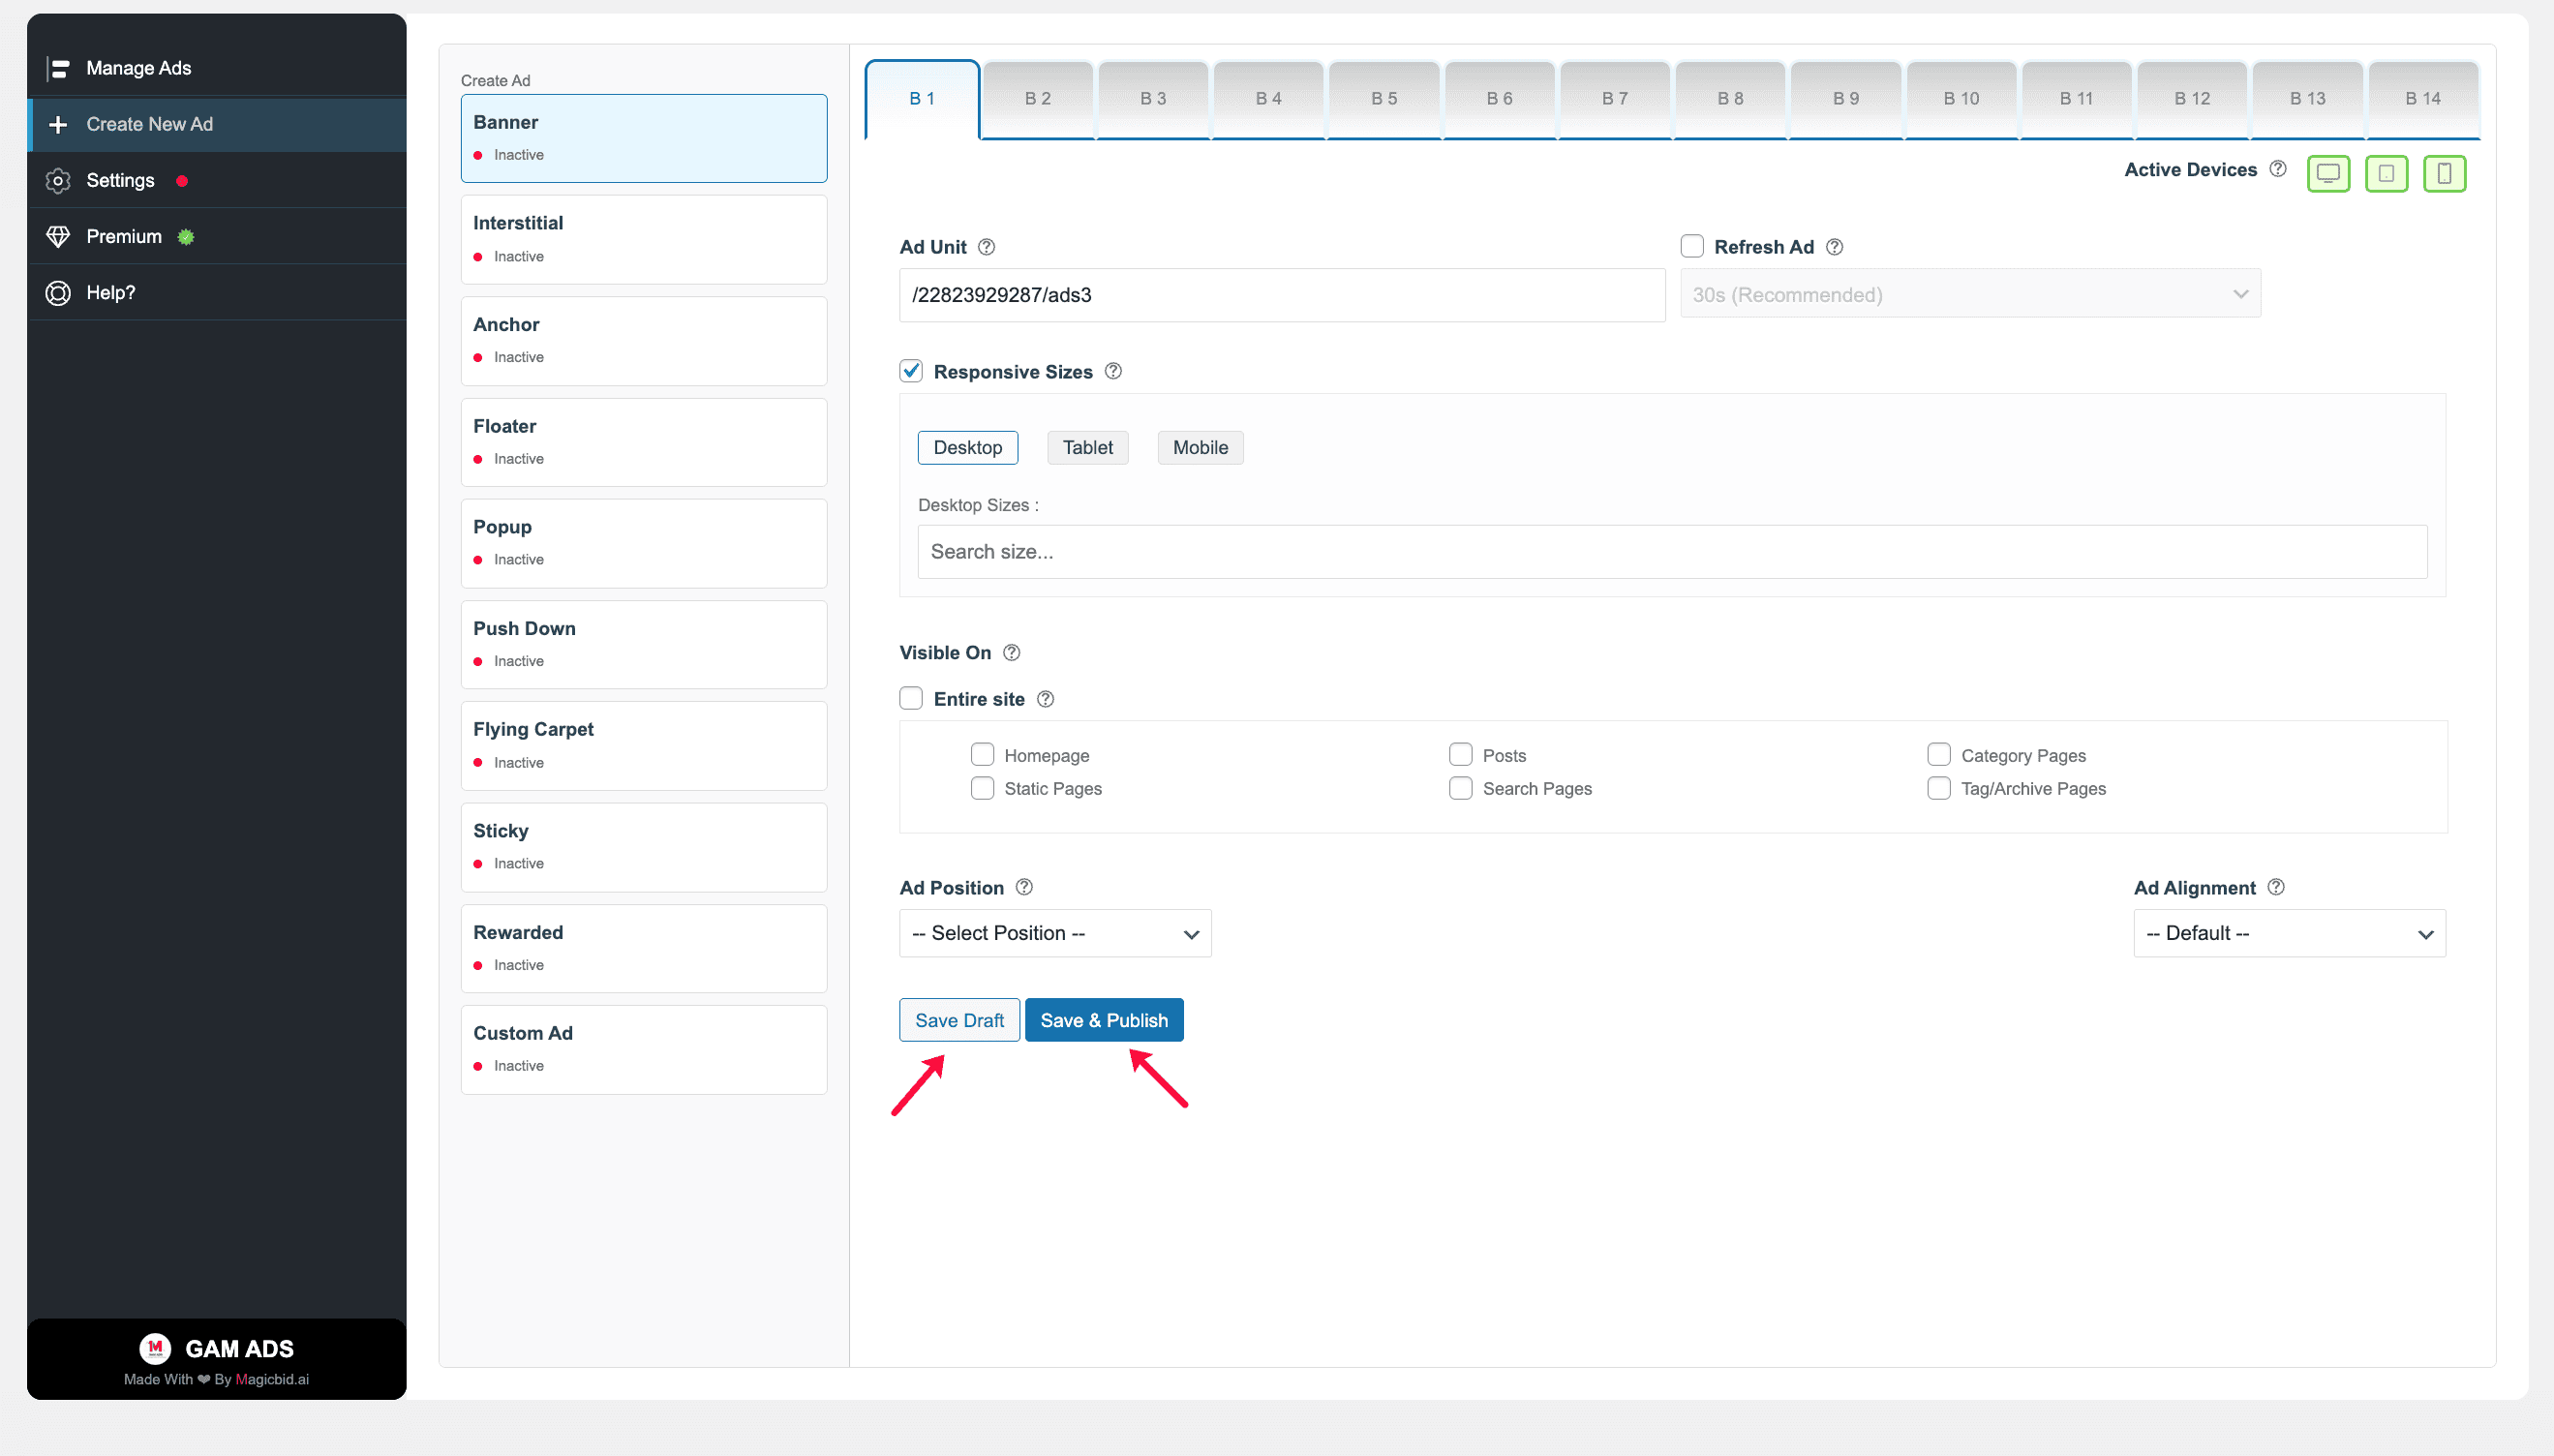
Step 10: Save Your Ad
Save Draft: Saves the ad without publishing it.
Save & Publish: Saves and immediately activates the ad.
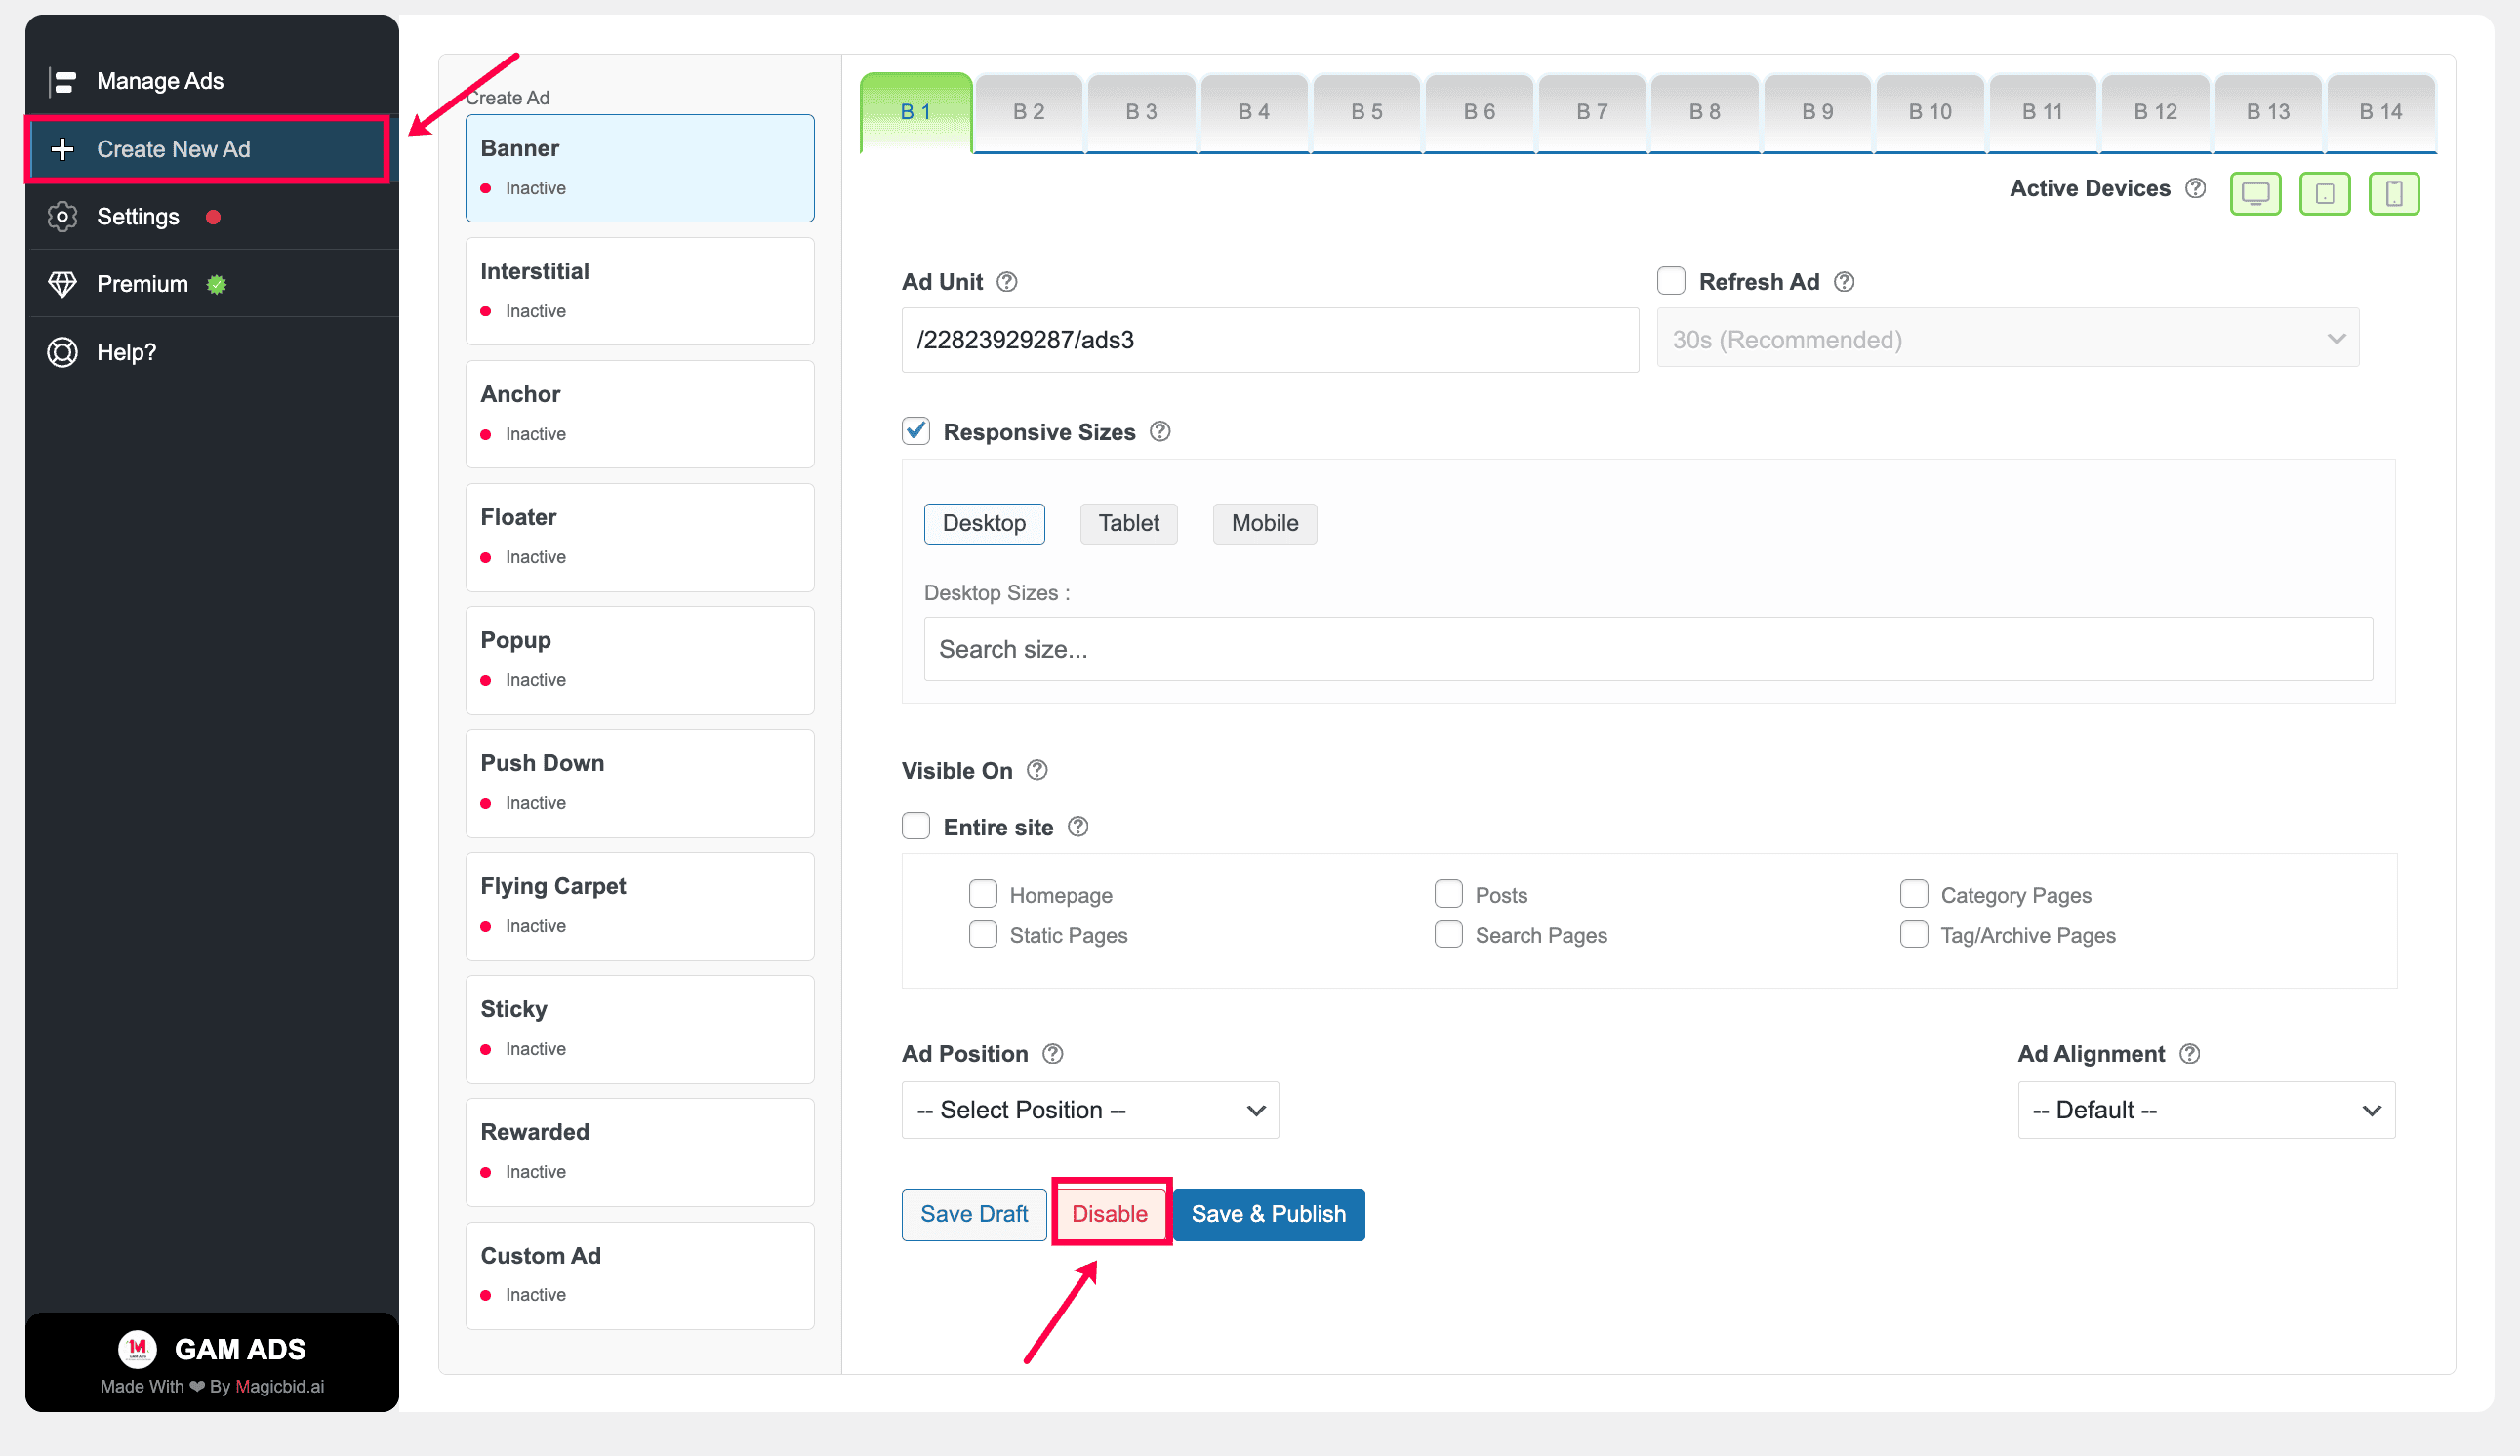
Step 11: Manage Ad Status
After publishing, you can manage the ad status:
- Disable: Pause the ad anytime
- Save & Publish: Apply updates while keeping it live
You can manage all ads later from: GAM ADS → Manage Ads
Creating Interstitial Ads
Overview
- Select Interstitial as the ad type
- Choose where it runs (Desktop, Tablet, Mobile)
- Pick your Google Ad Manager ad unit
- Set where the ad should be shown
- Save & Publish to make it live
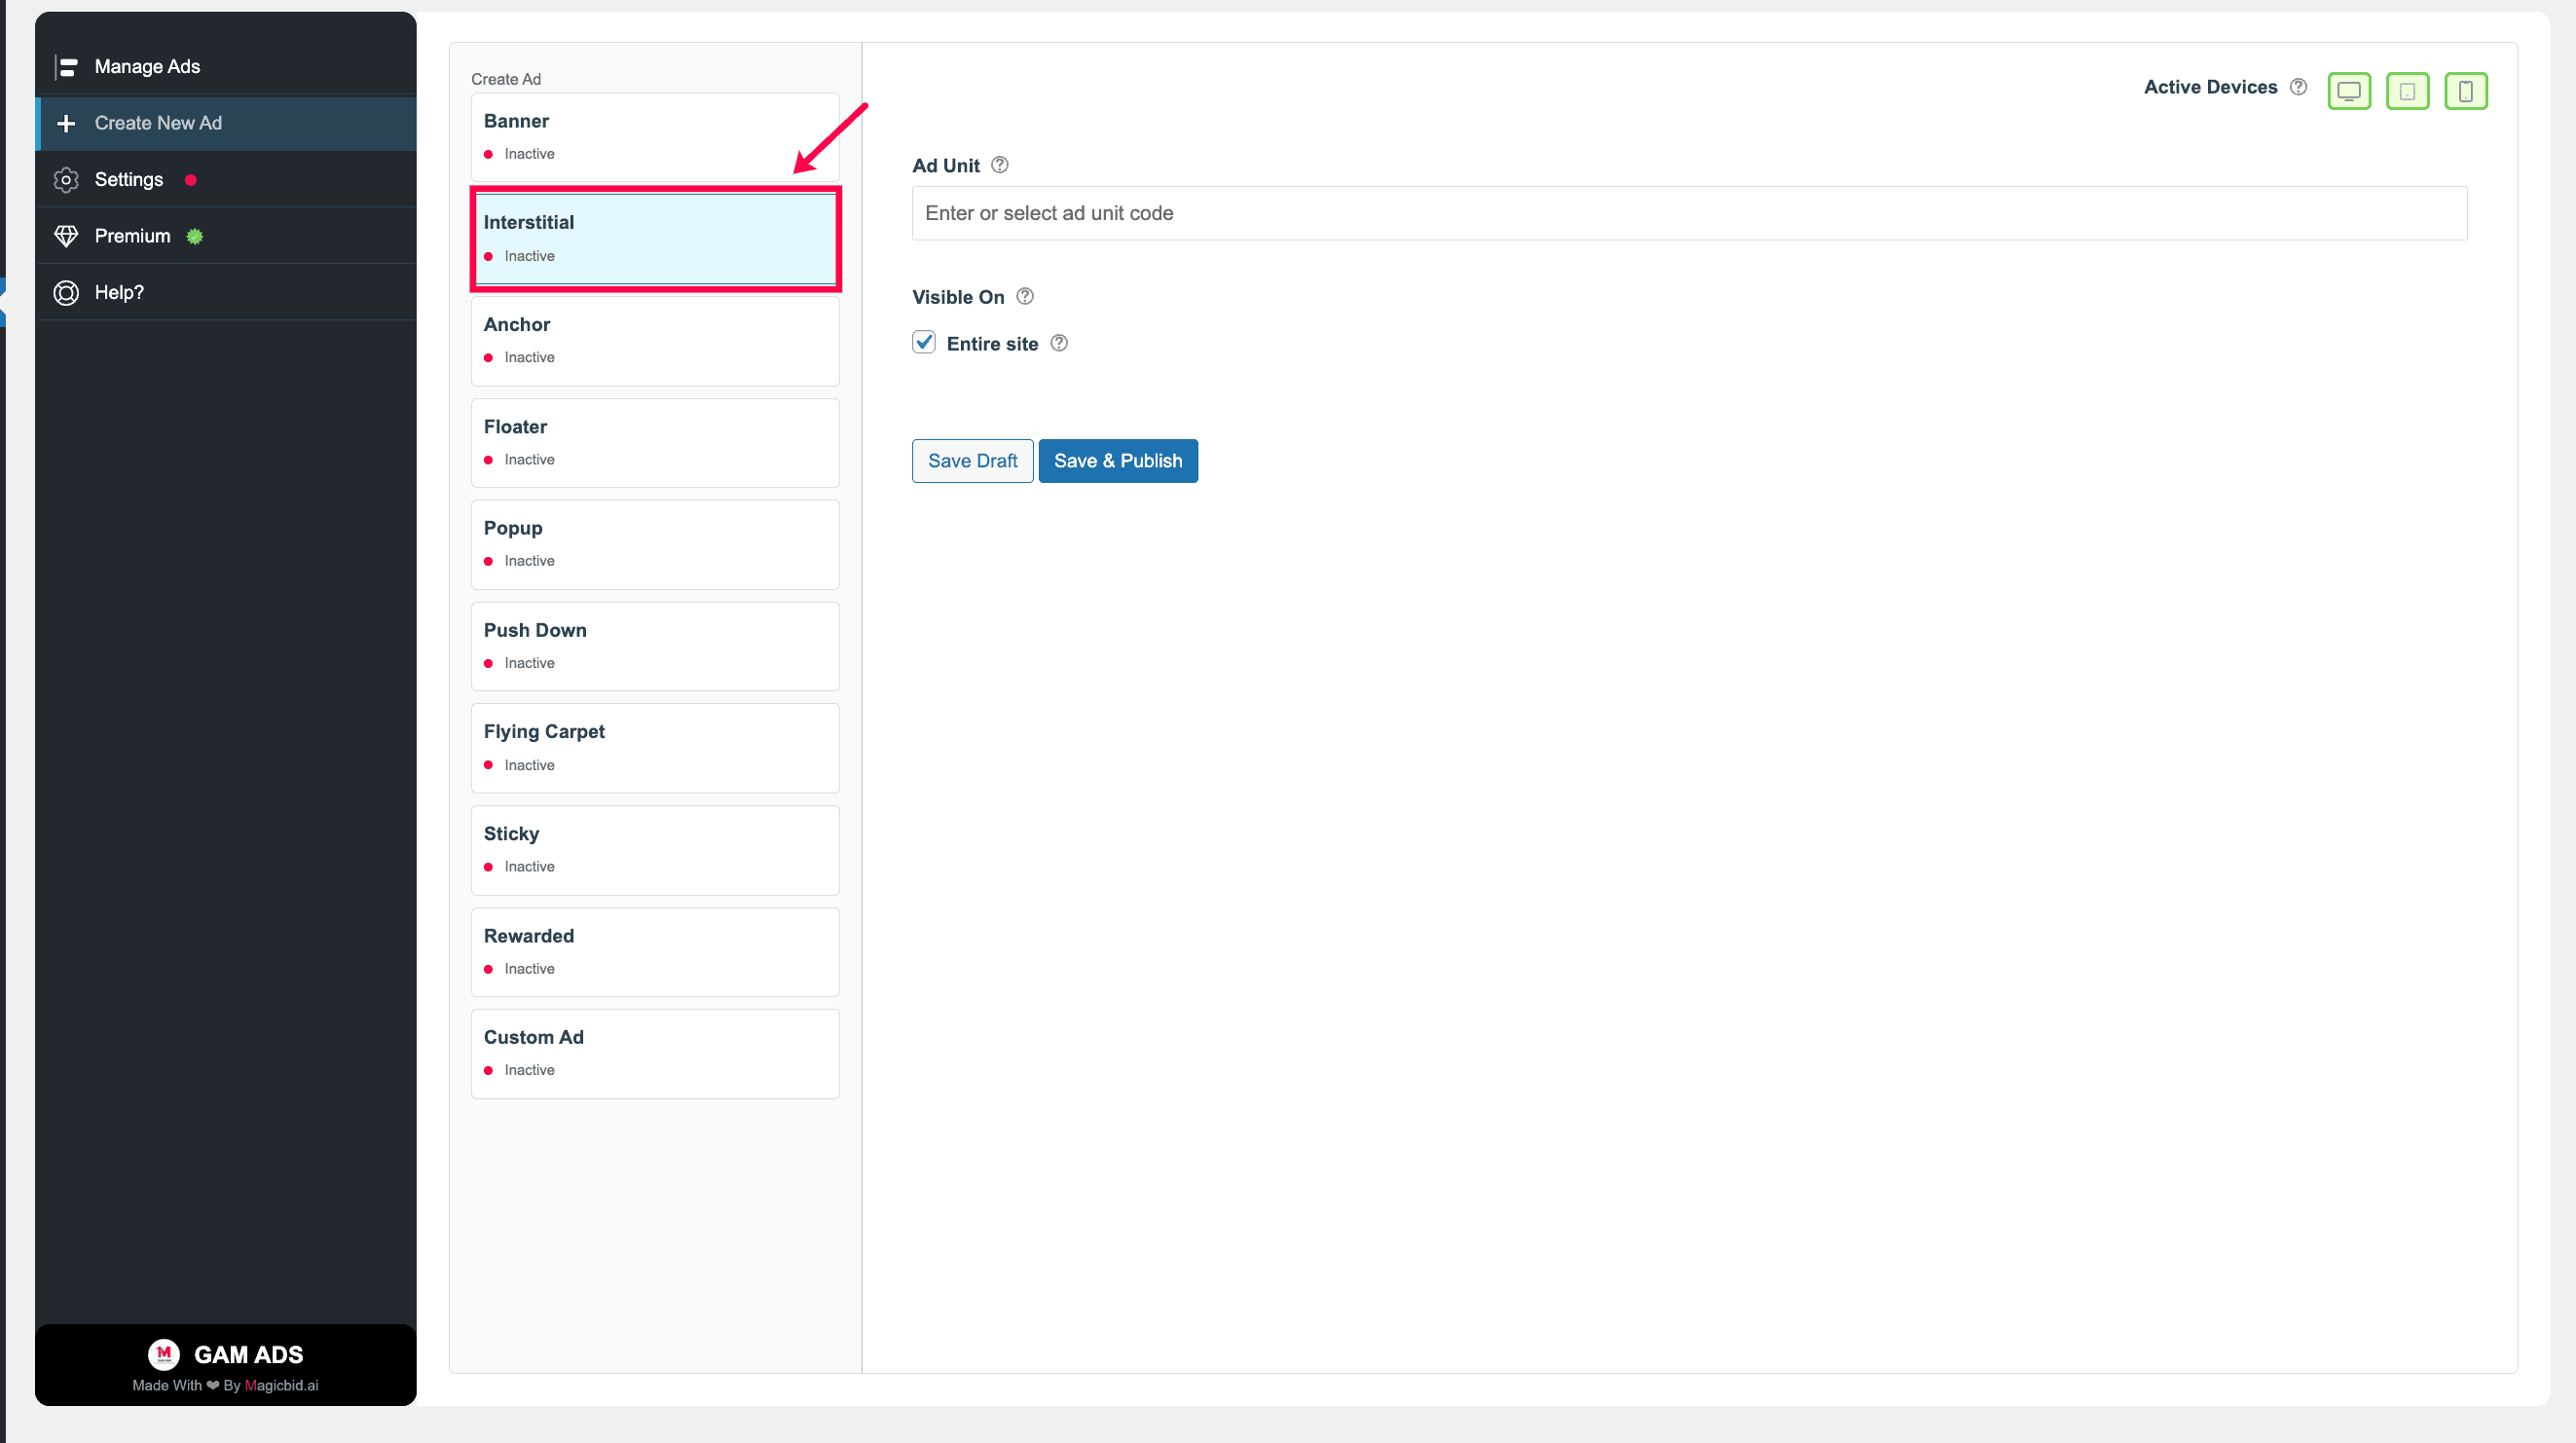
Step 1: Choose Ad Type
Go to Create New Ad and select Interstitial.
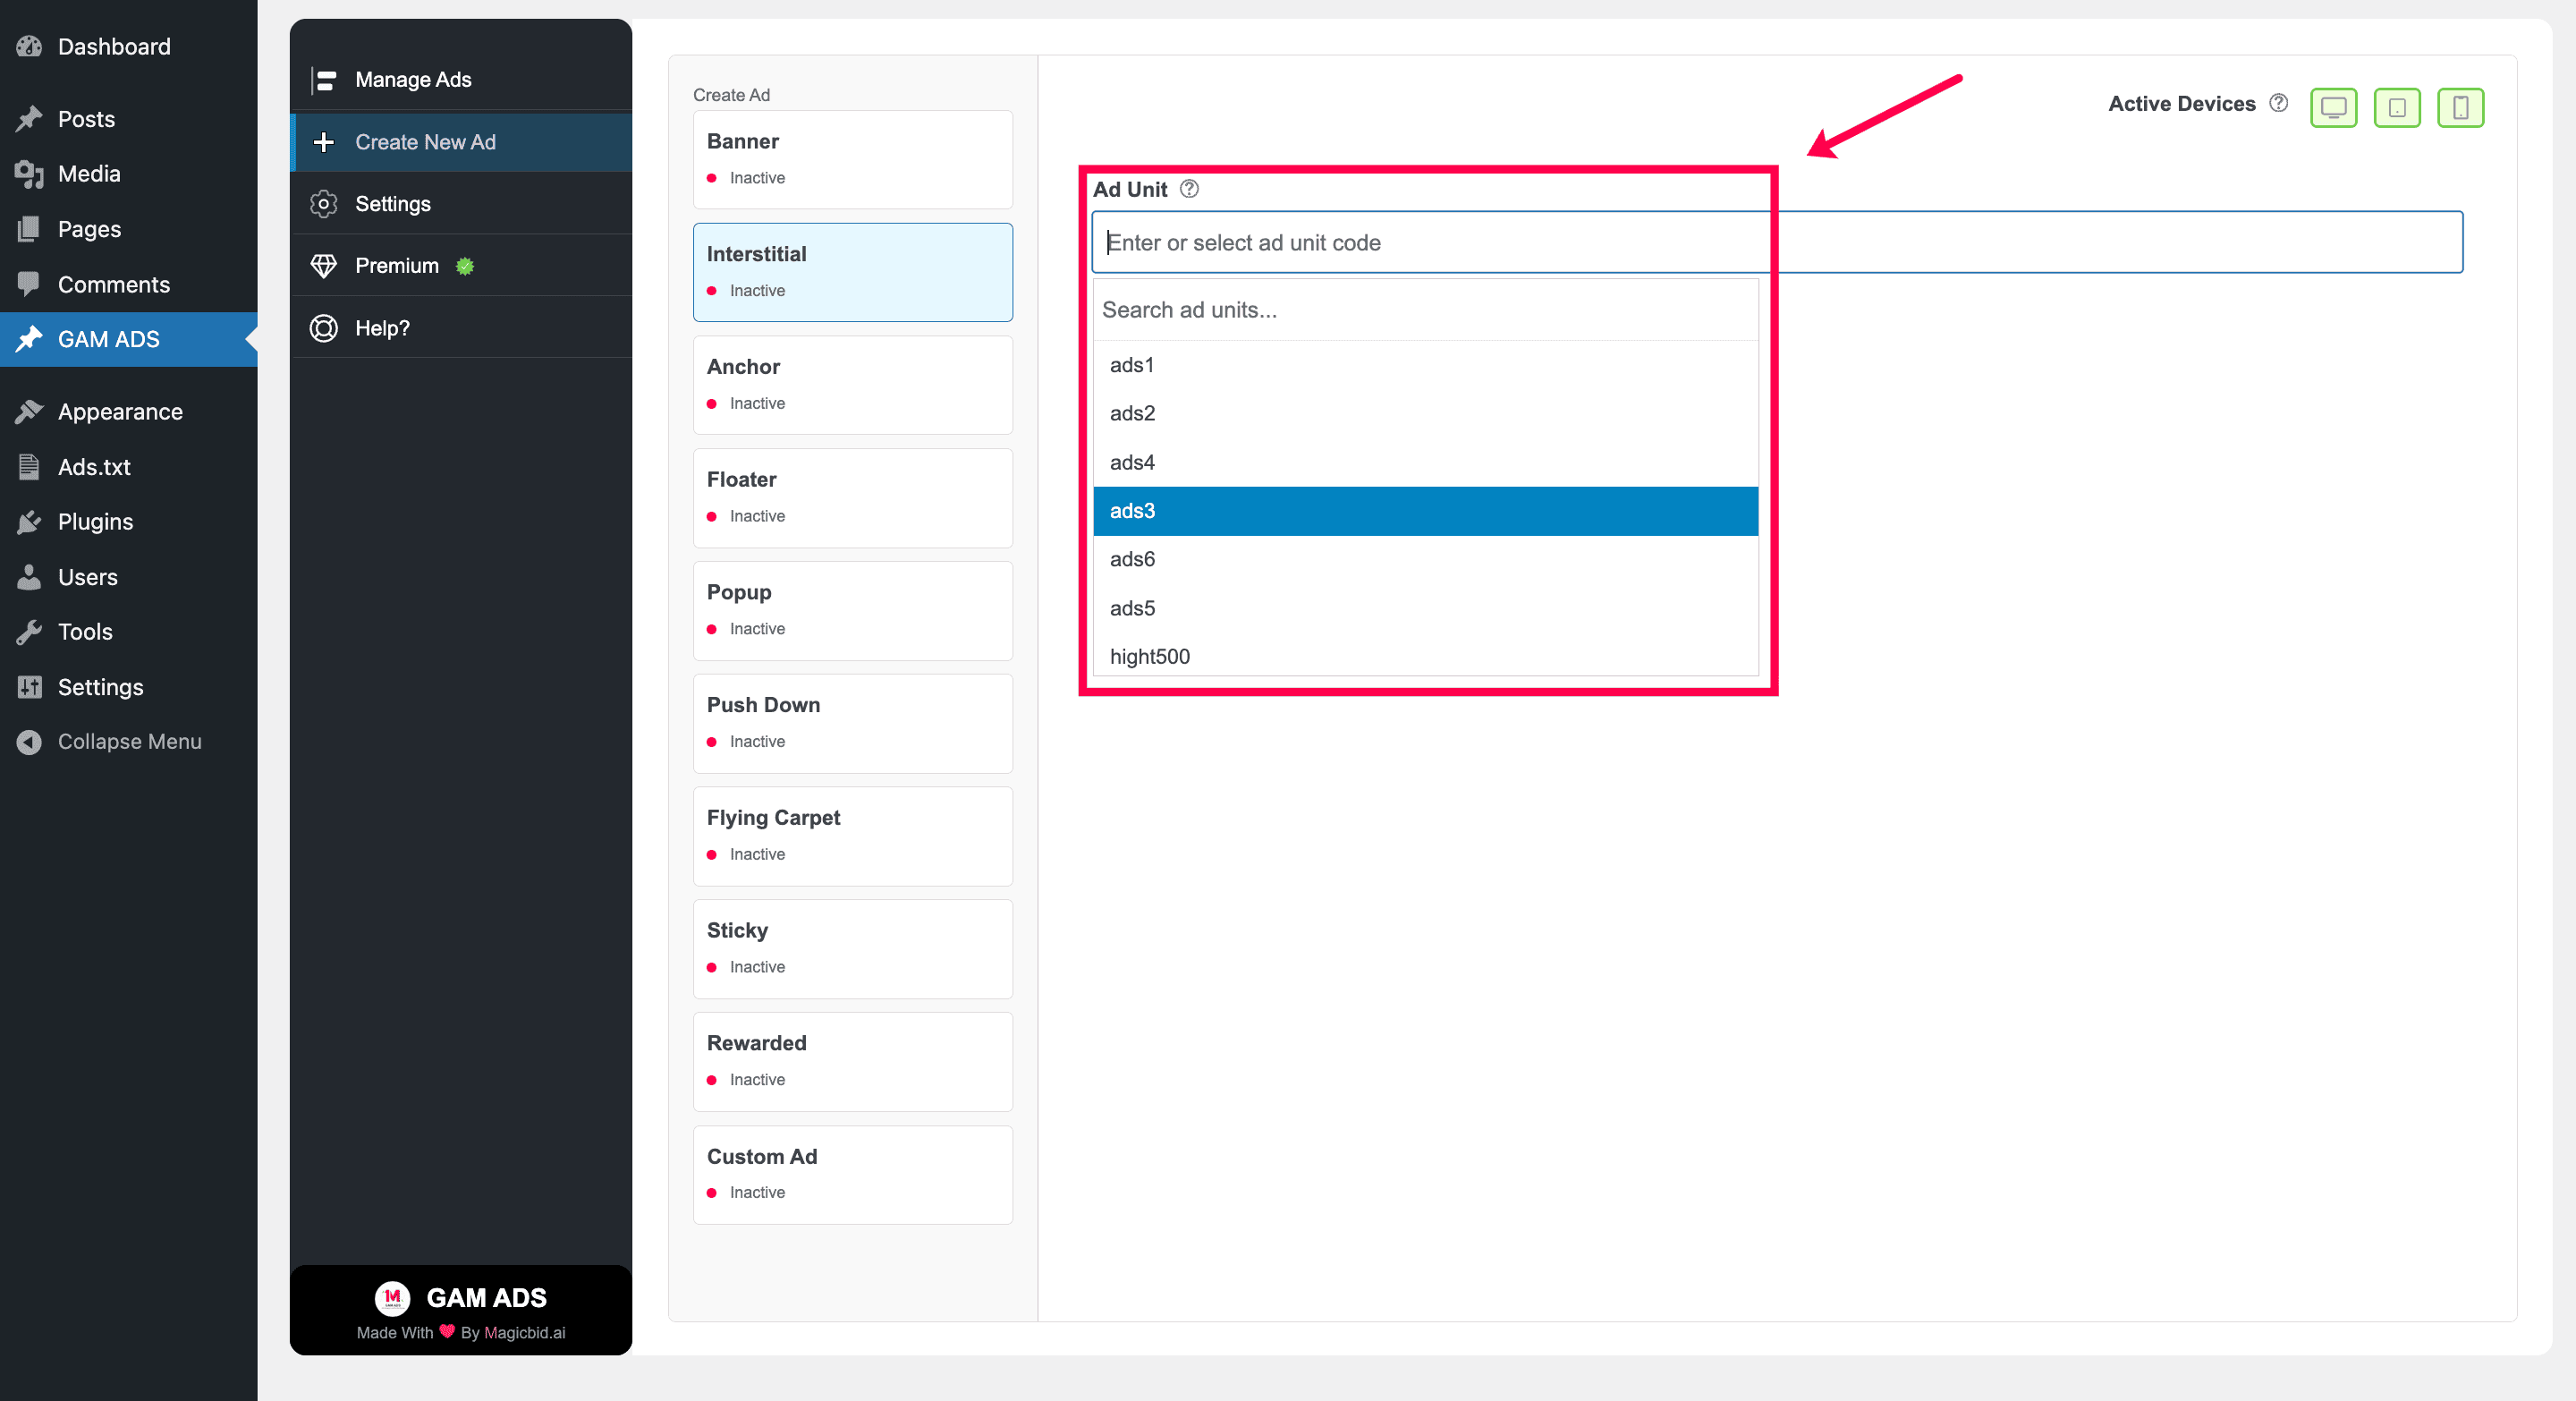
Step 2: Select Ad Unit
Choose the Google Ad Manager ad unit you want to serve.
Note: The ad unit must already exist in your Google Ad Manager account in order to appear in this list.
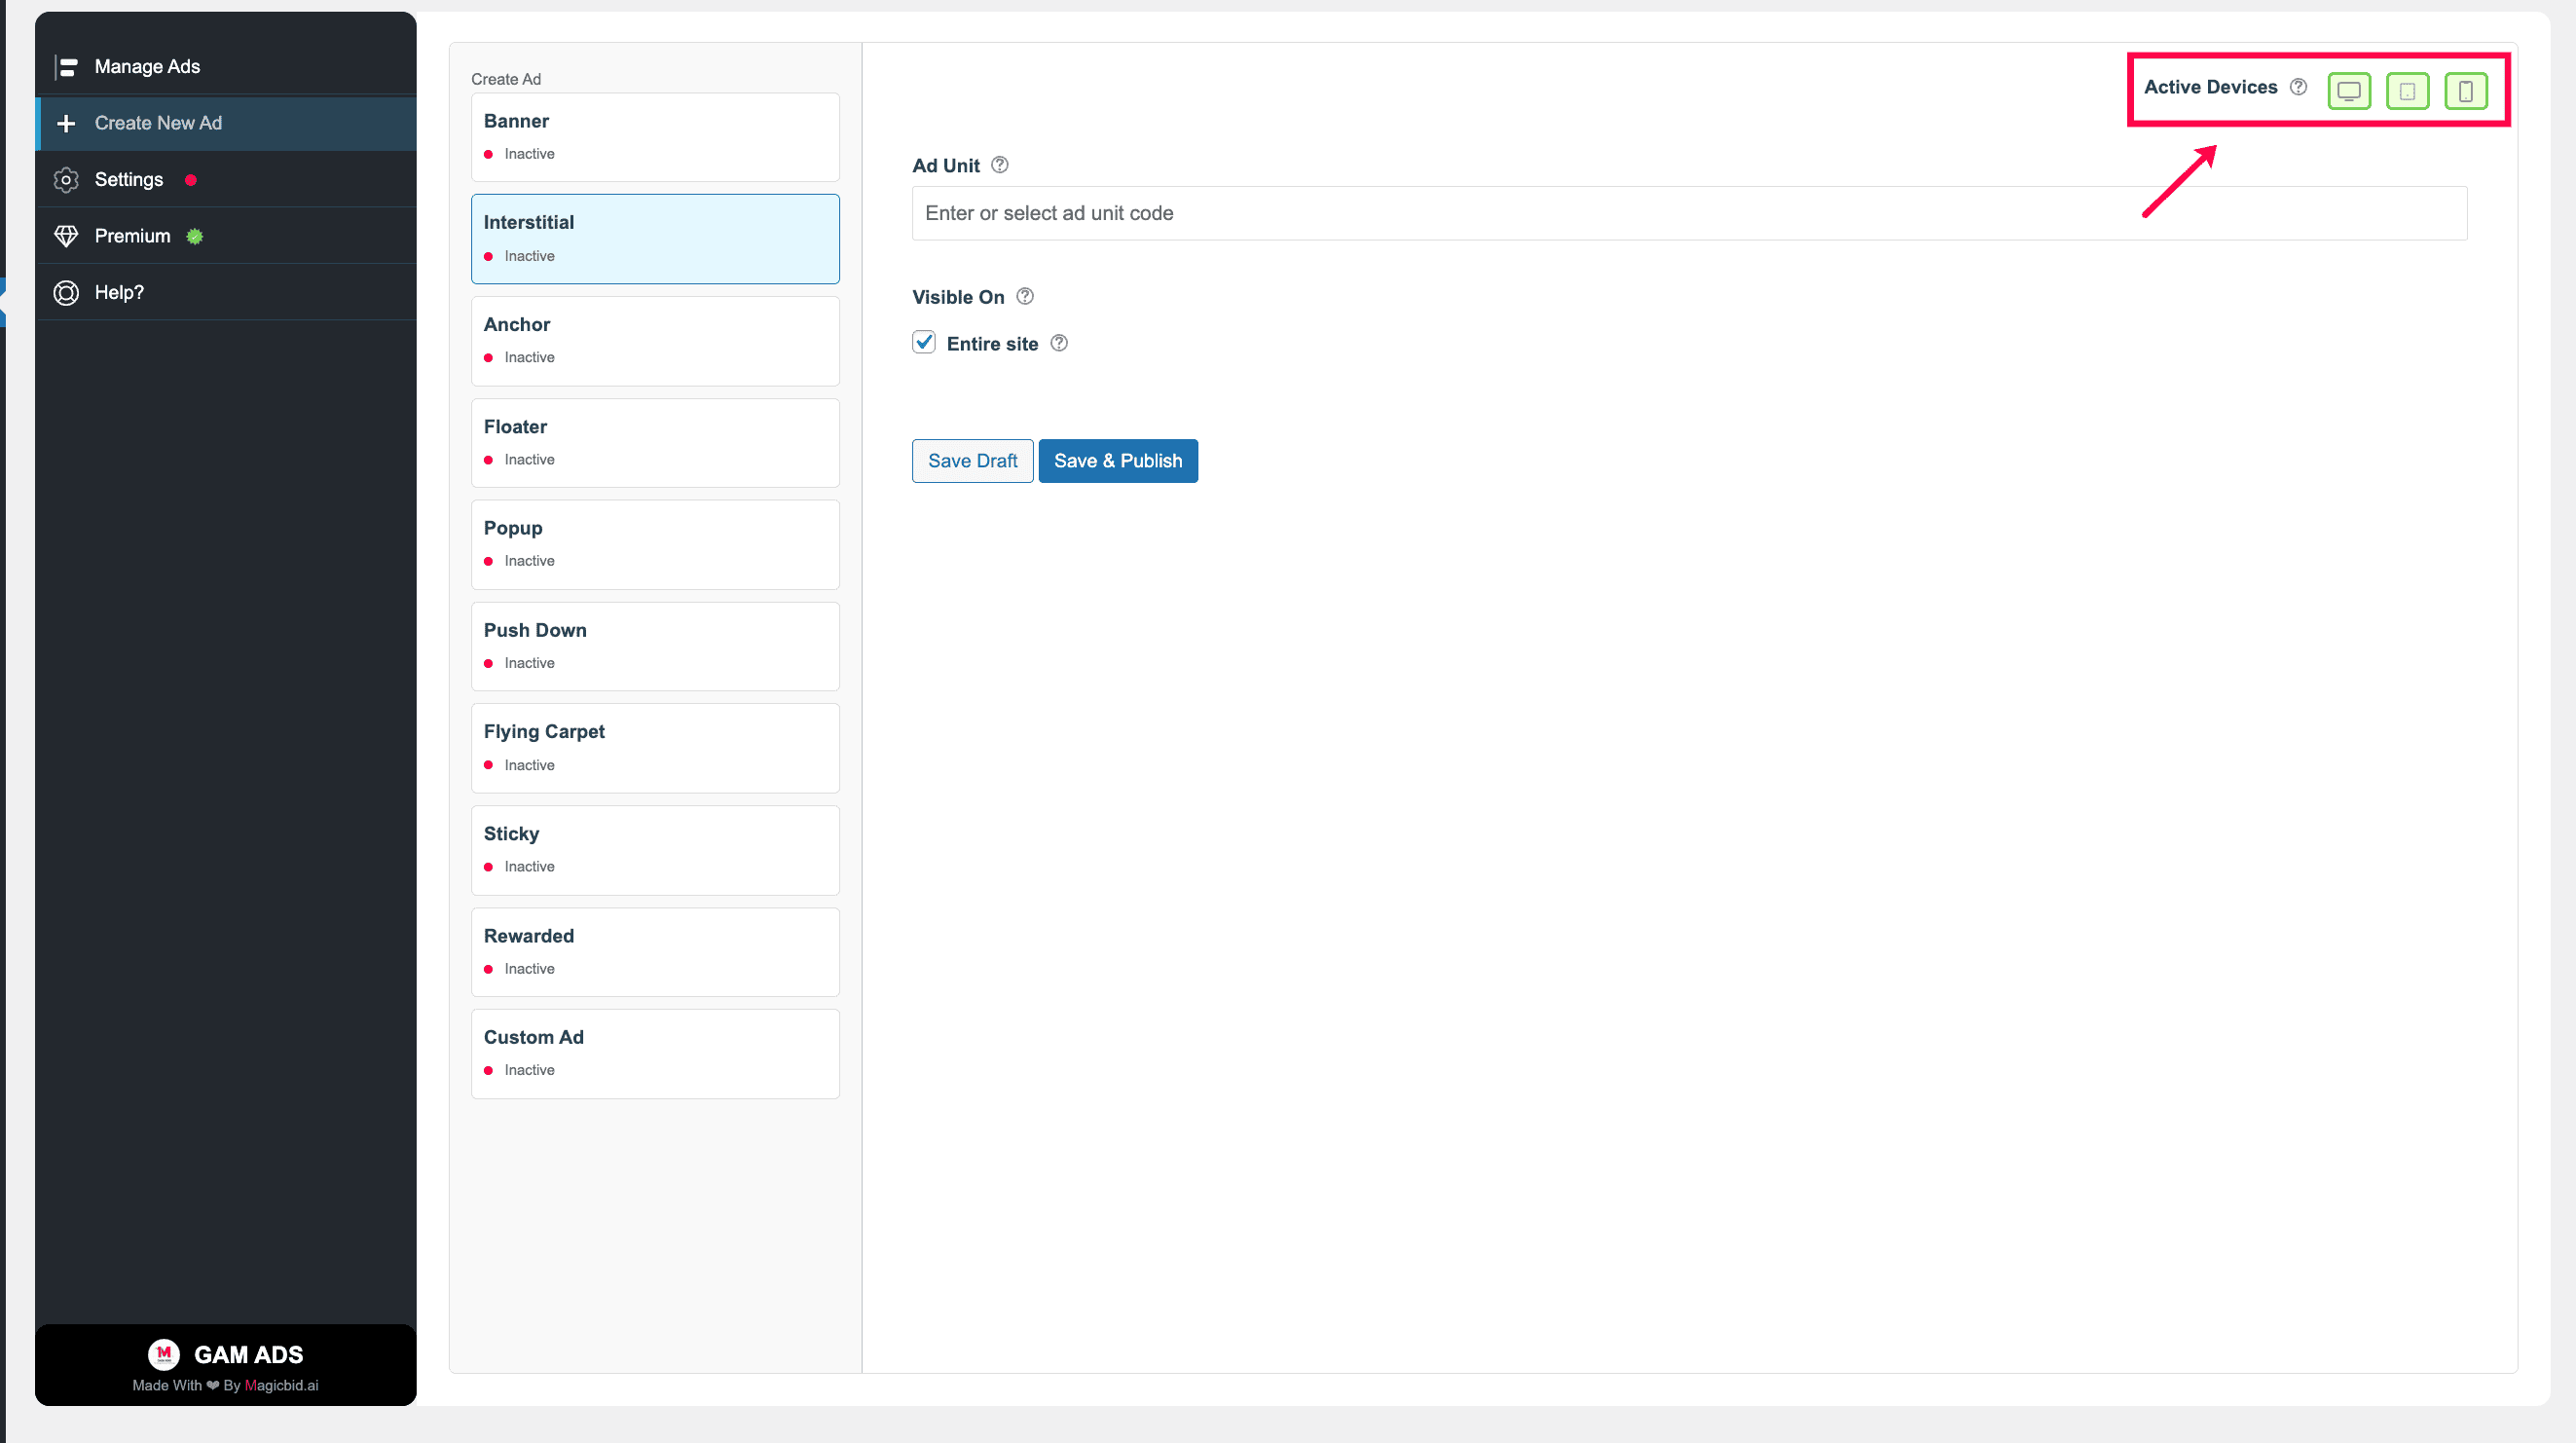
Step 3: Choose Devices
Under Active Devices, select where this ad should run:
- Desktop
- Tablet
- Mobile
You may enable one, two, or all three device types.
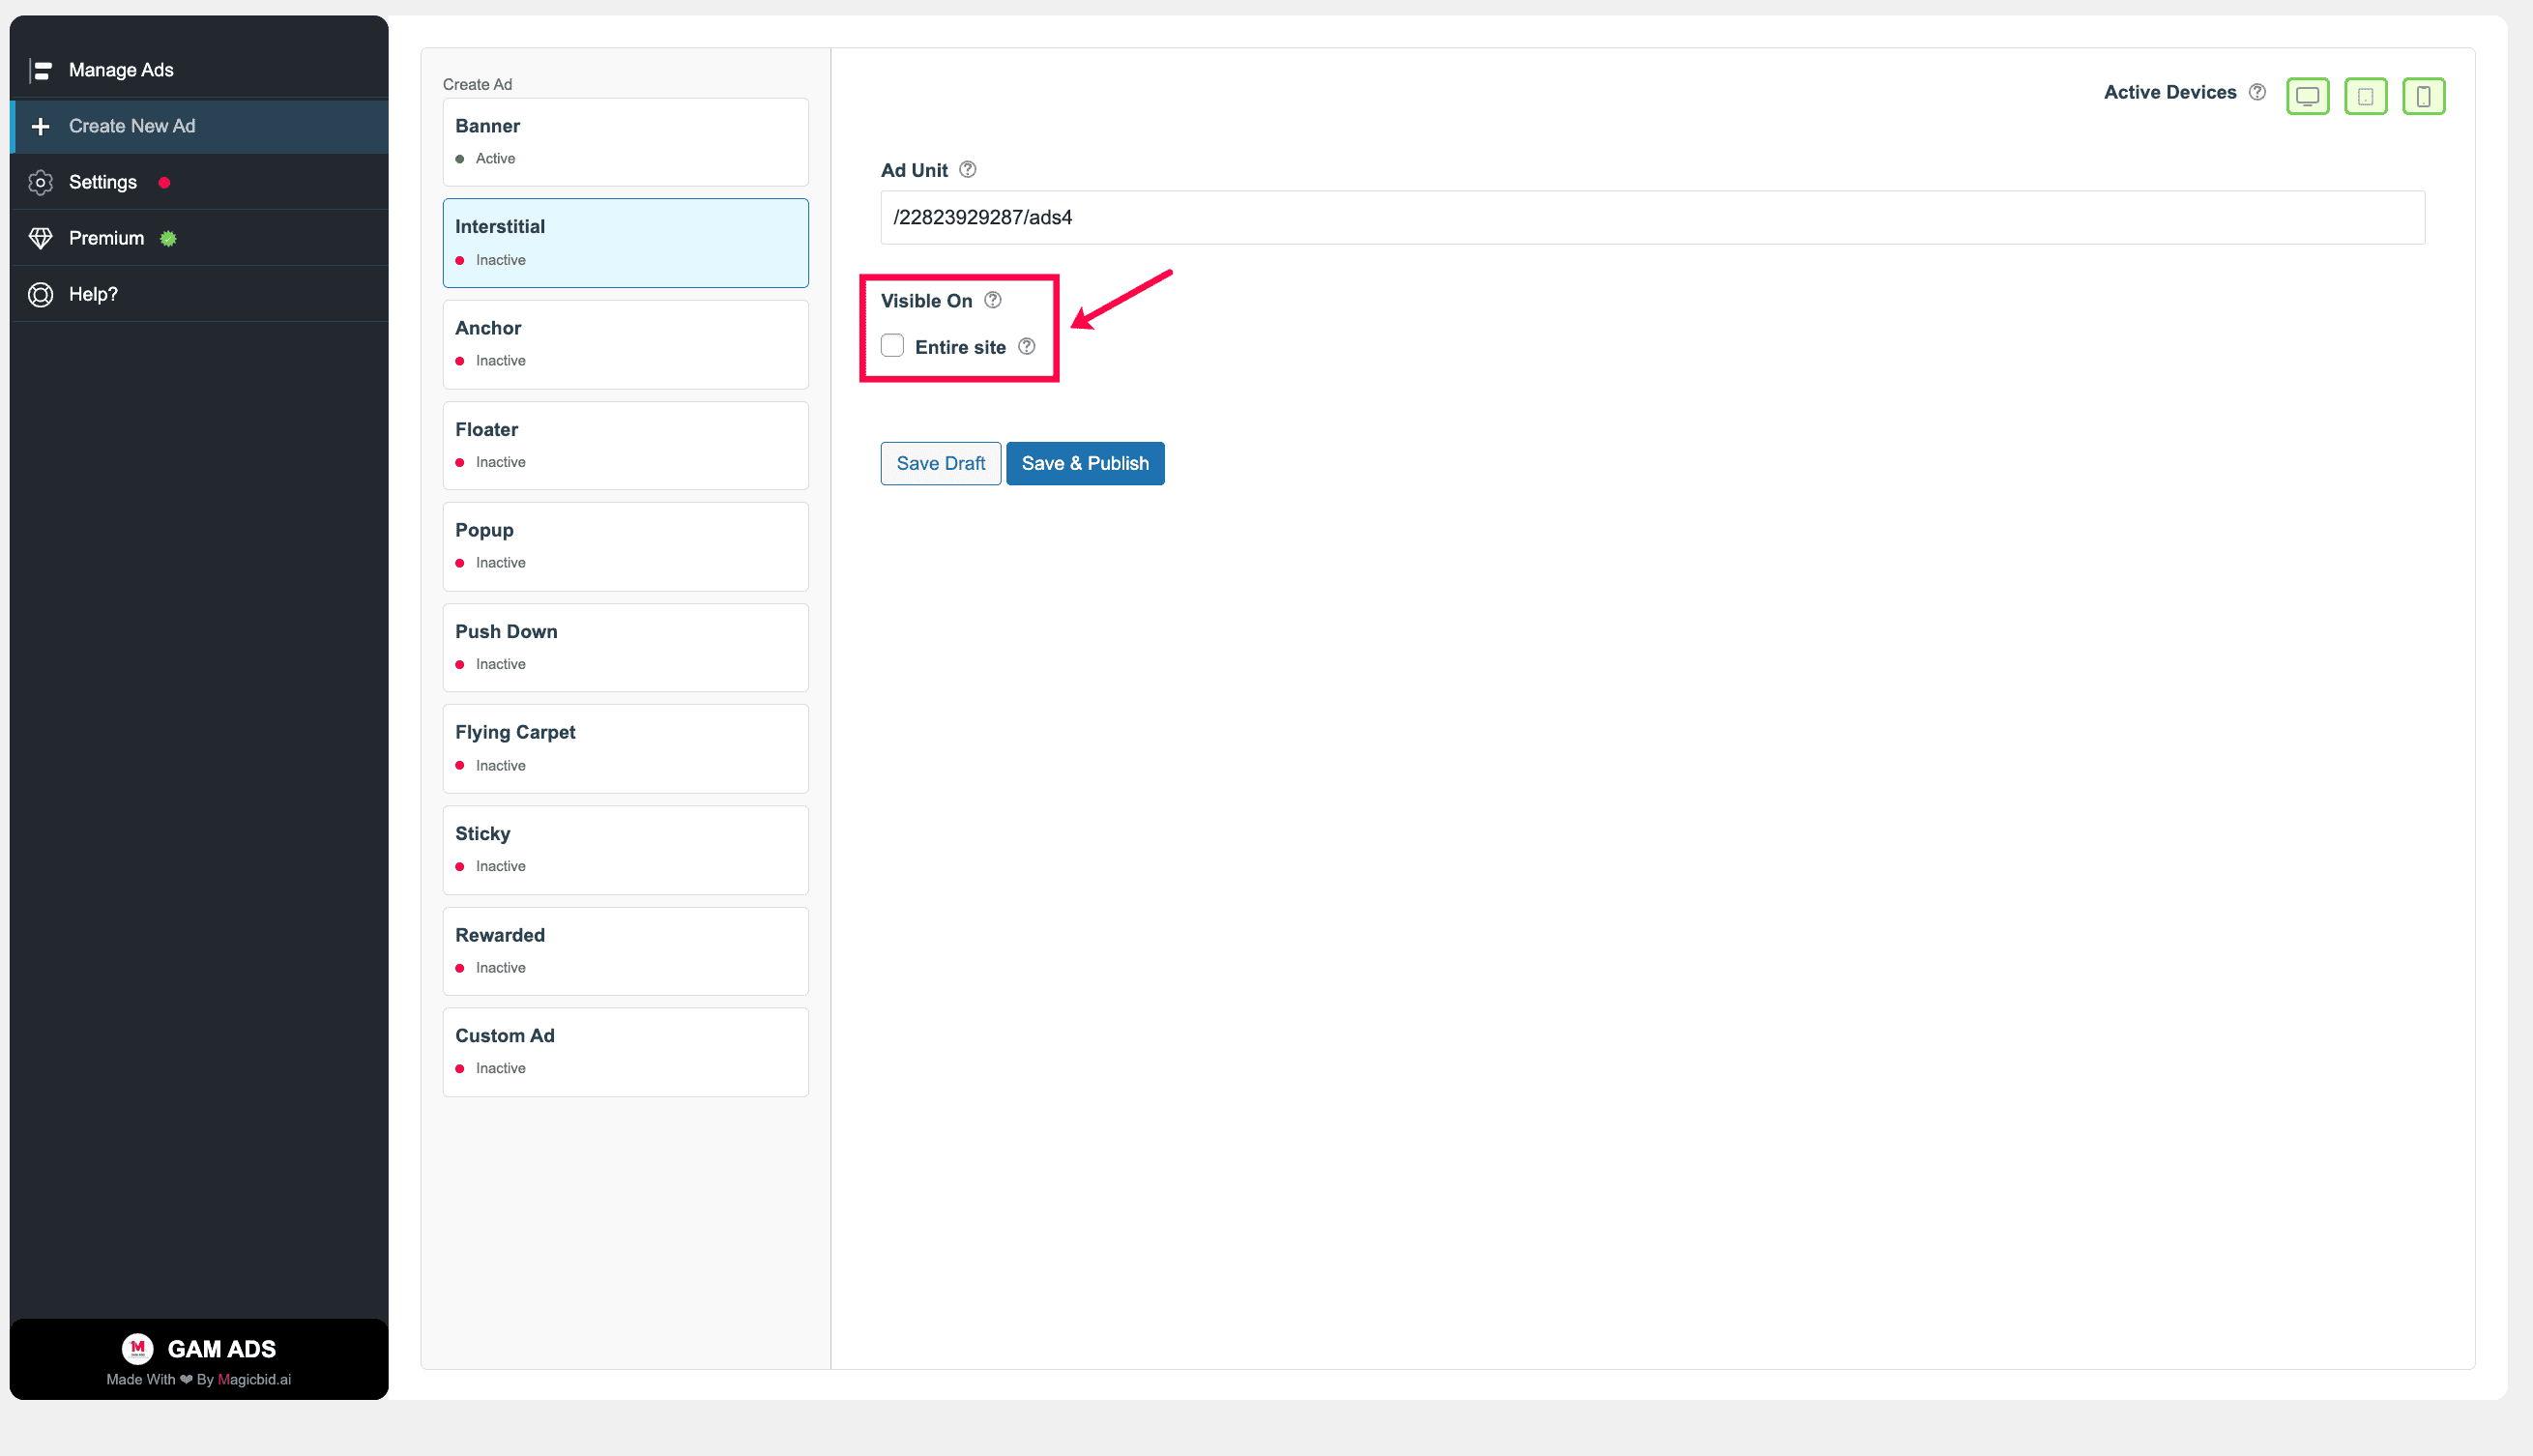
Step 4: Visibility
By default, interstitial ads are displayed across the entire site.
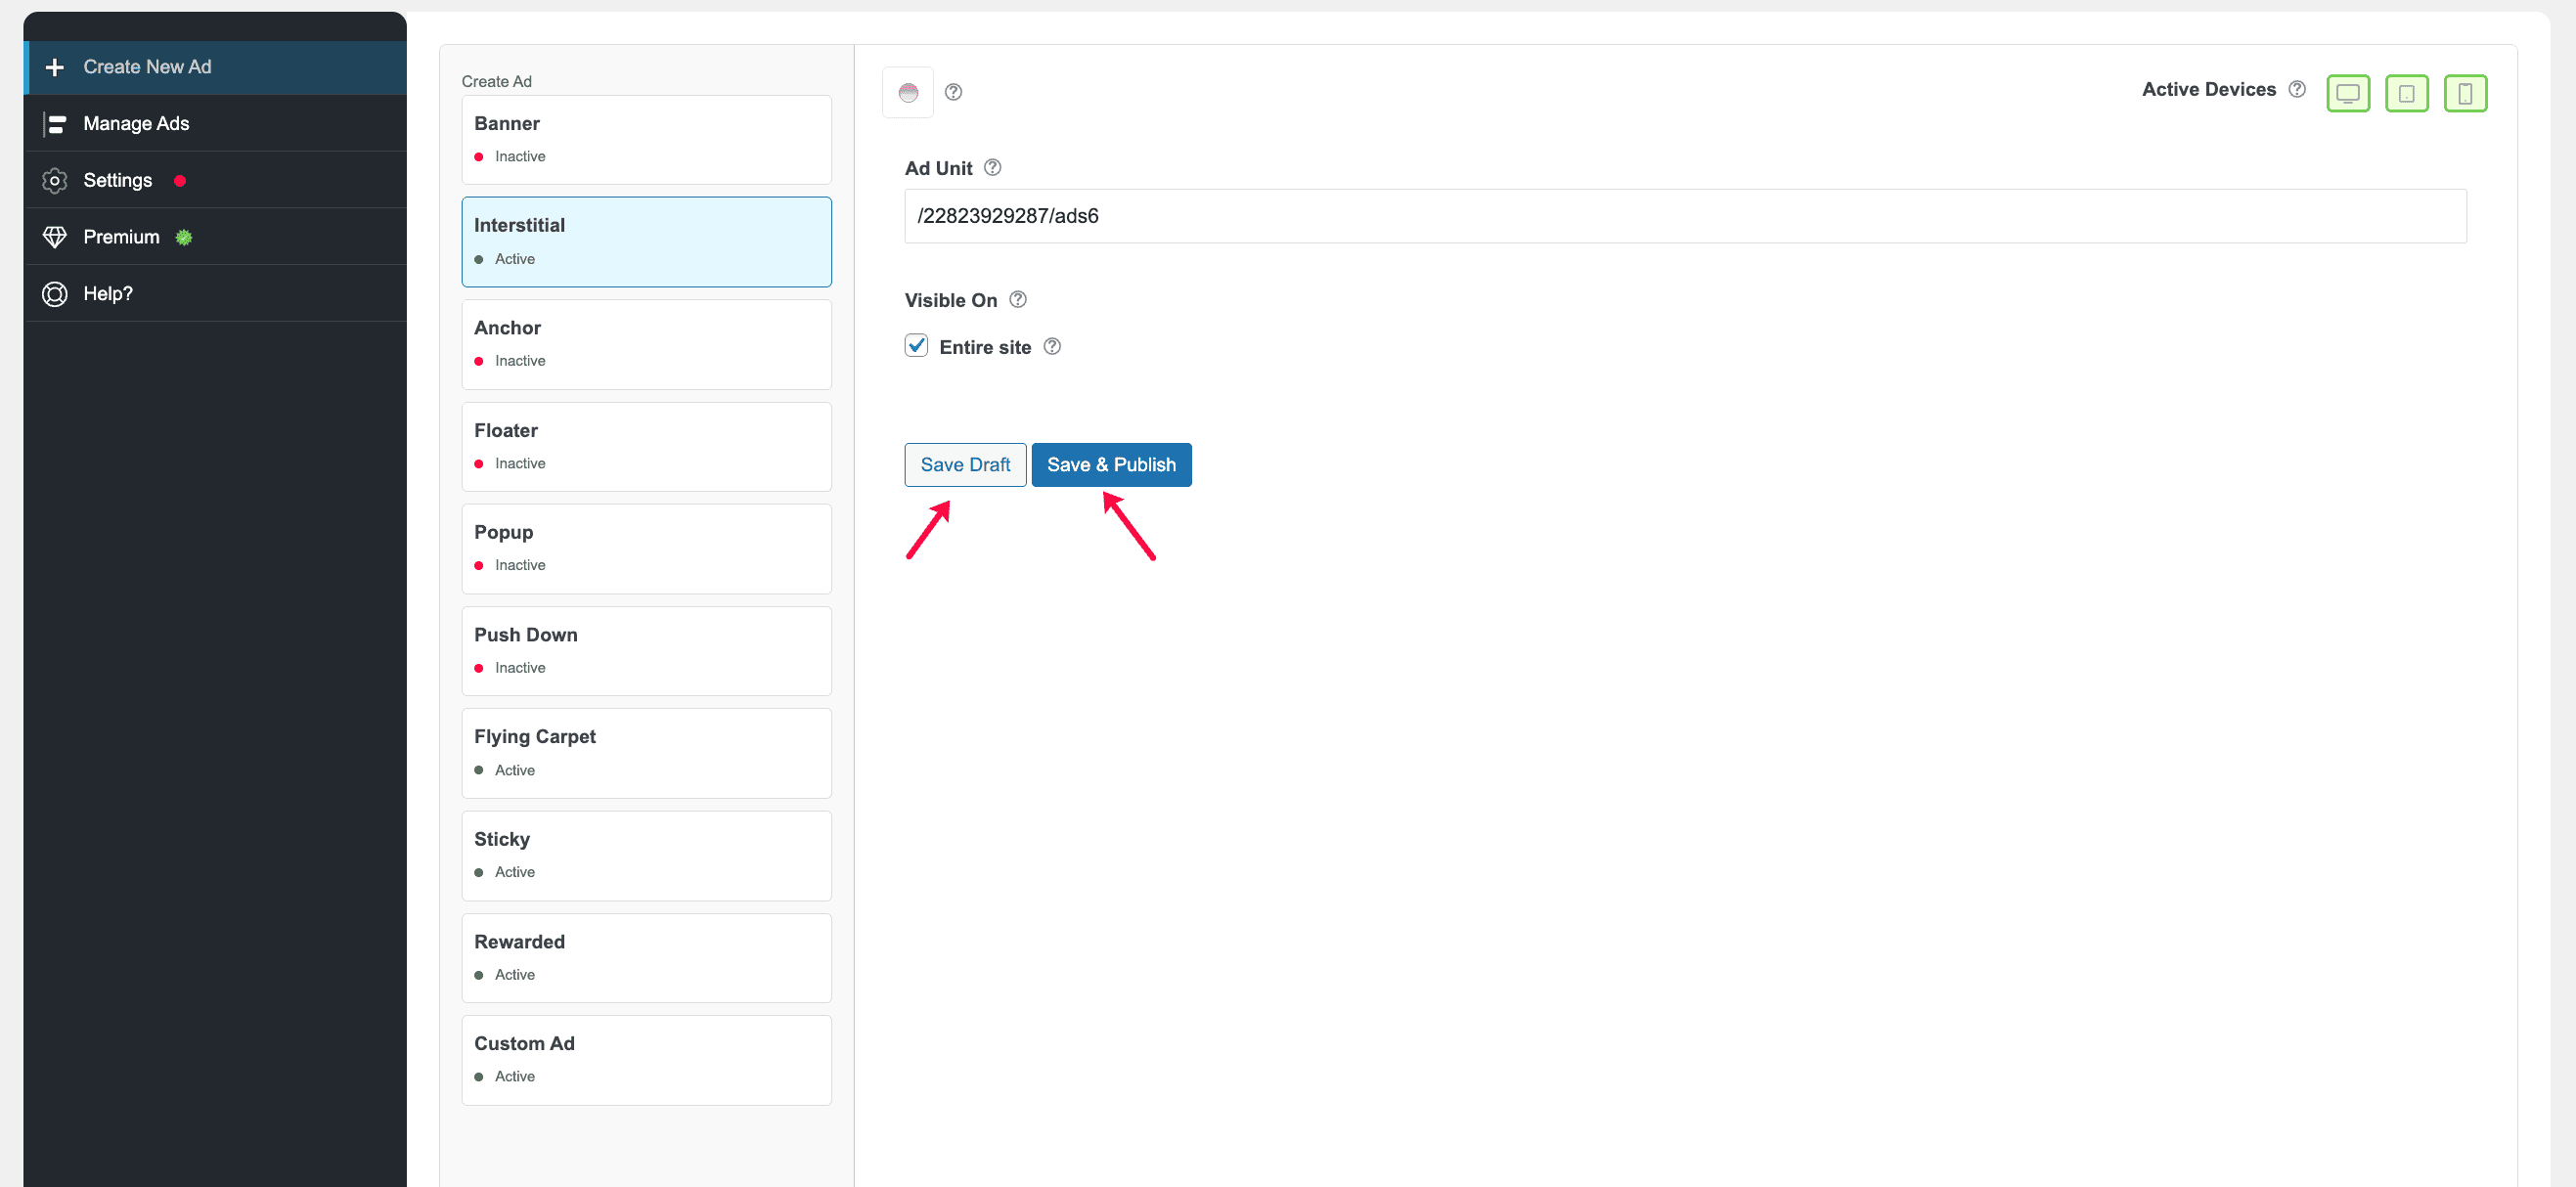
Step 5: Save Your Ad
Save Draft: Saves the ad without publishing it.
Save & Publish: Saves the ad and activates it immediately.
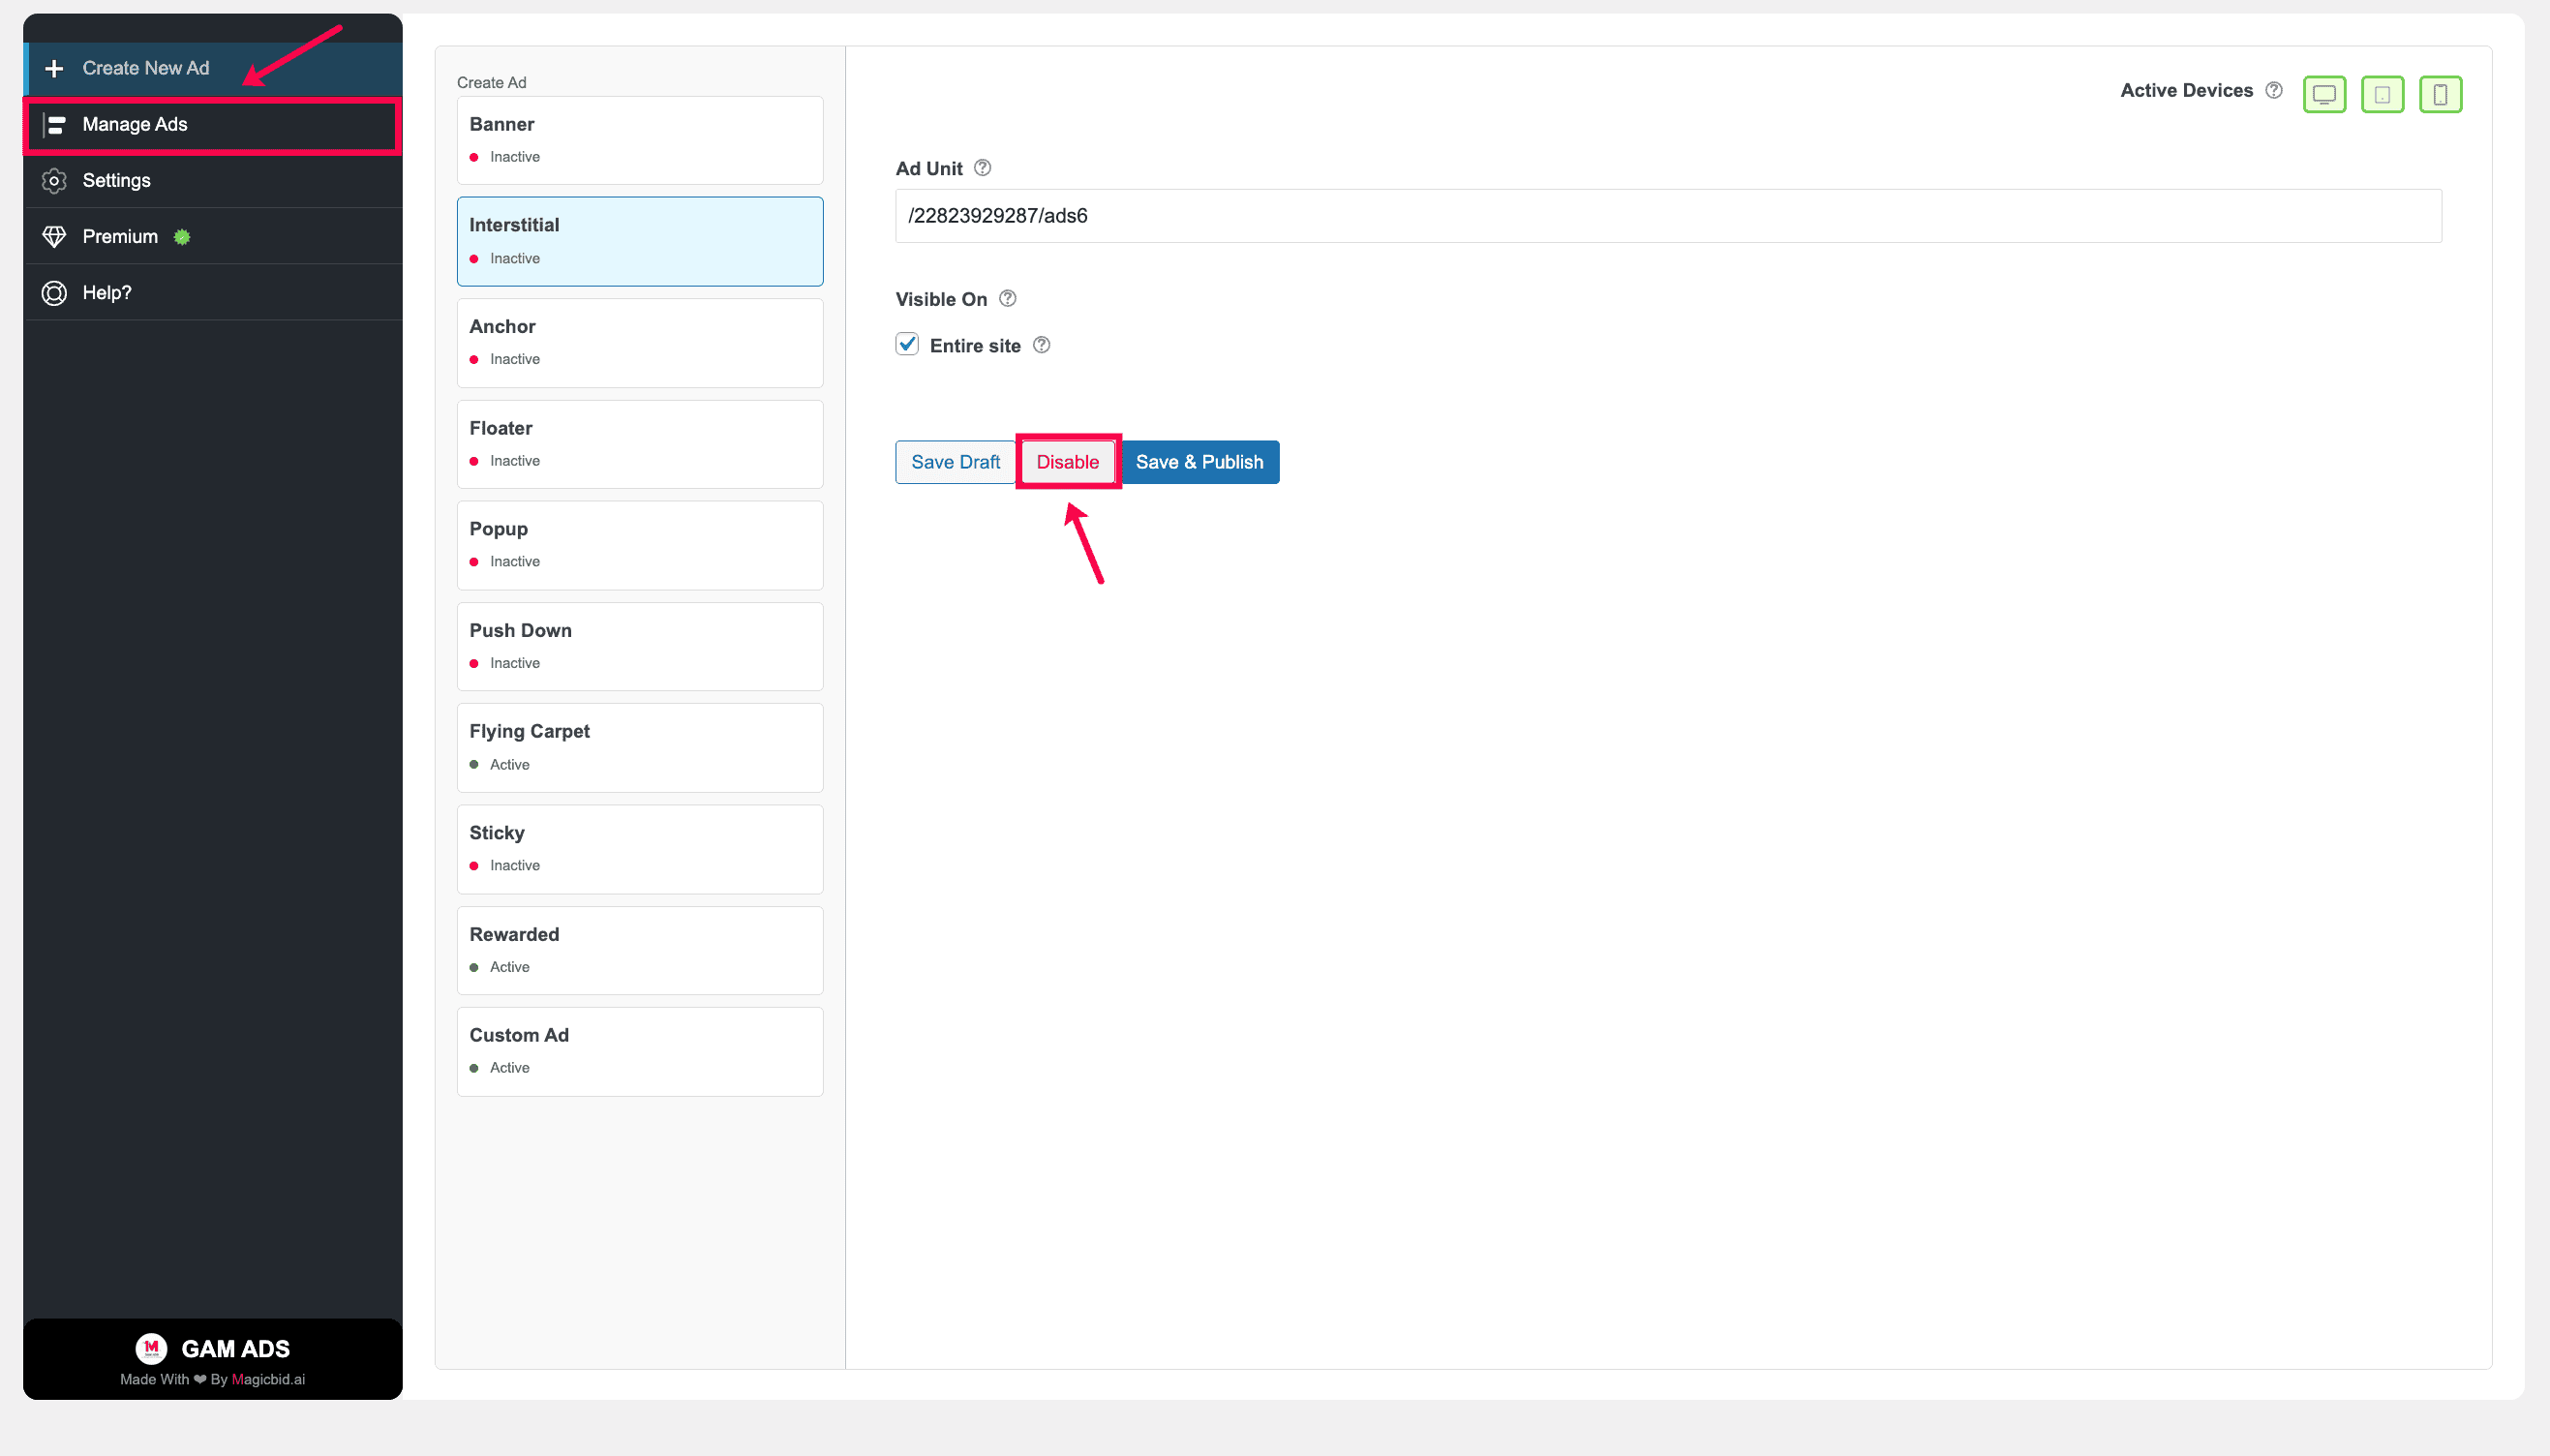
Step 6: Manage Ad Status
After publishing, you can manage the ad status:
- Disable: Pause the ad anytime
- Save & Publish: Apply updates while keeping it live
You can manage all ads later from: GAM ADS → Manage Ads
Creating Anchor Ads
Overview
- Select Anchor as the ad type
- Choose where it runs (Desktop, Tablet, Mobile)
- Pick your Google Ad Manager ad unit
- Decide where the ad appears
- Set the ad alignment
- Click Save & Publish to make it live
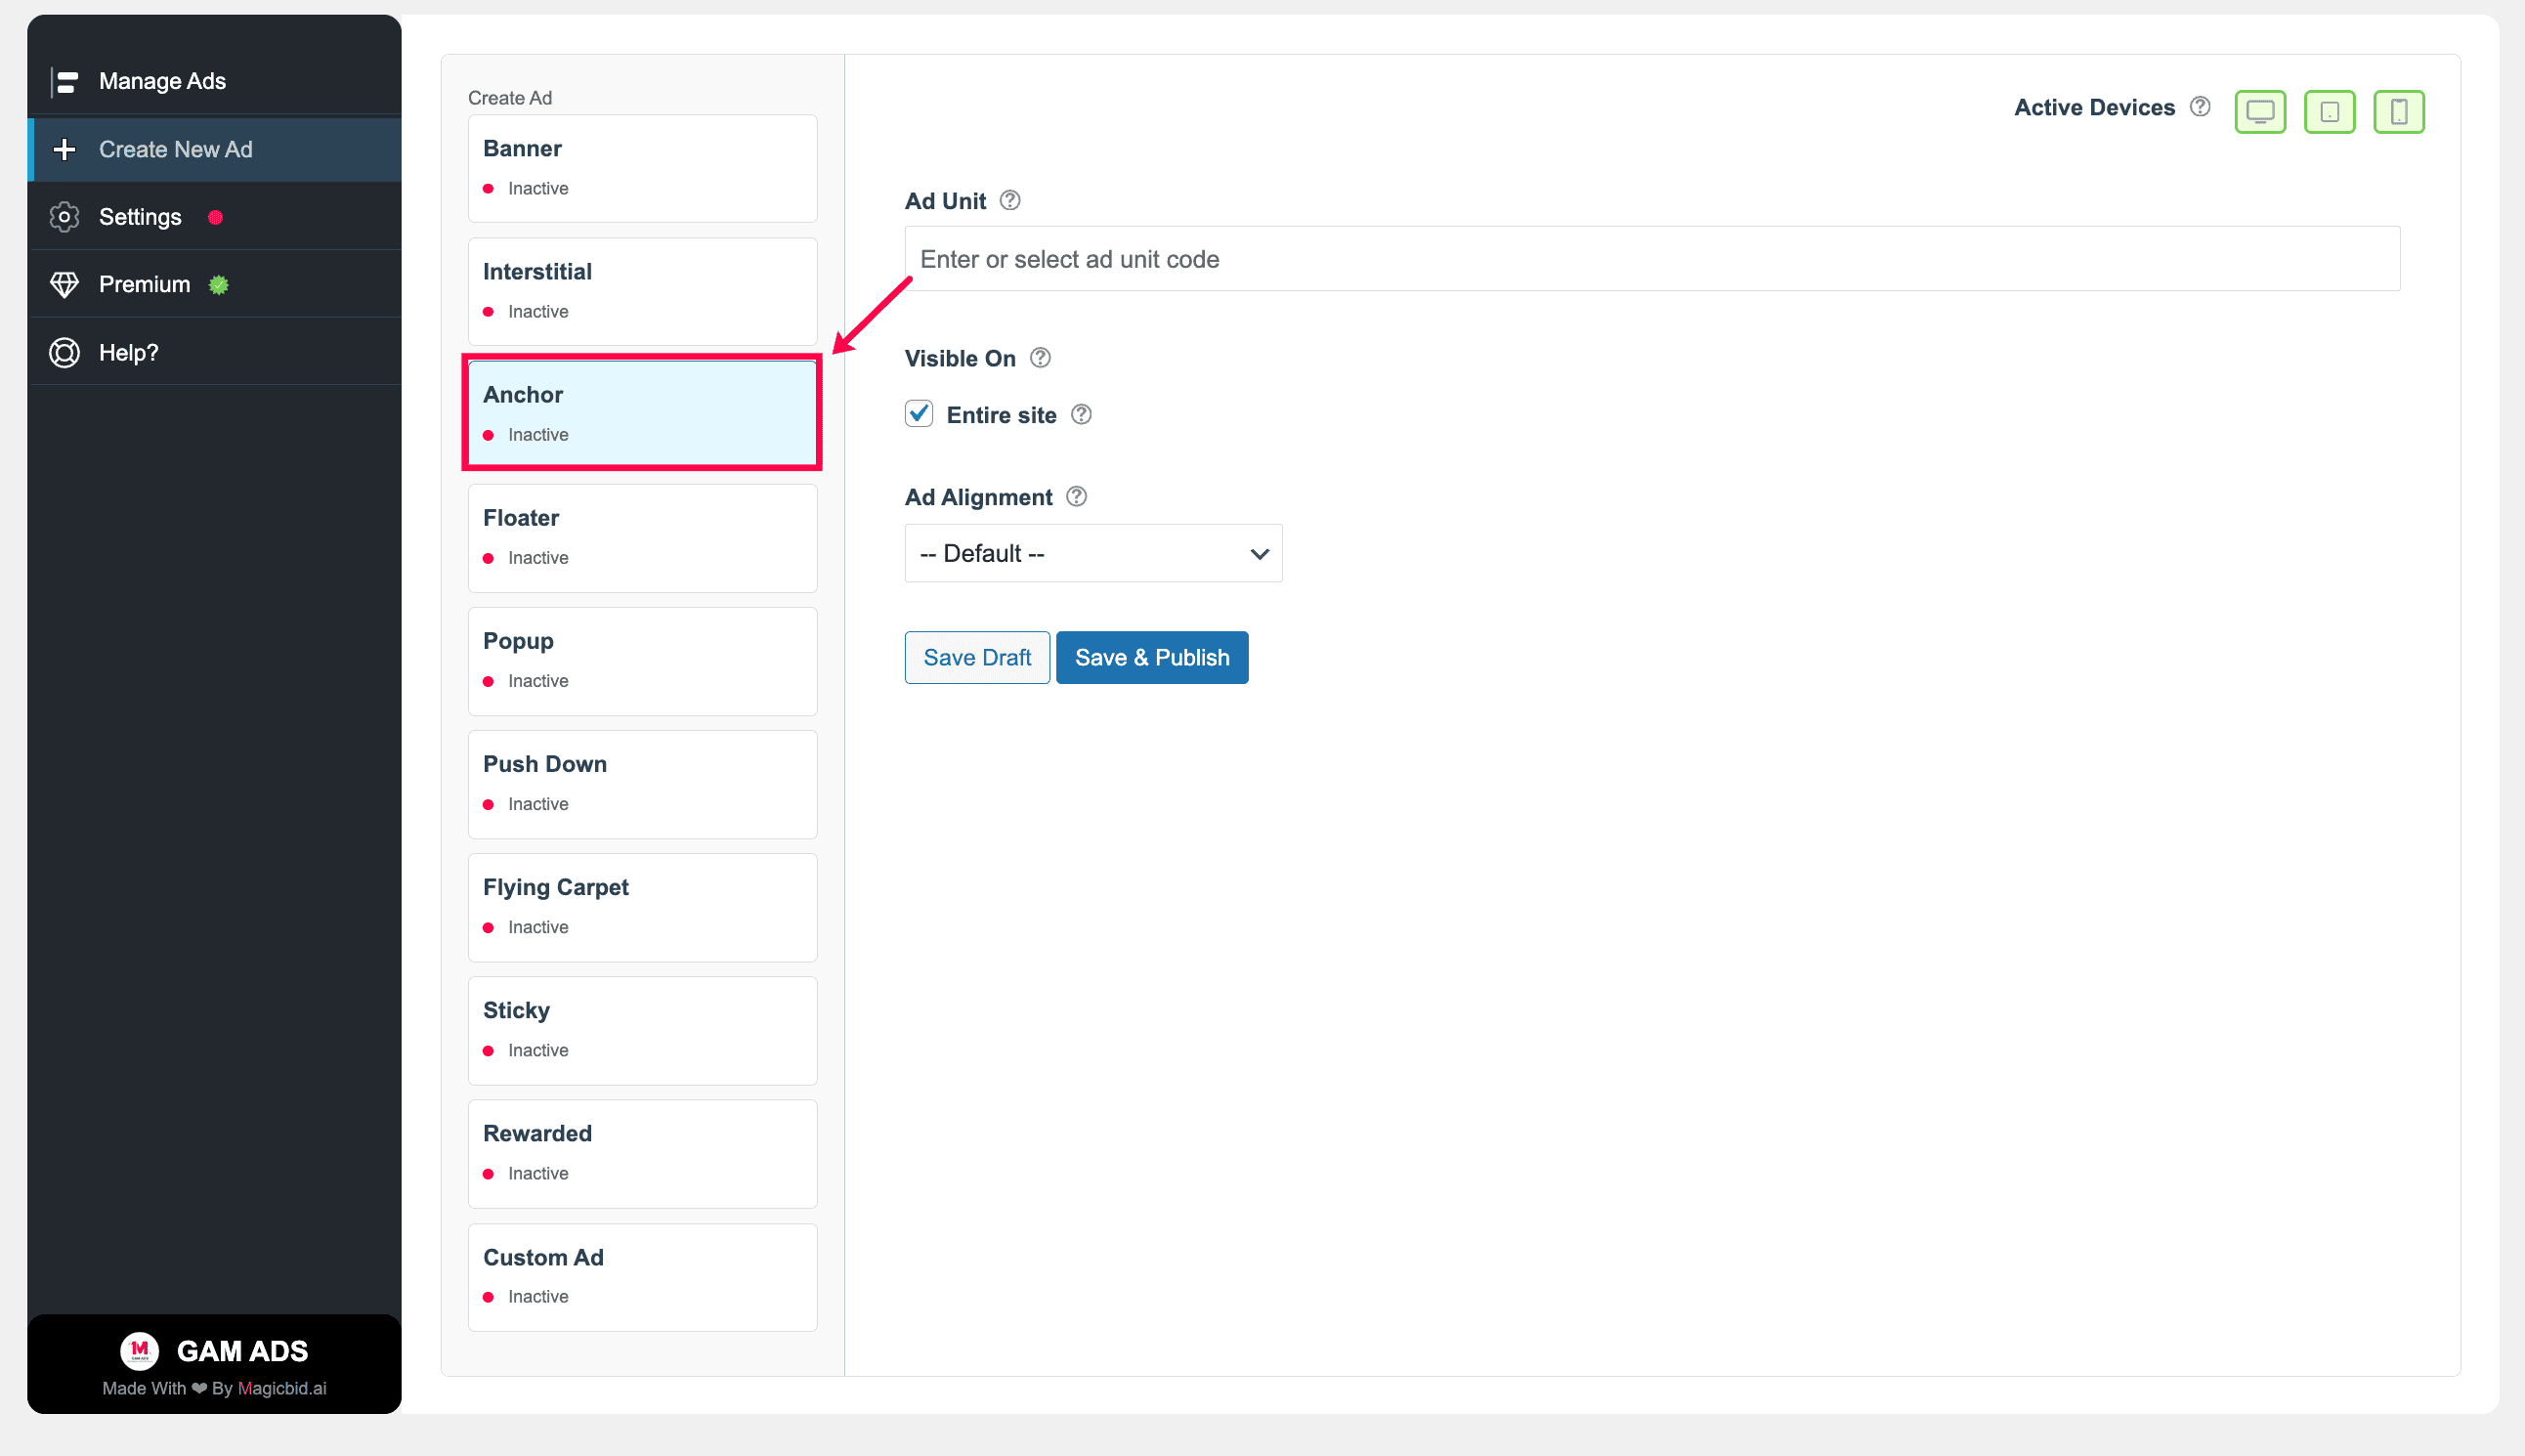
Step 1: Choose Ad Type
Go to Create New Ad and select Anchor.
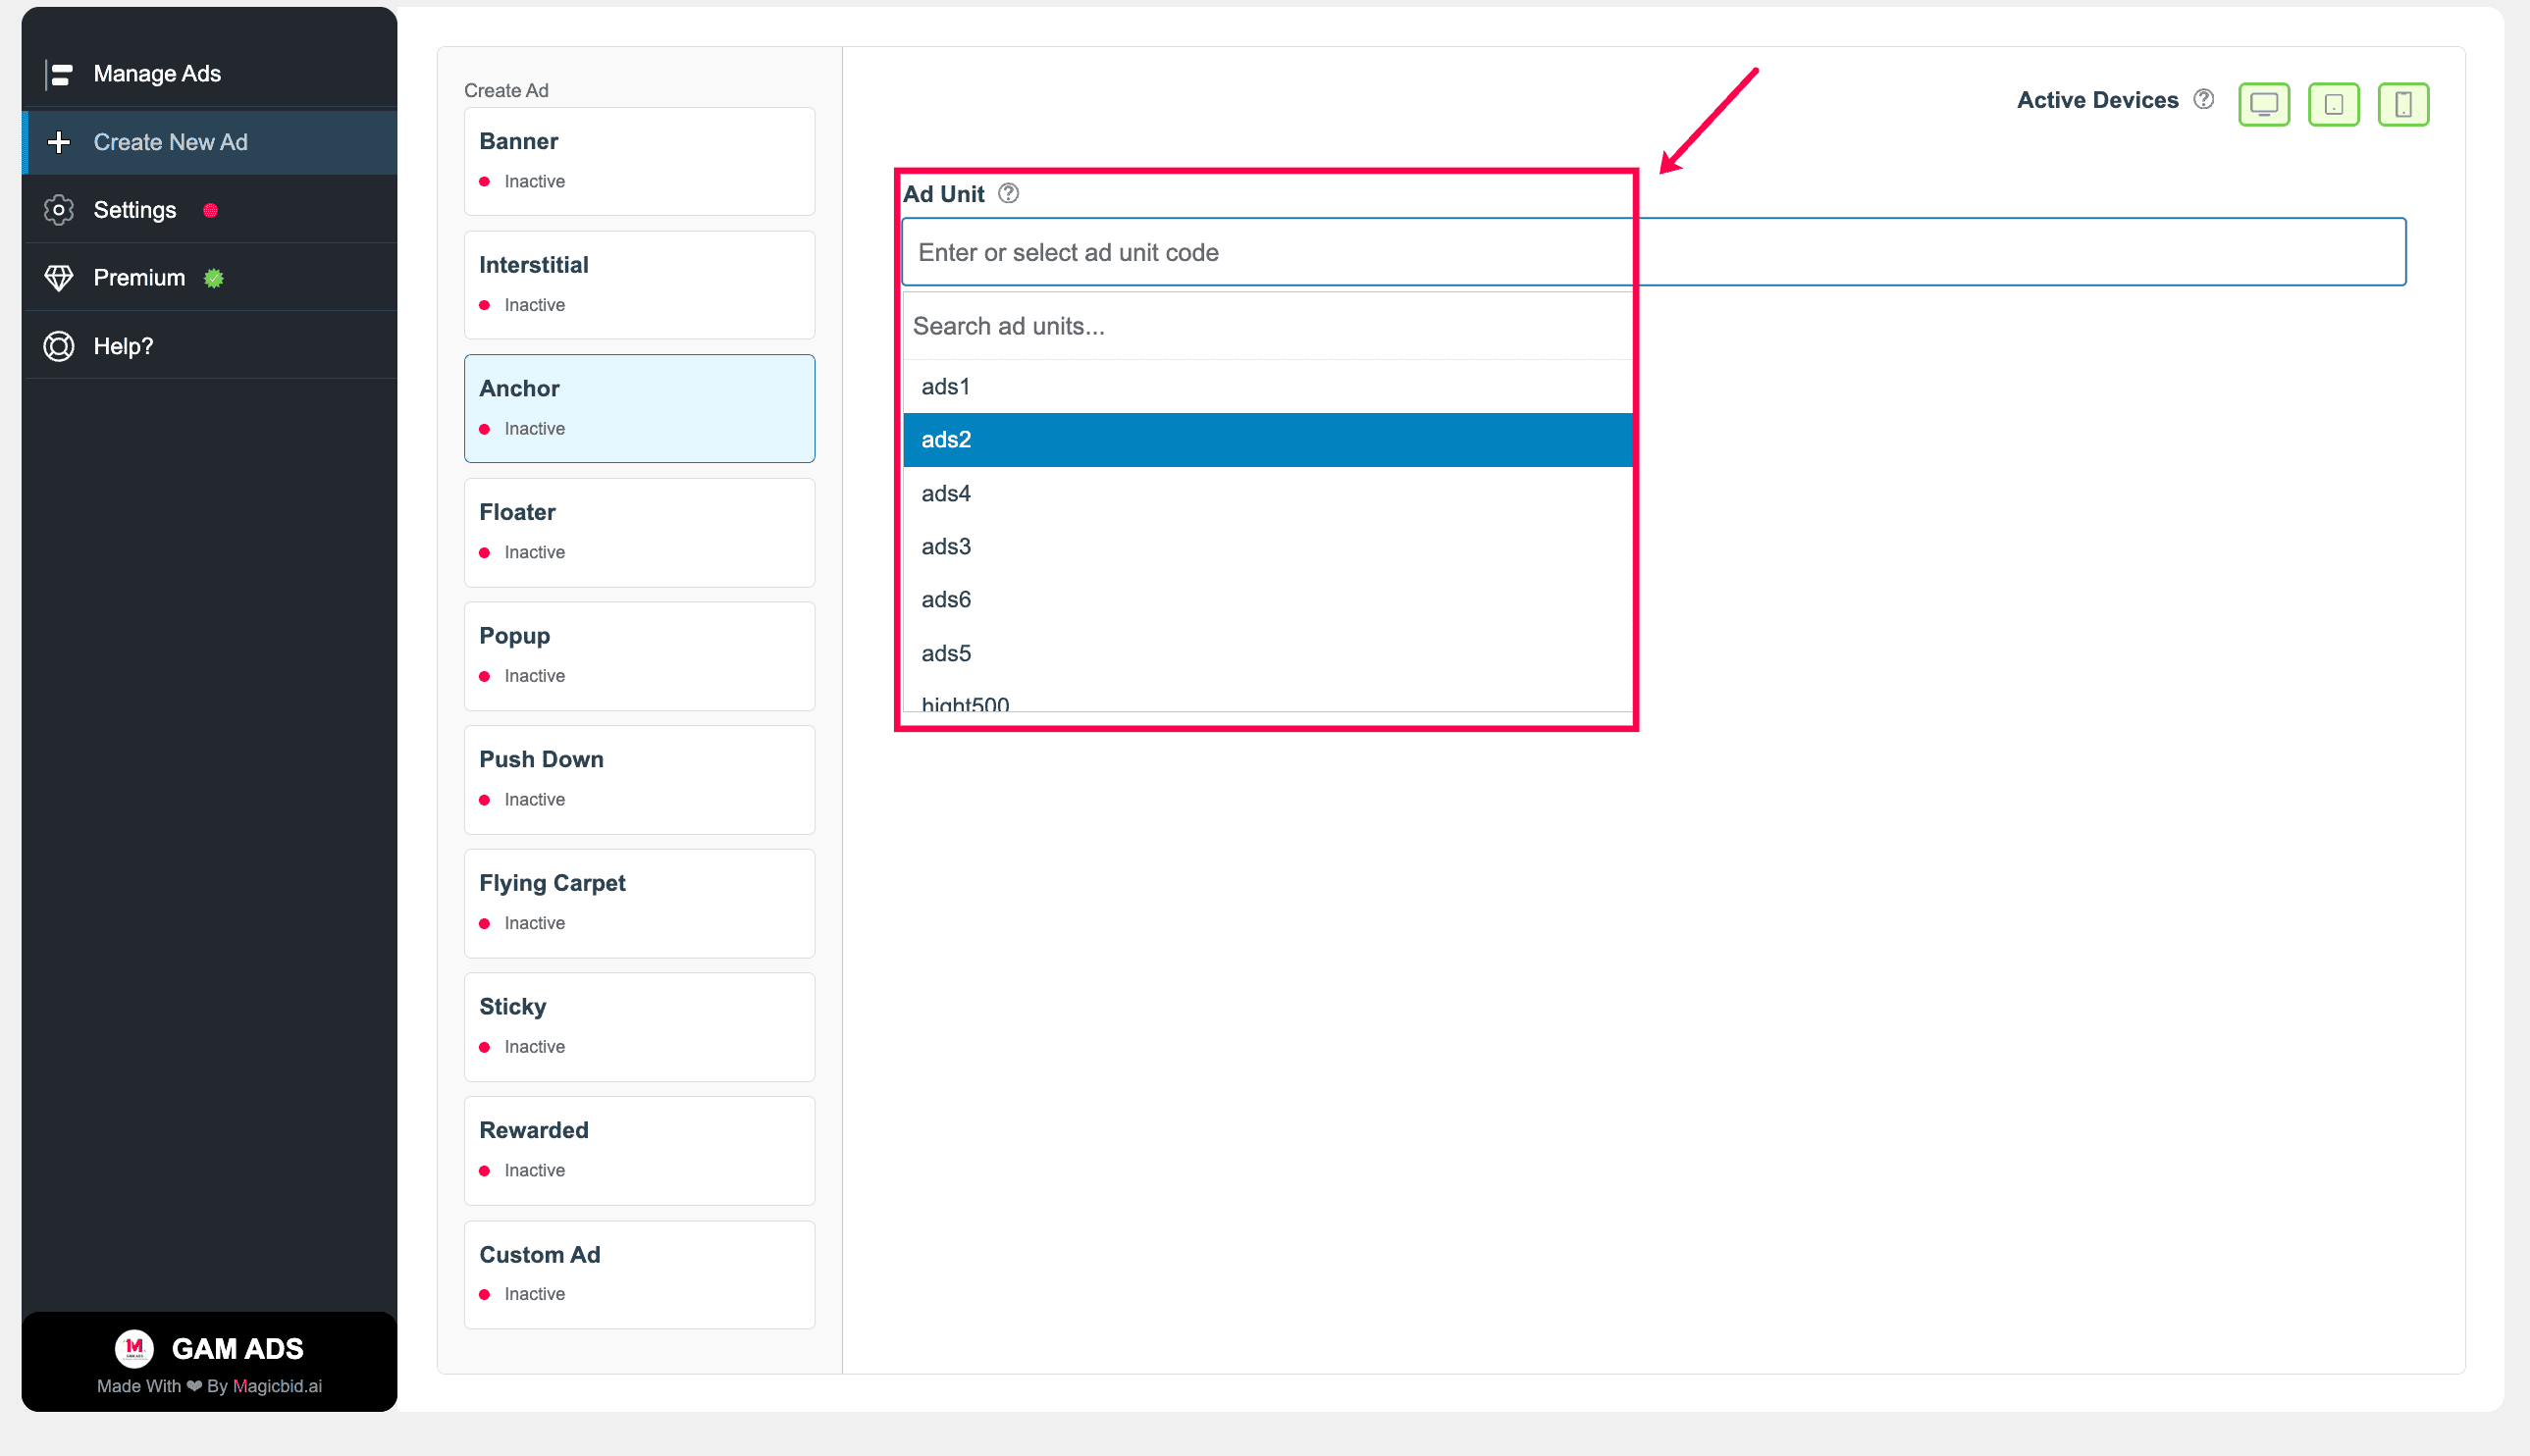
Step 2: Select Ad Unit
Choose the Google Ad Manager ad unit you want to serve.
Note: The ad unit must already exist in your Google Ad Manager account in order to appear in this list.
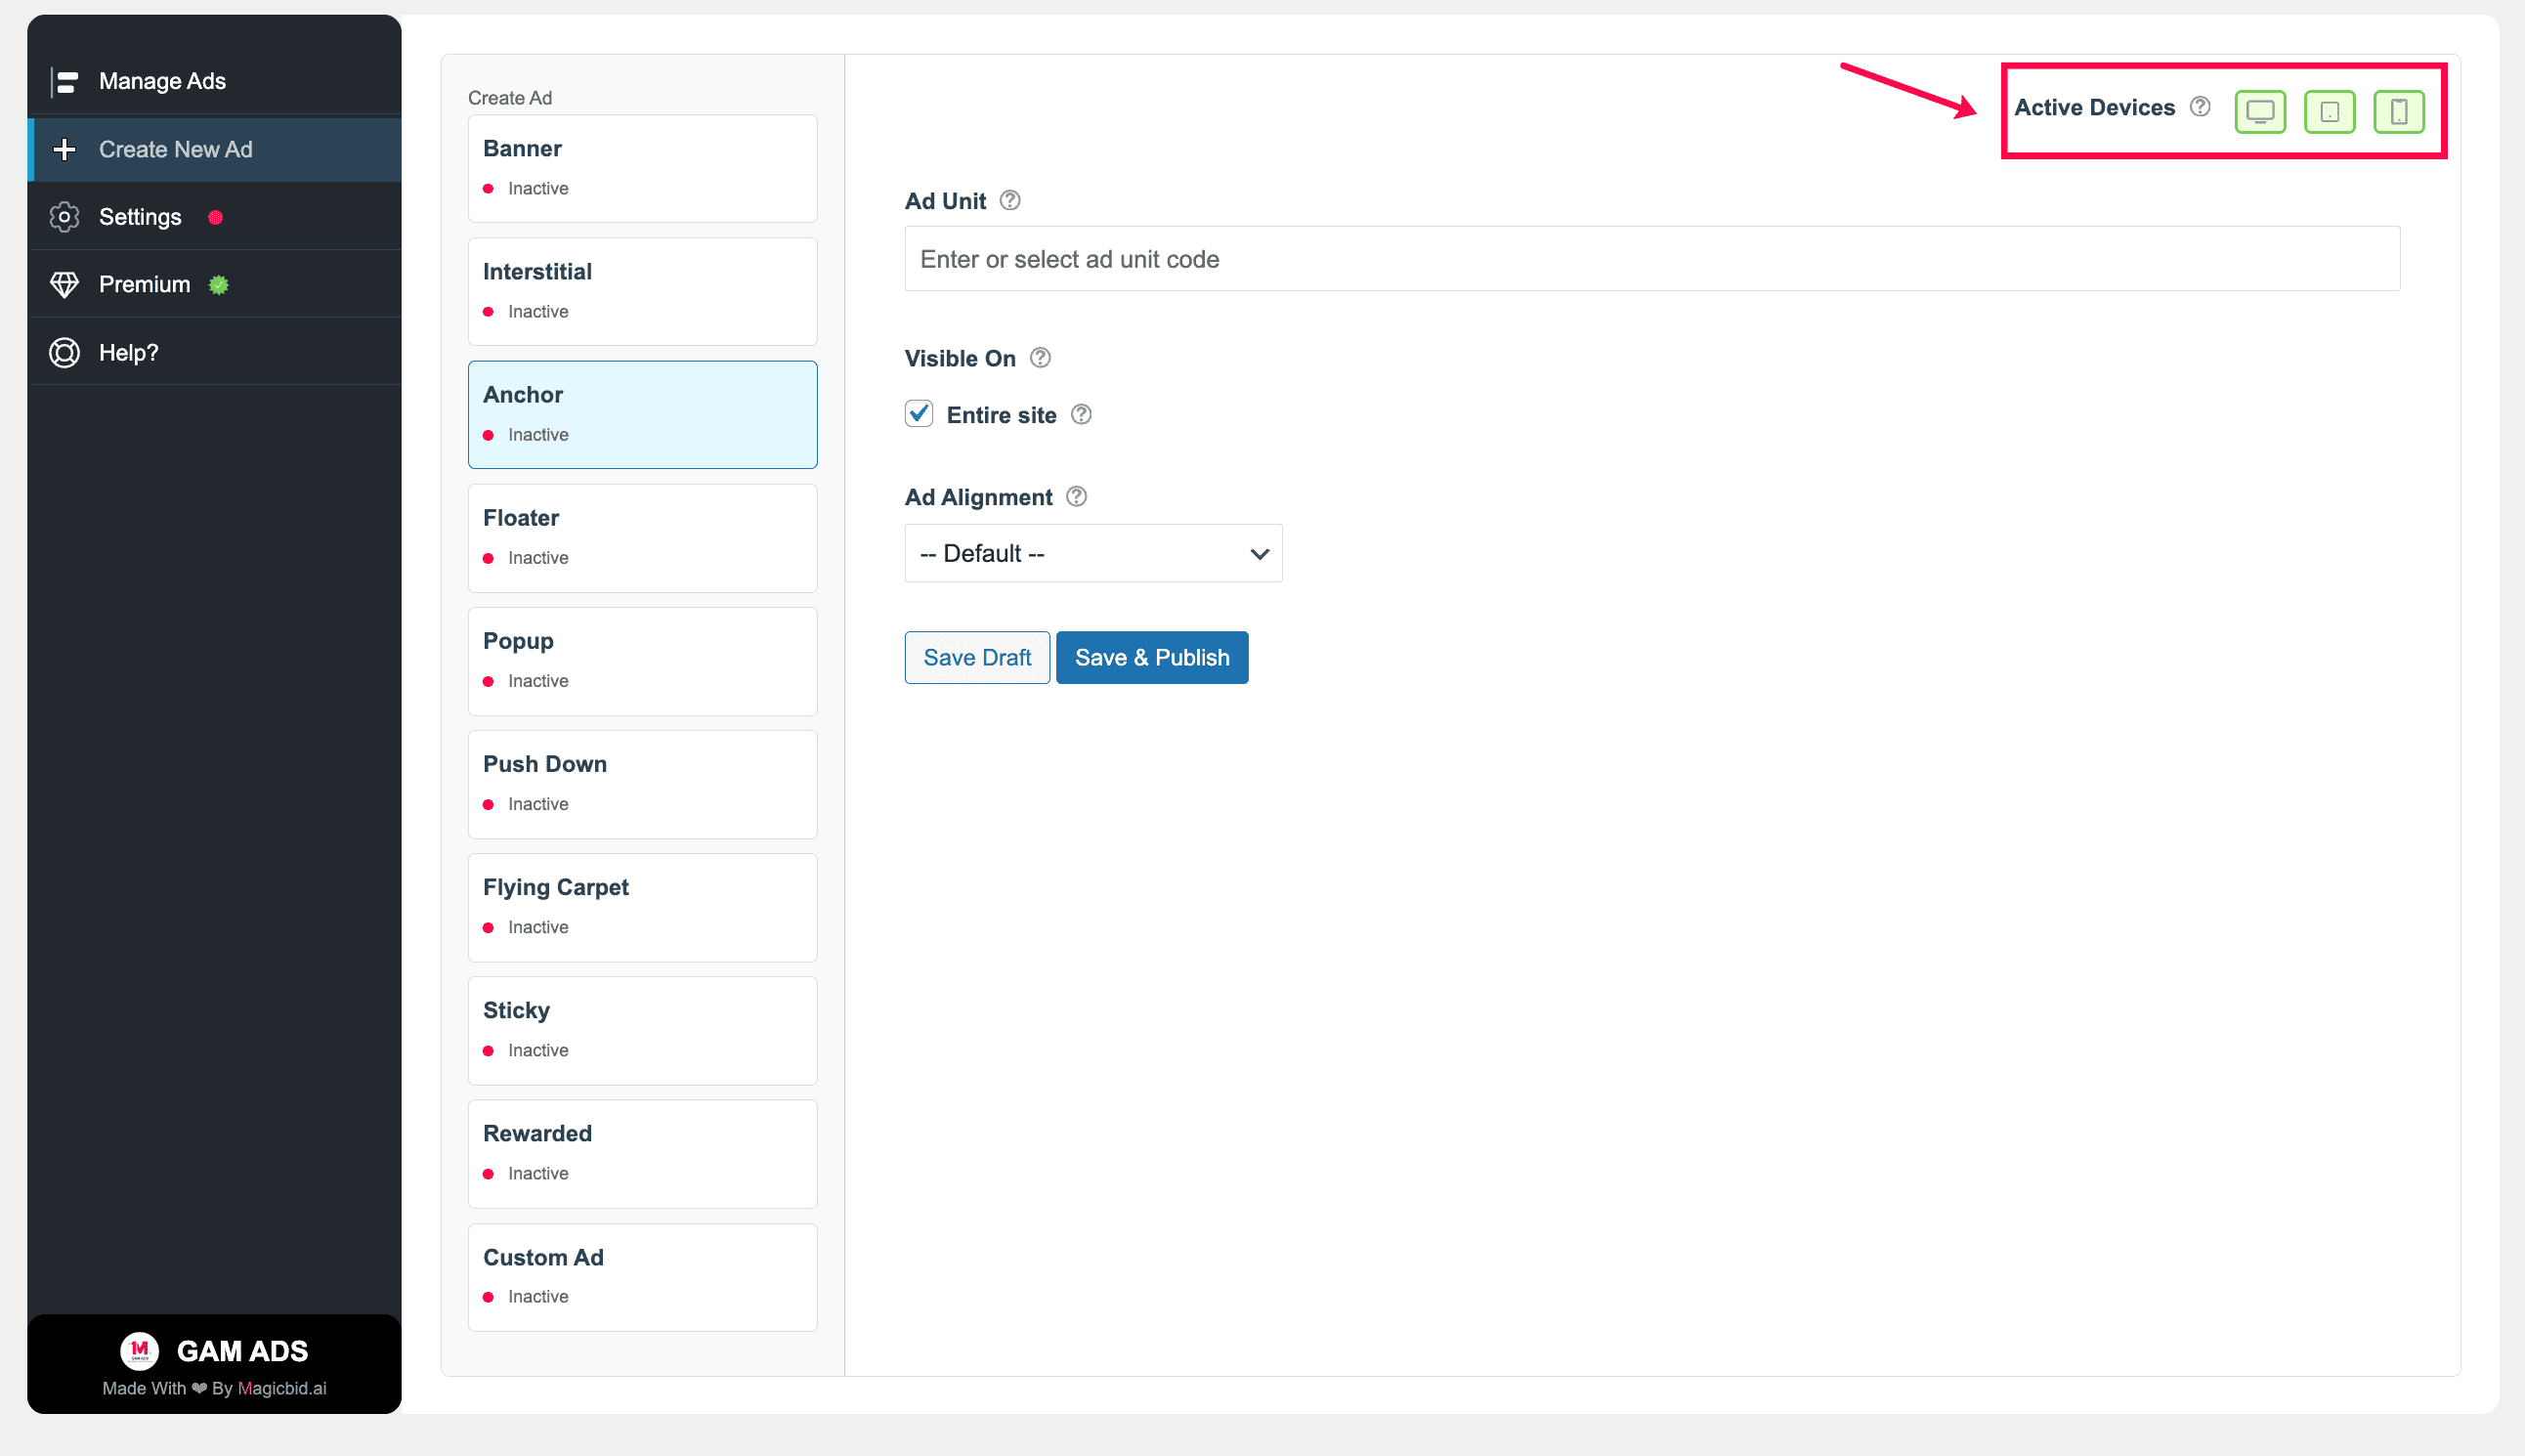
Step 3: Choose Devices
Under Active Devices, select where this ad should run:
- Desktop
- Tablet
- Mobile
You may enable one, two, or all three device types.
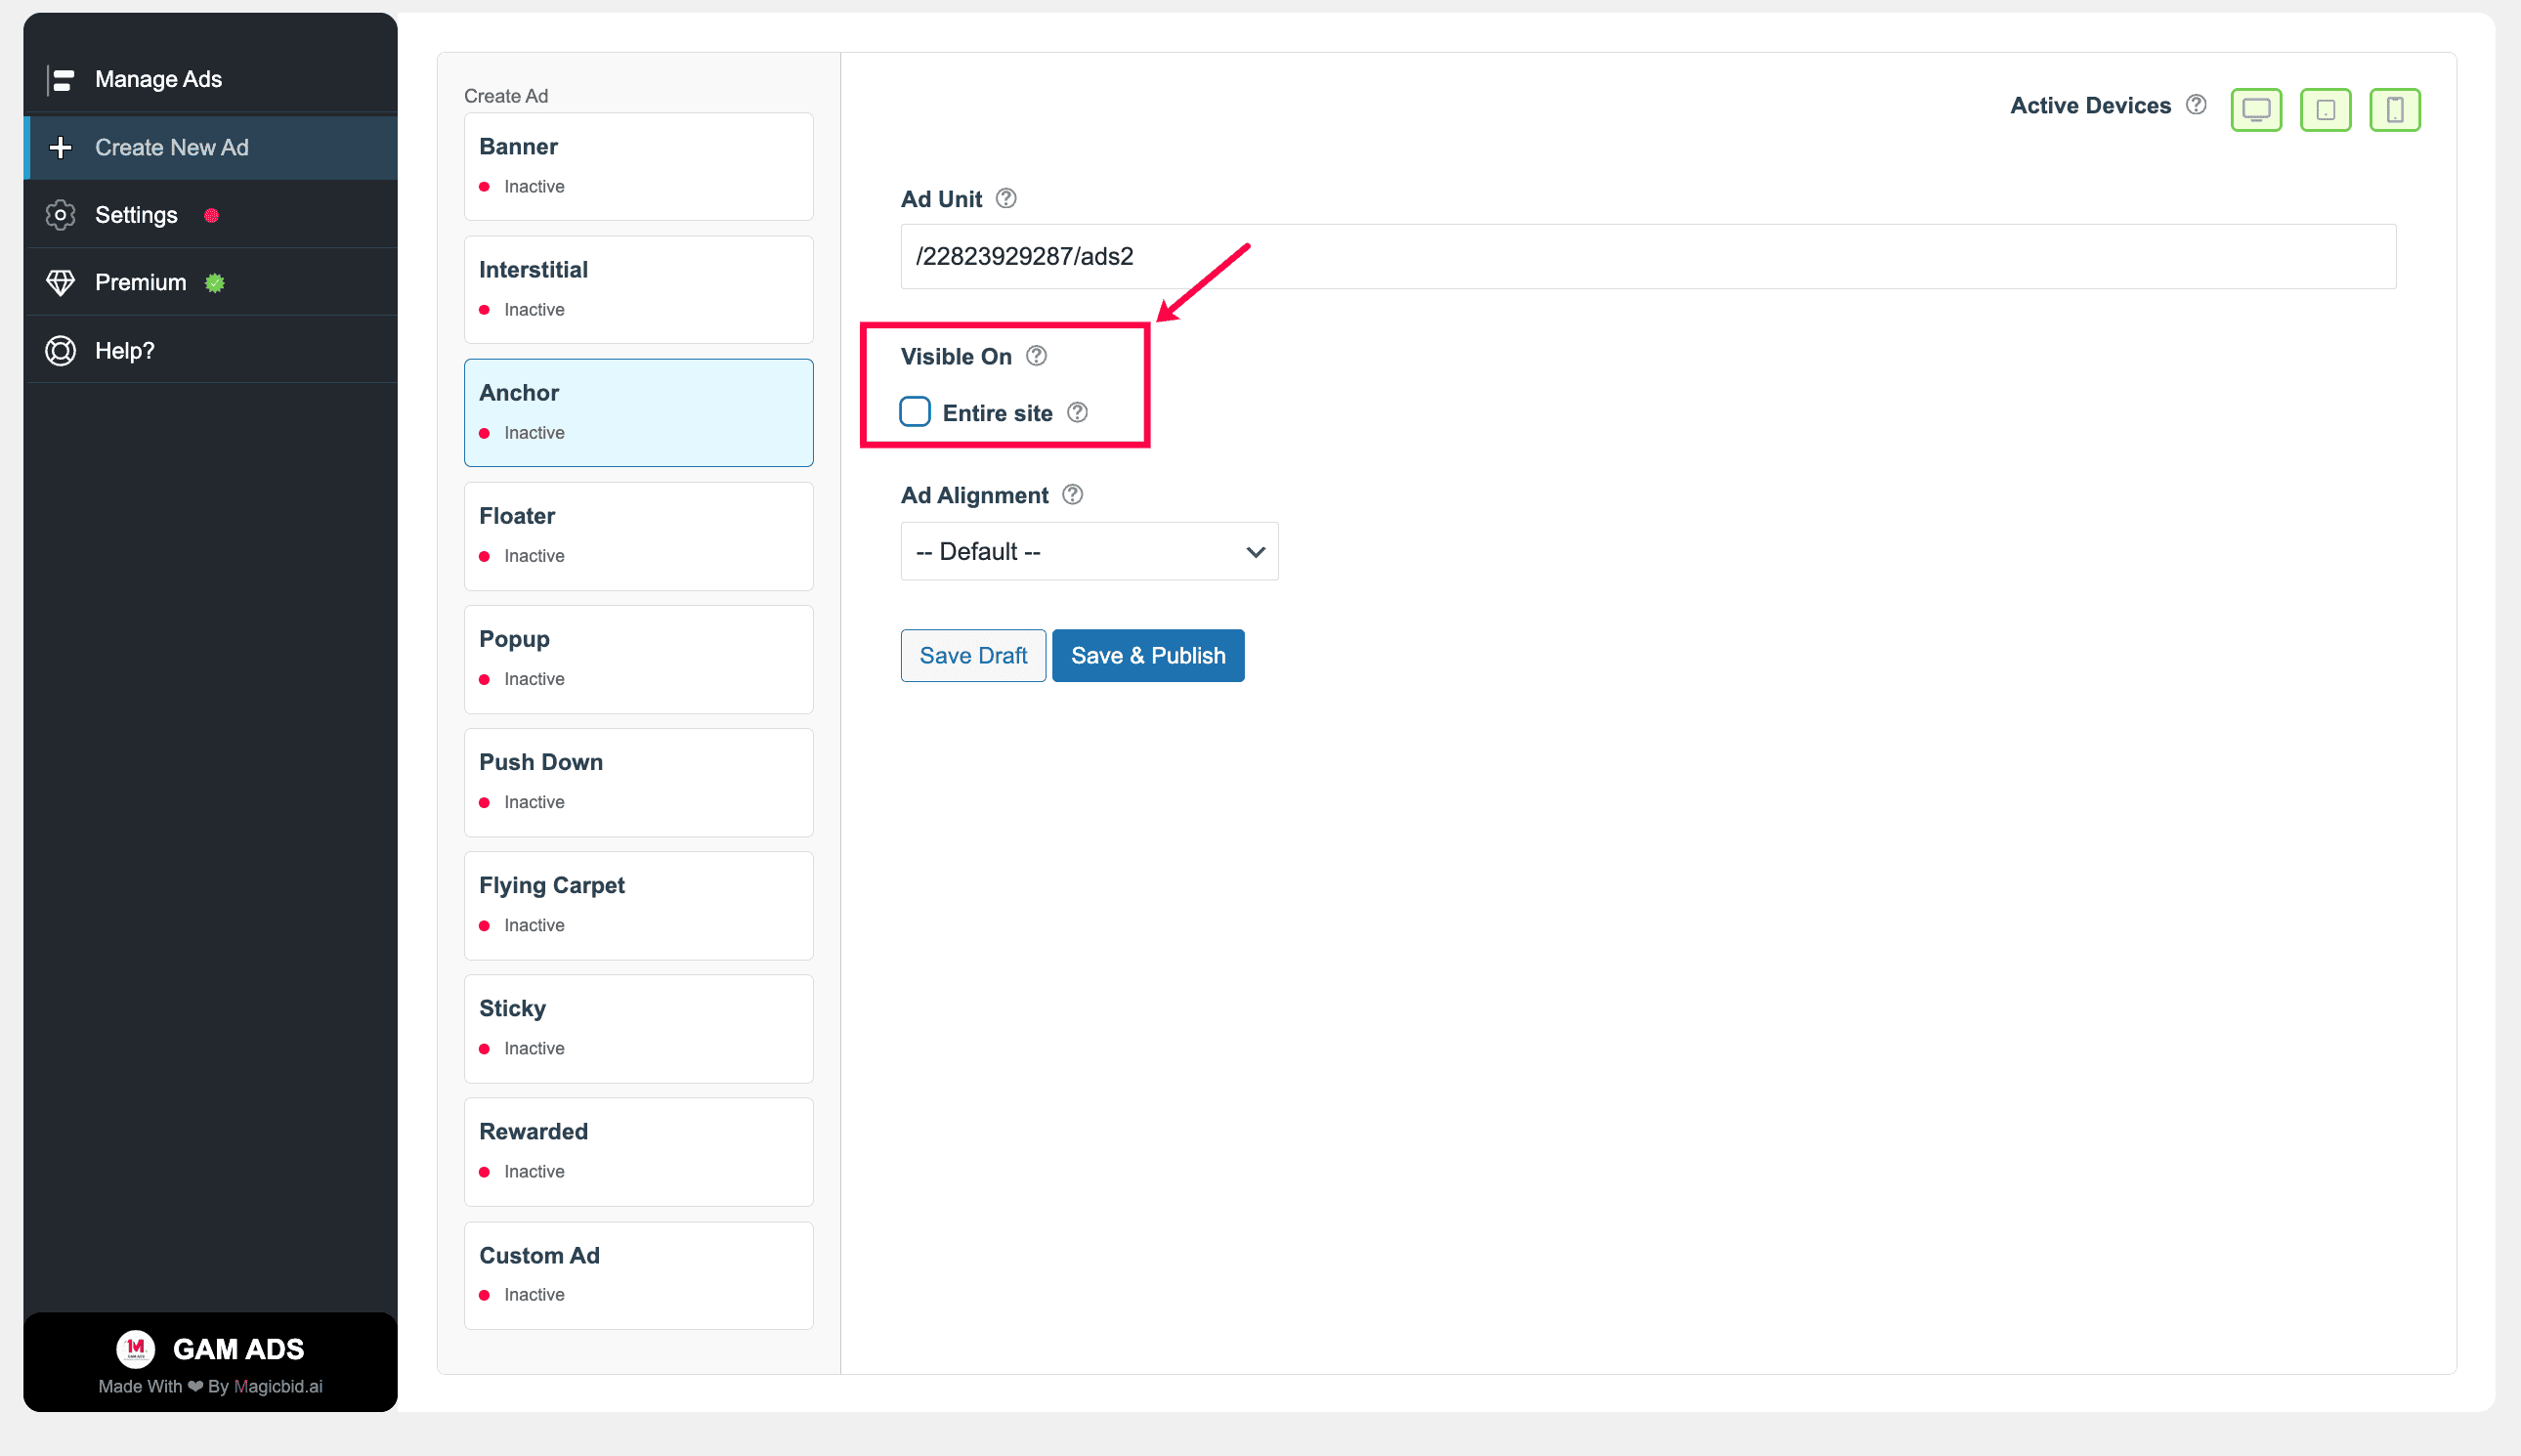
Step 4: Set Visibility
By default, Anchor ads are displayed across the entire site.
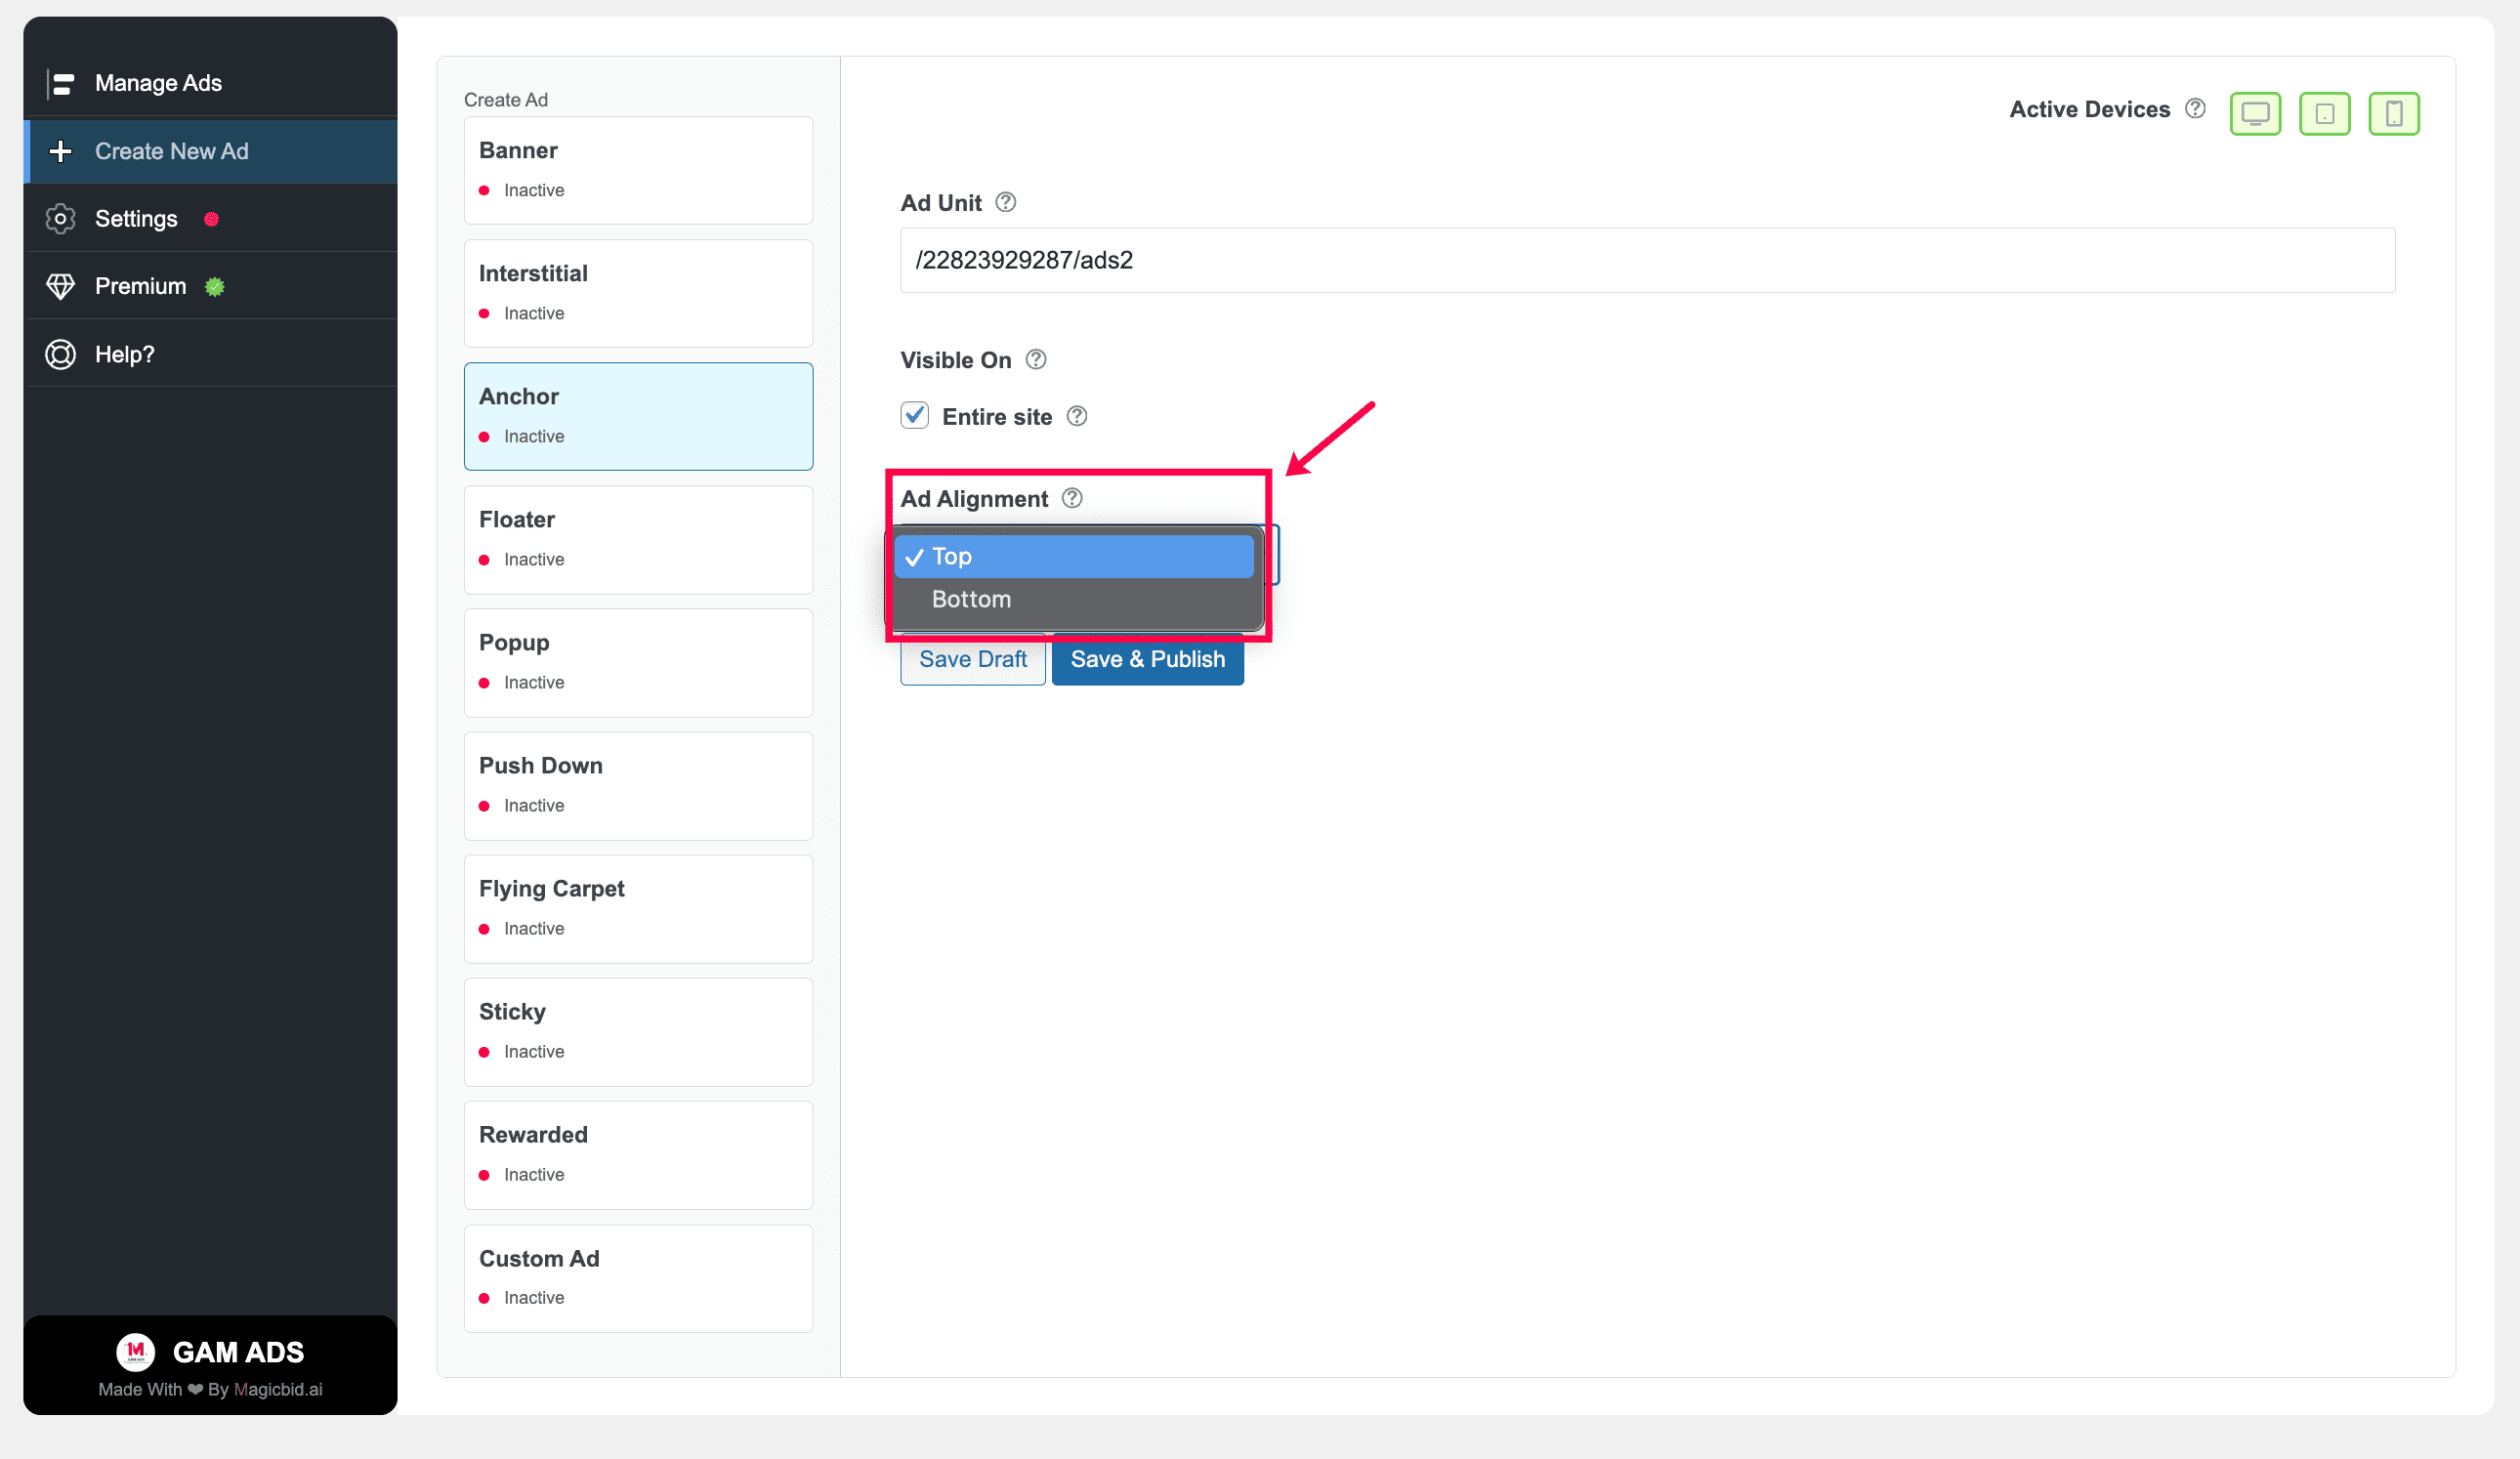
Step 5: Ad Alignment
Controls how the ad is positioned inside its placement on the page.
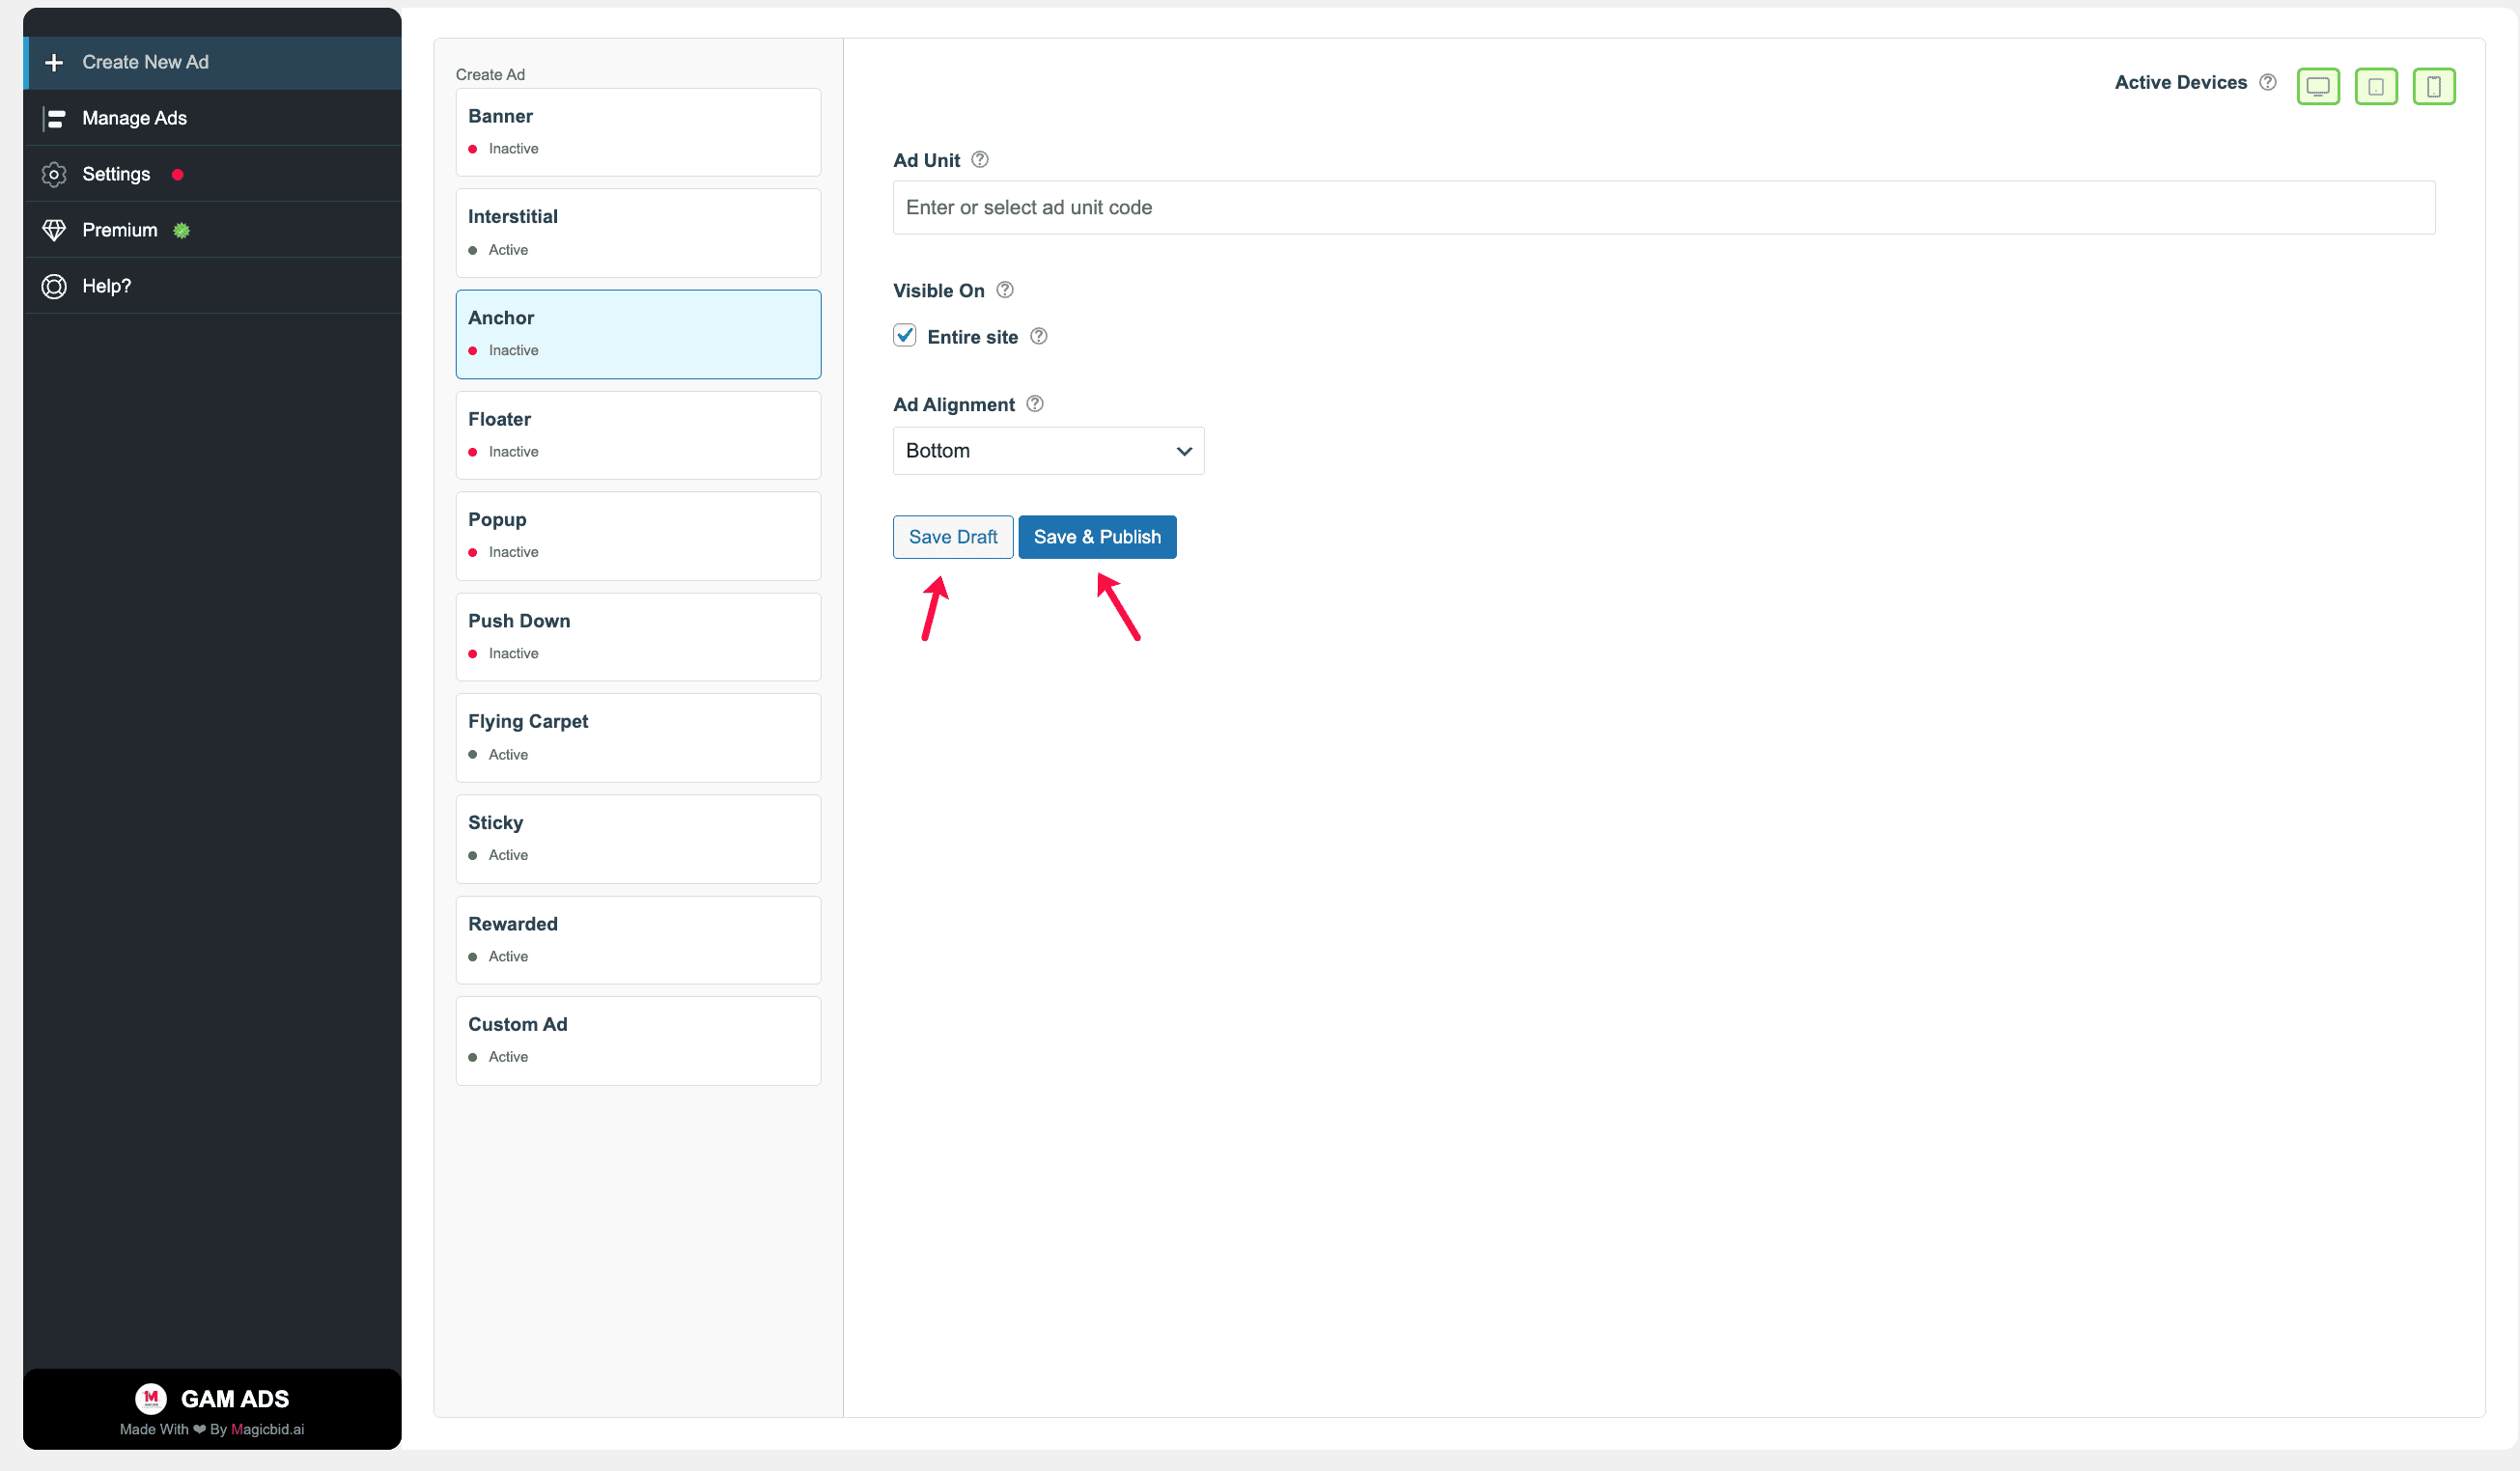
Step 6: Save Your Ad
Save Draft: Saves the ad without publishing it.
Save & Publish: Saves the ad and makes it live immediately.
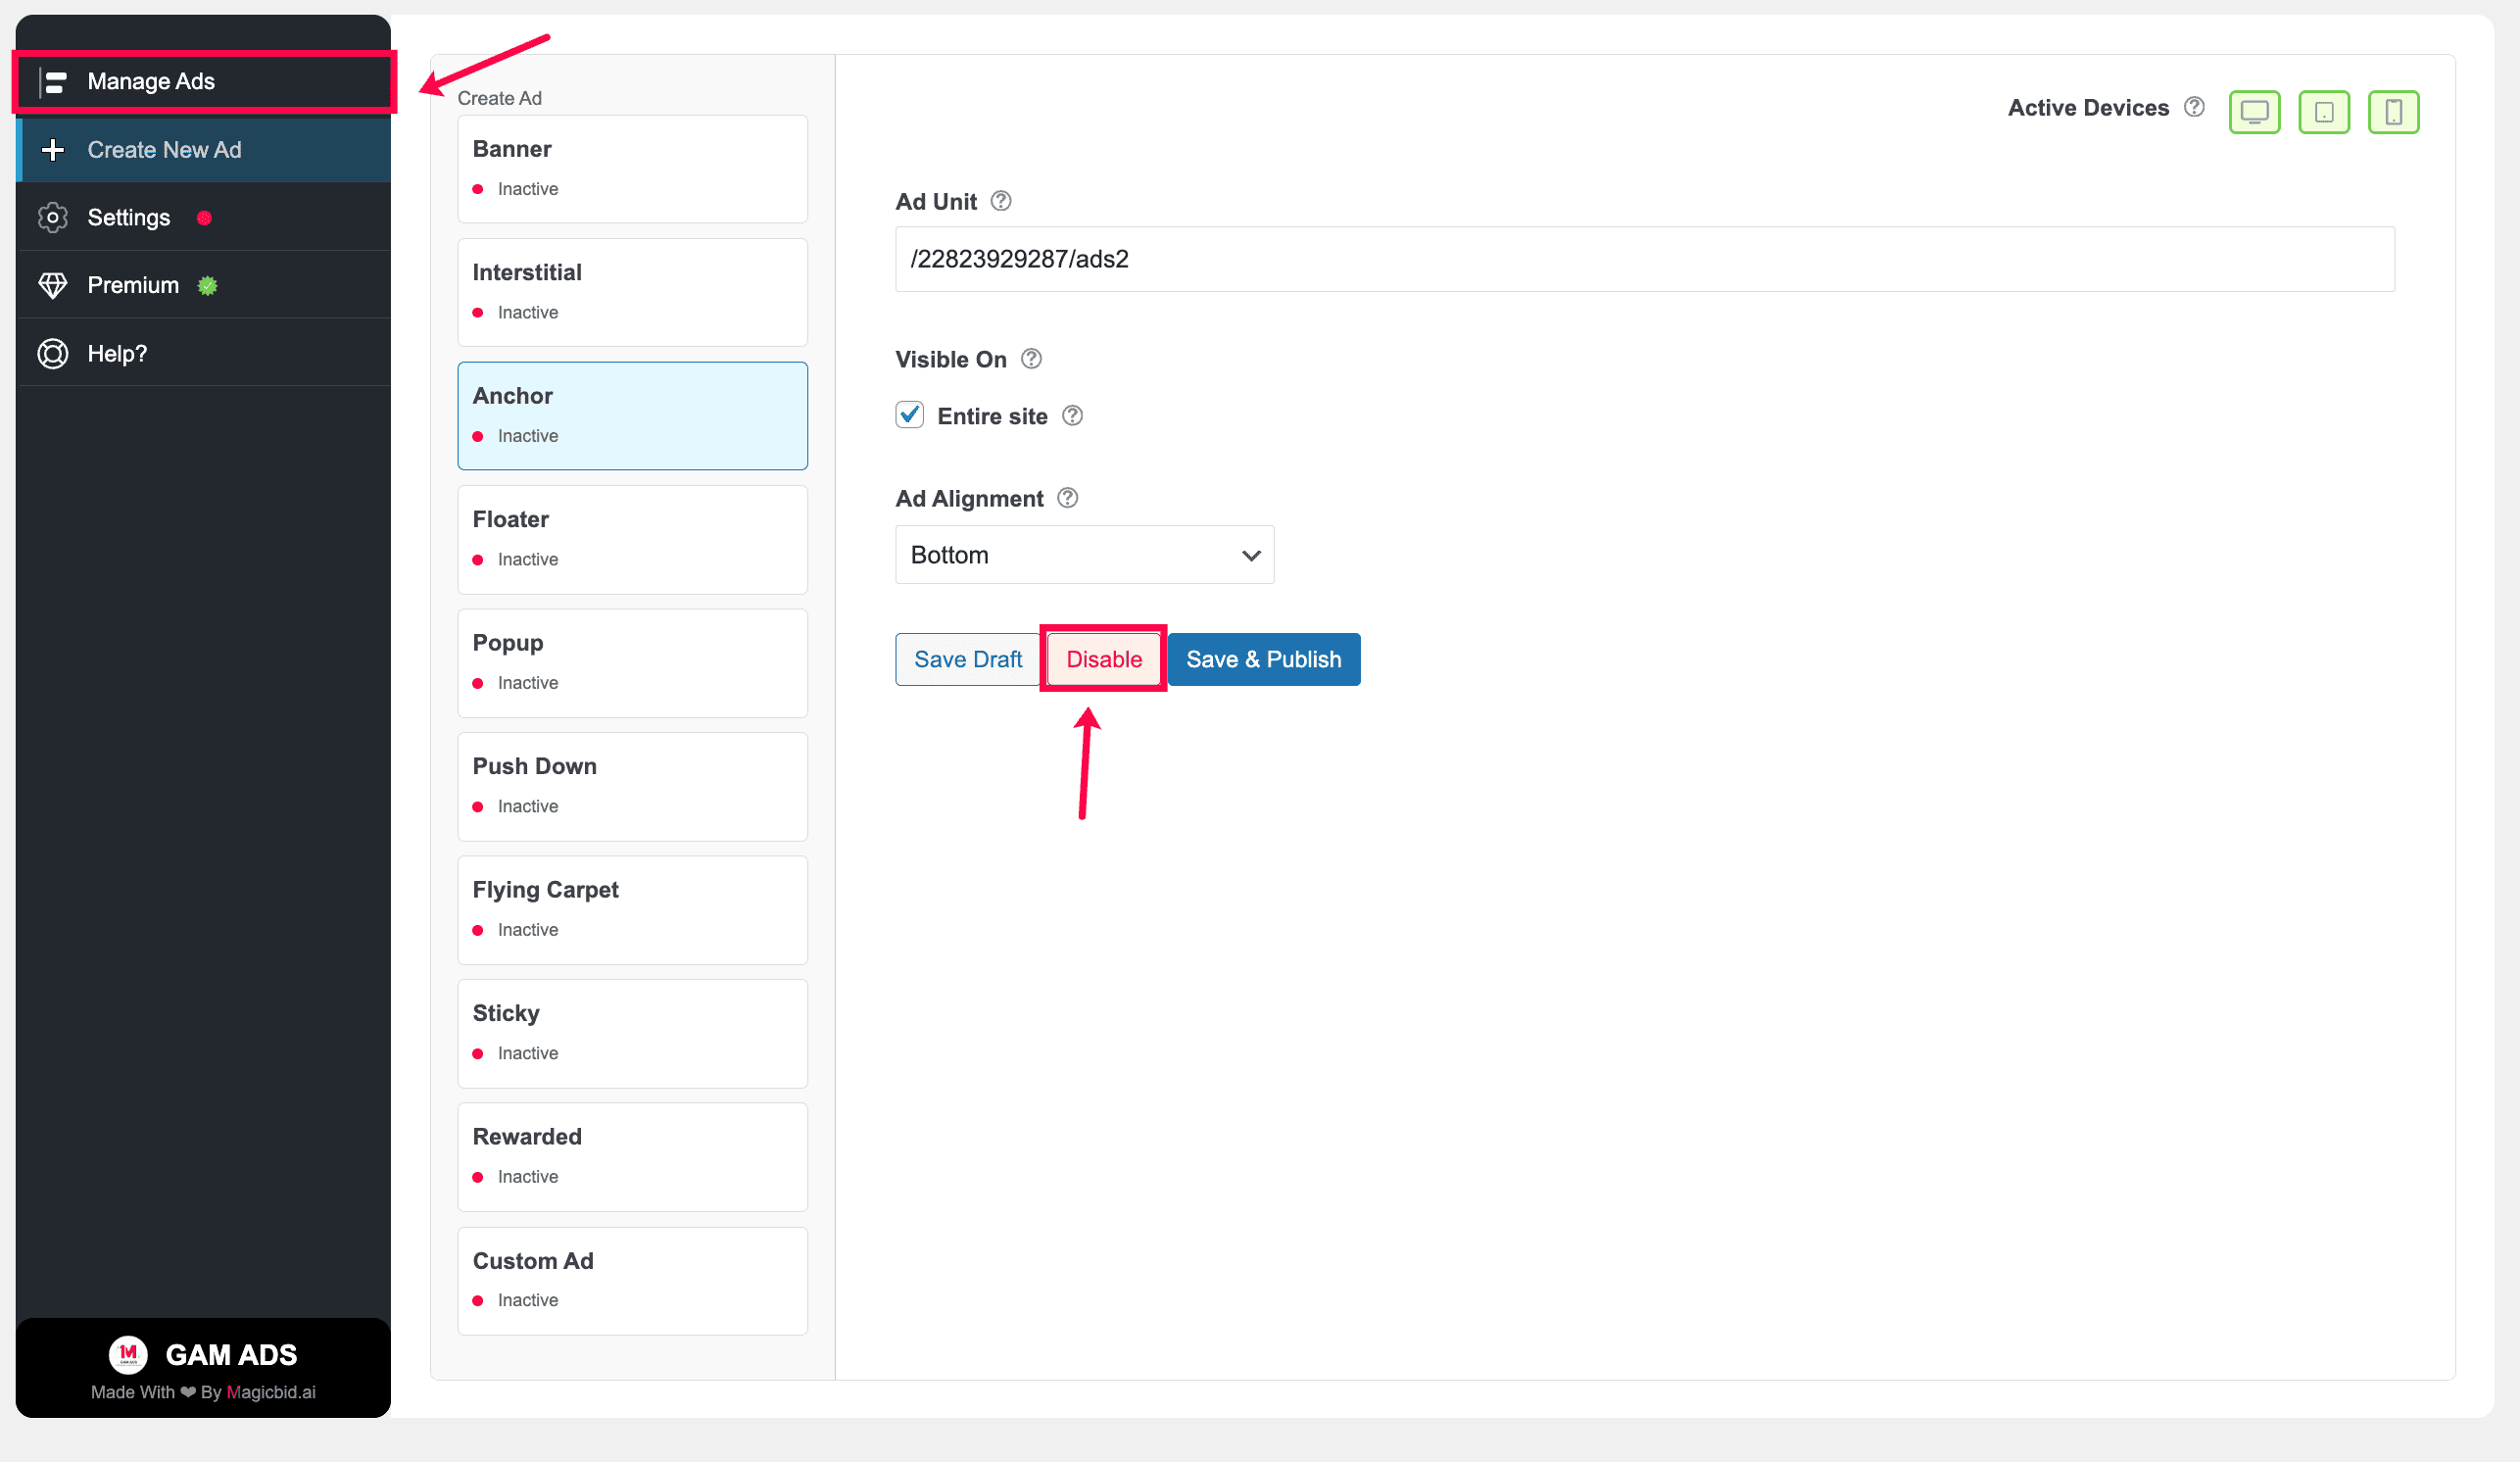
Step 7: Manage Ad Status
After publishing, you can manage the ad status:
- Disable: Pause the ad anytime
- Save & Publish: Apply updates and keep the ad live
You can manage all ads later from: GAM ADS → Manage Ads
Creating Floater Ads
Overview
- Select Floater as the ad type
- Choose where it runs (Desktop, Tablet, Mobile)
- Pick your Google Ad Manager ad unit
- Enable Ad Refresh if needed (Premium)
- Turn Responsive ON or OFF
- Choose ad sizes for each device
- Decide placement (Entire site or specific pages)
- Set the ad alignment
- Click Save & Publish to make it live
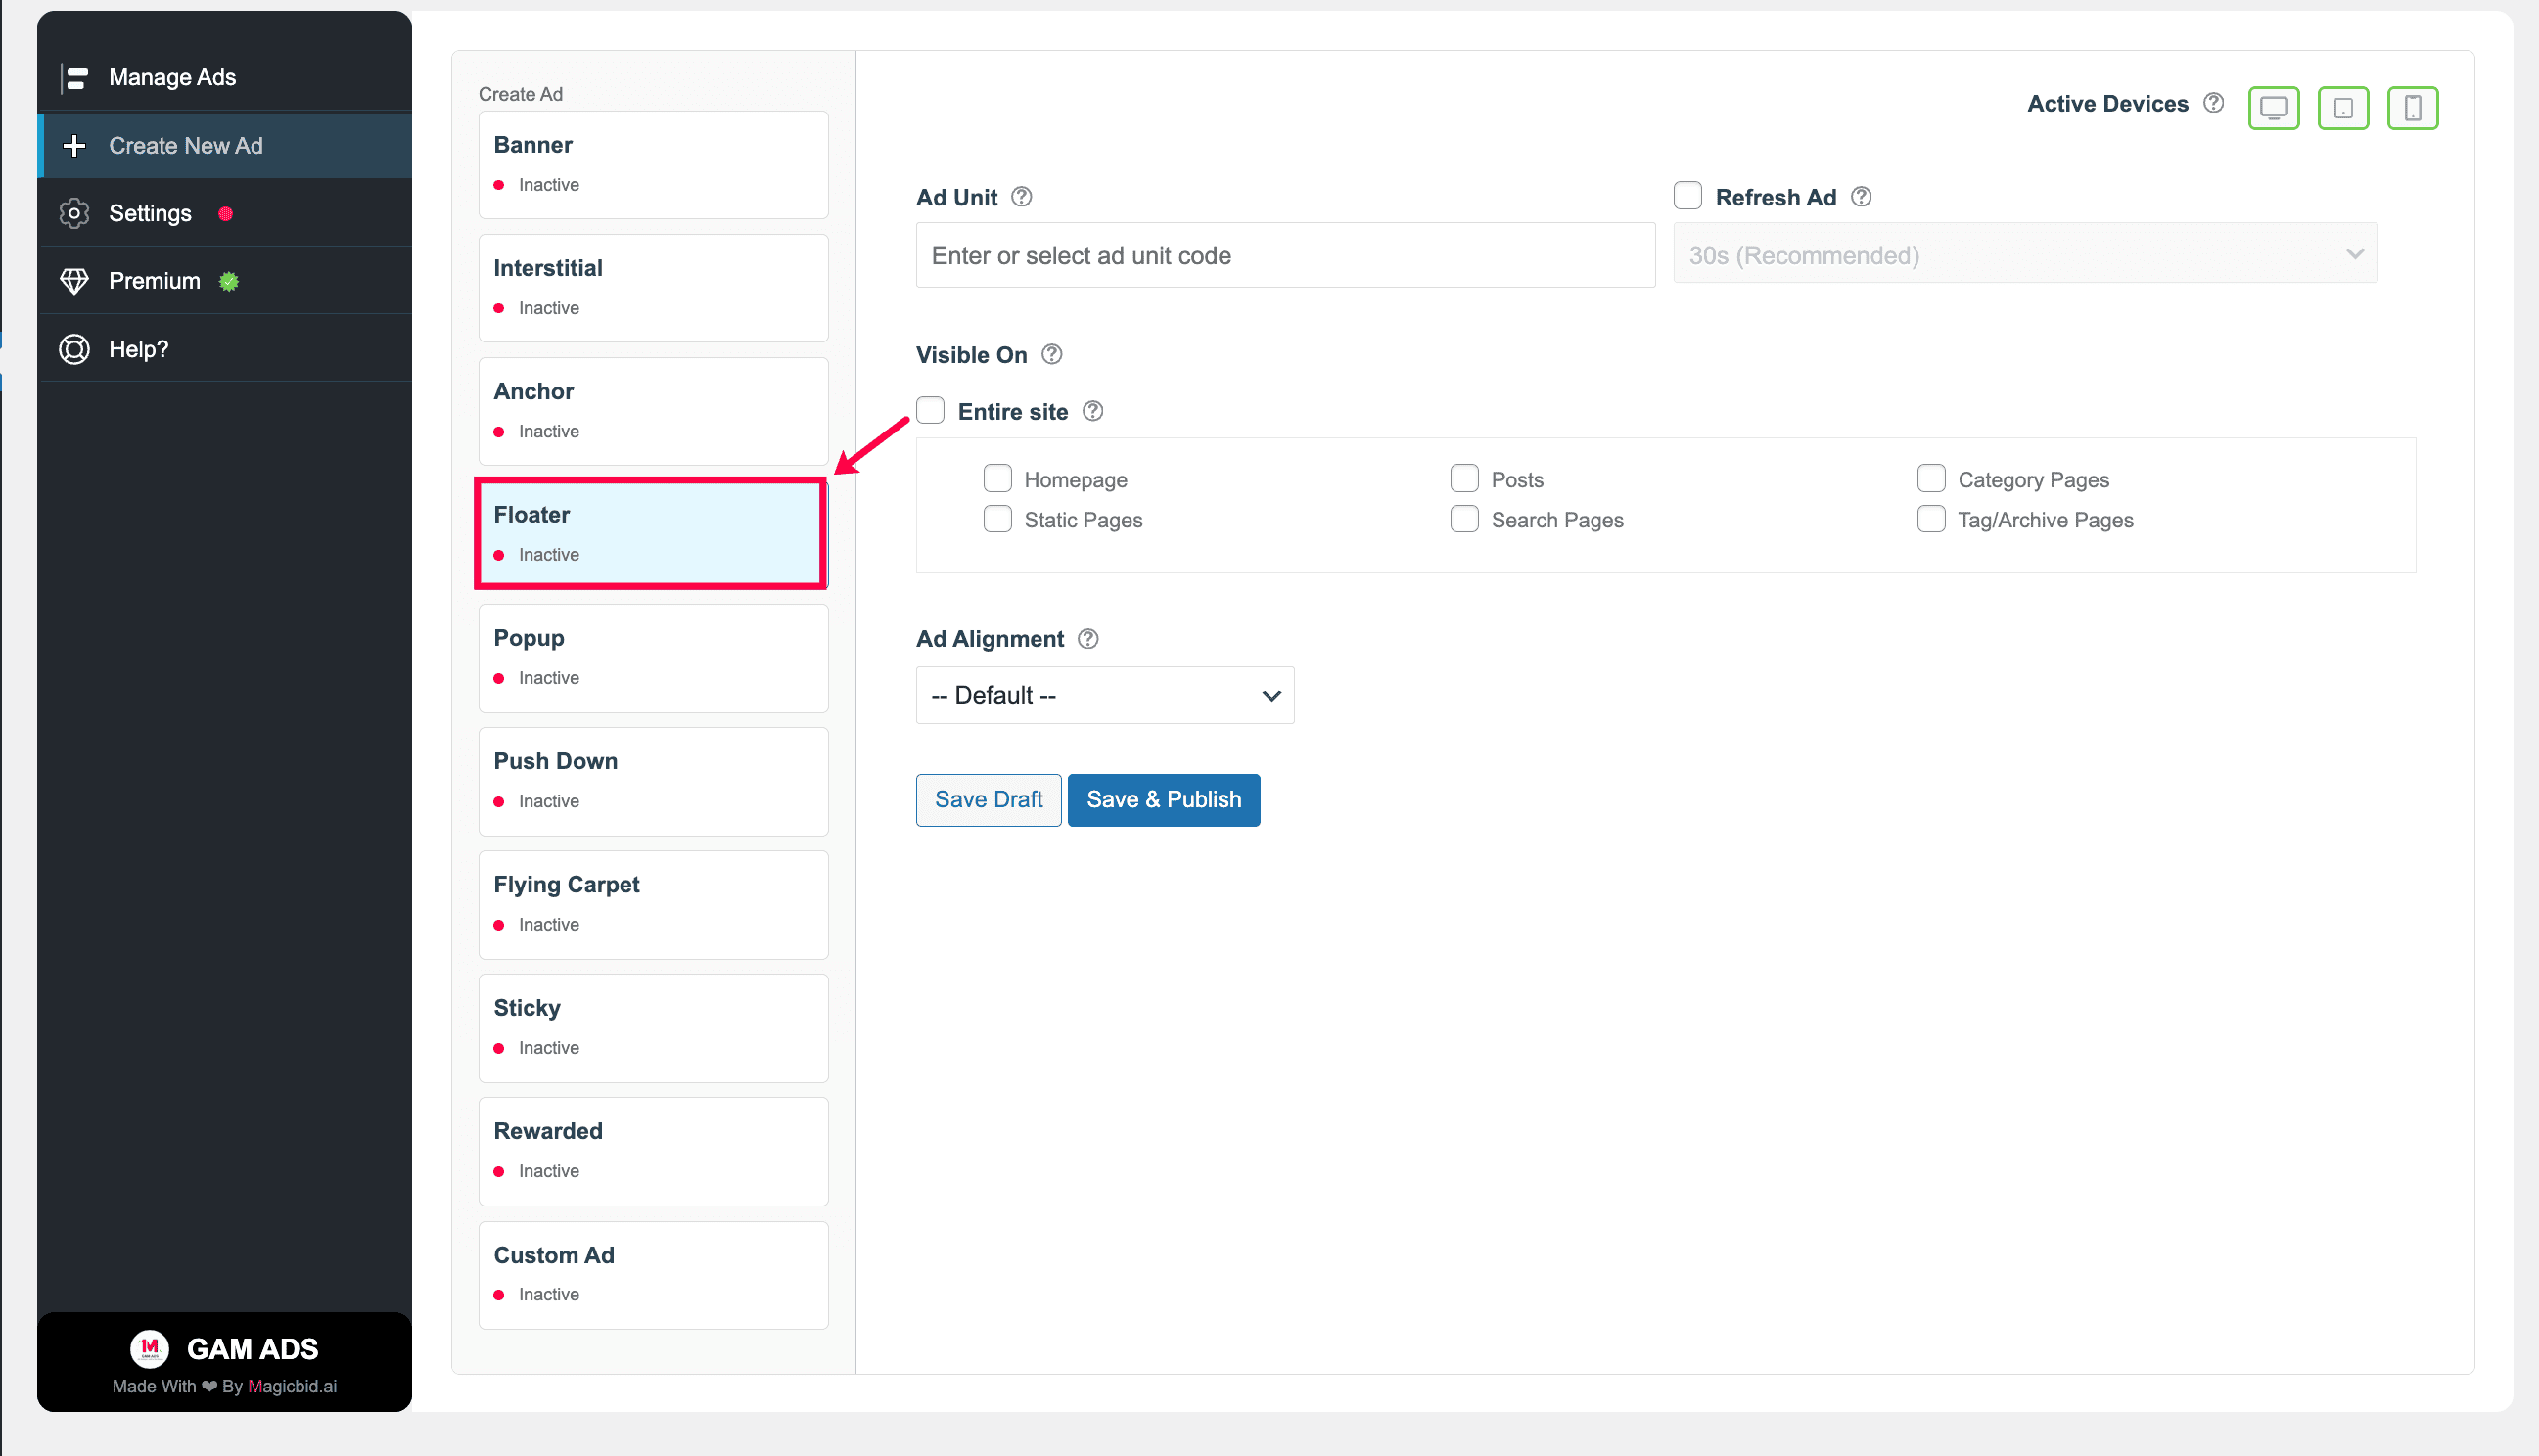
Step 1: Choose Ad Type
Go to Create New Ad and select Floater.
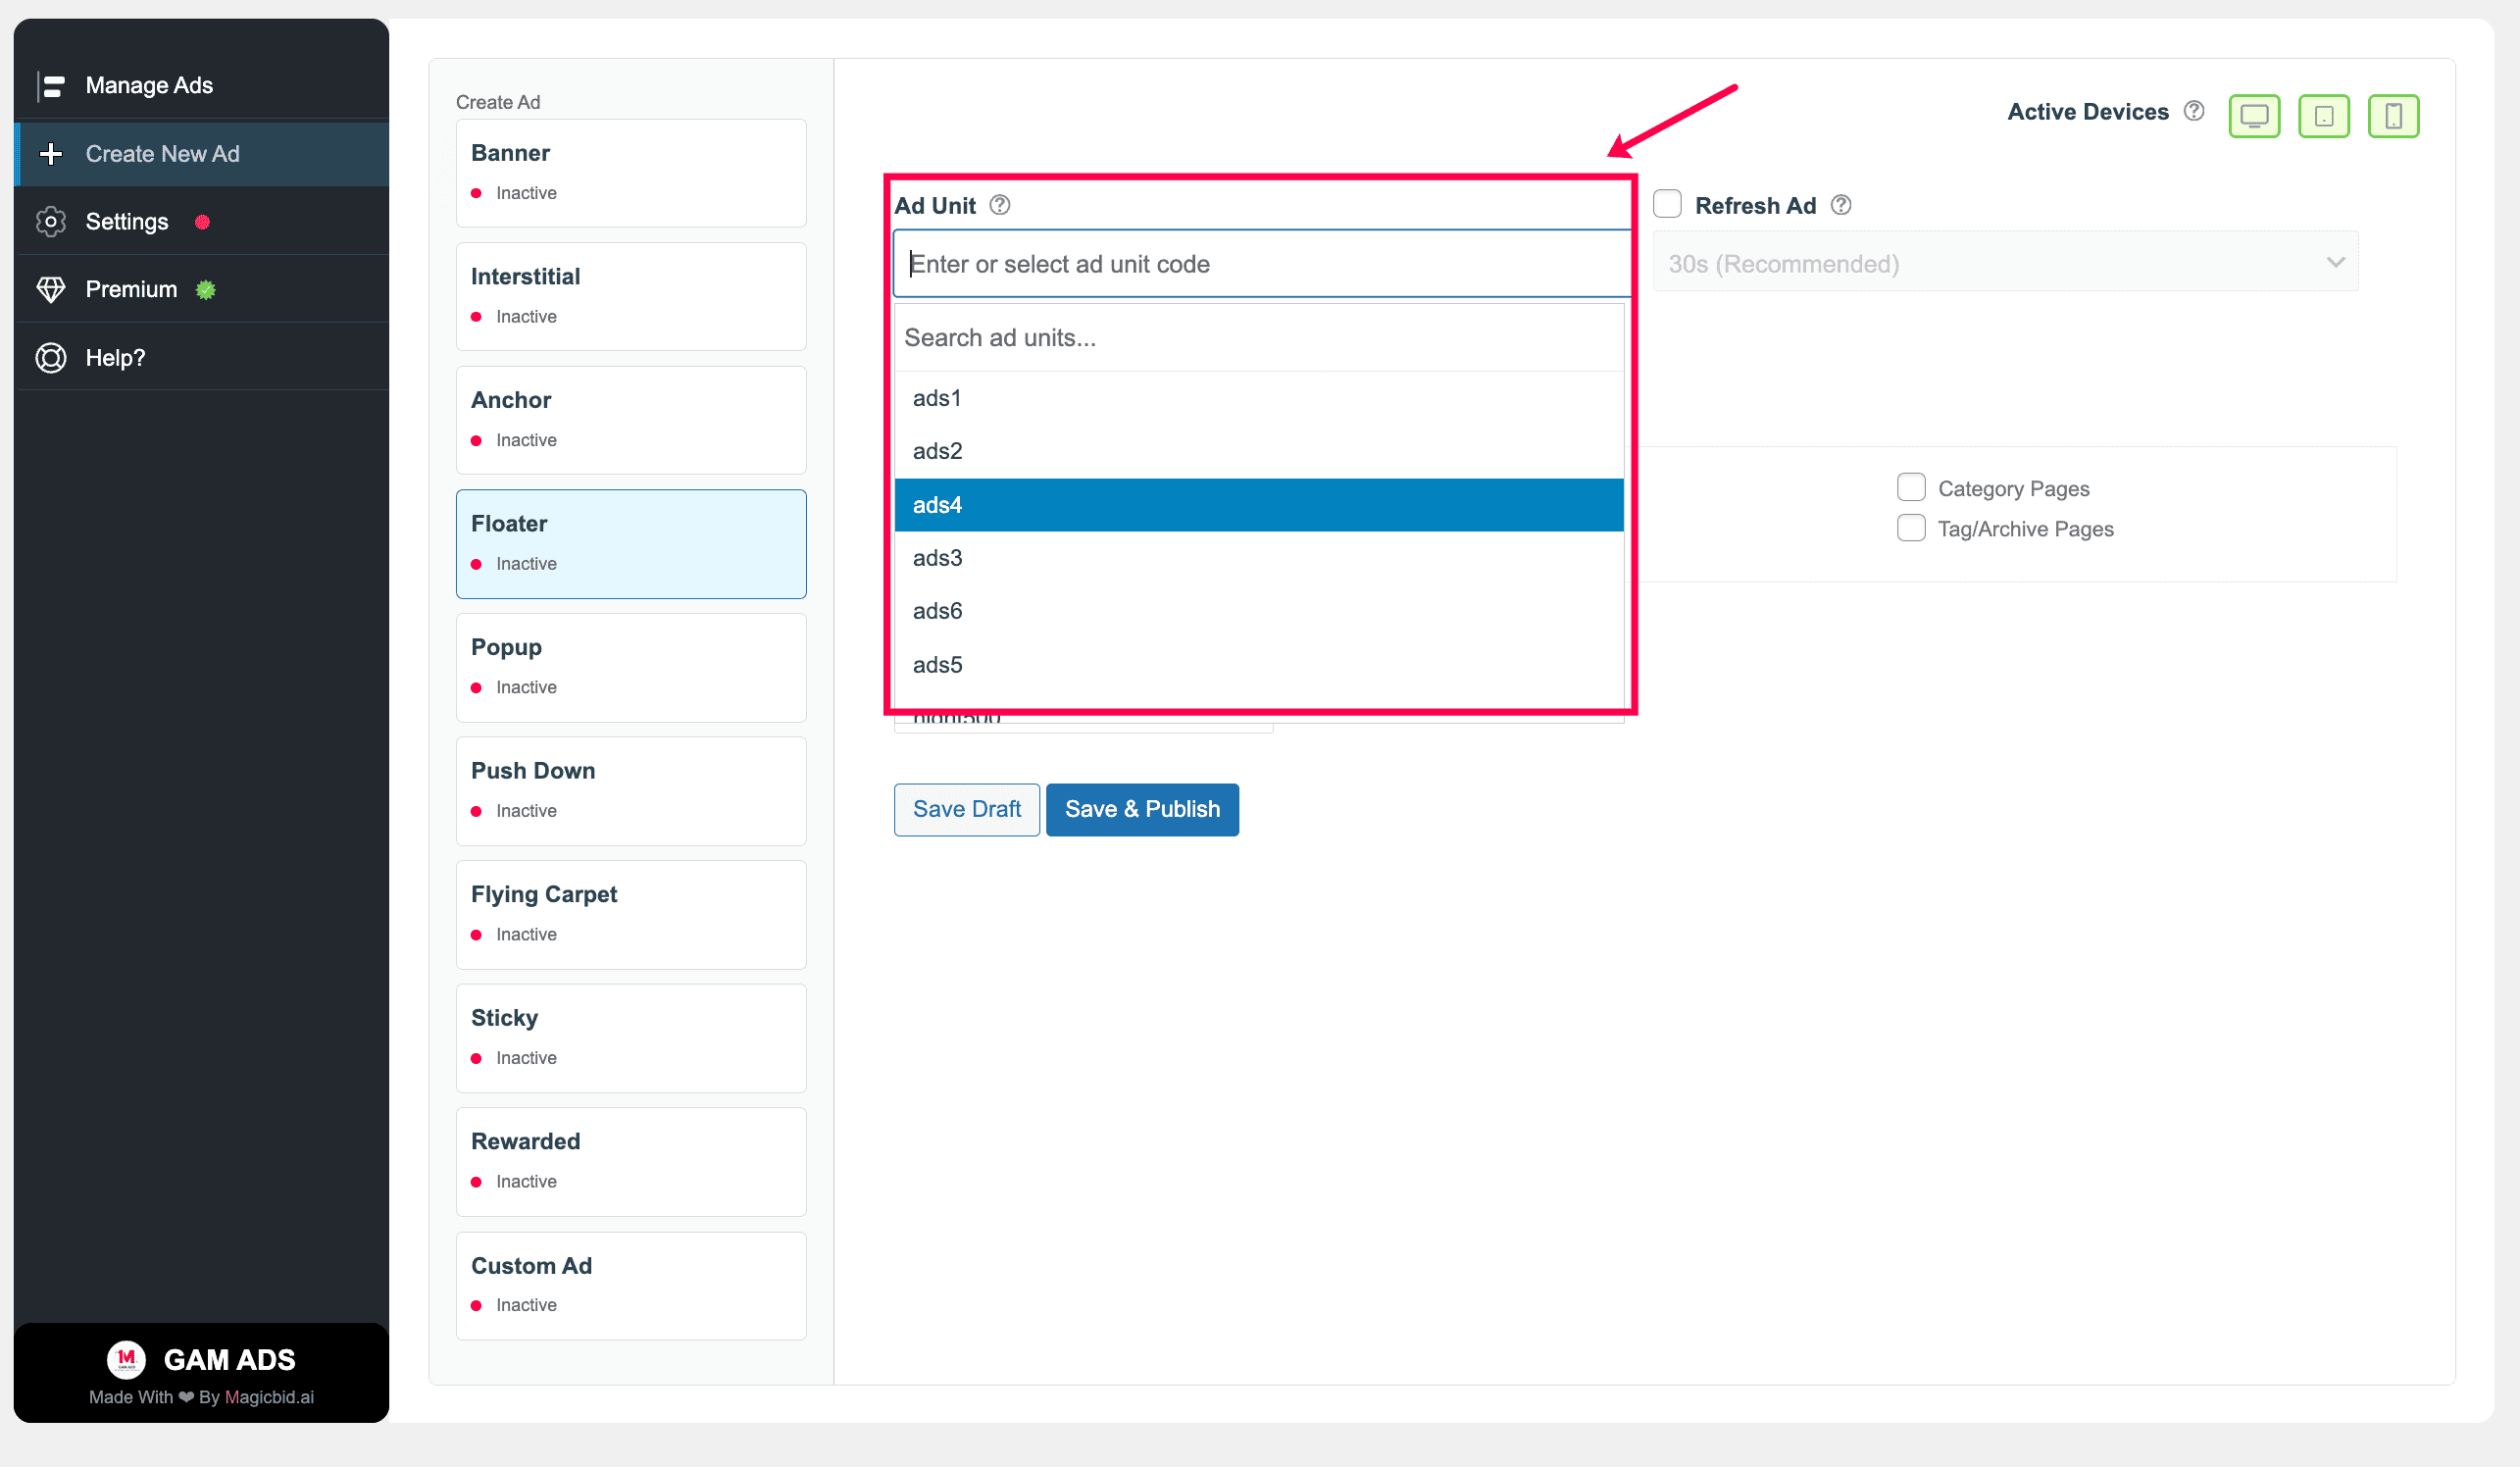
Step 2: Select Ad Unit
Choose the Google Ad Manager ad unit you want to serve.
Note: The ad unit must already exist in your Google Ad Manager account in order to appear in this list.
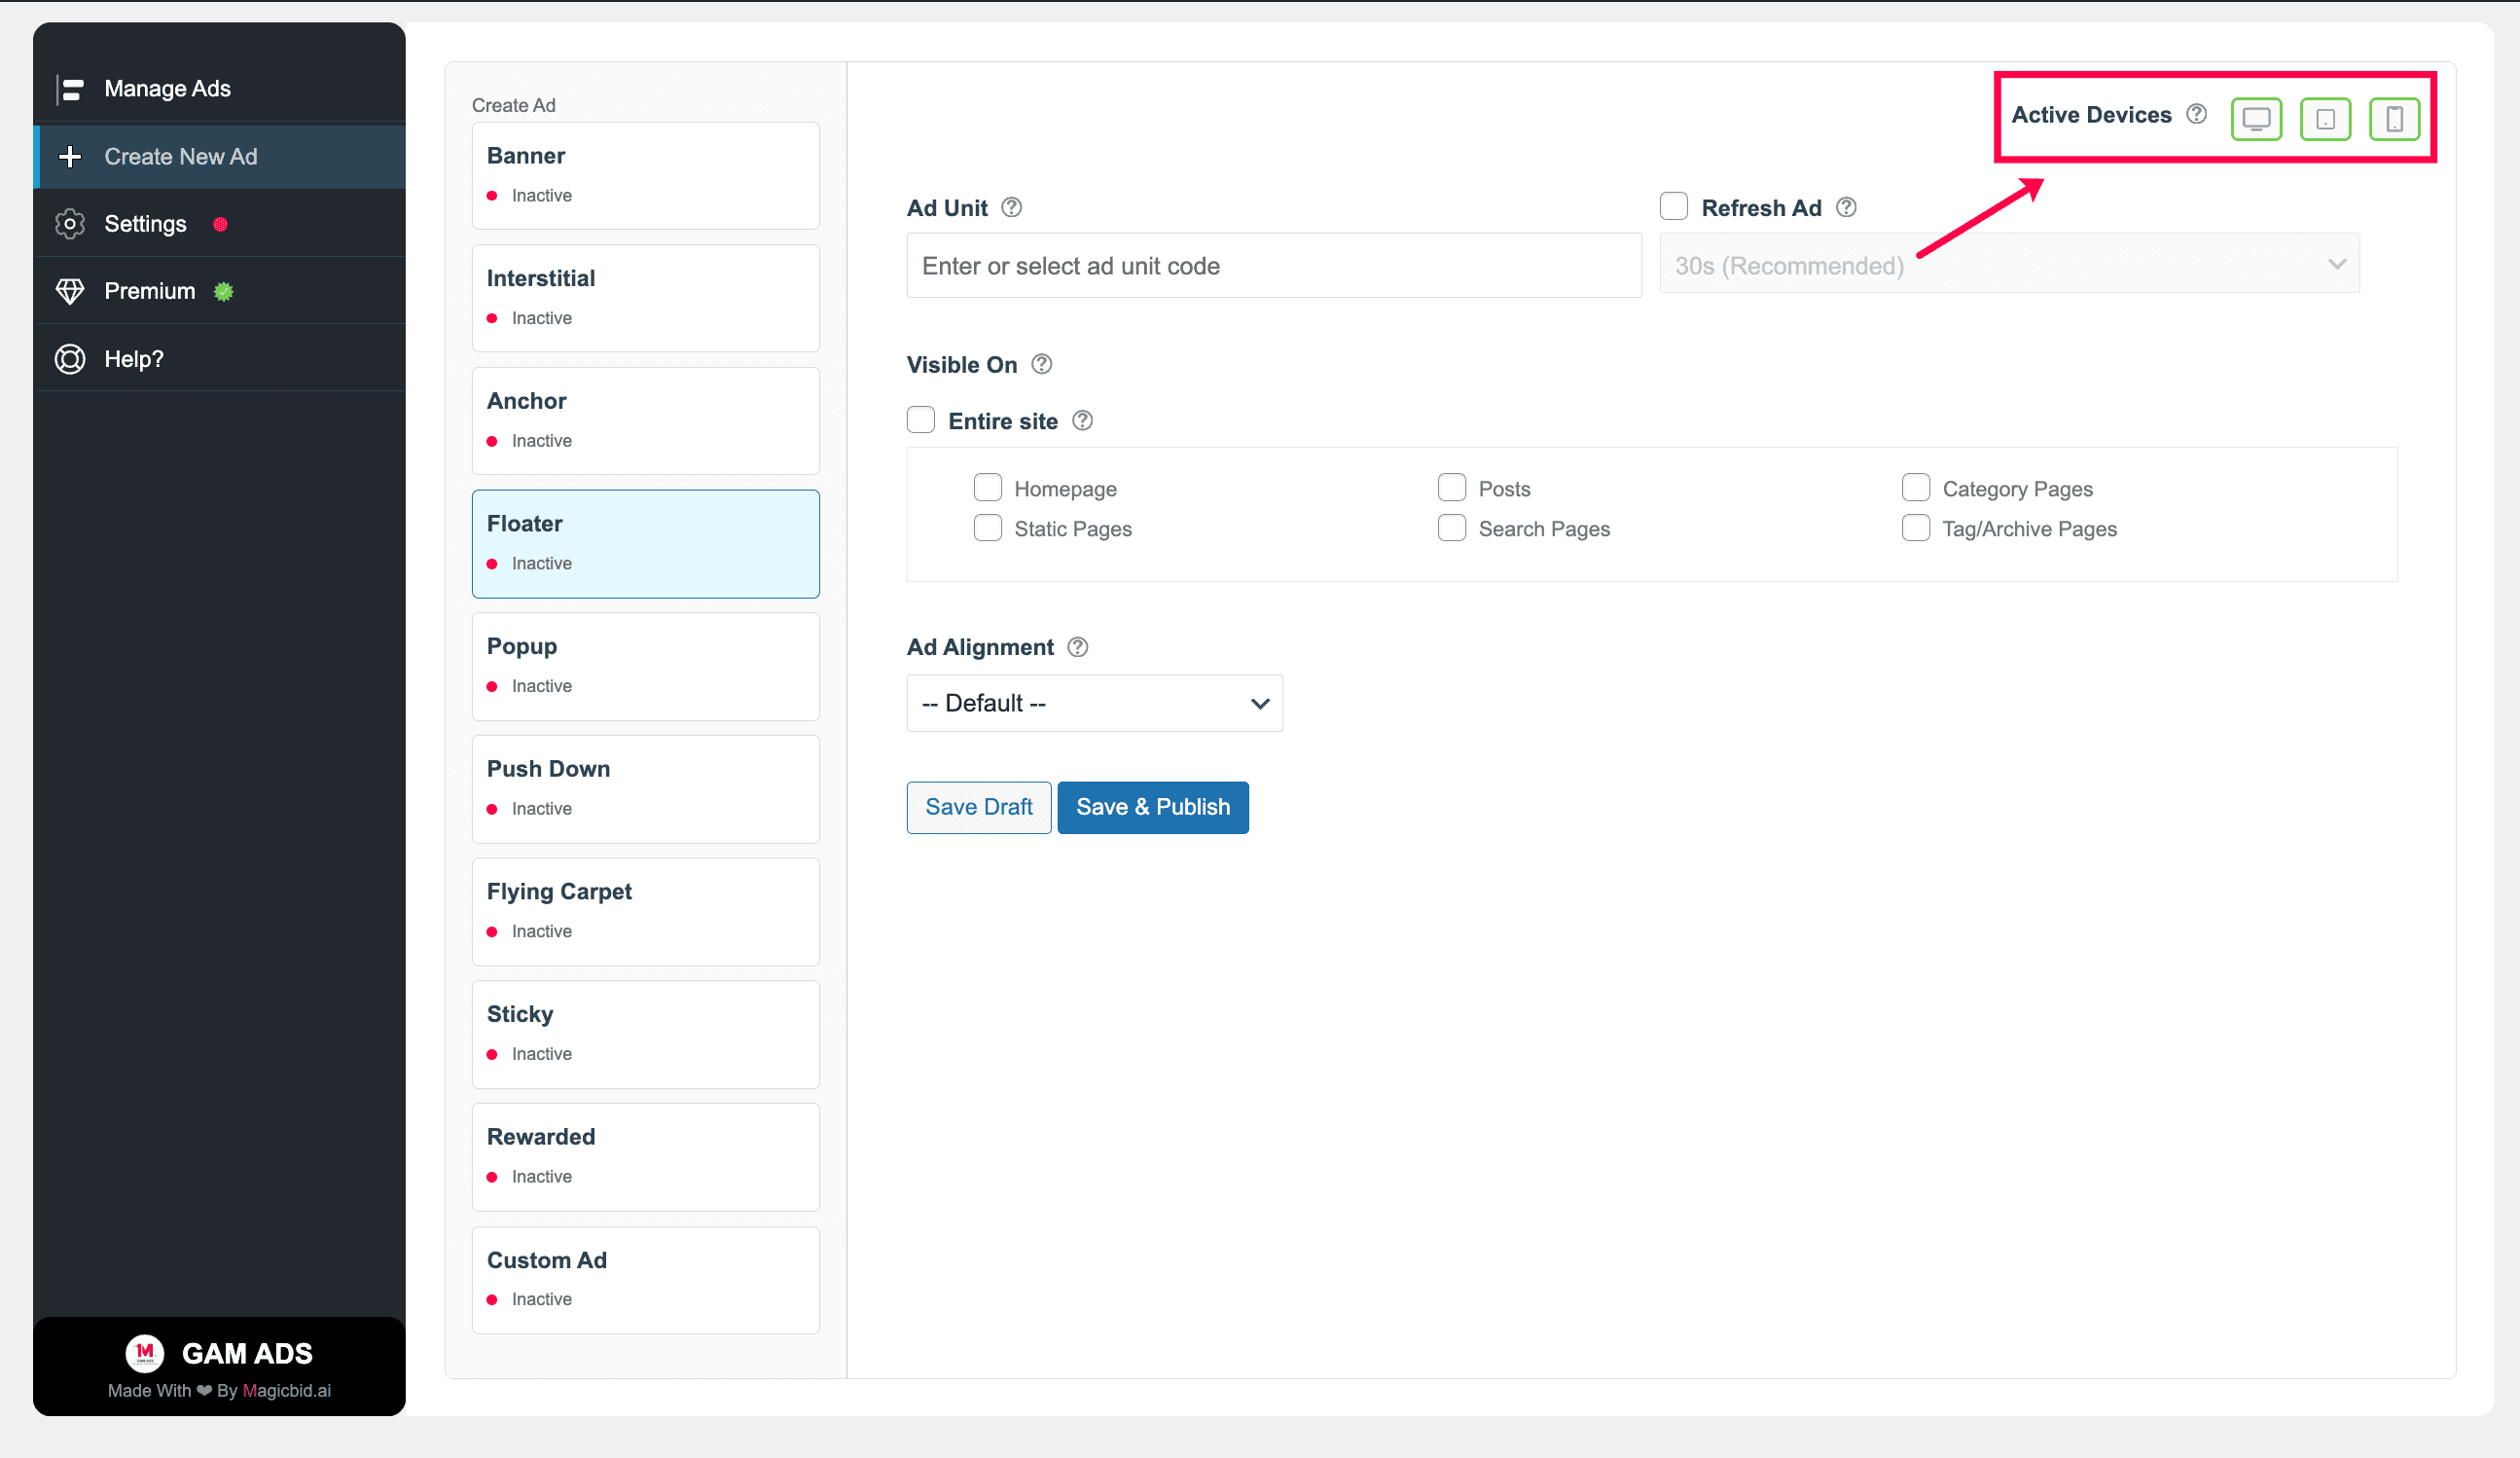
Step 3: Choose Devices
Under Active Devices, select where this ad should run:
- Desktop
- Tablet
- Mobile
You may enable one, two, or all three device types.
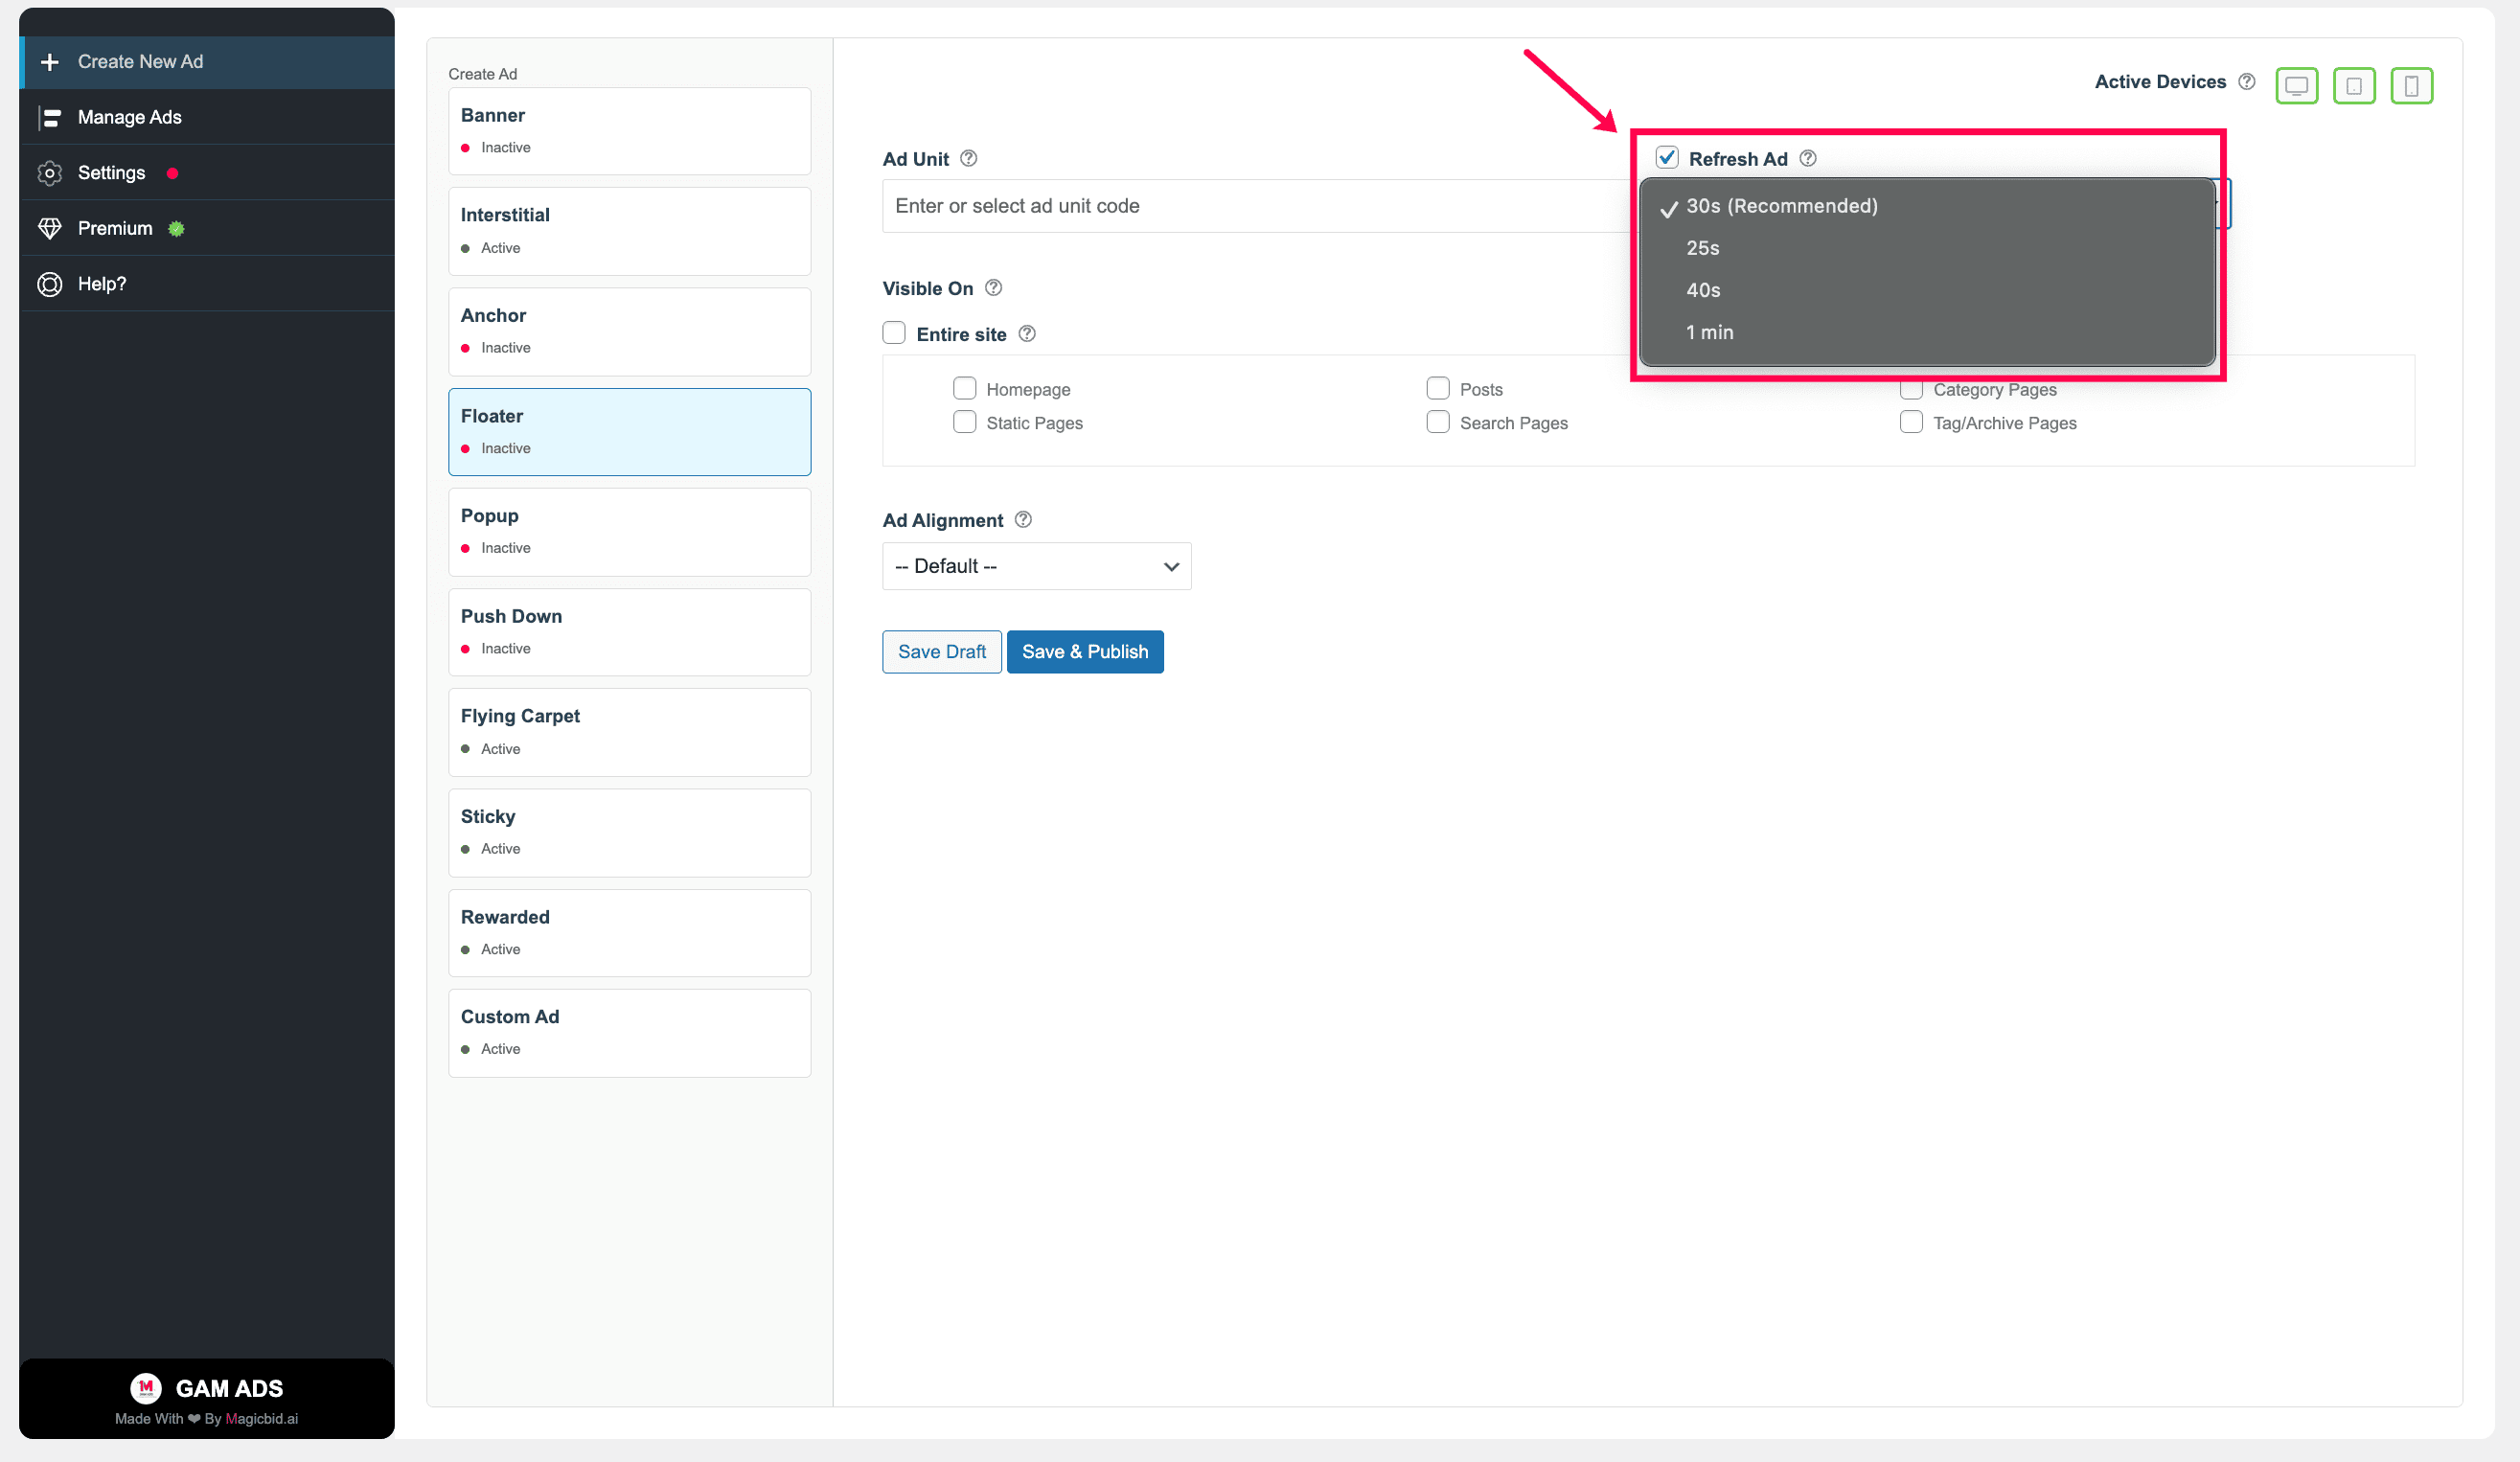
Step 4: Ad Refresh (Premium Feature)
Enable or disable ad refresh.
- ON: Reloads the ad after a set interval
- OFF: Keeps the ad static
Note: This feature is available for premium users only.
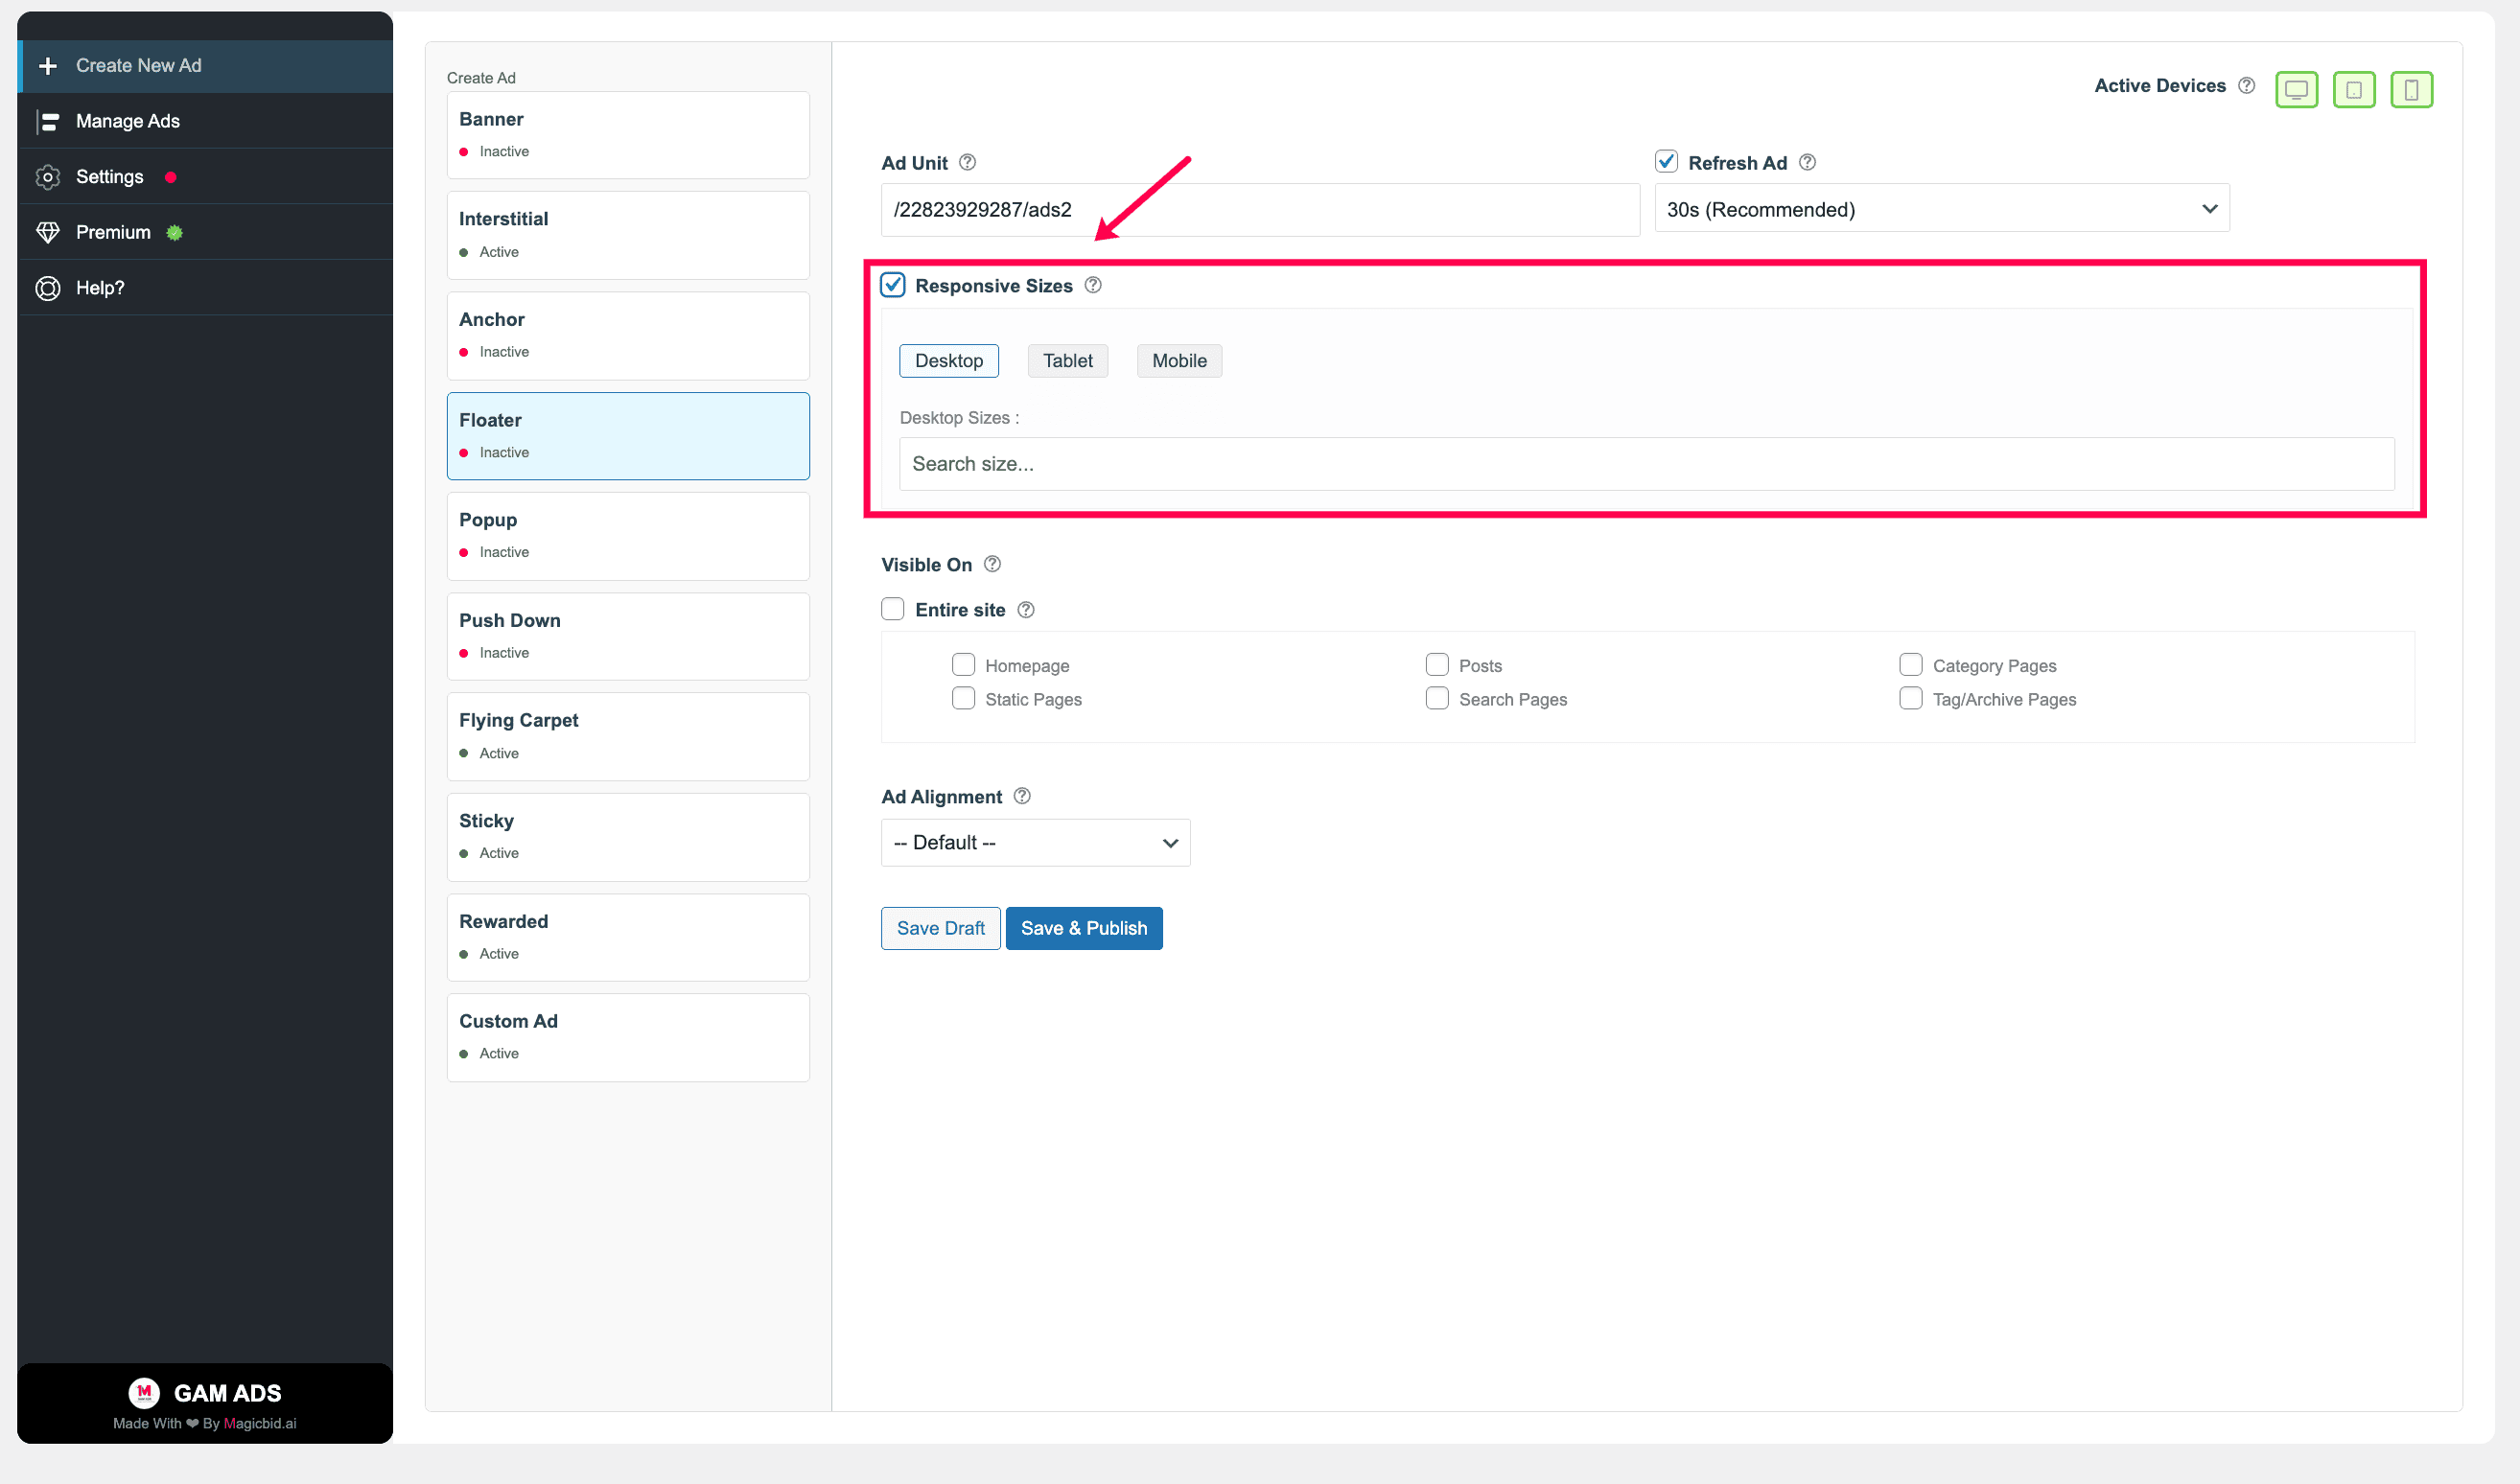
Step 5: Responsive Setting
Decide if the ad should be responsive.
- ON: Automatically adjusts to screen size
- OFF: Uses only fixed ad sizes
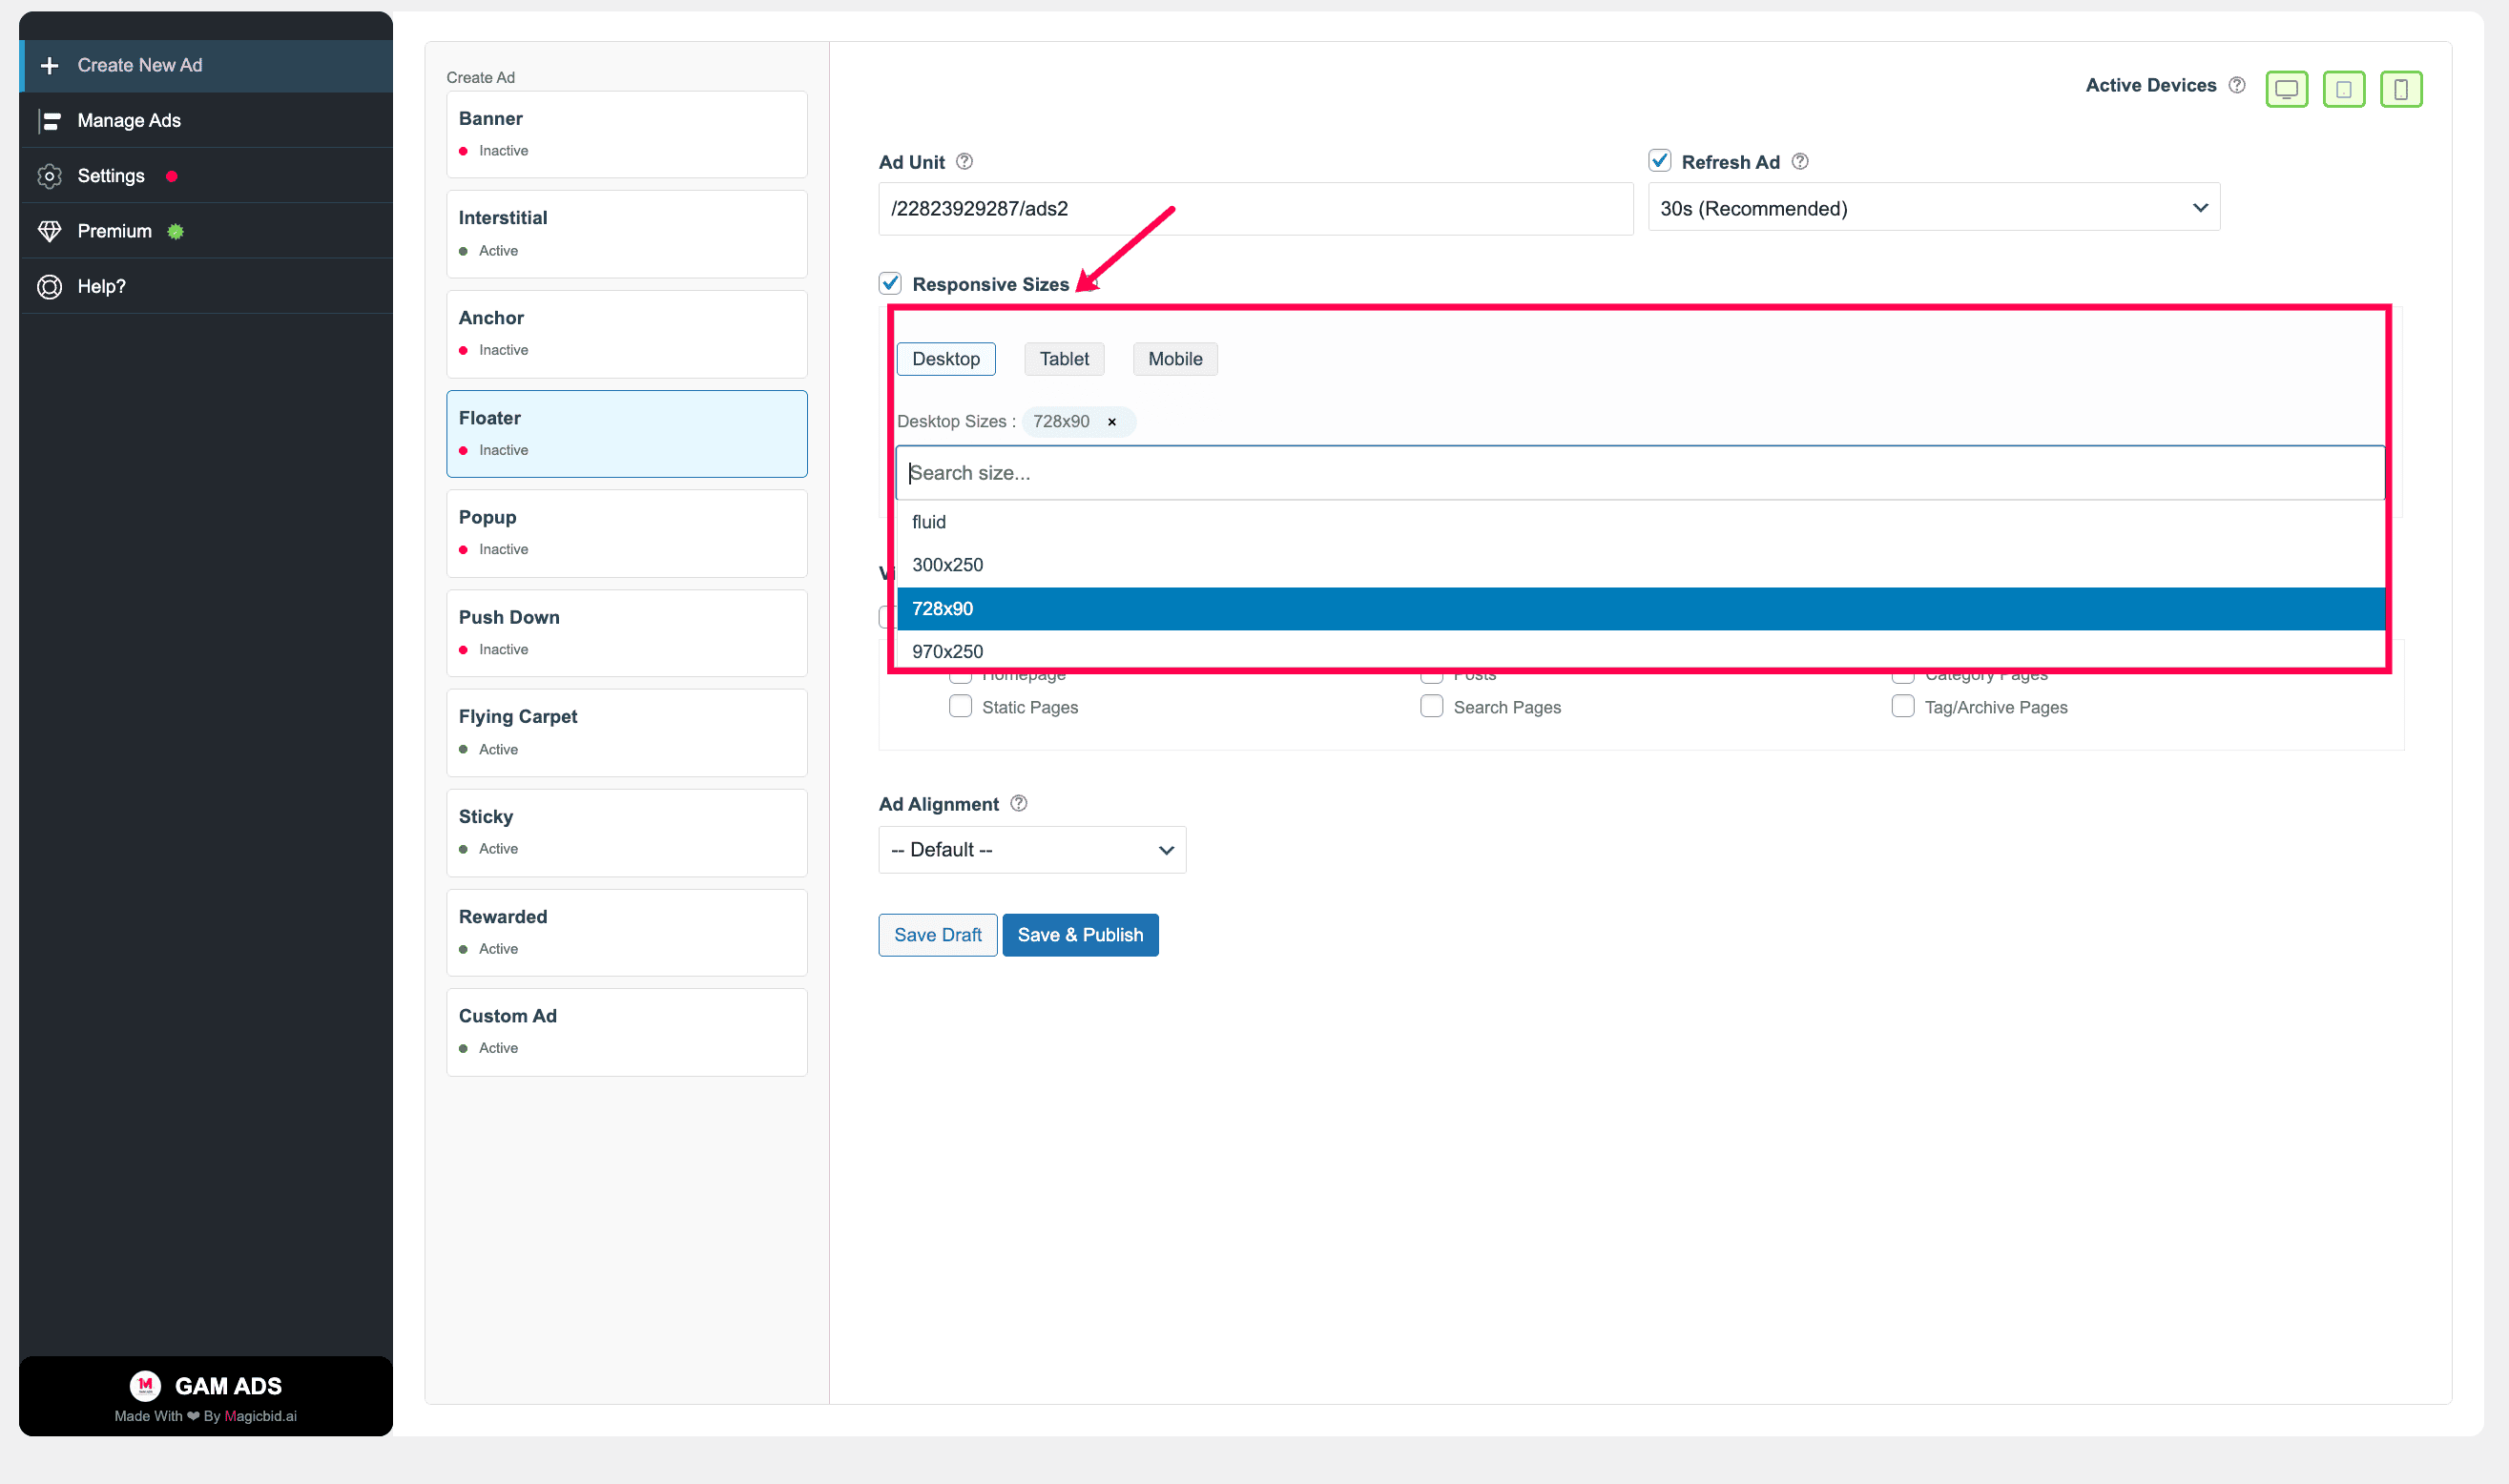
Step 6: Choose Ad Sizes
Select ad sizes for each device.
Example:
- Desktop: 728×90, 300×250
- Mobile: 320×50, 300×250
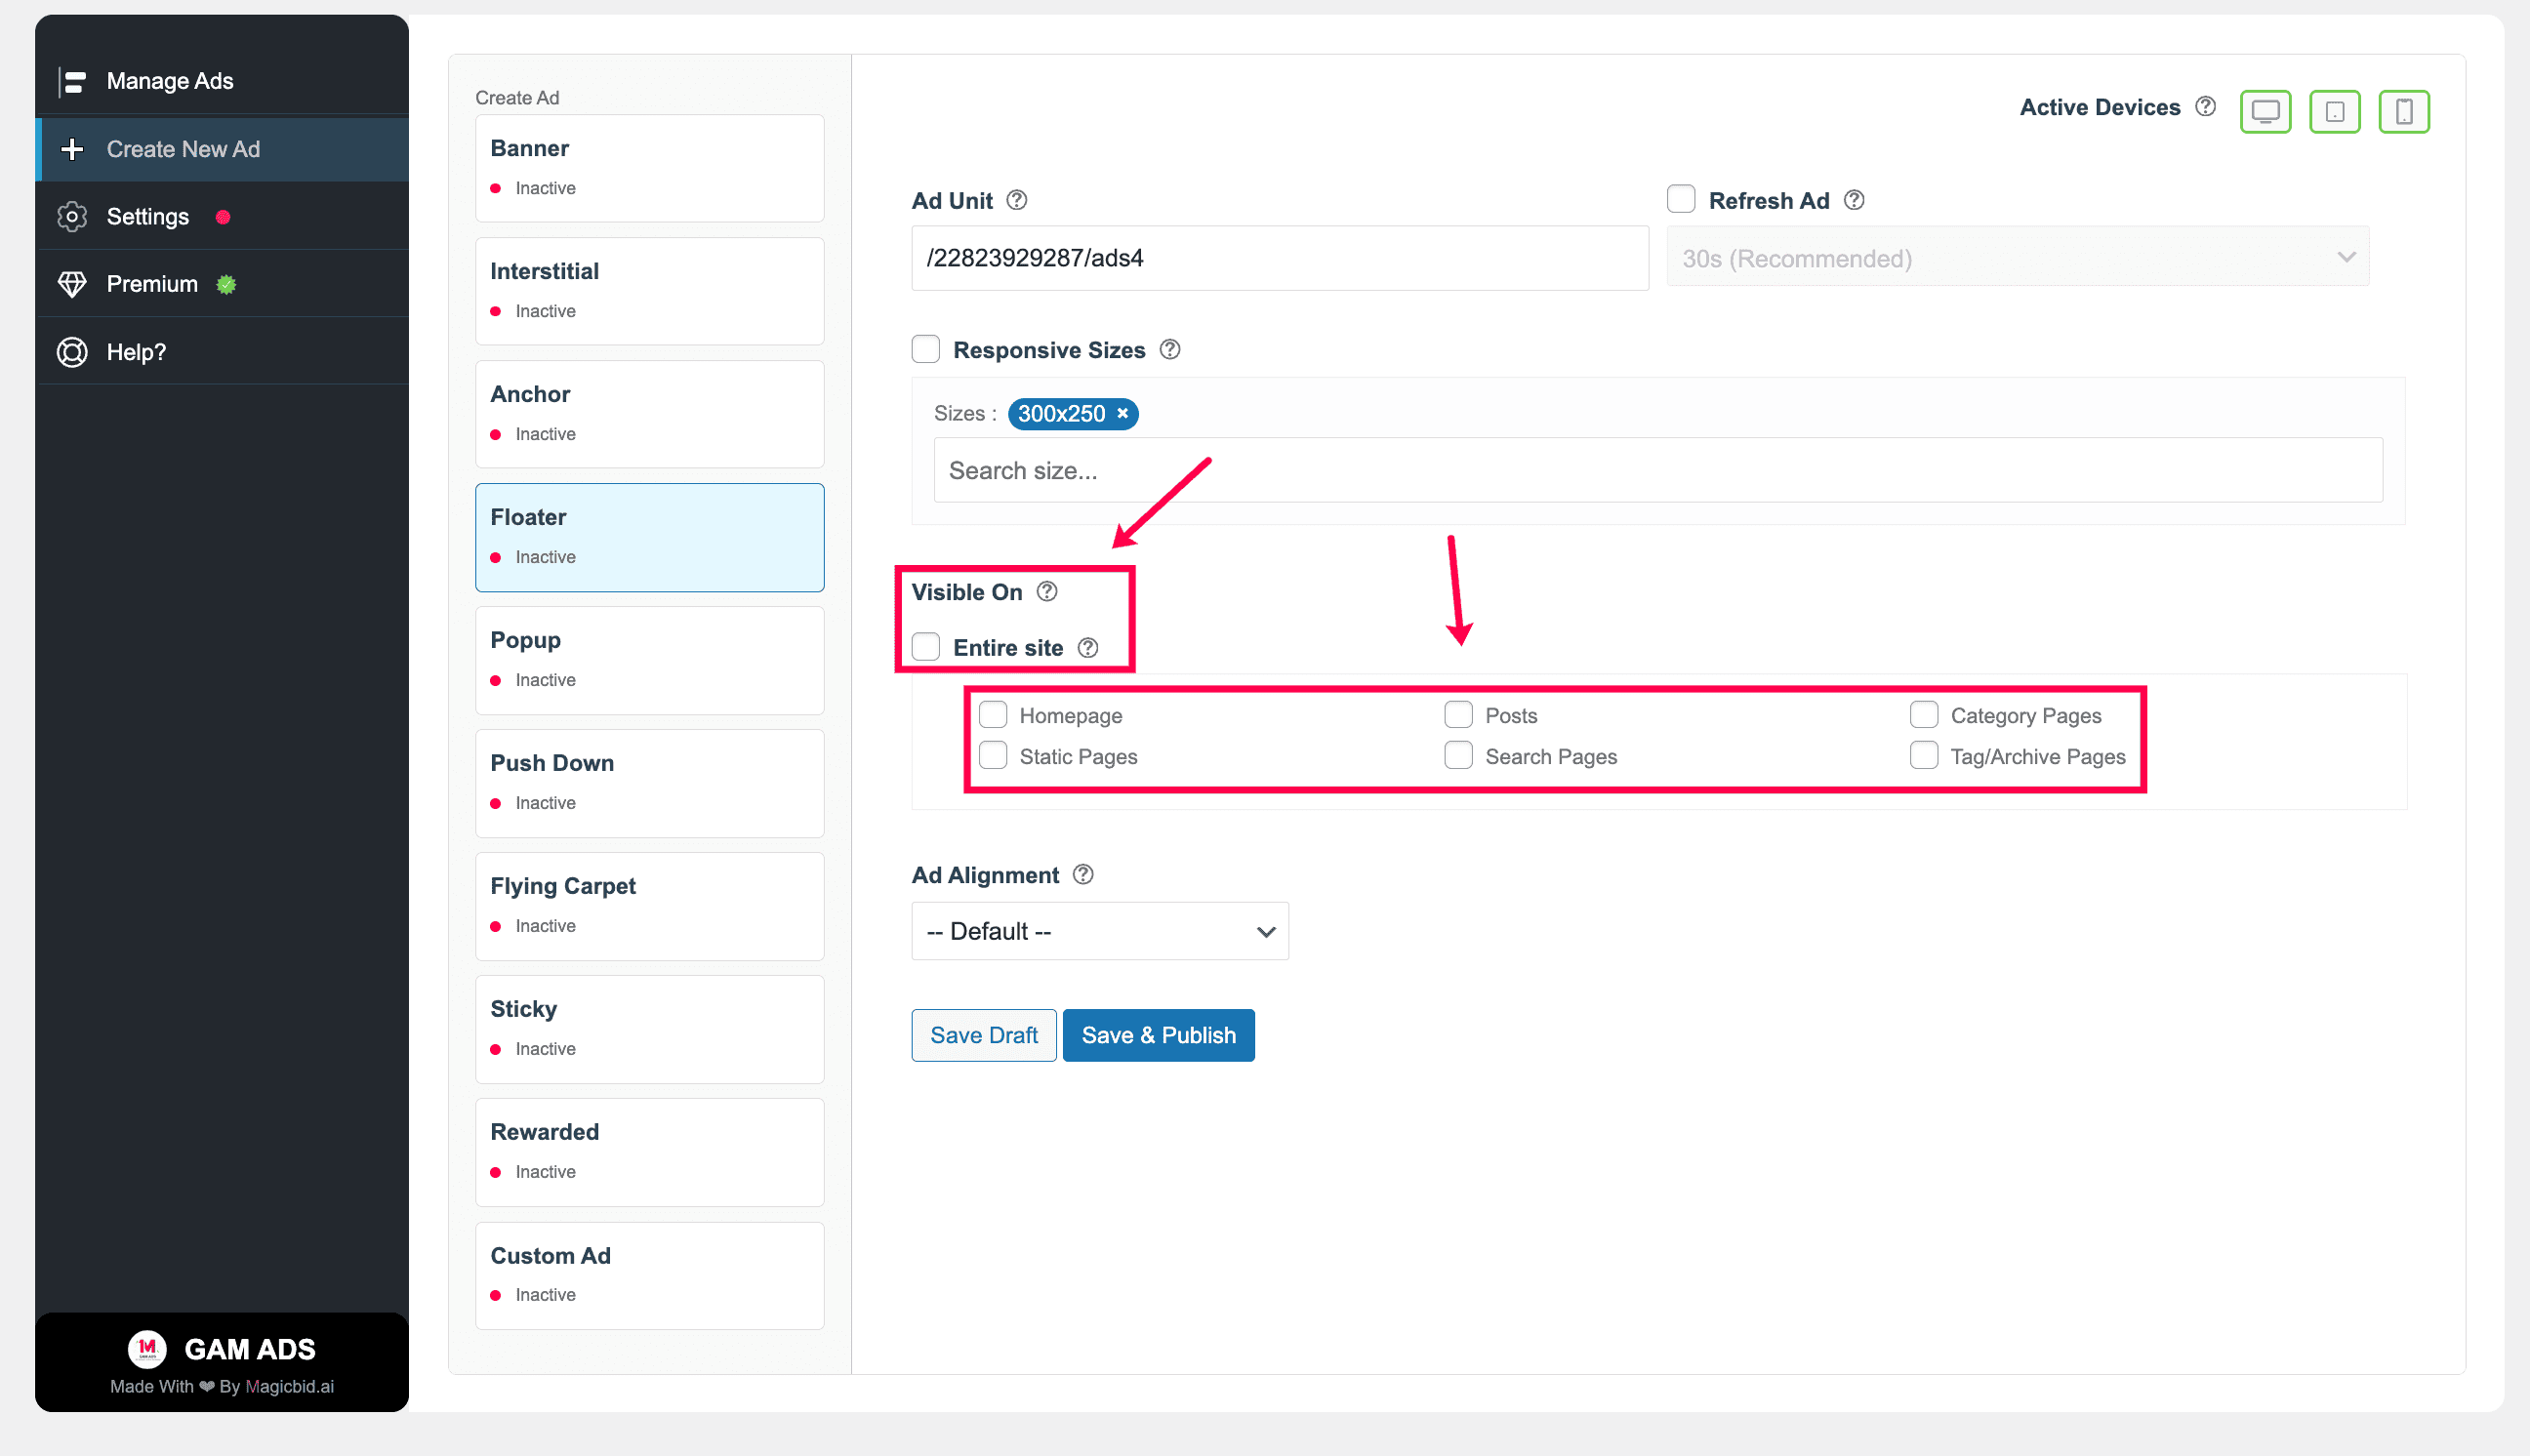
Step 7: Placement Rules
Choose where this ad should appear.
- Entire Site: Shows on all pages
- Specific Pages: Shows only on selected posts, pages, or categories
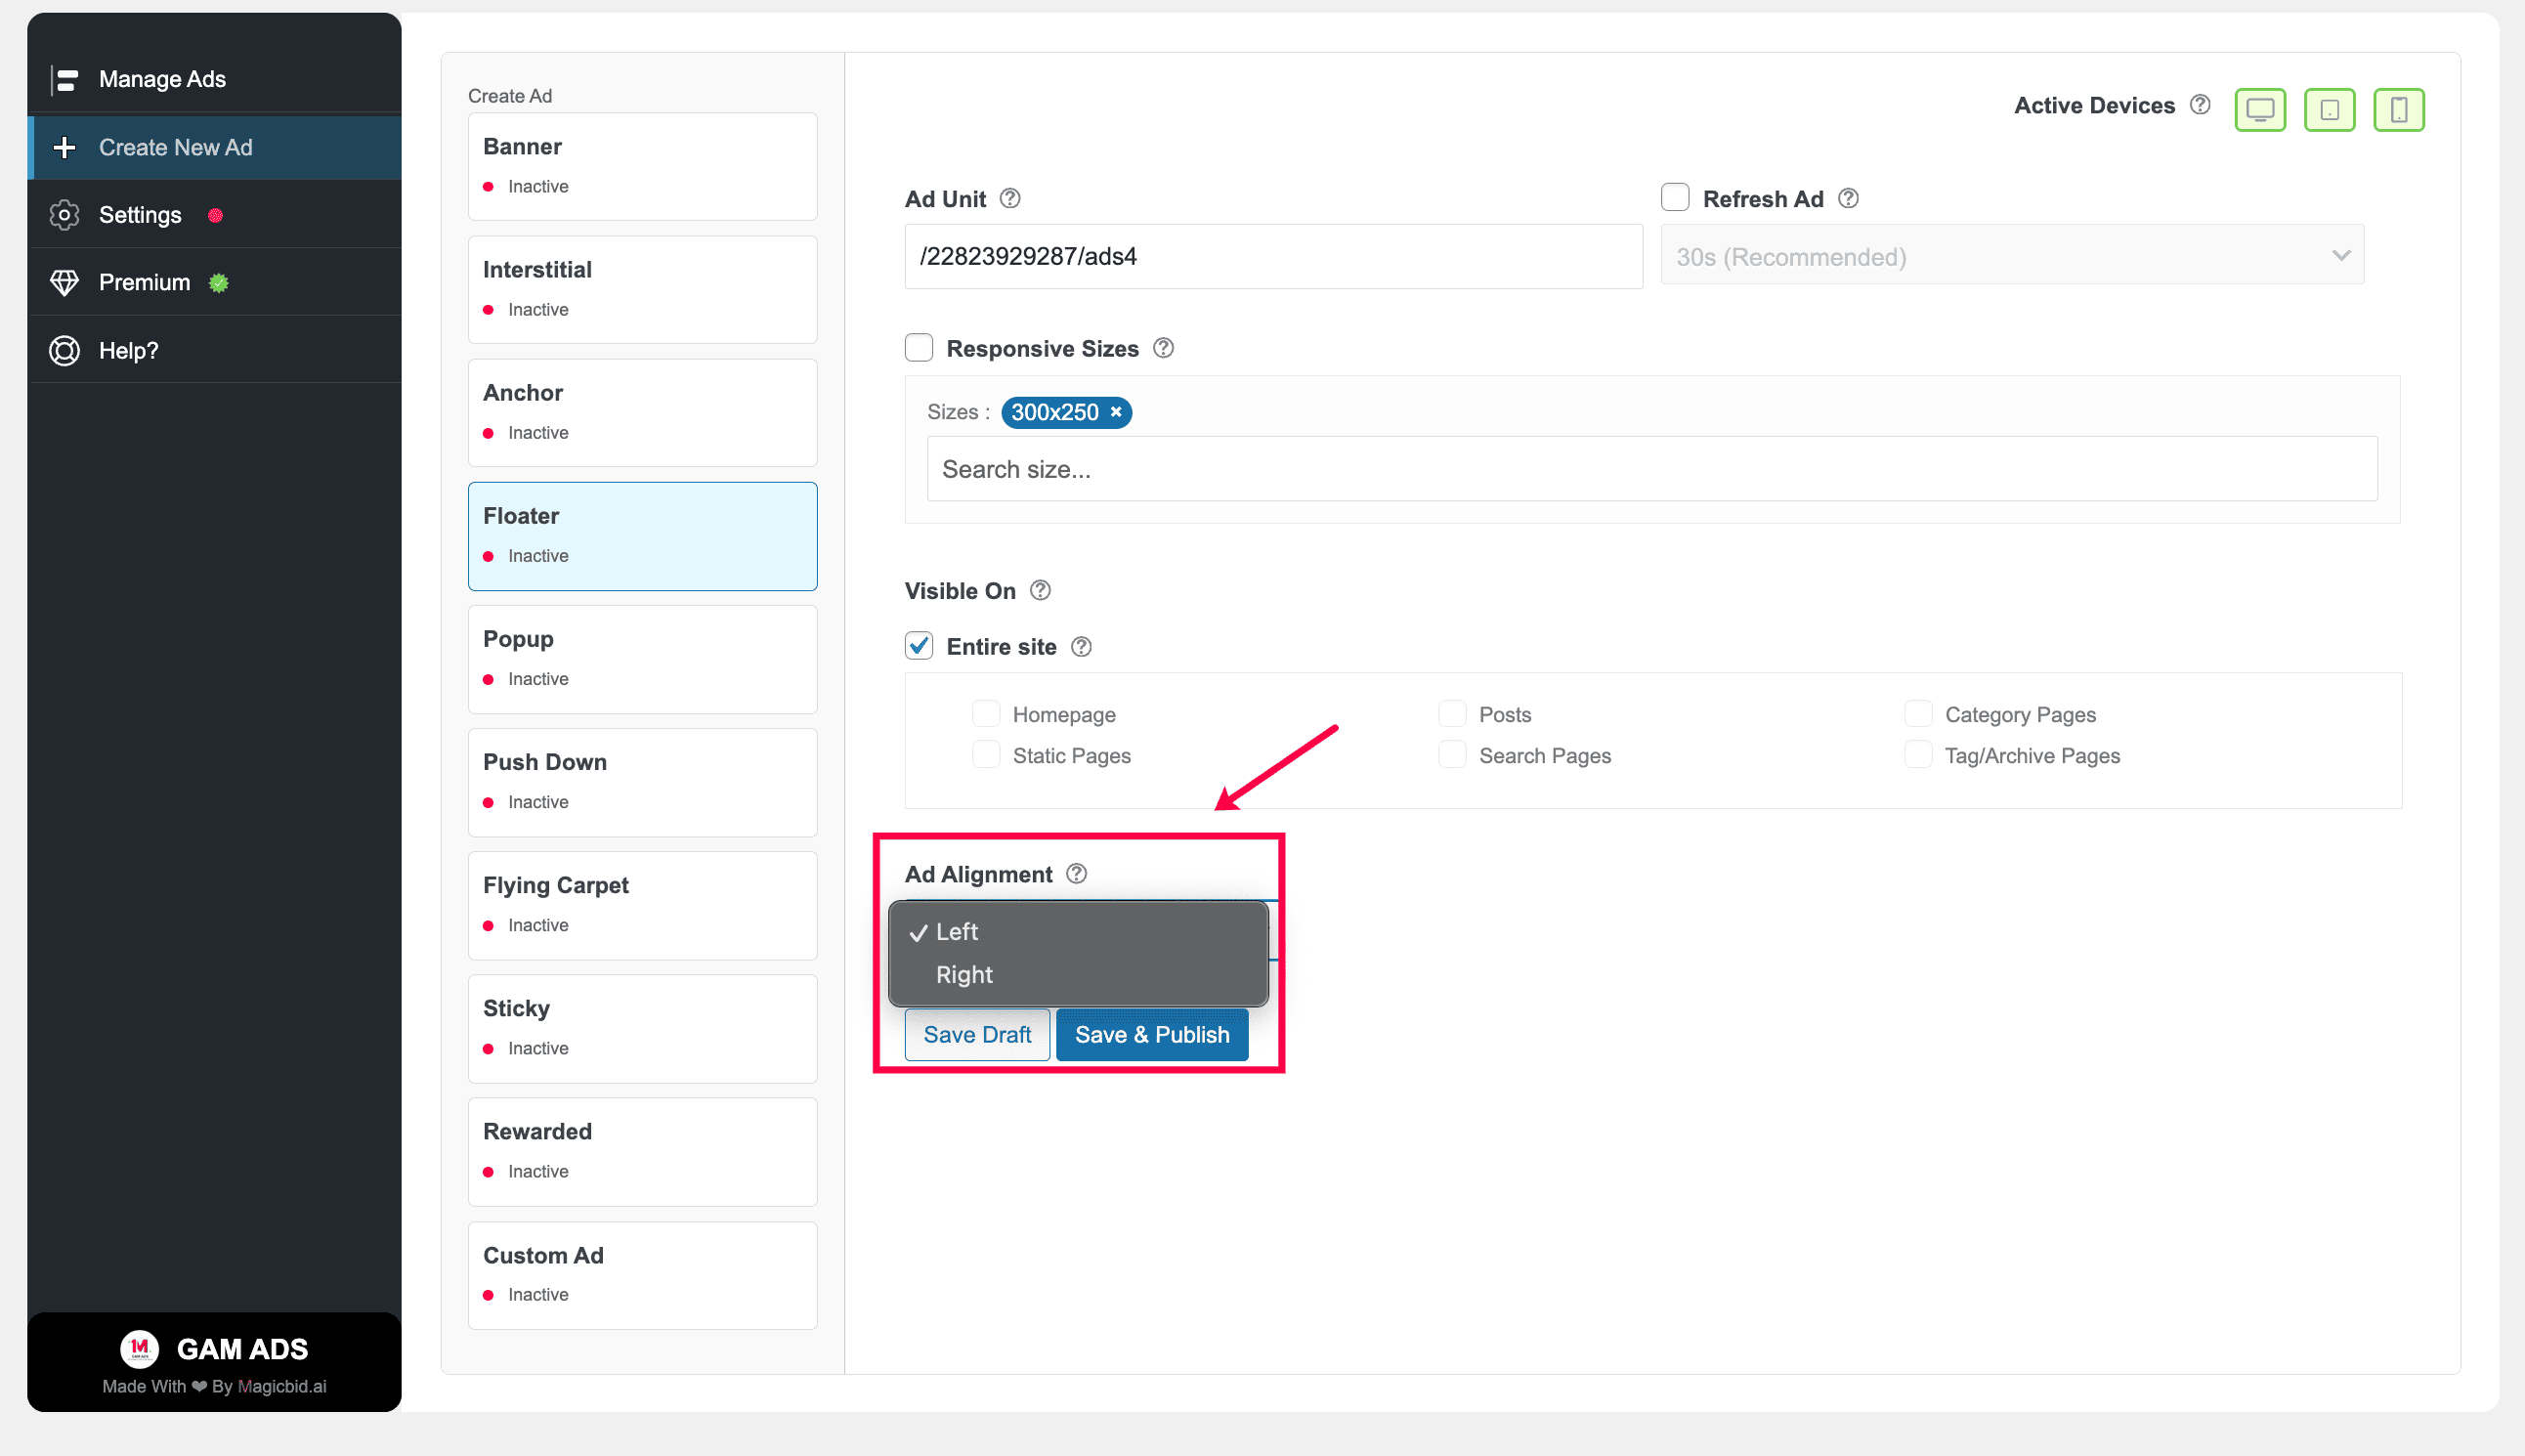
Step 8: Ad Alignment
Controls how the ad is positioned inside its placement container.
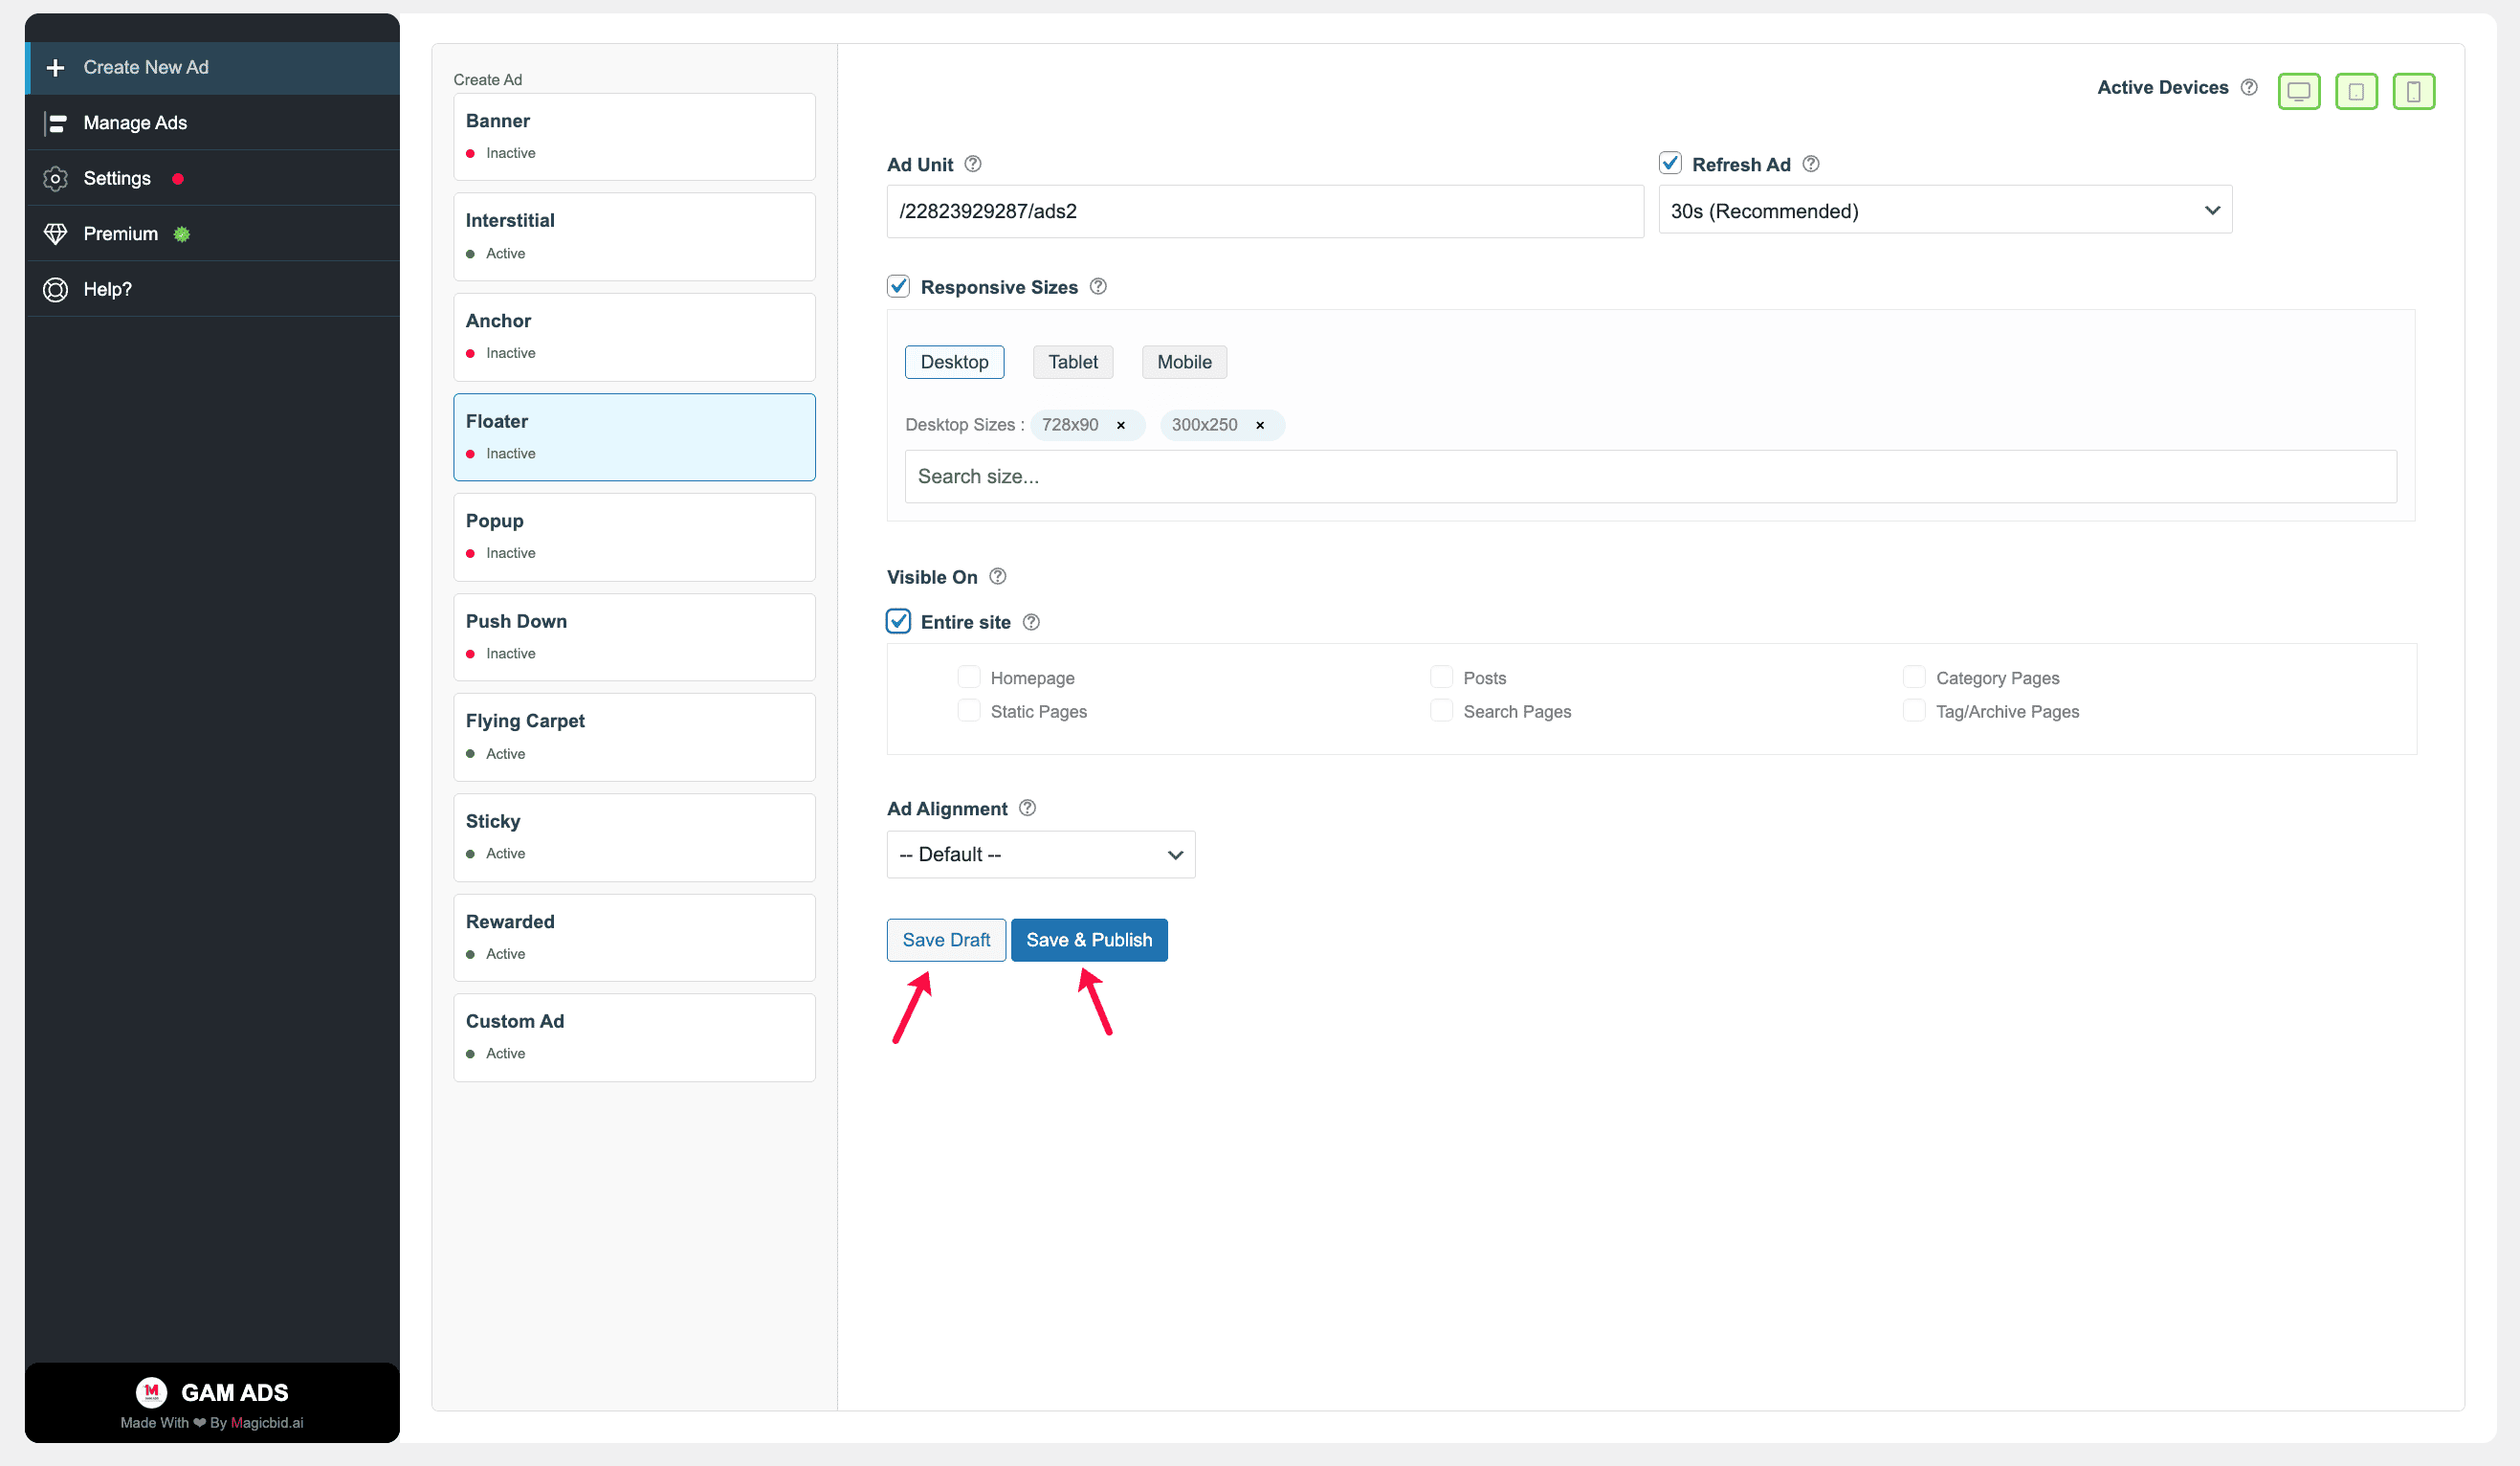
Step 9: Save Your Ad
Save Draft: Saves the ad without publishing it.
Save & Publish: Saves the ad and makes it live immediately.
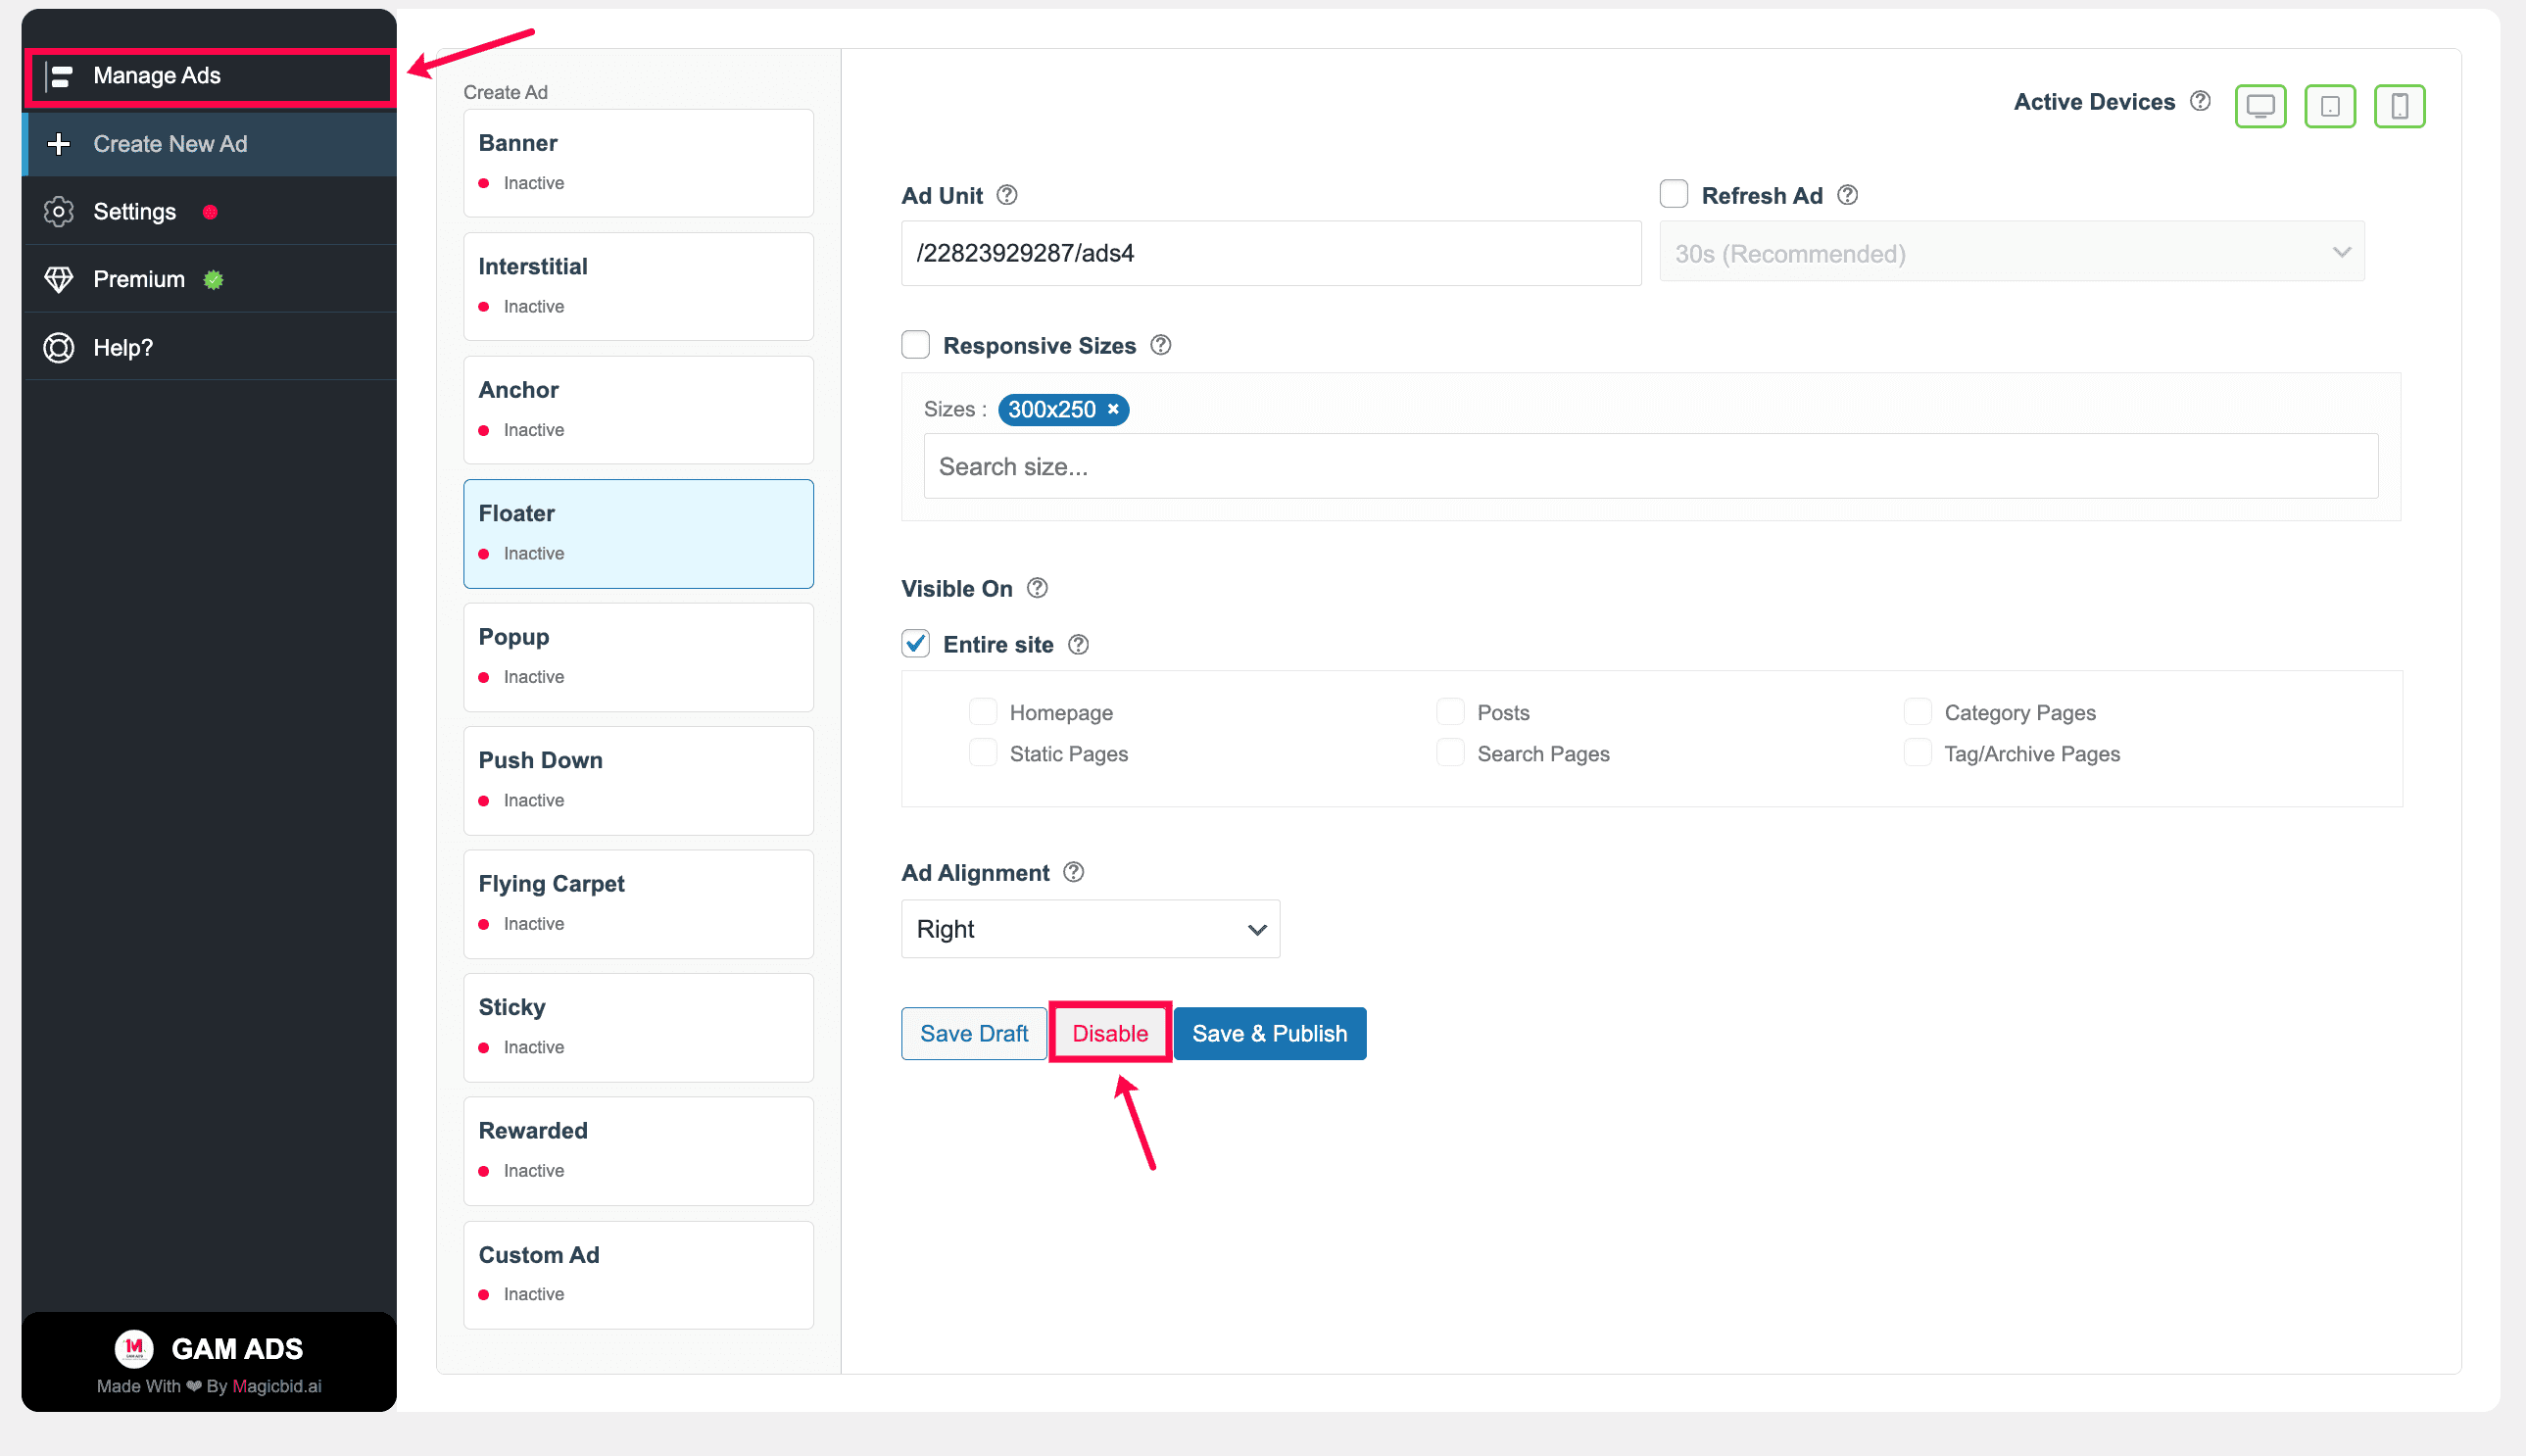
Step 10: Manage Ad Status
After publishing, you can manage the ad status:
- Disable: Pause the ad anytime
- Save & Publish: Apply updates and keep the ad live
You can manage all ads later from: GAM ADS → Manage Ads
Creating Popup Ads
Overview
- Select Popup as the ad type
- Choose where it runs (Desktop, Tablet, Mobile)
- Pick your Google Ad Manager ad unit
- Turn Responsive ON or OFF
- Choose ad sizes for each device
- Decide placement (Entire site or specific pages)
- Click Save & Publish to make it live
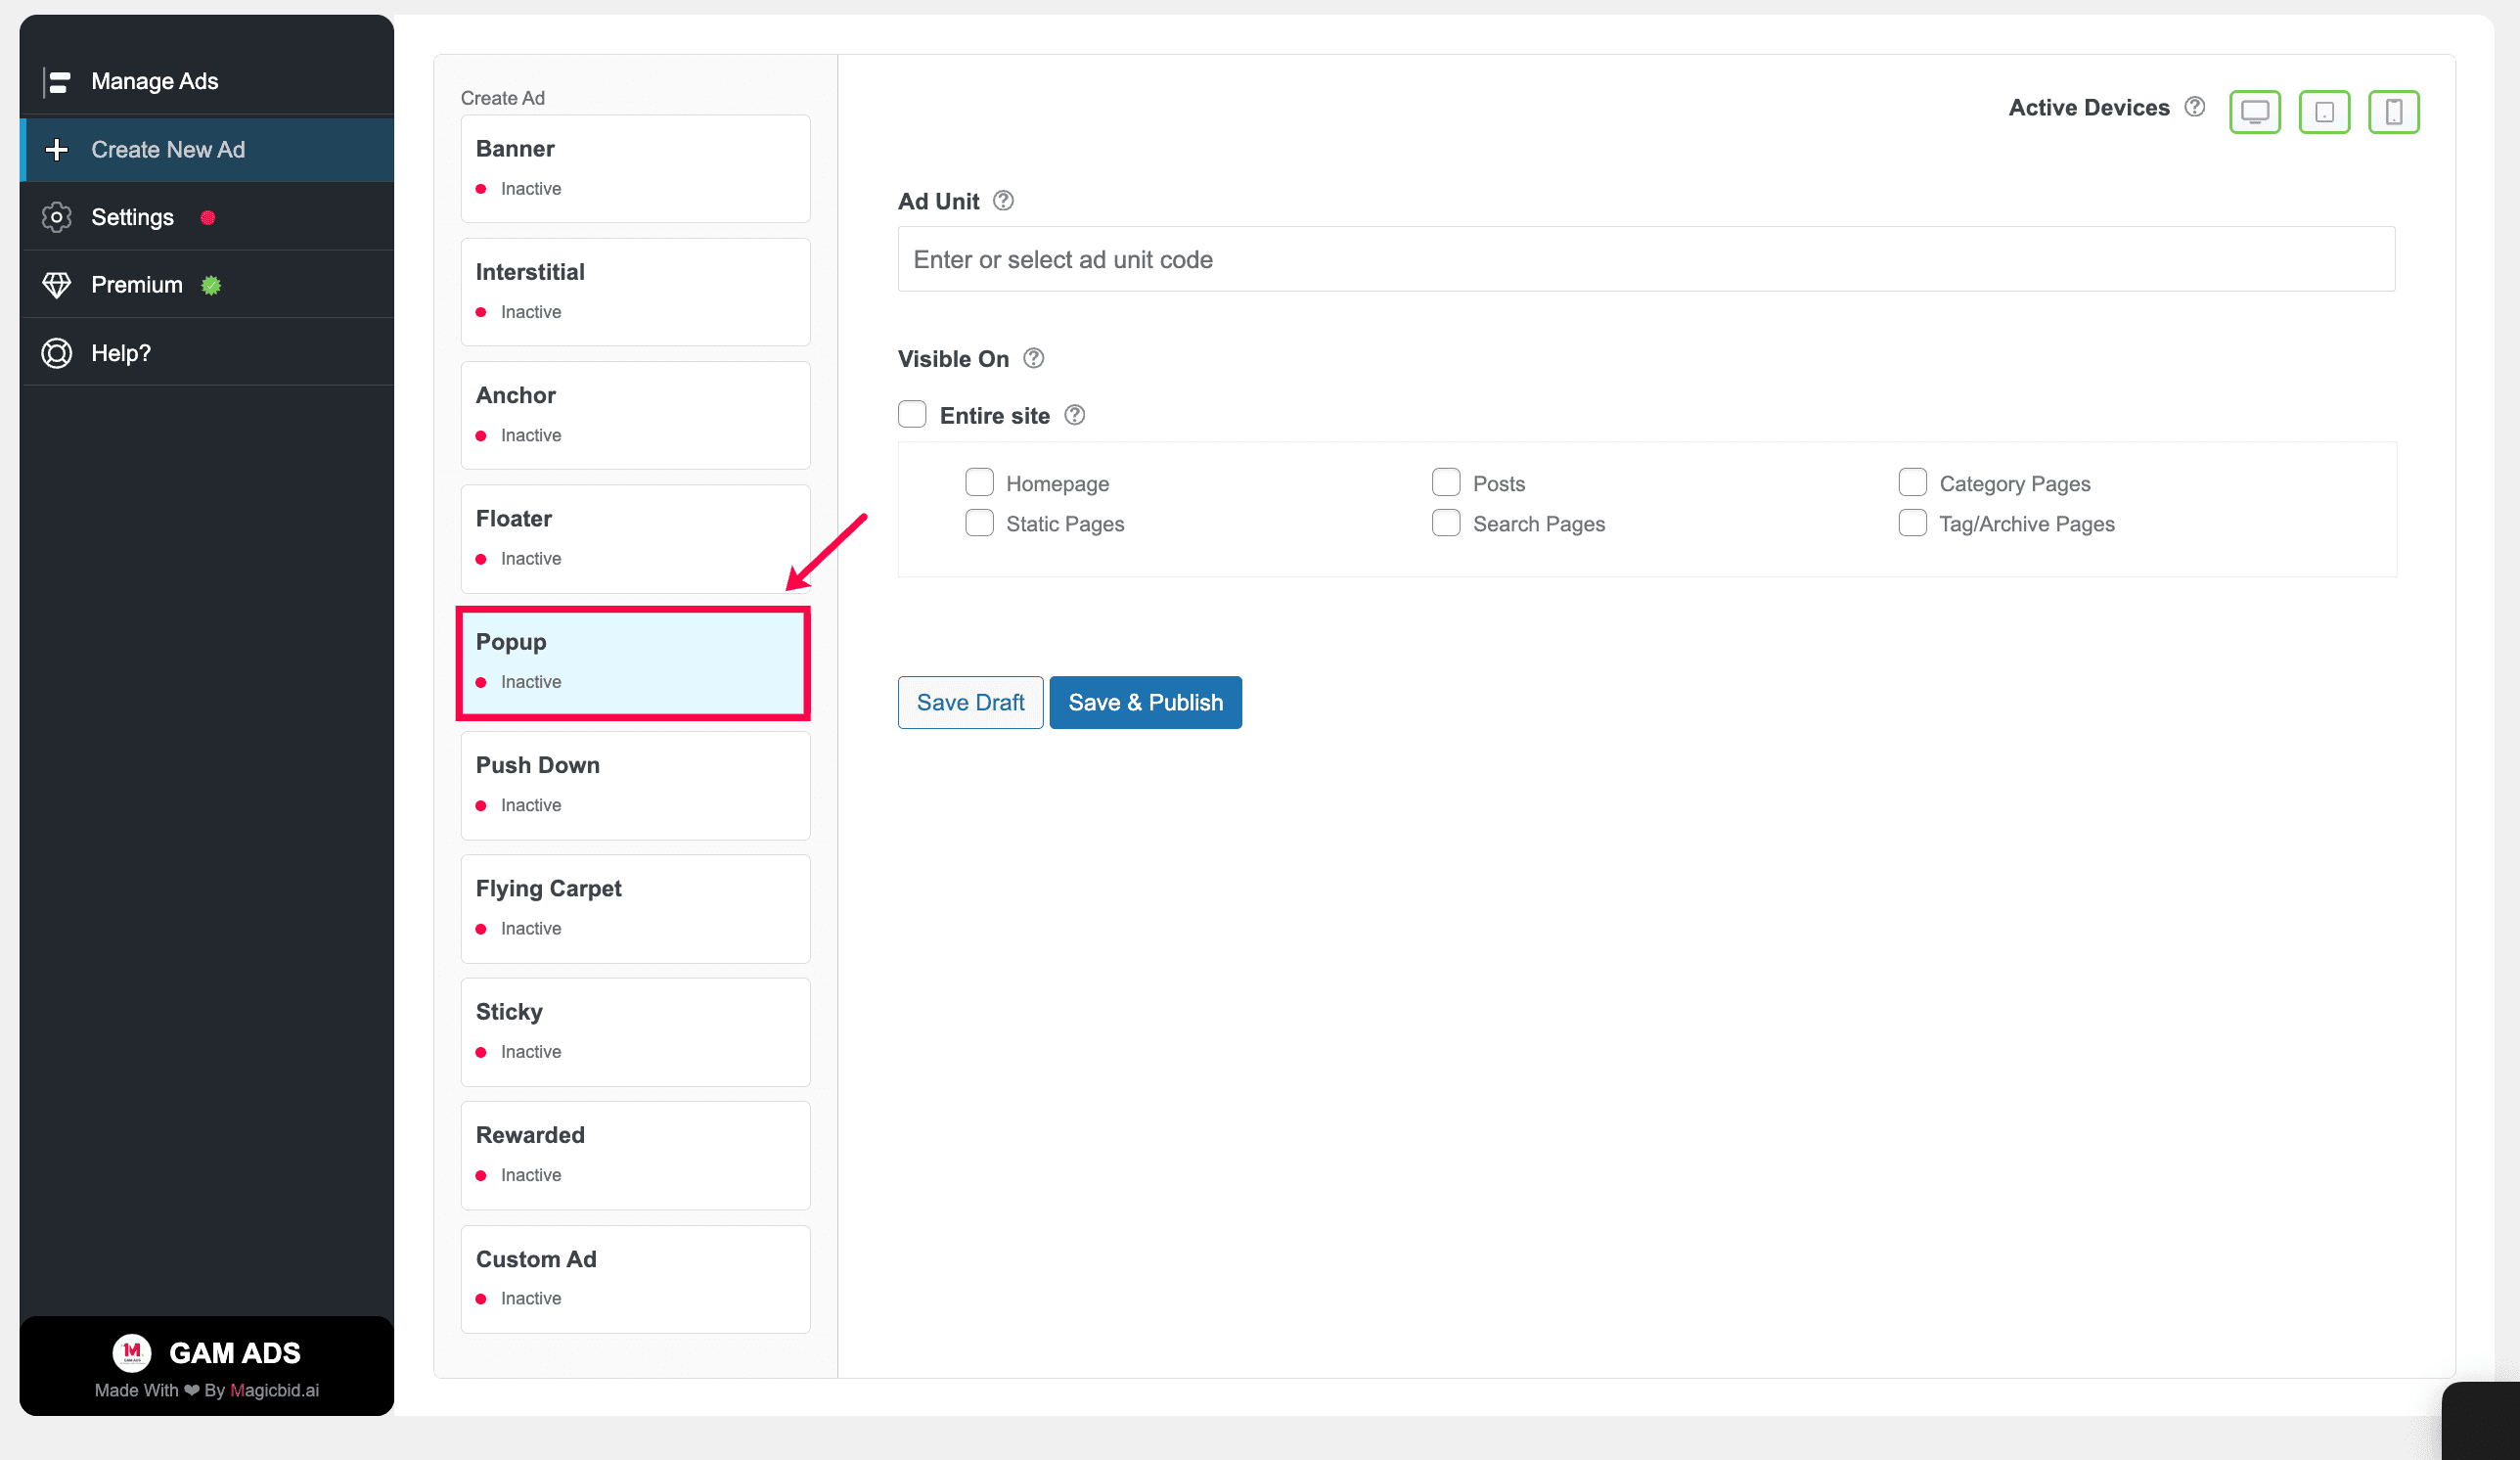
Step 1: Choose Ad Type
Go to Create New Ad and select Popup.
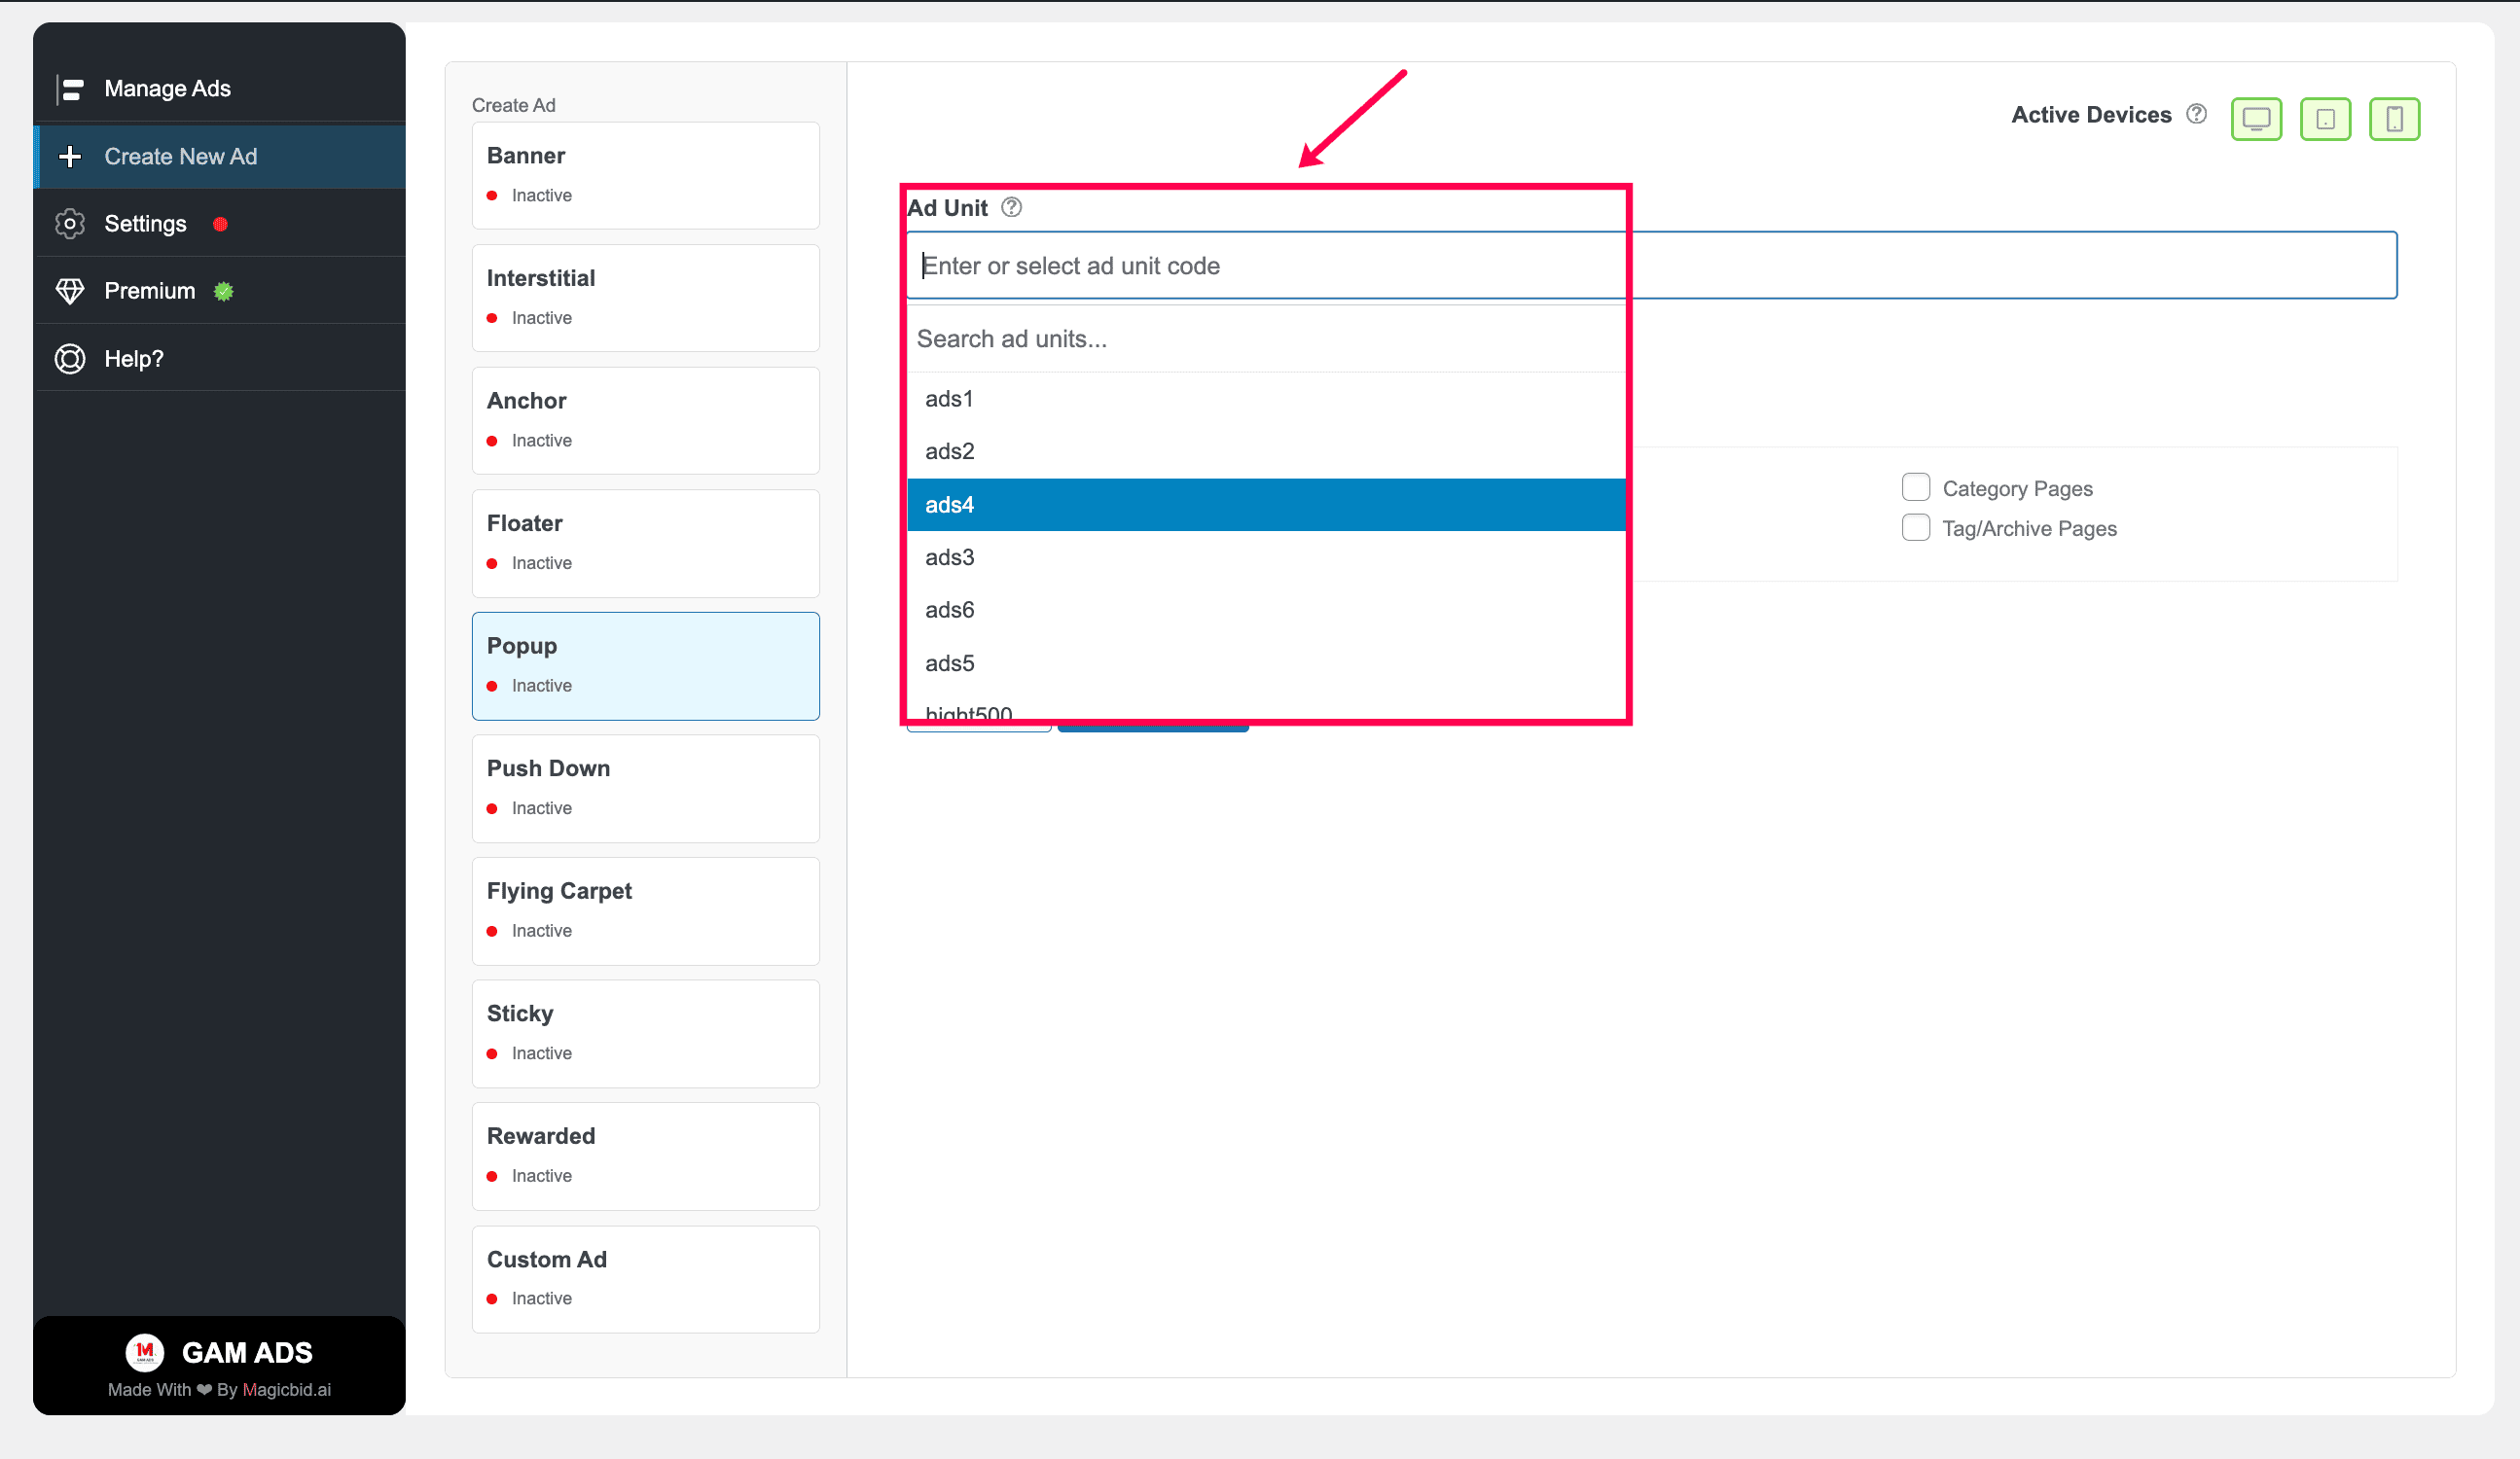
Step 2: Select Ad Unit
Choose the Google Ad Manager ad unit you want to serve.
Note: The ad unit must already exist in your Google Ad Manager account in order to appear in this list.
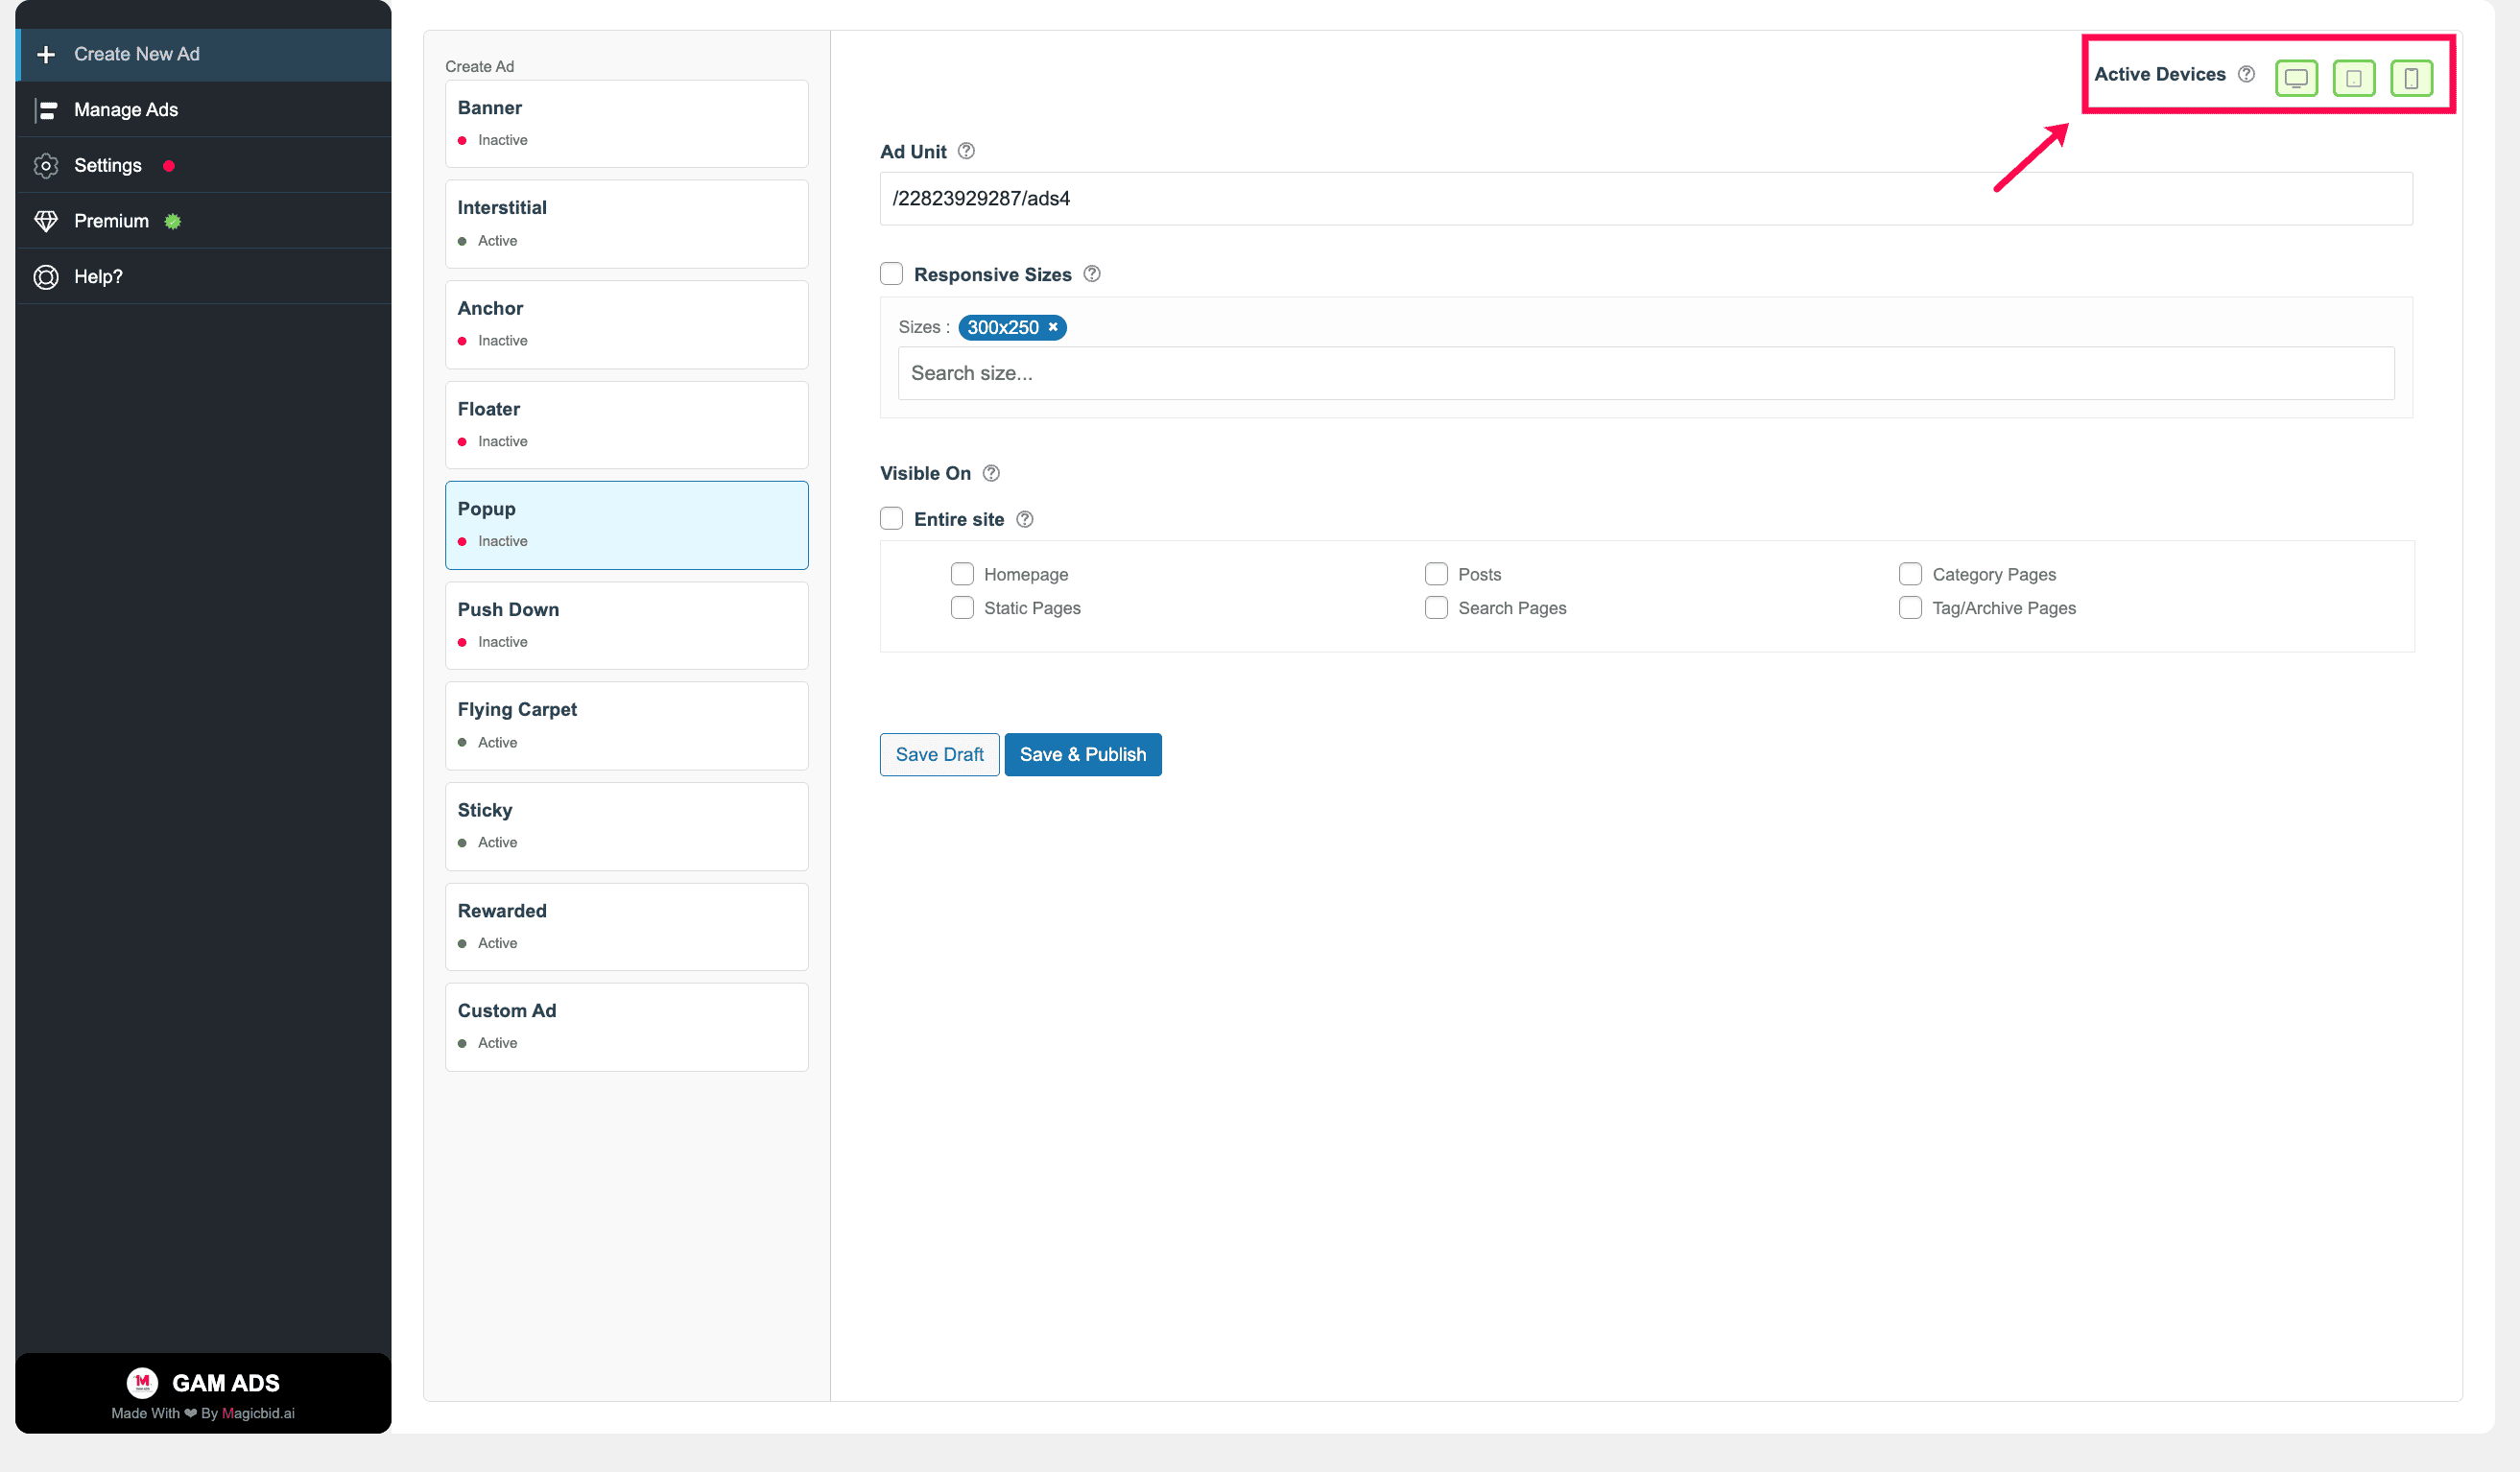
Step 3: Choose Devices
Under Active Devices, select where this ad should run:
- Desktop
- Tablet
- Mobile
You may enable one, two, or all three device types.
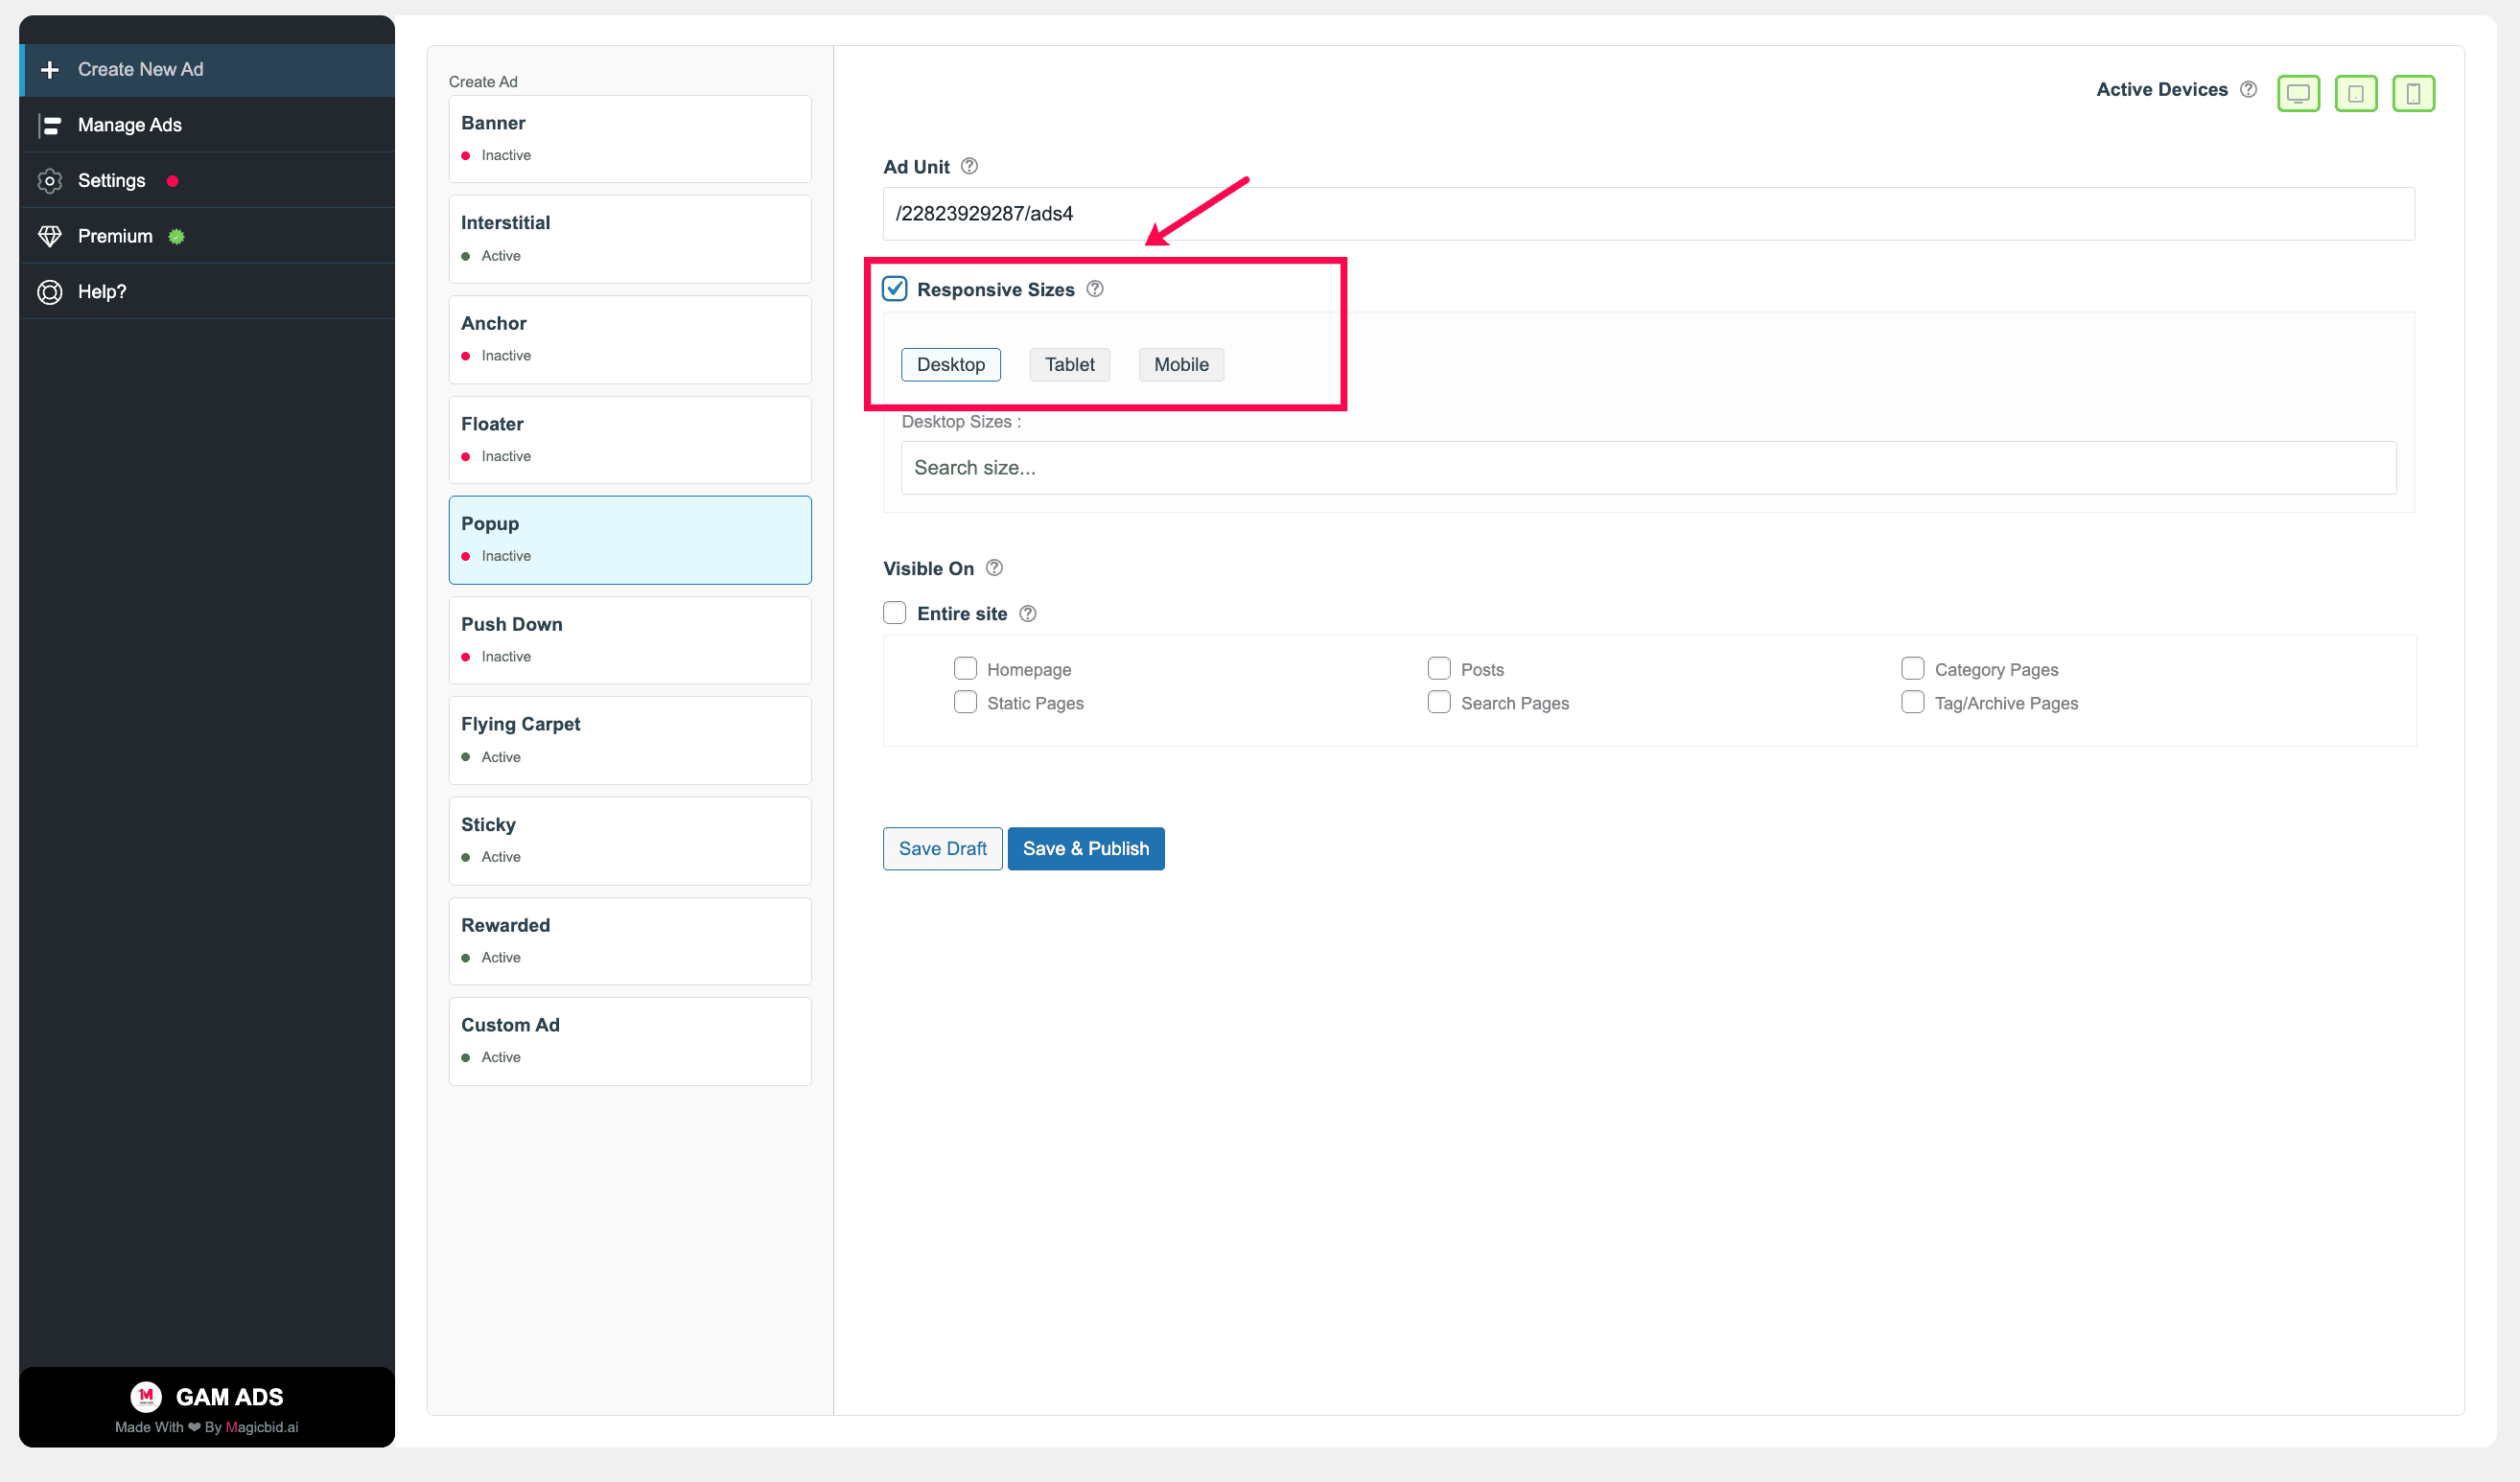
Step 4: Responsive Setting
Decide if the ad should be responsive.
- ON: Automatically adjusts to screen size
- OFF: Uses only fixed ad sizes
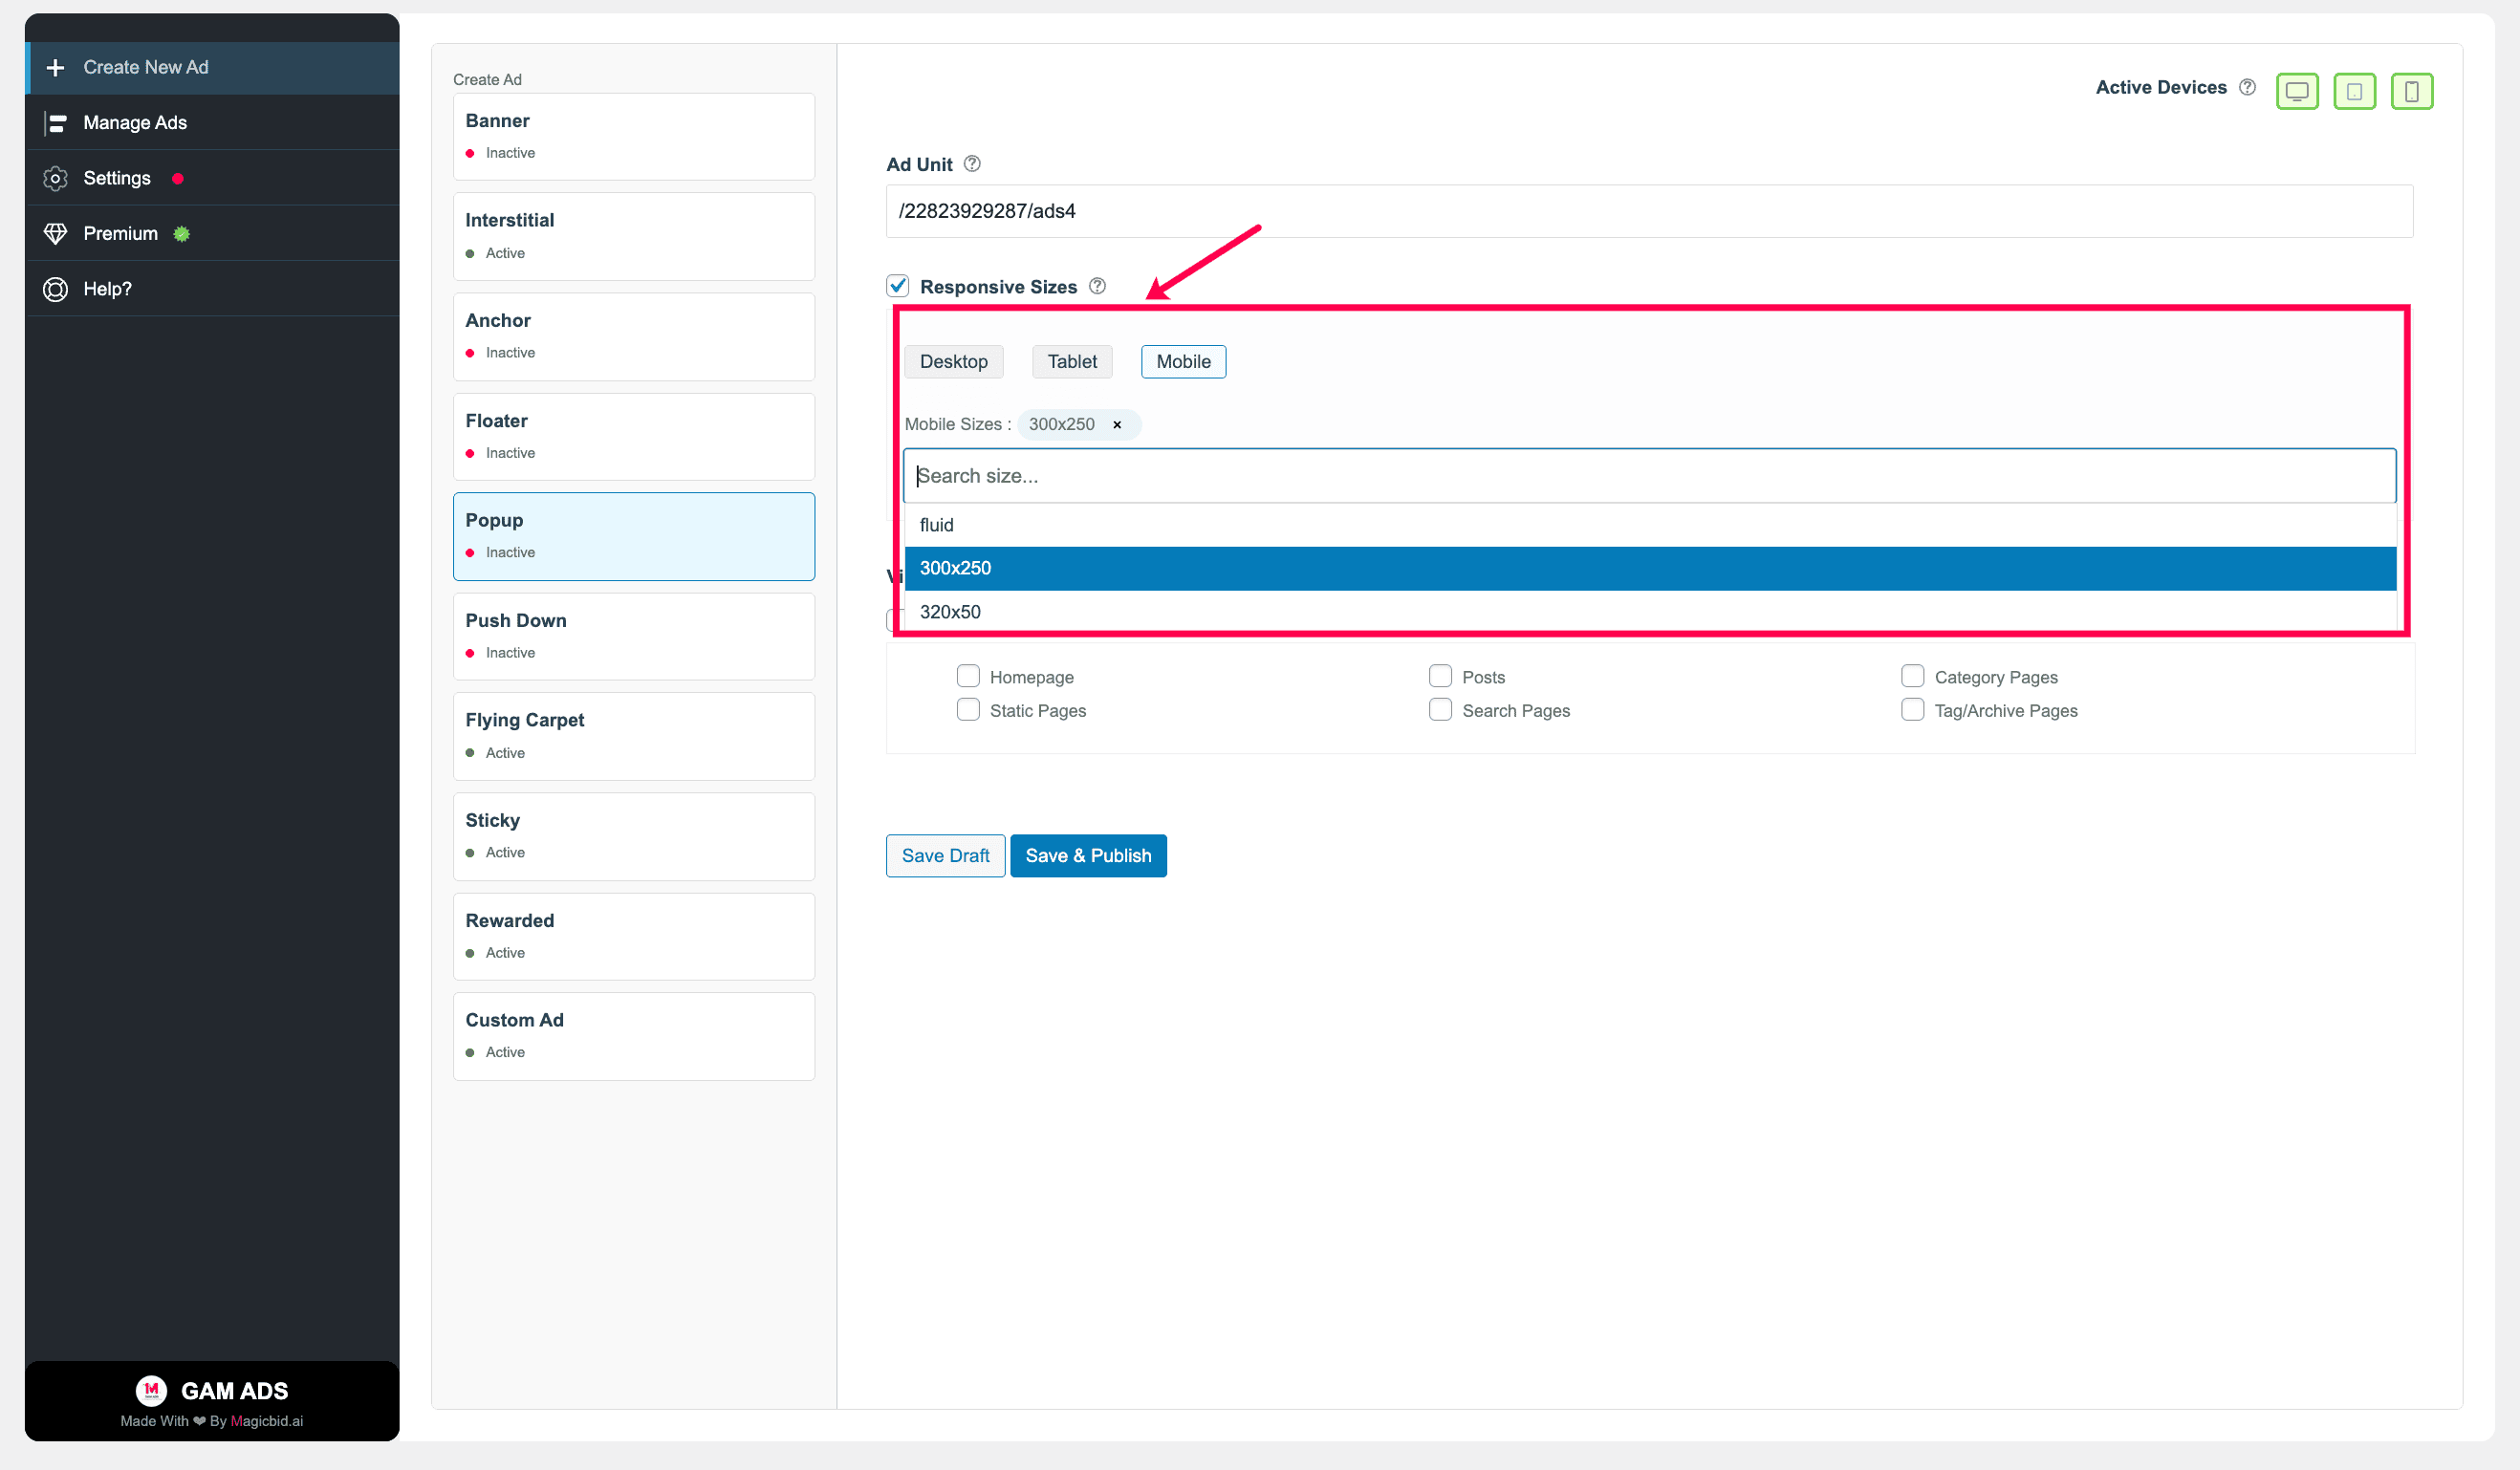
Step 5: Choose Ad Sizes
Select ad sizes for each device.
Example:
- Desktop: 728×90, 300×250
- Mobile: 320×50, 300×250
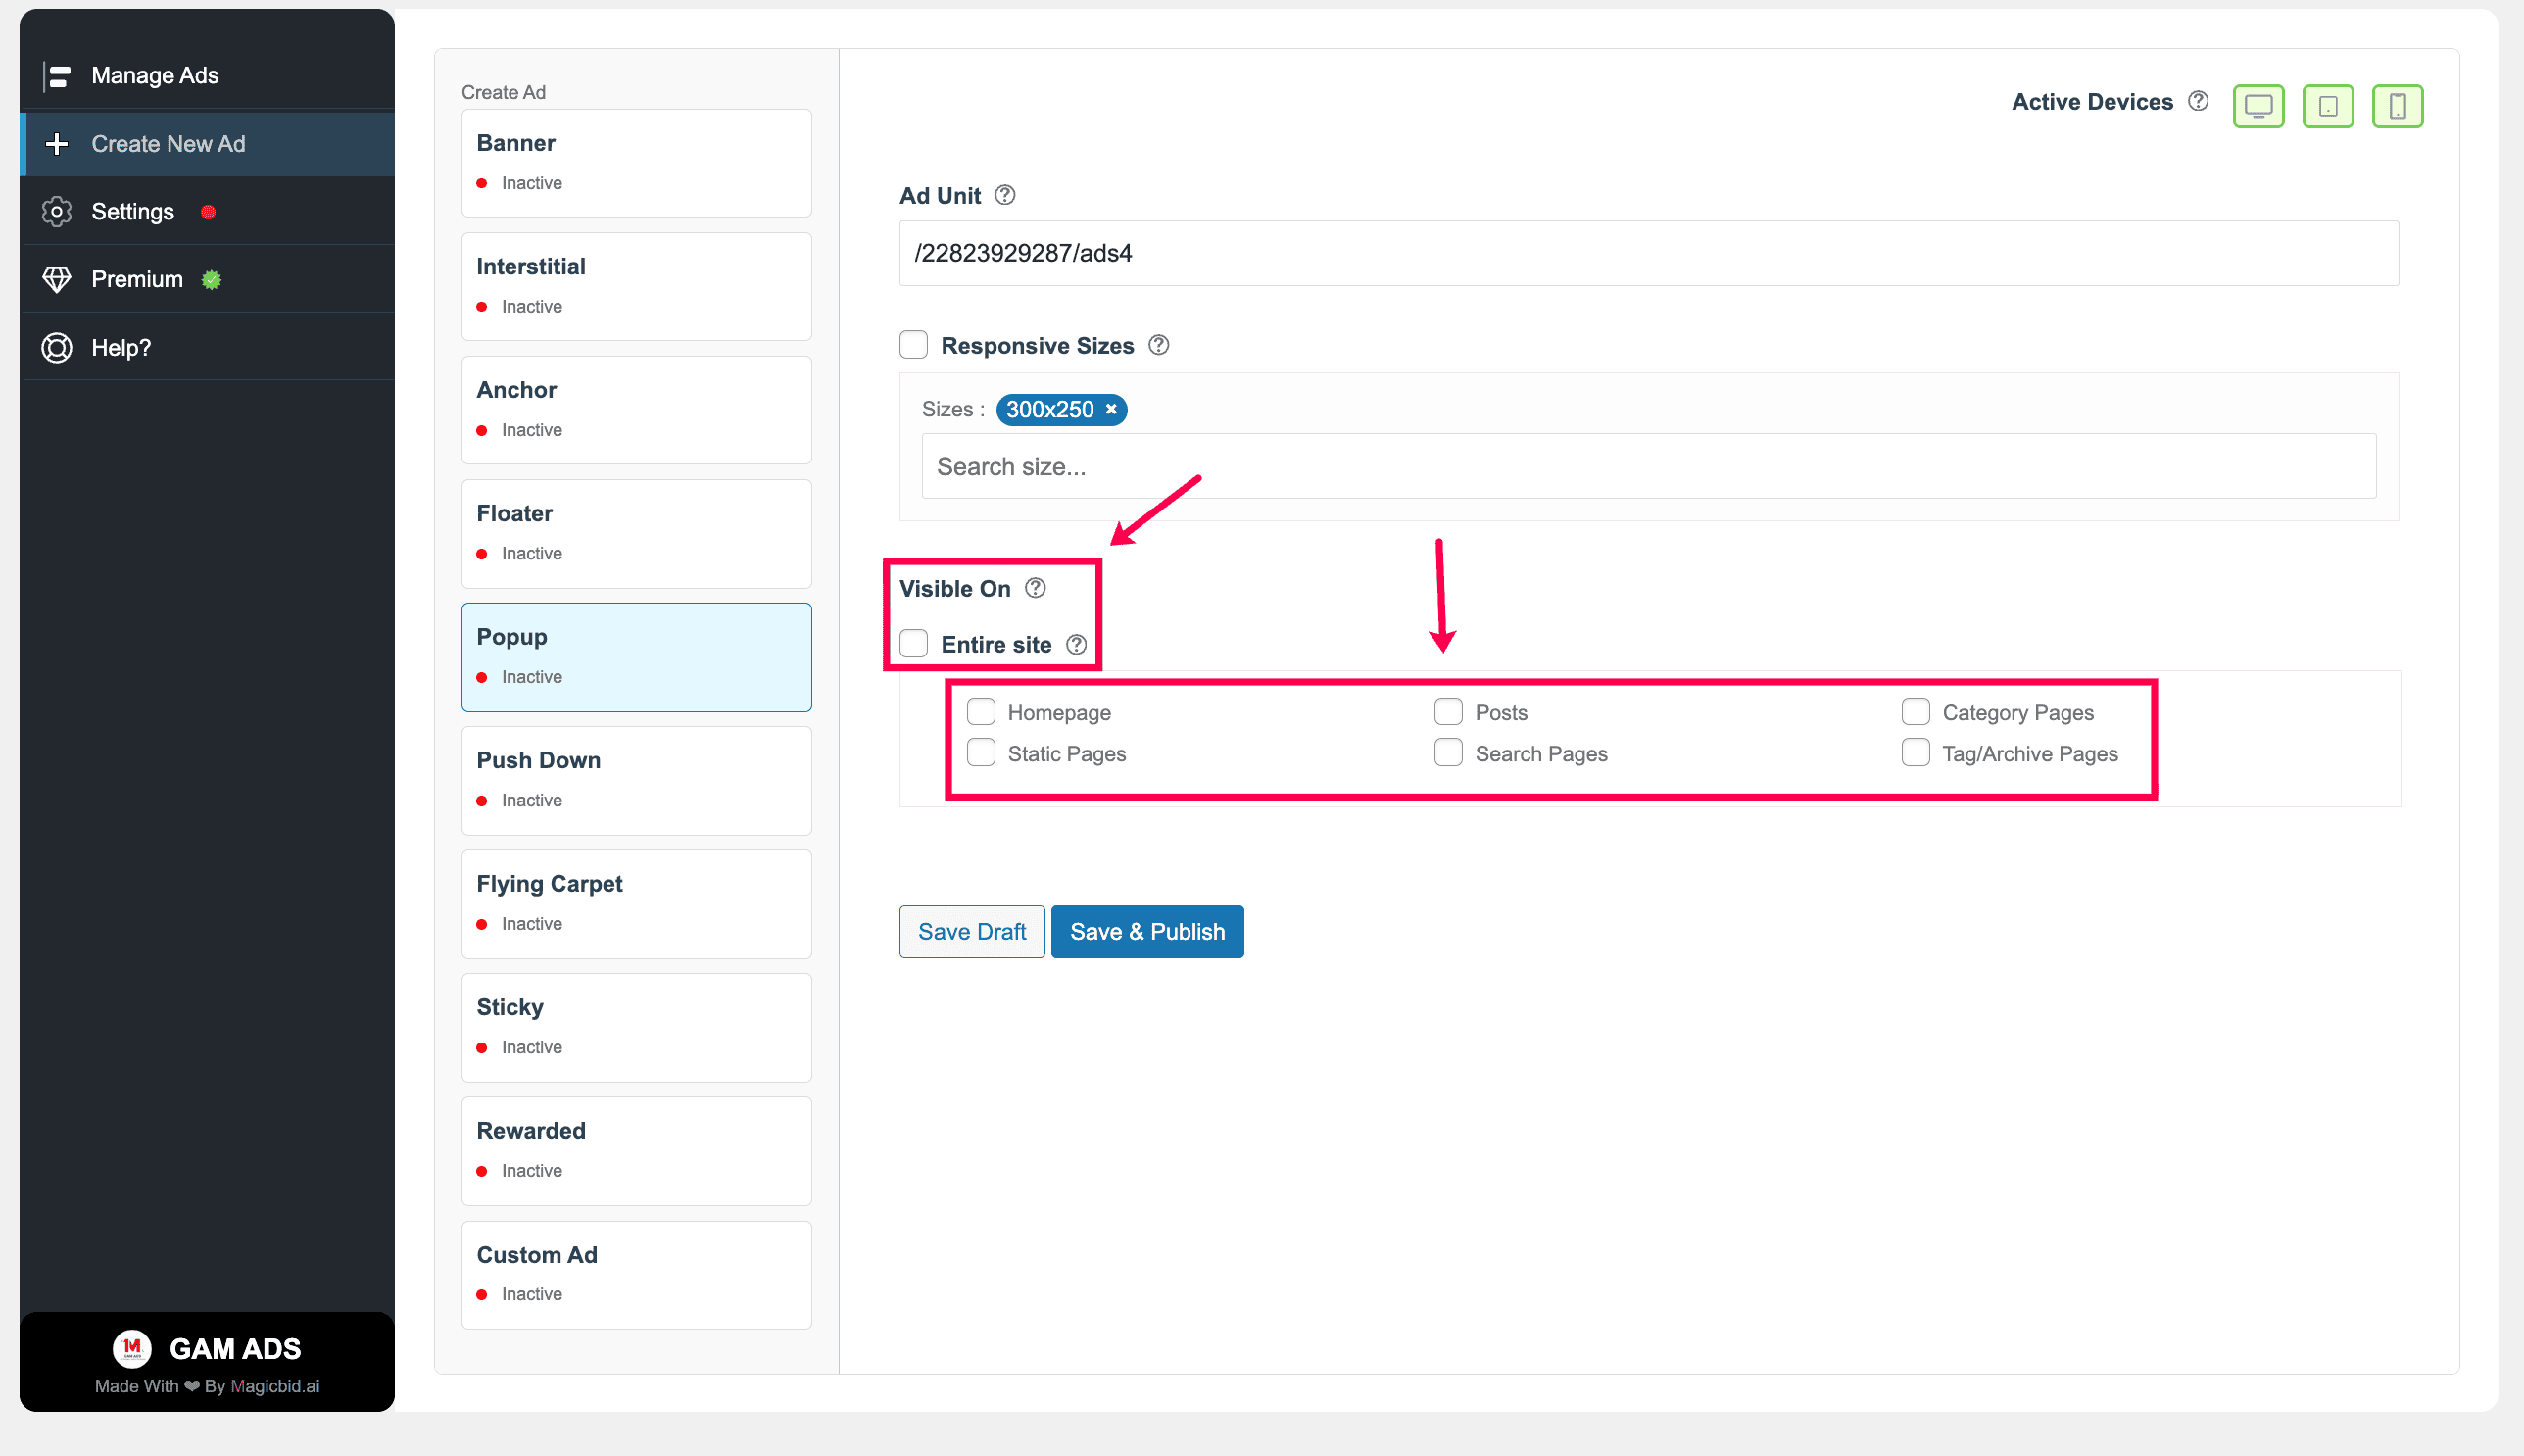
Step 6: Placement Rules
Choose where this ad should appear.
- Entire Site: Shows on all pages
- Specific Pages: Shows only on selected posts, pages, or categories
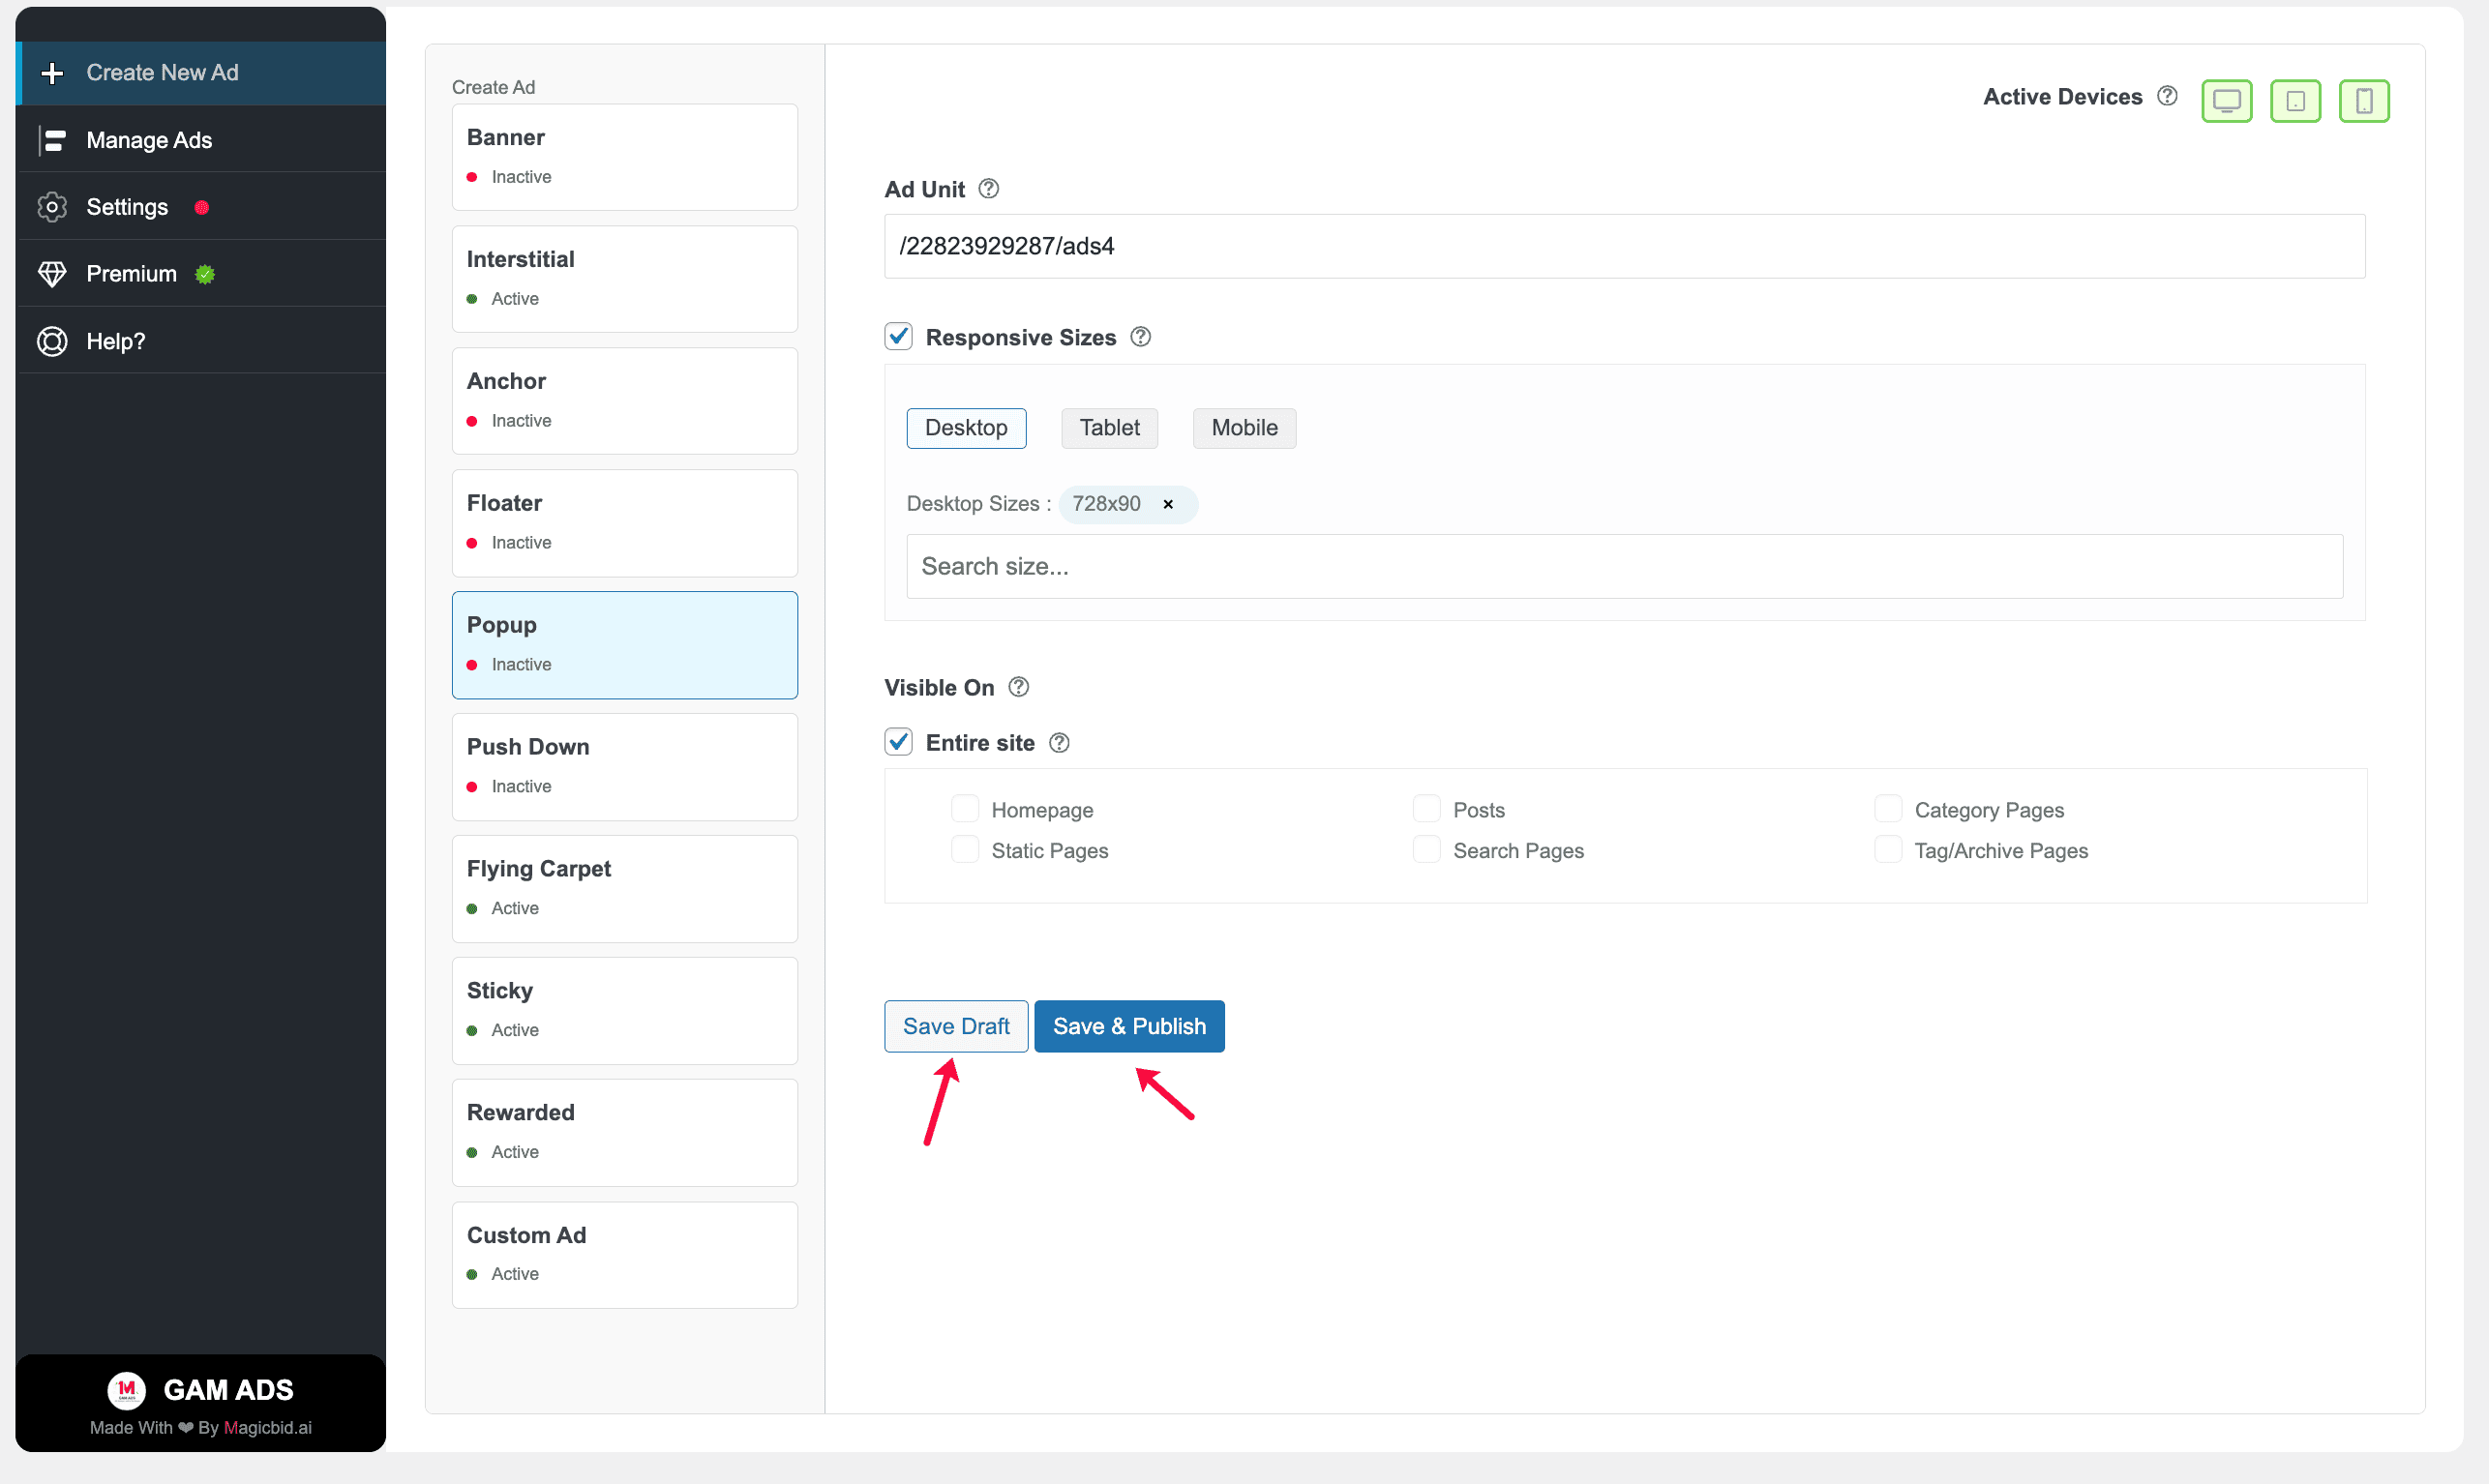
Step 7: Save Your Ad
Save Draft: Saves the ad without publishing it.
Save & Publish: Saves the ad and makes it live immediately.
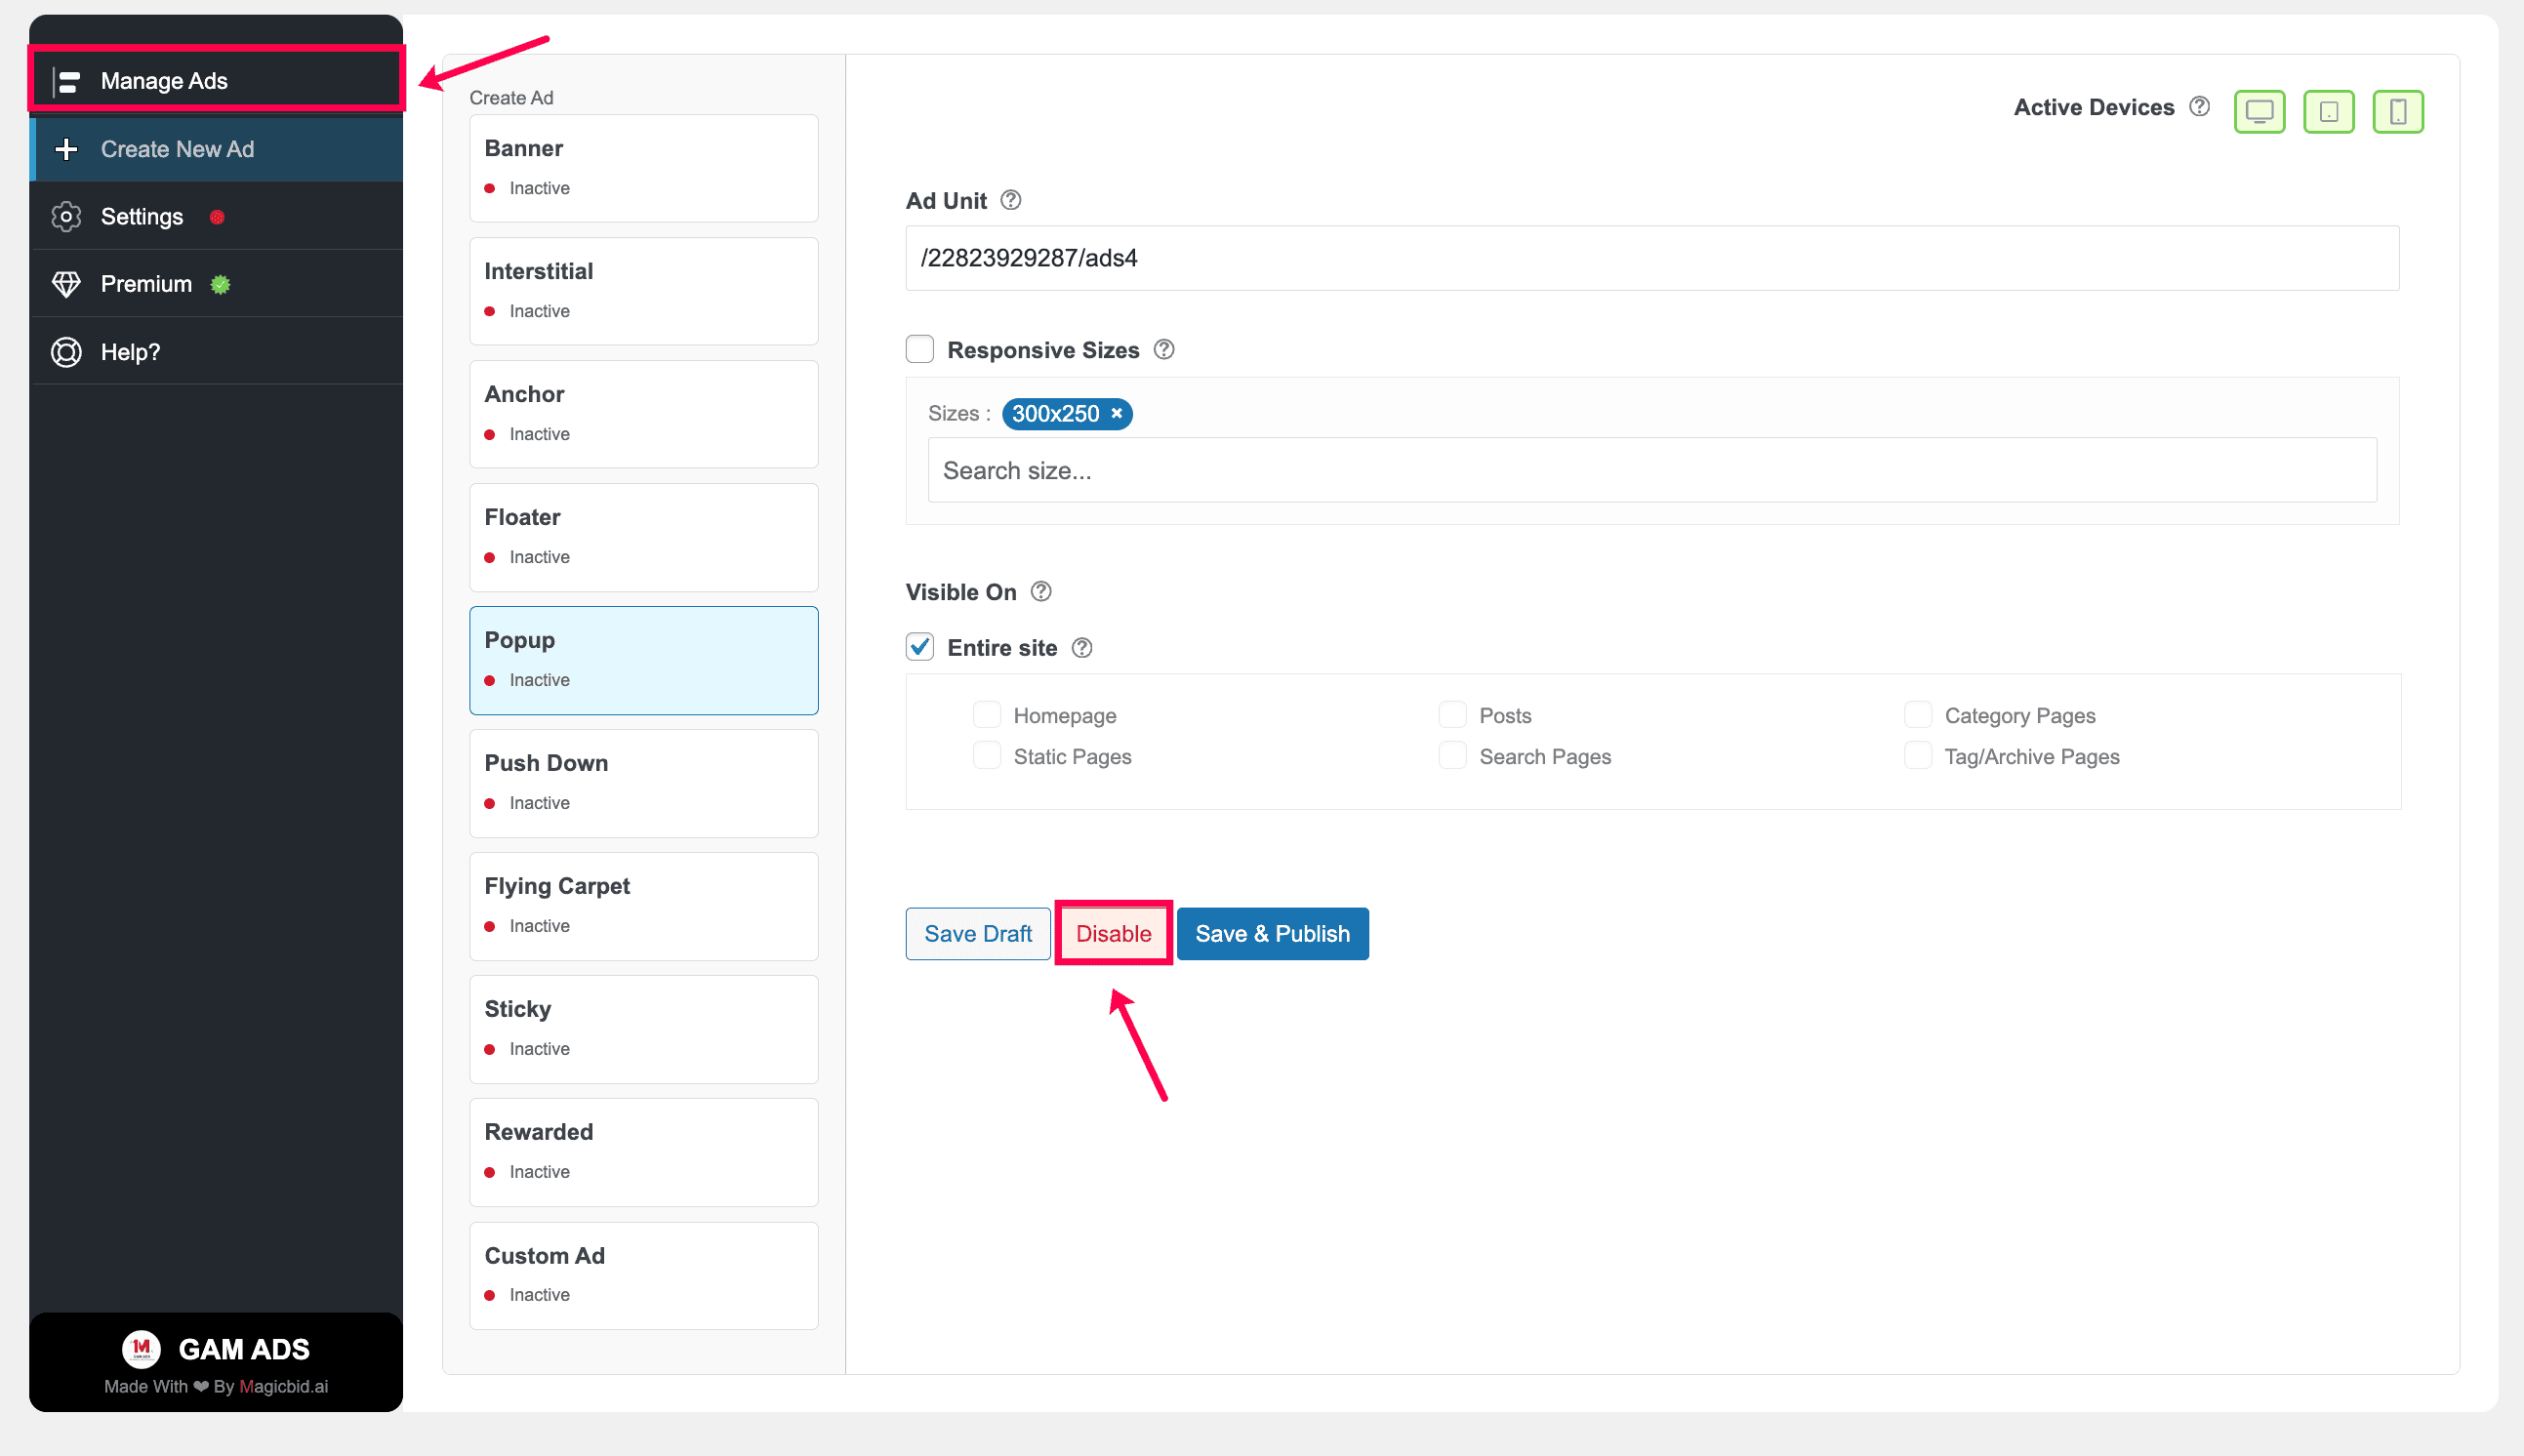
Step 8: Manage Ad Status
After publishing, you can manage the ad status:
- Disable: Pause the ad anytime
- Save & Publish: Apply updates and keep the ad live
You can manage all ads later from: GAM ADS → Manage Ads
Creating Push Down Ads
Overview
- Select Push Down as the ad type
- Choose where it runs (Desktop, Tablet, Mobile)
- Pick your Google Ad Manager ad unit
- Enable Ad Refresh if needed (Premium)
- Turn Responsive ON or OFF
- Choose ad sizes for each device
- Decide placement (Entire site or specific pages)
- Click Save & Publish to make it live
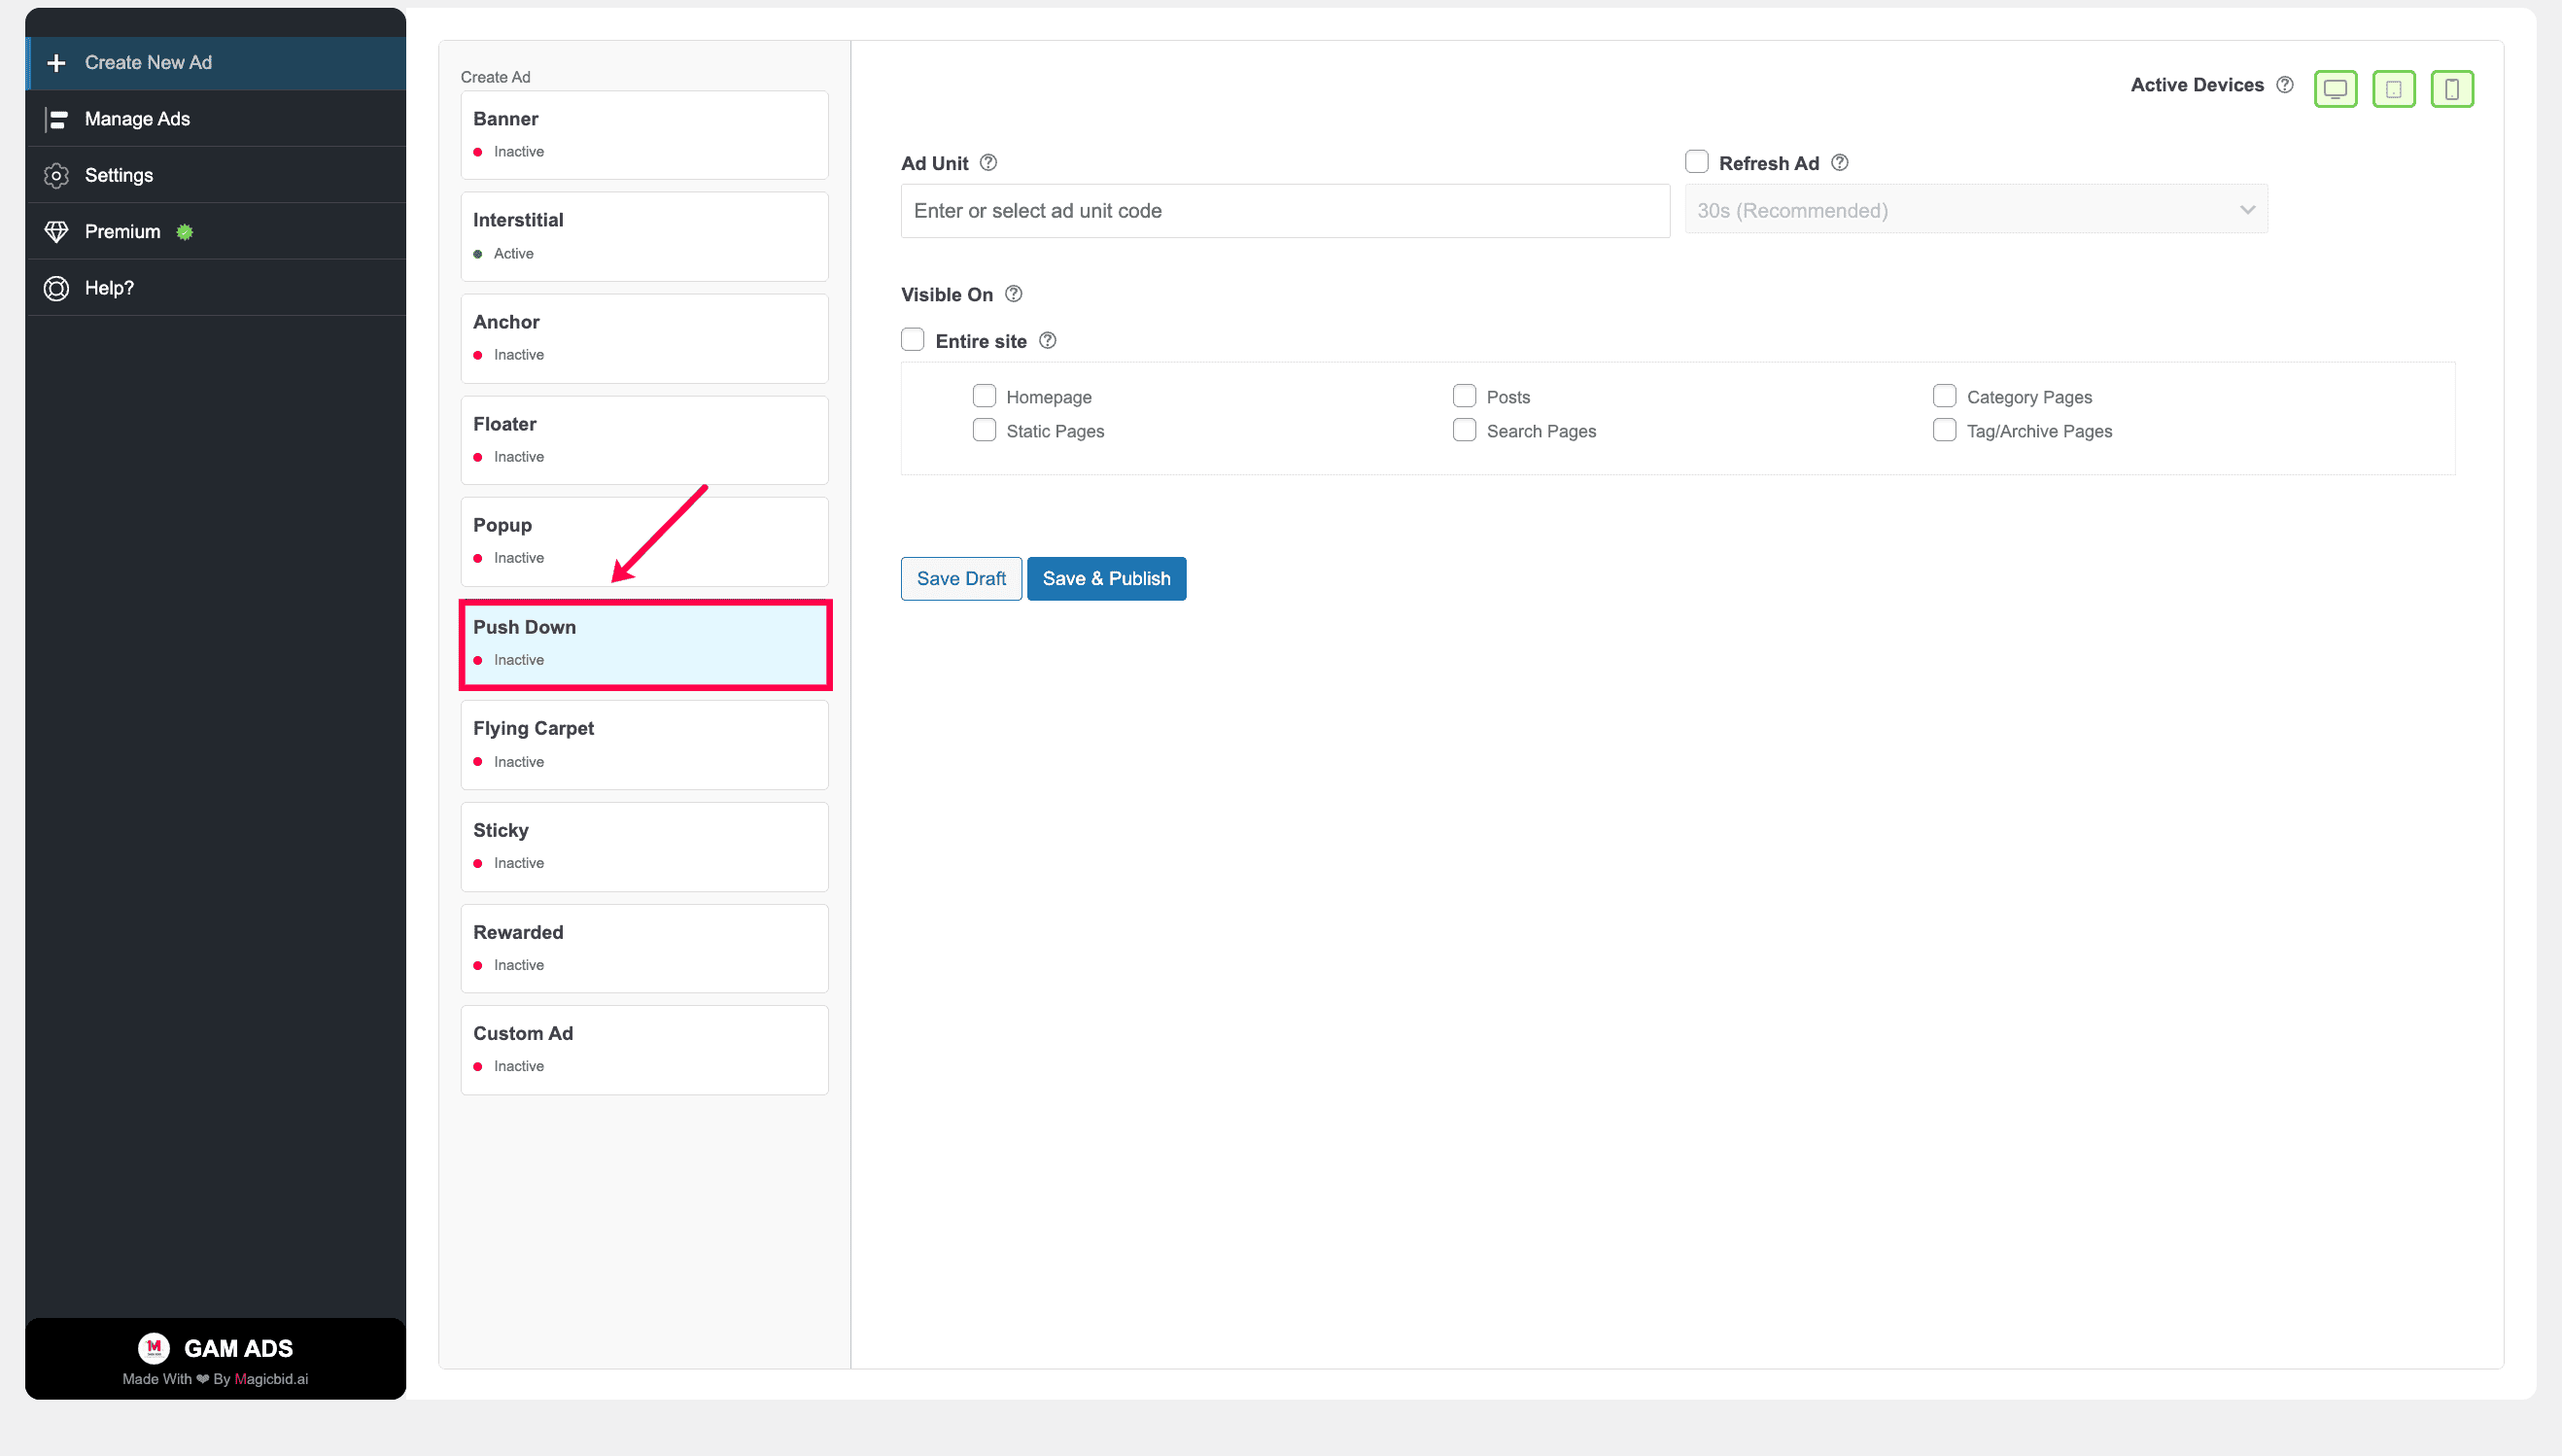
Step 1: Choose Ad Type
Go to Create New Ad and select Push Down.
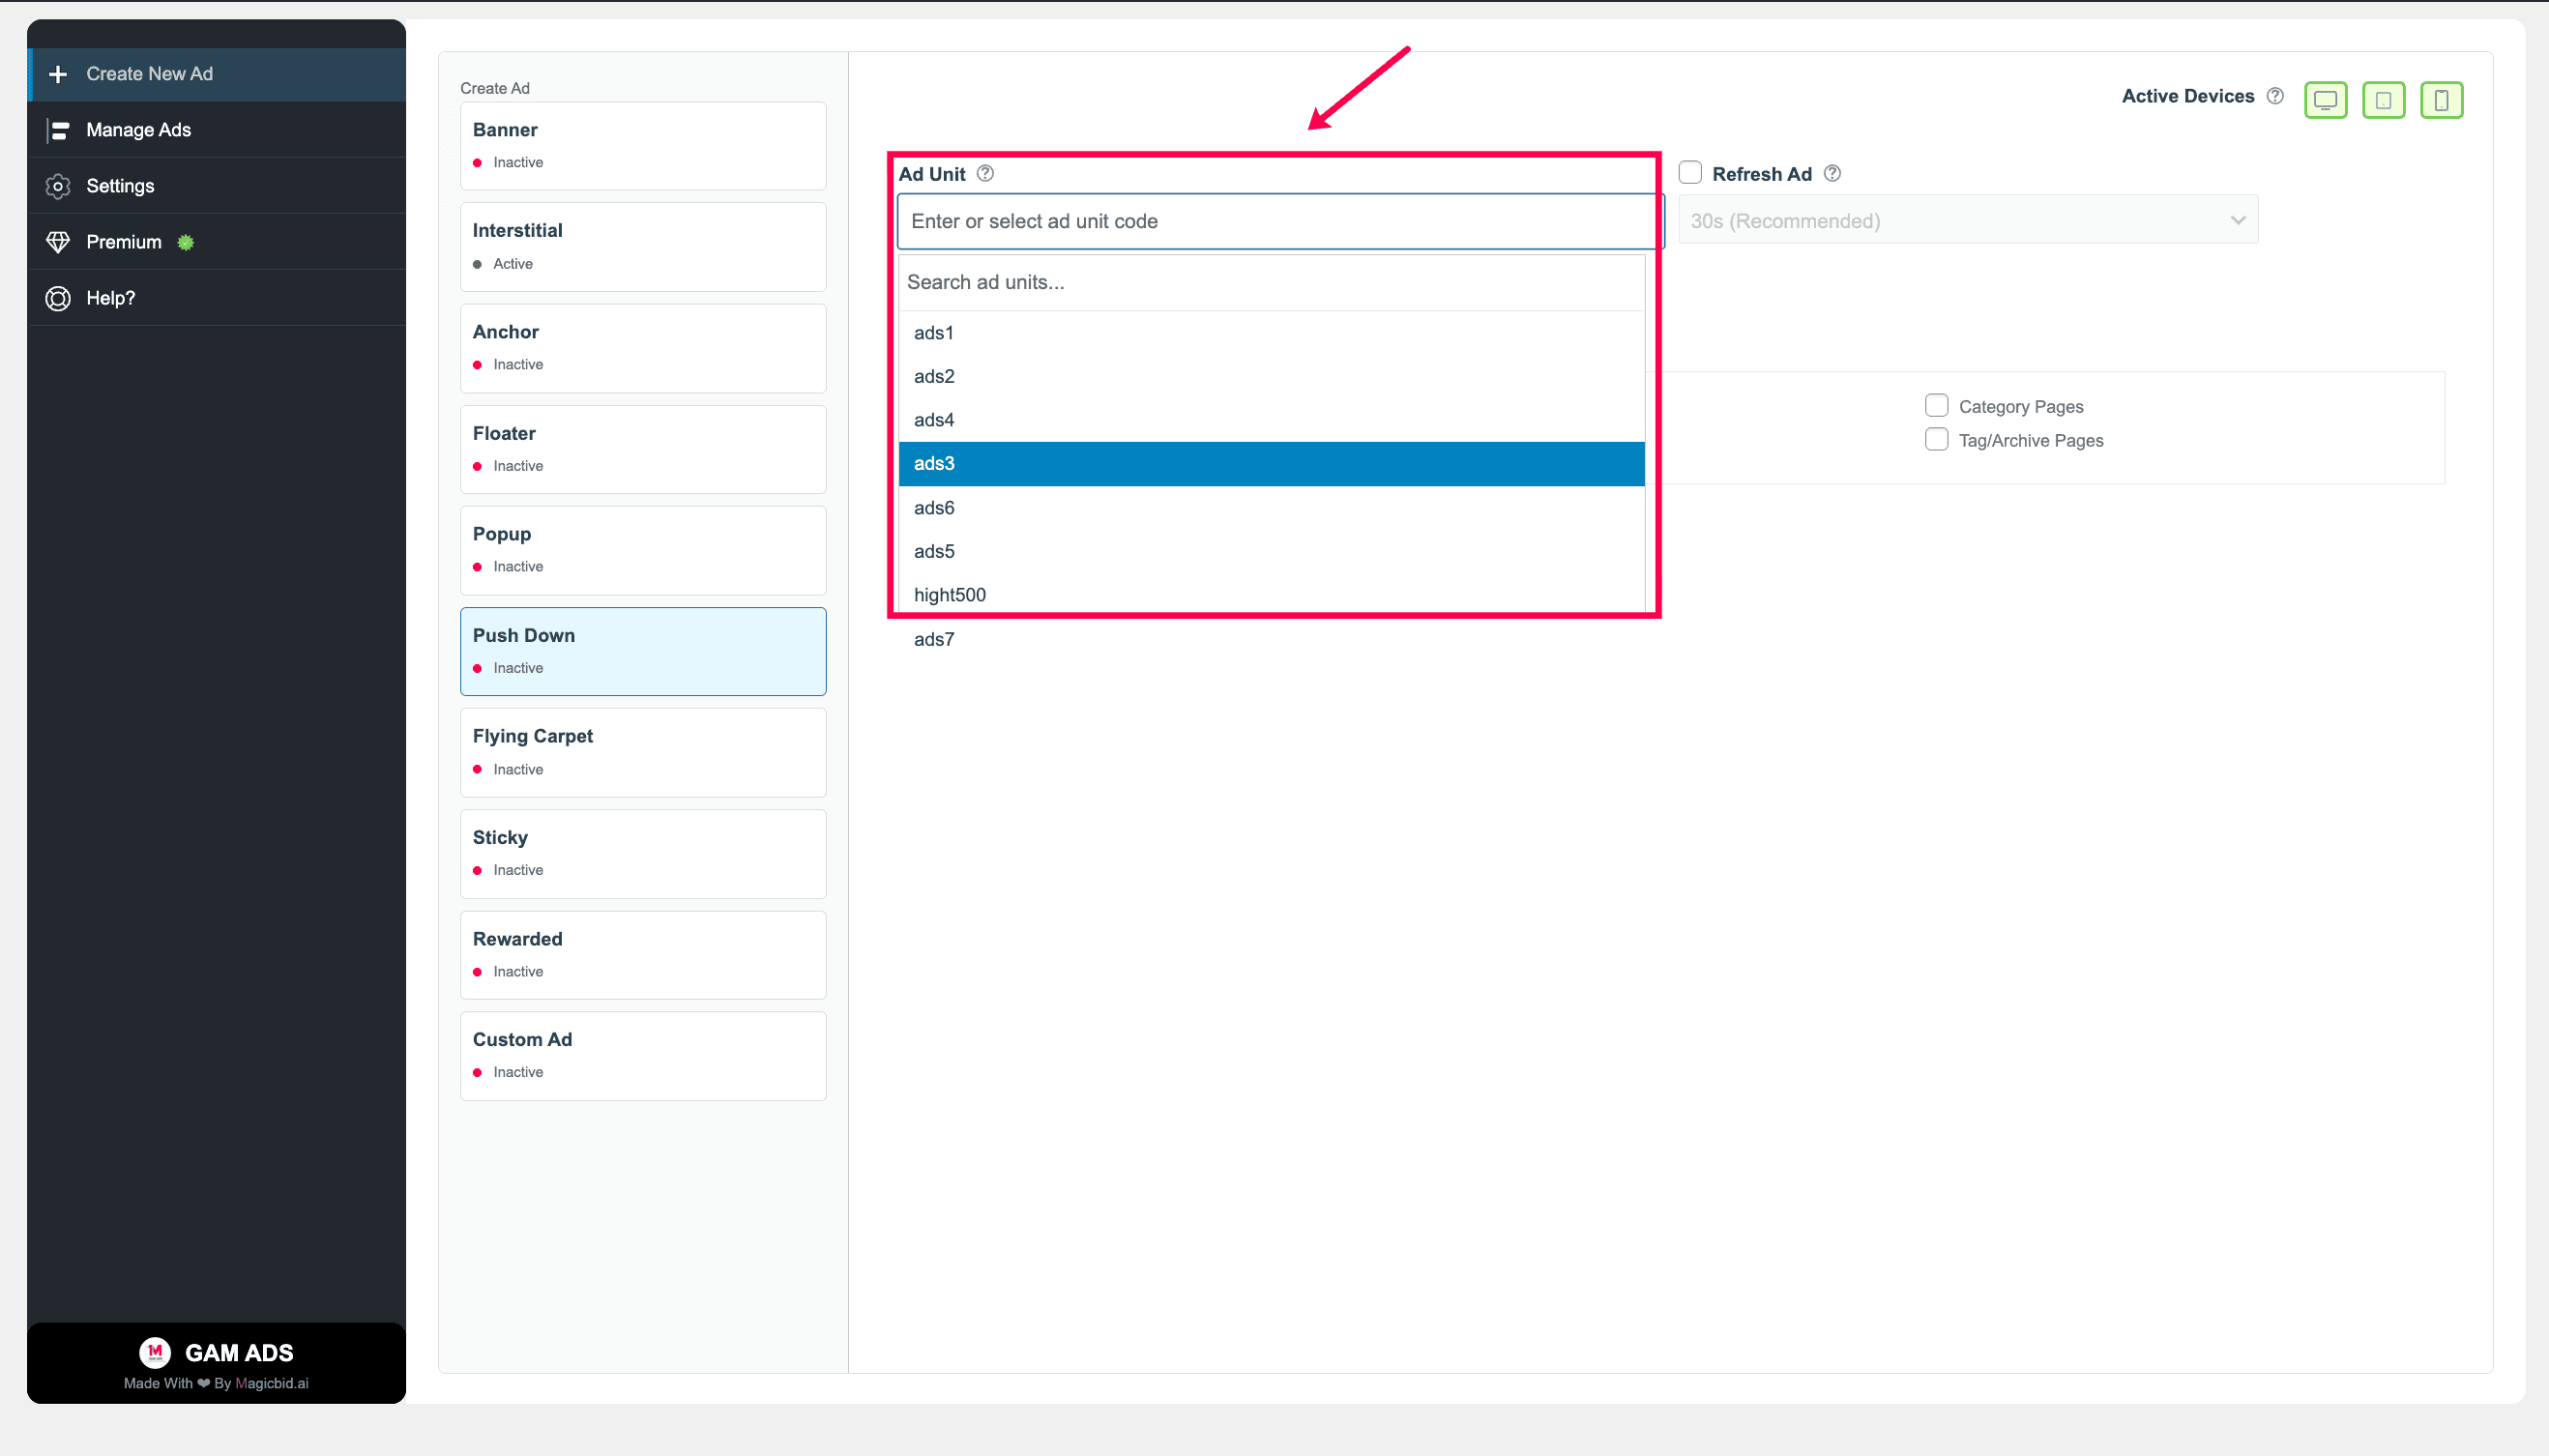
Step 2: Select Ad Unit
Choose the Google Ad Manager ad unit you want to serve.
Note: The ad unit must already exist in your Google Ad Manager account in order to appear in this list.
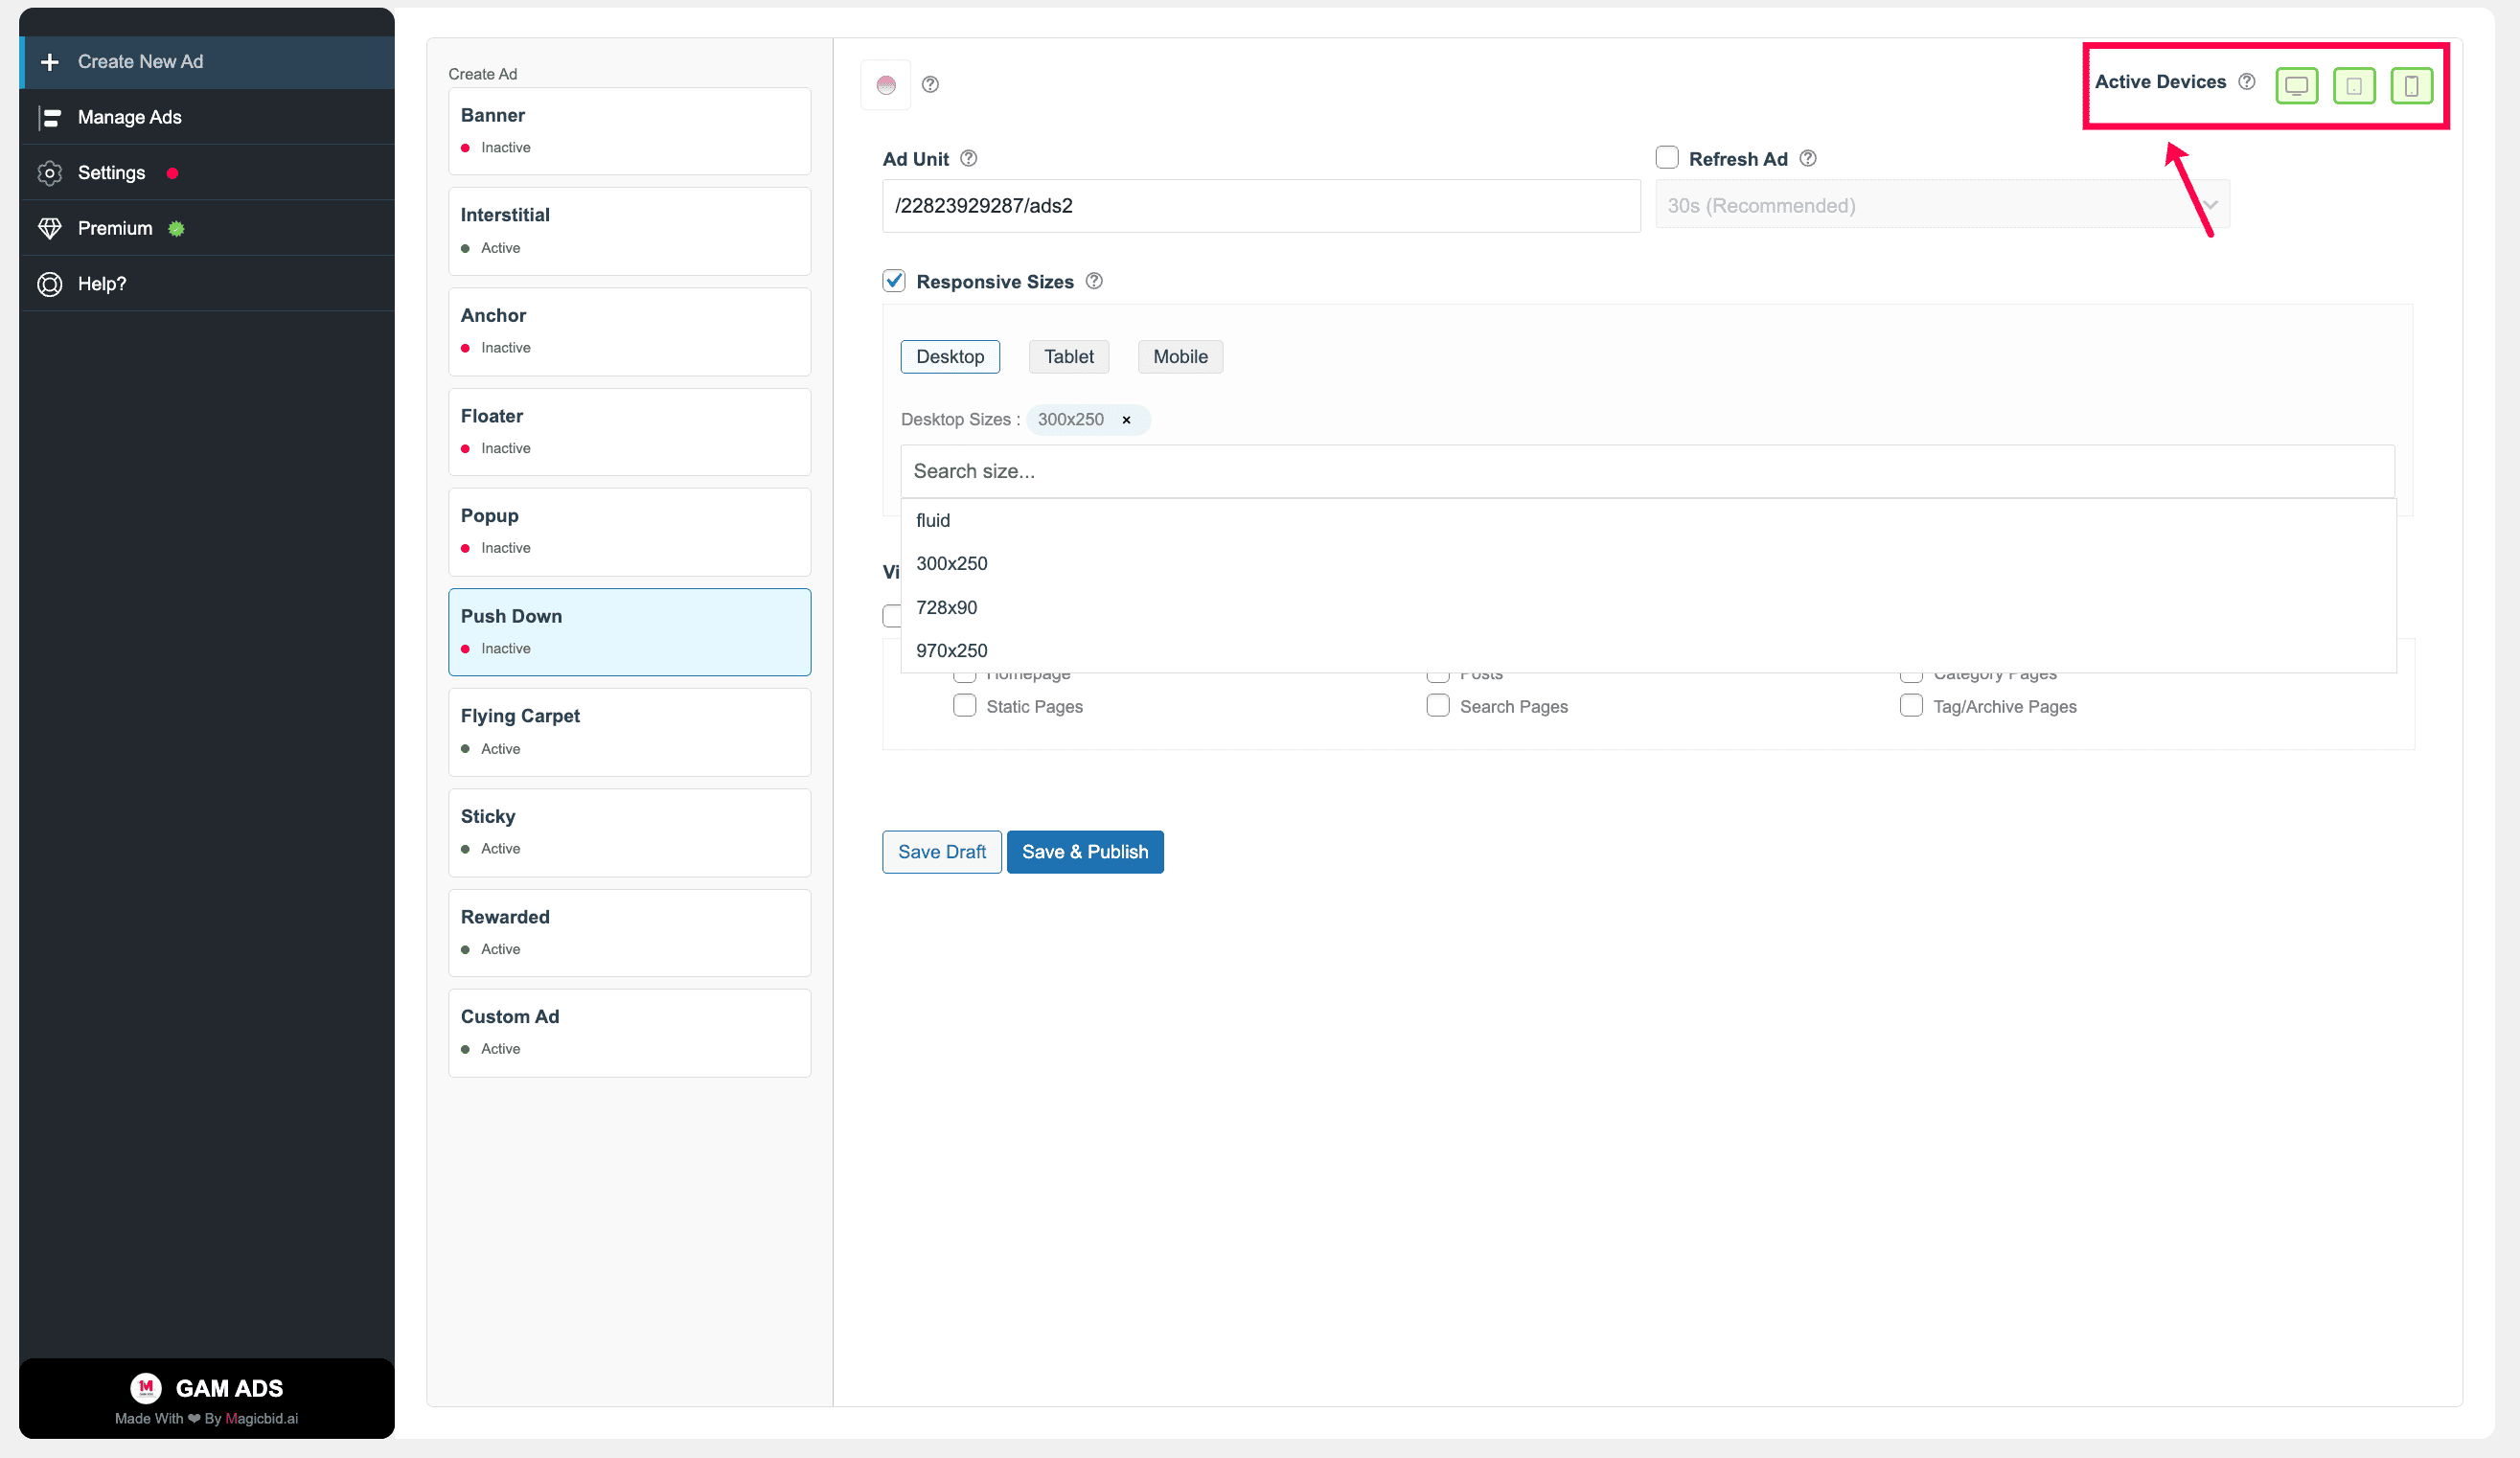
Step 3: Choose Devices
Under Active Devices, select where this ad should run:
- Desktop
- Tablet
- Mobile
You may enable one, two, or all three device types.
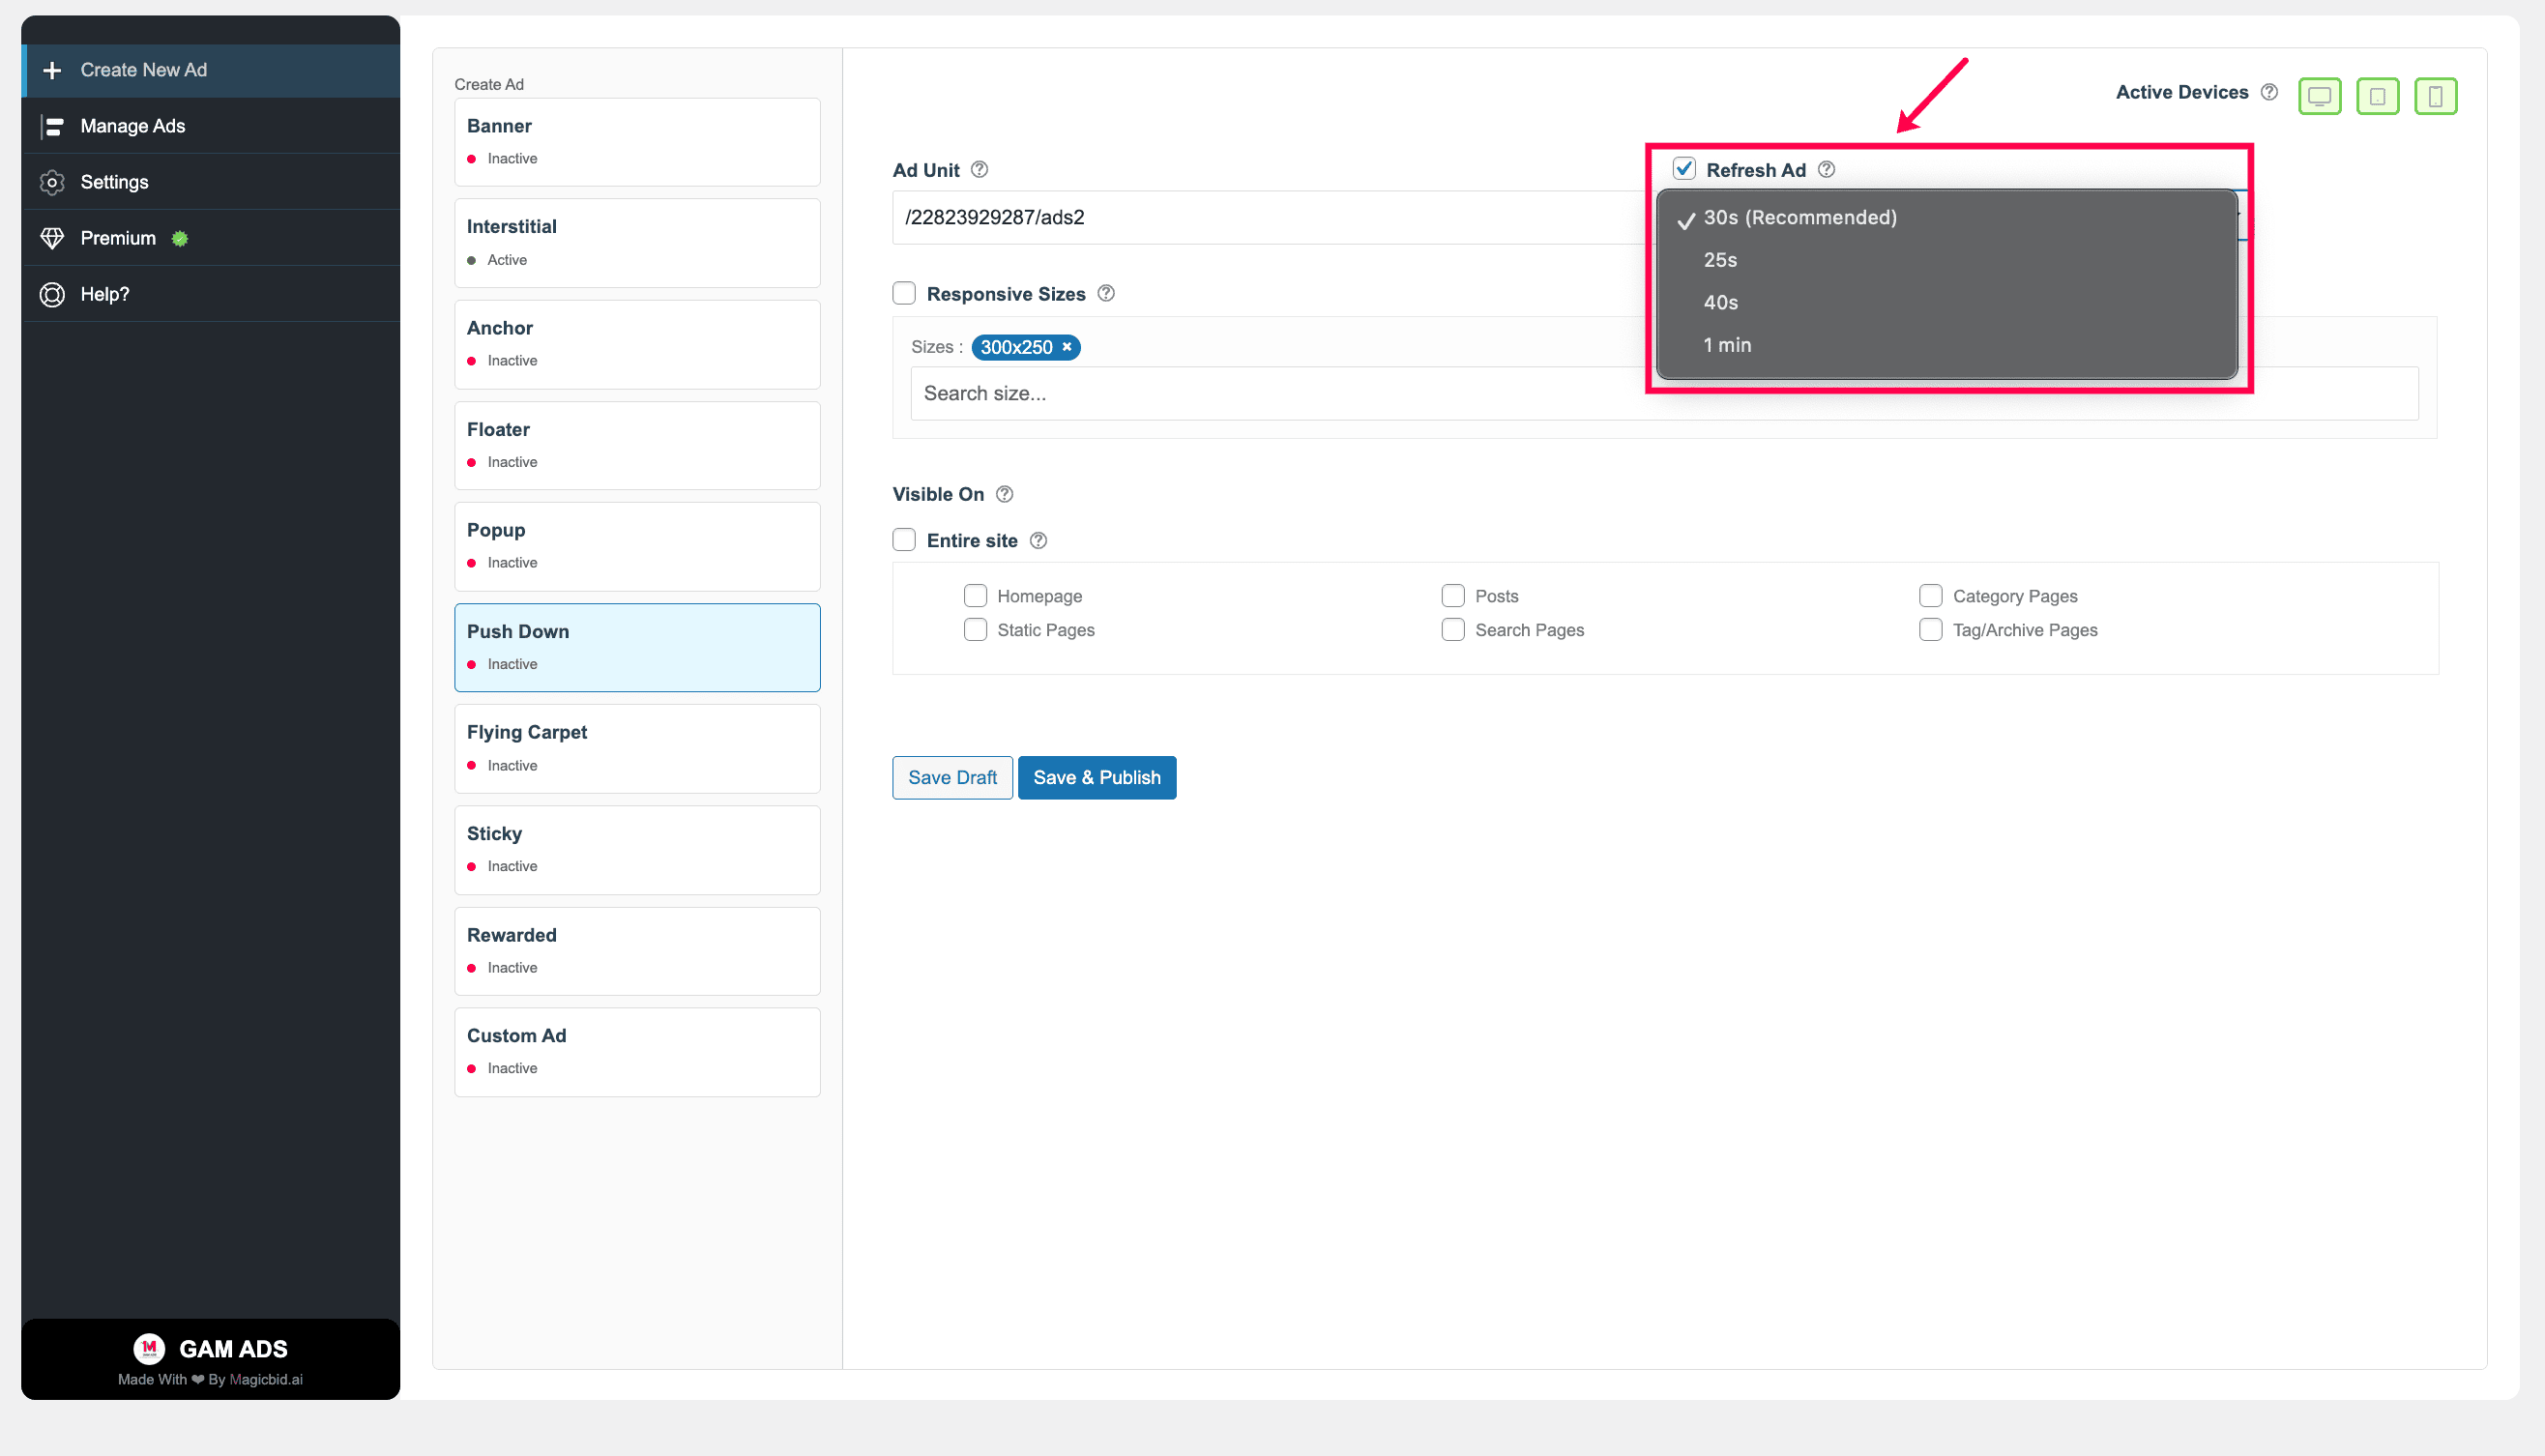
Step 4: Ad Refresh (Premium Feature)
Enable or disable ad refresh.
- ON: Reloads ads after a set interval
- OFF: Keeps the ad static
Note: This feature is available for premium users only.
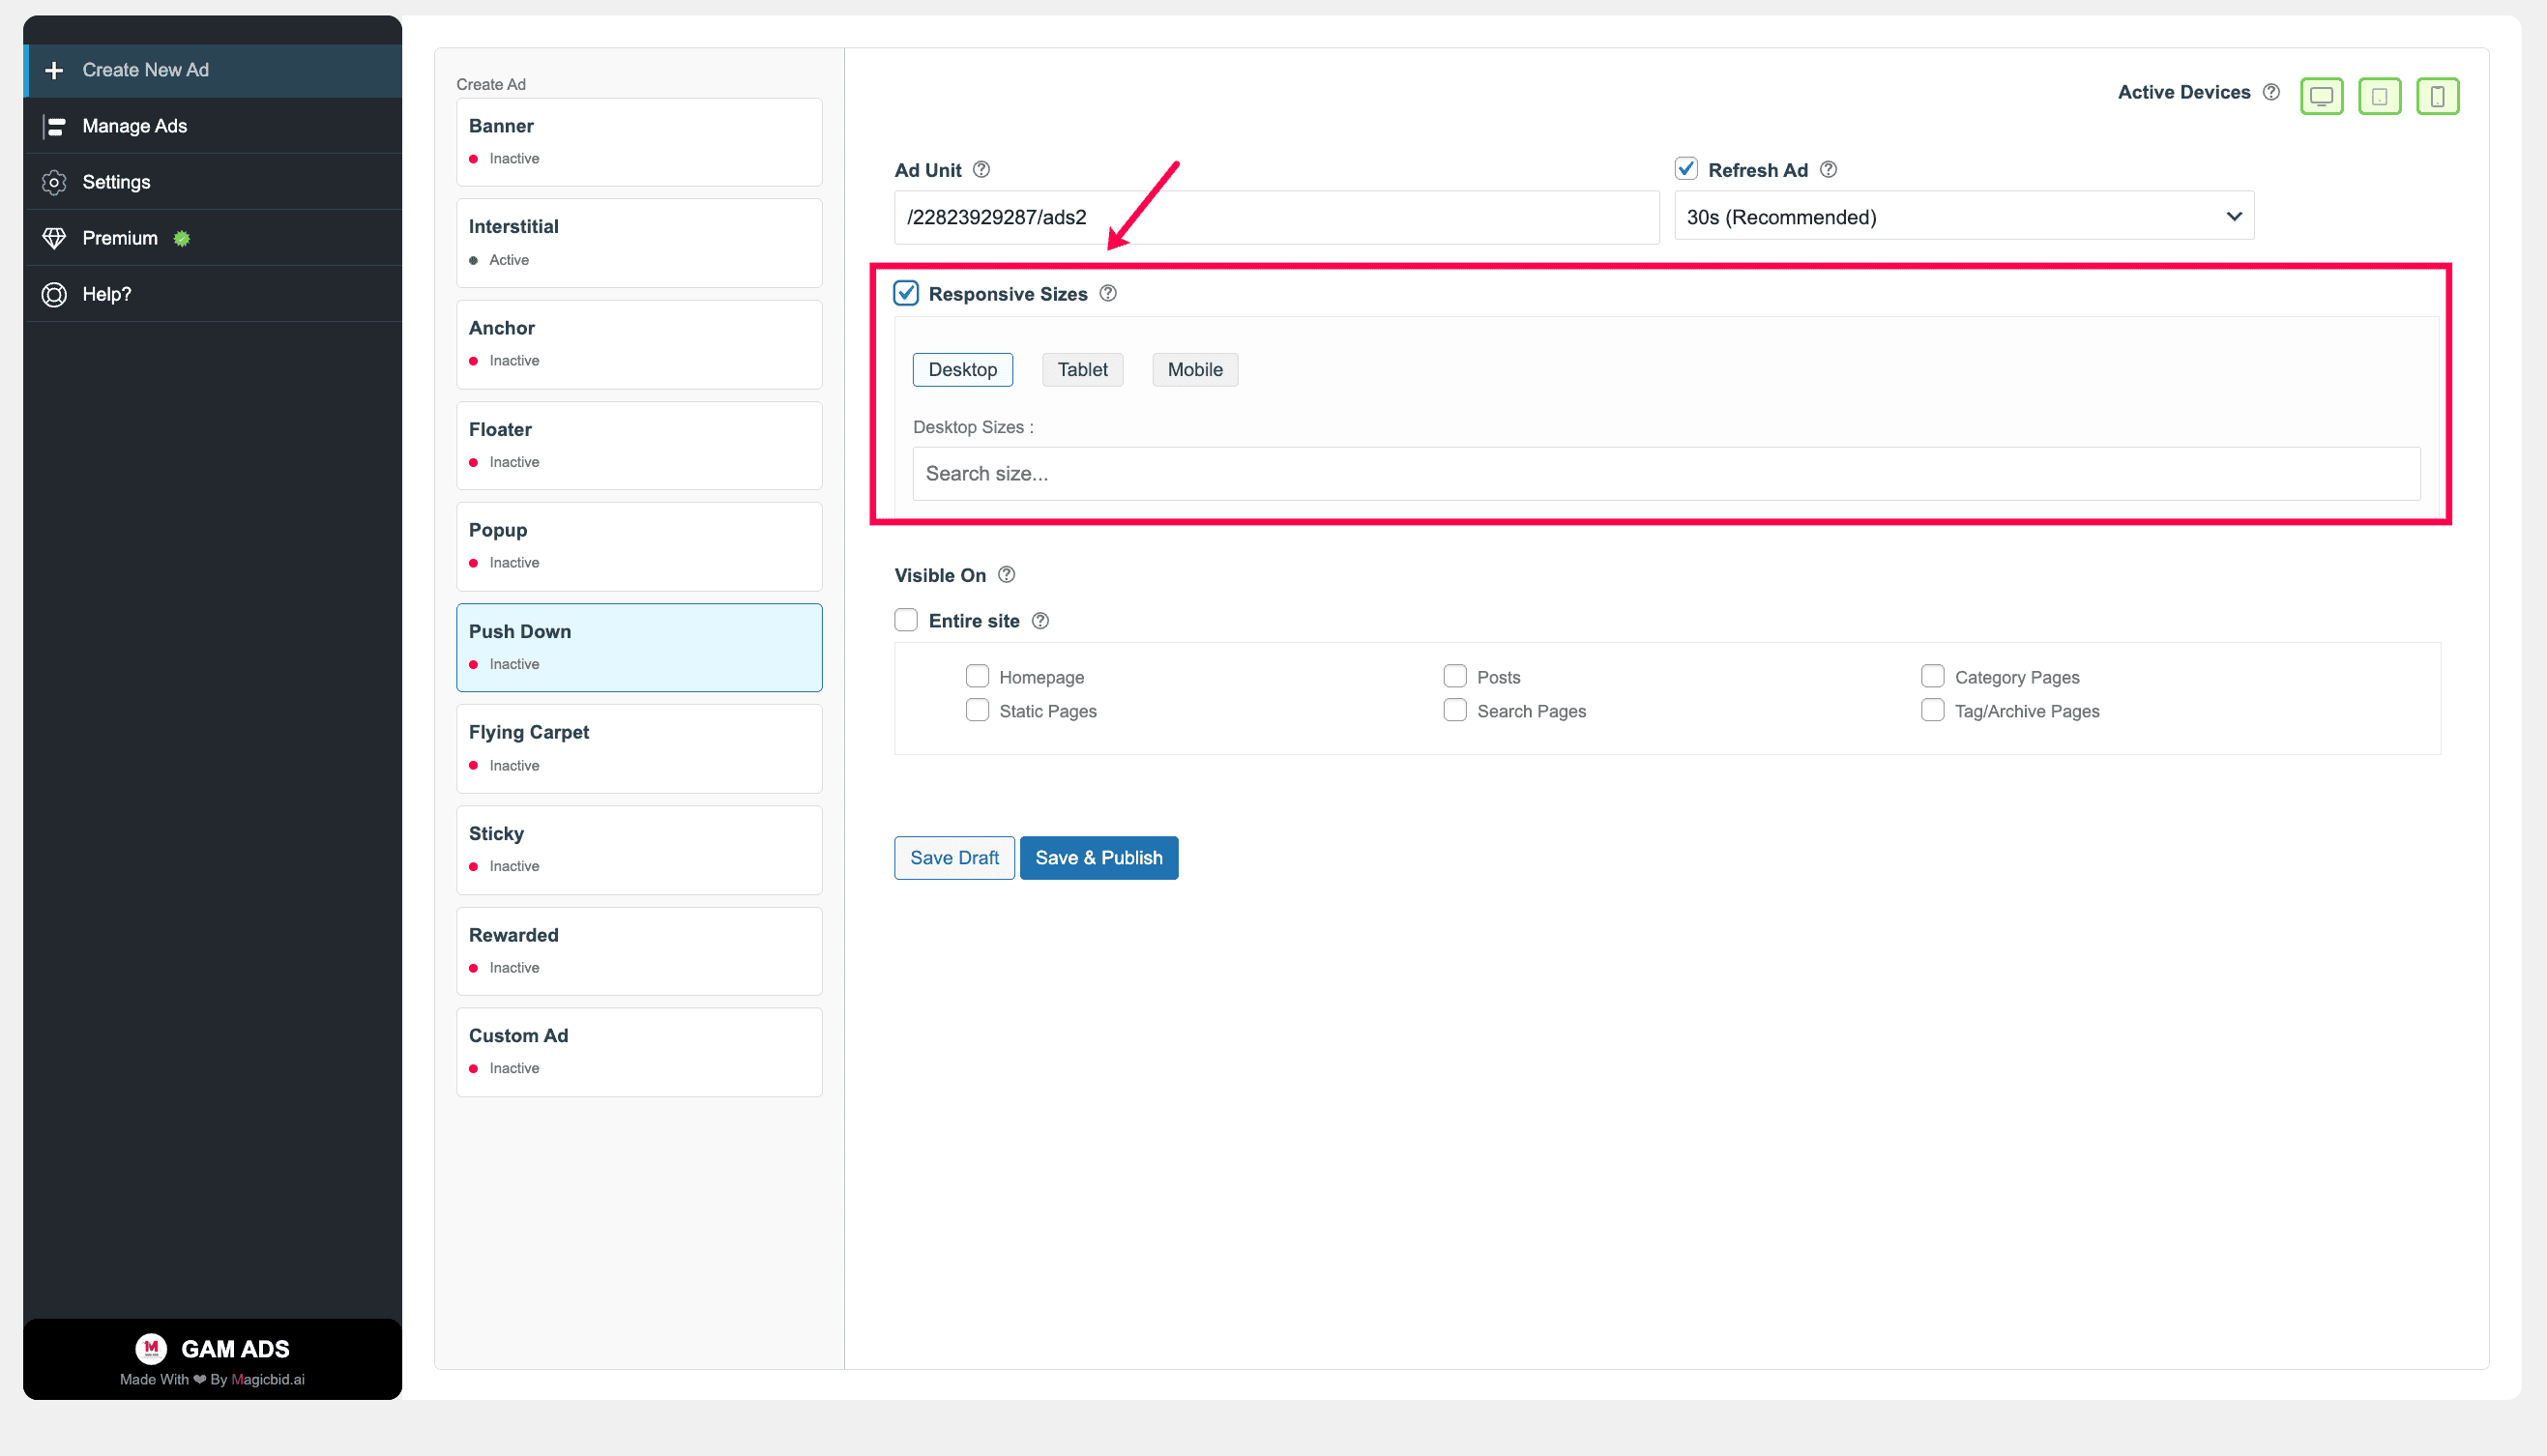
Step 5: Responsive Setting
Decide if the ad should be responsive.
- ON: Automatically adjusts to screen size
- OFF: Uses only fixed ad sizes
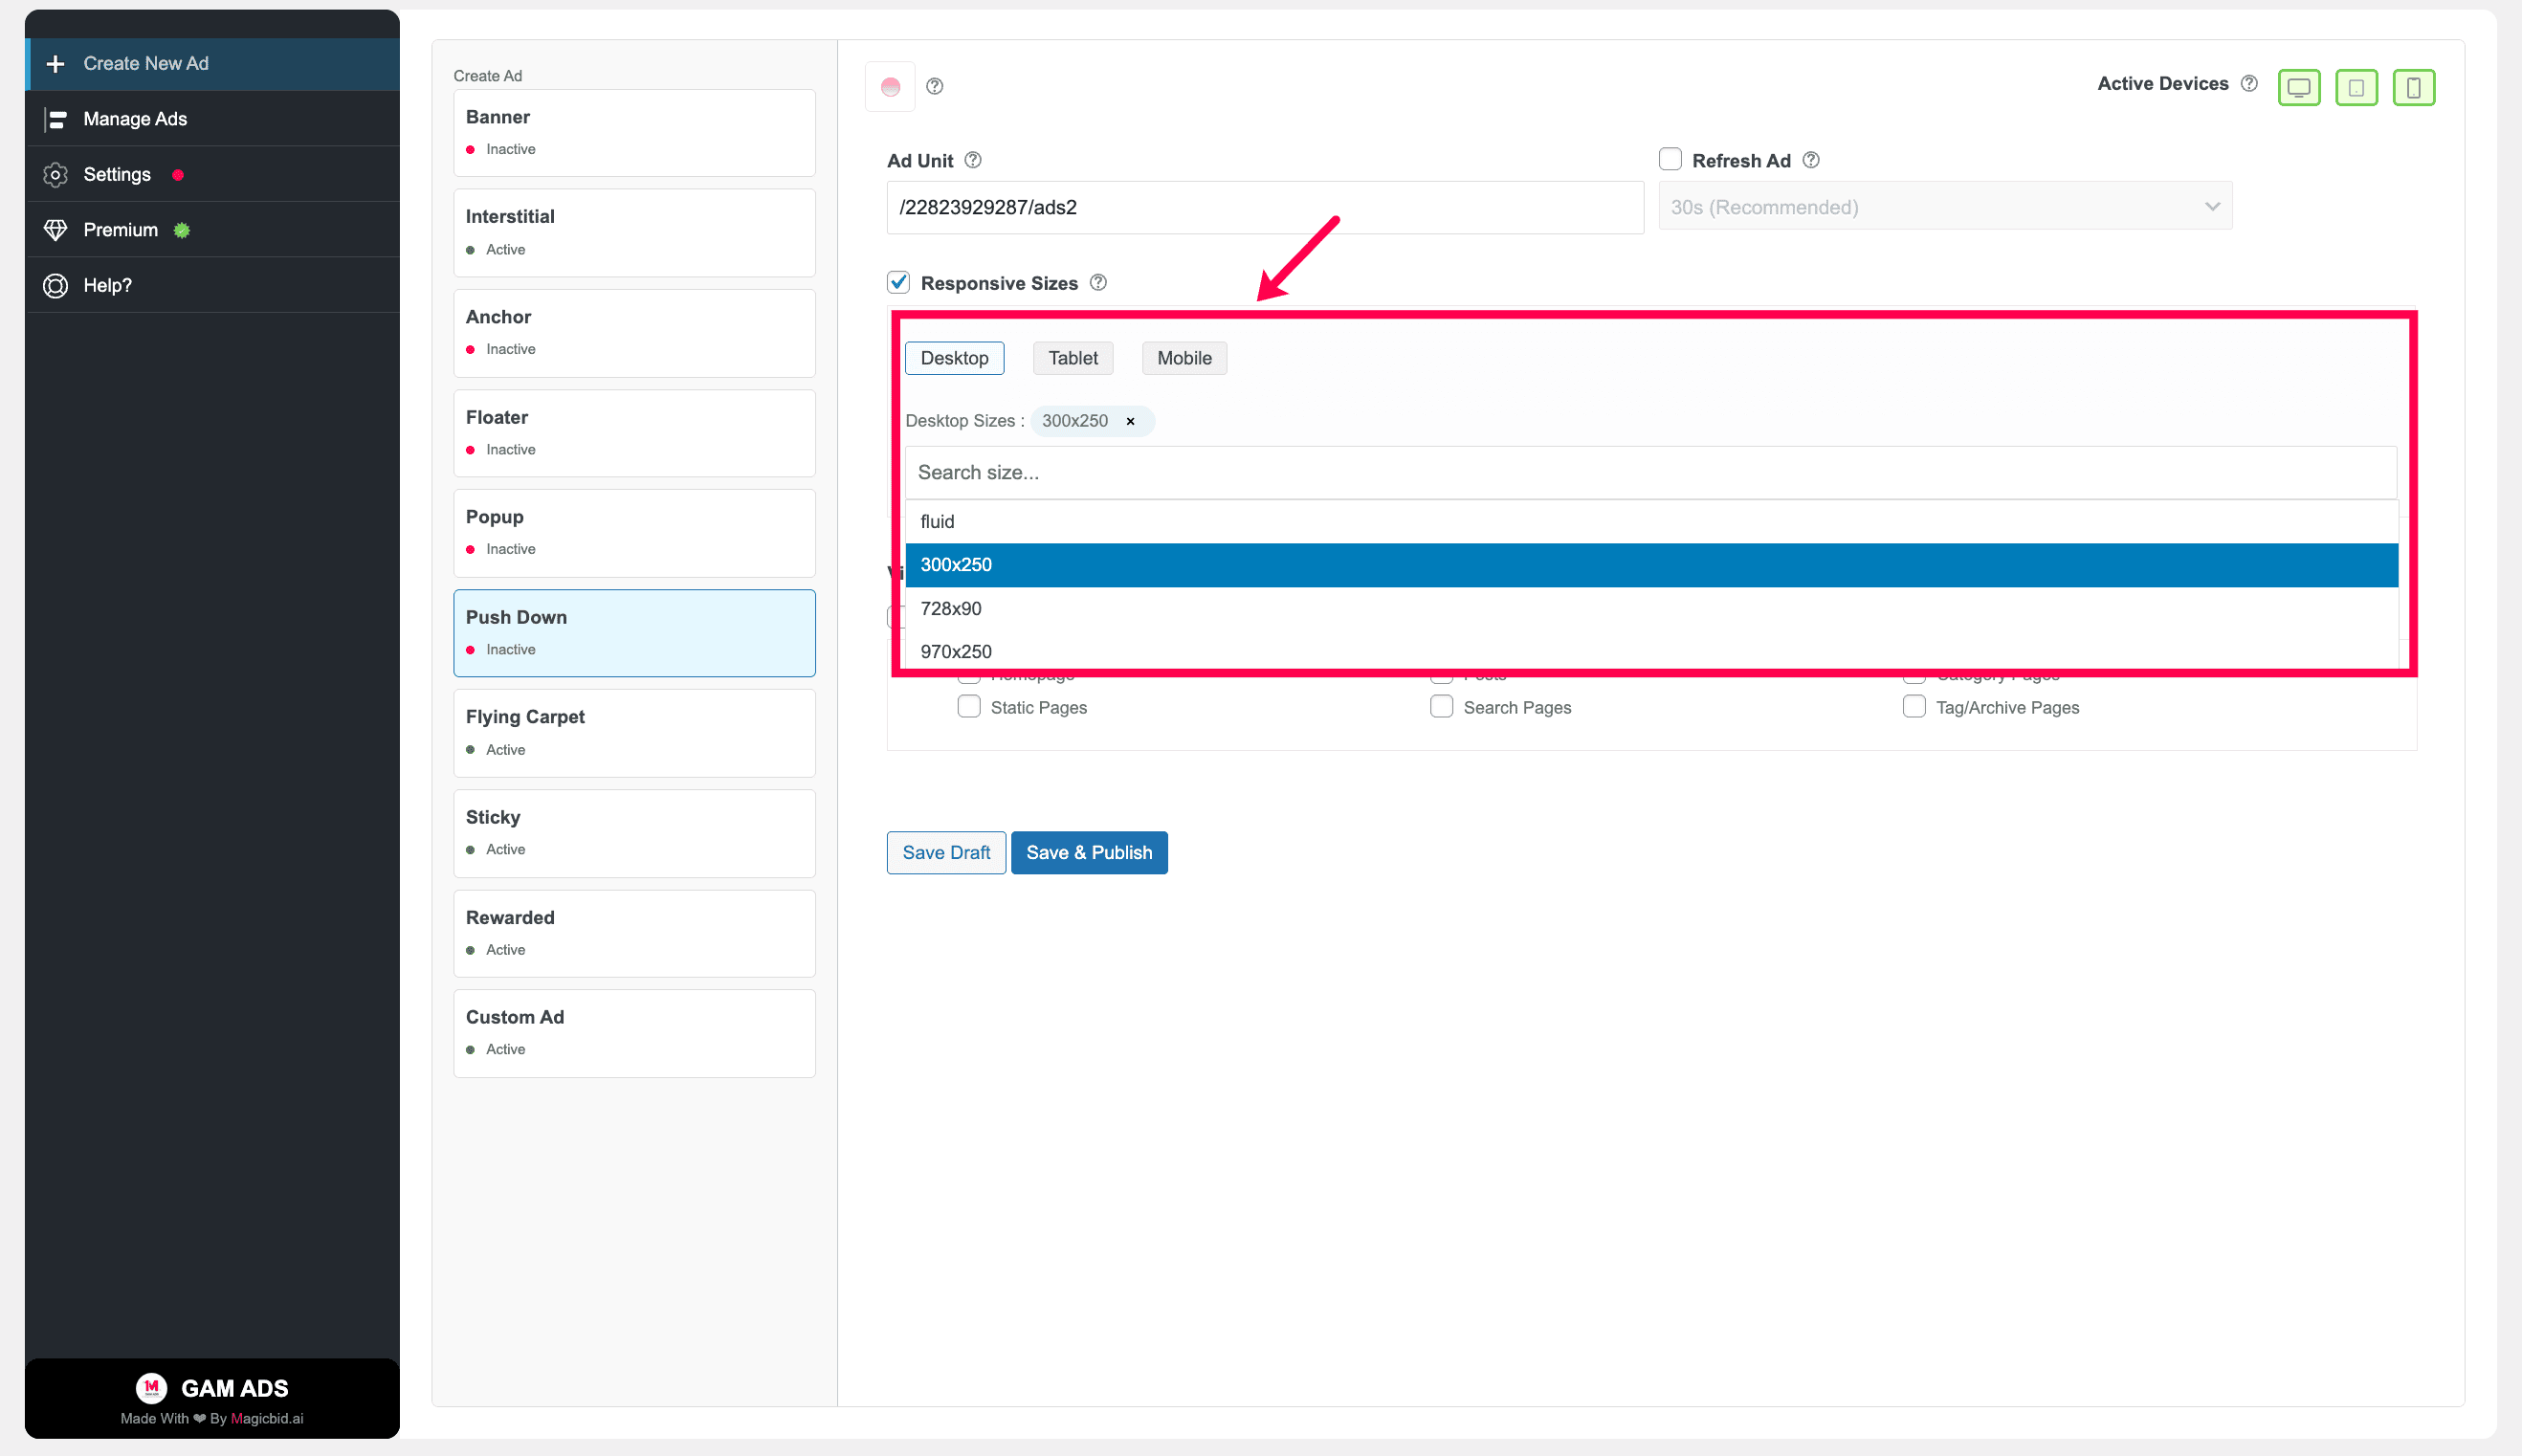
Step 6: Choose Ad Sizes
Select ad sizes for each device.
Example:
- Desktop: 728×90, 300×250
- Mobile: 320×50, 300×250
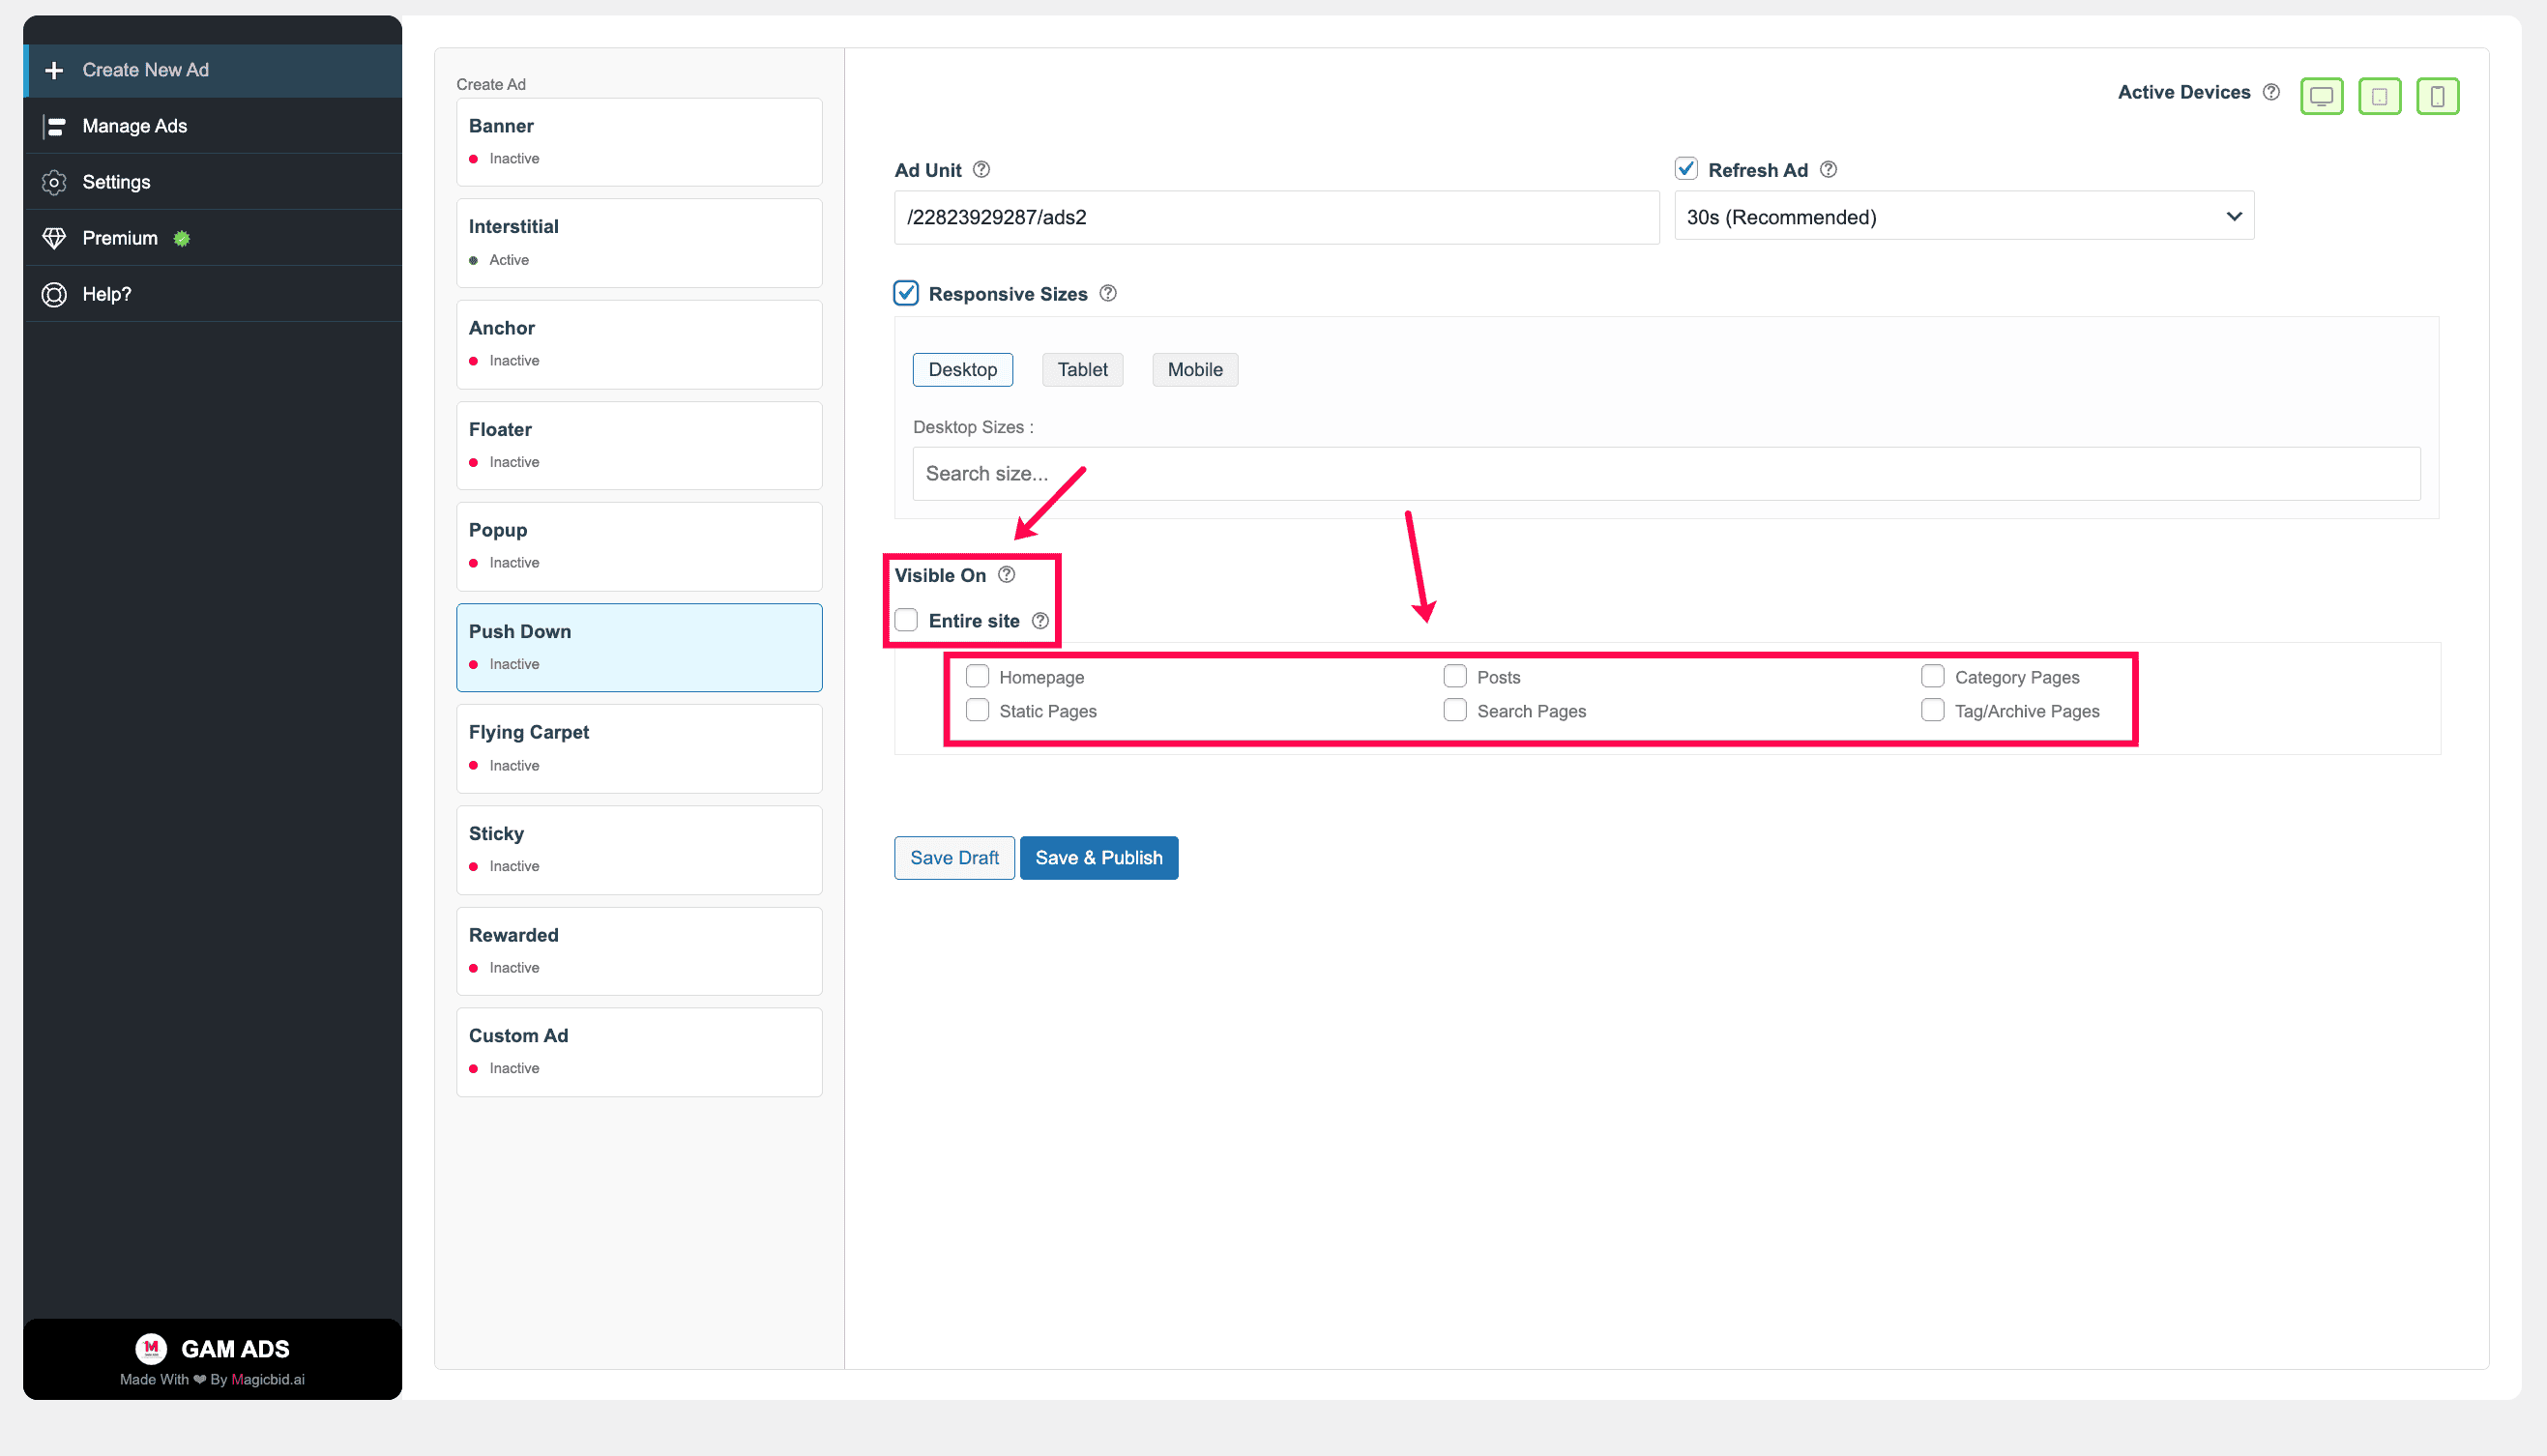
Step 7: Placement Rules
Choose where this ad should appear.
- Entire Site: Shows on all pages
- Specific Pages: Shows only on selected posts, pages, or categories
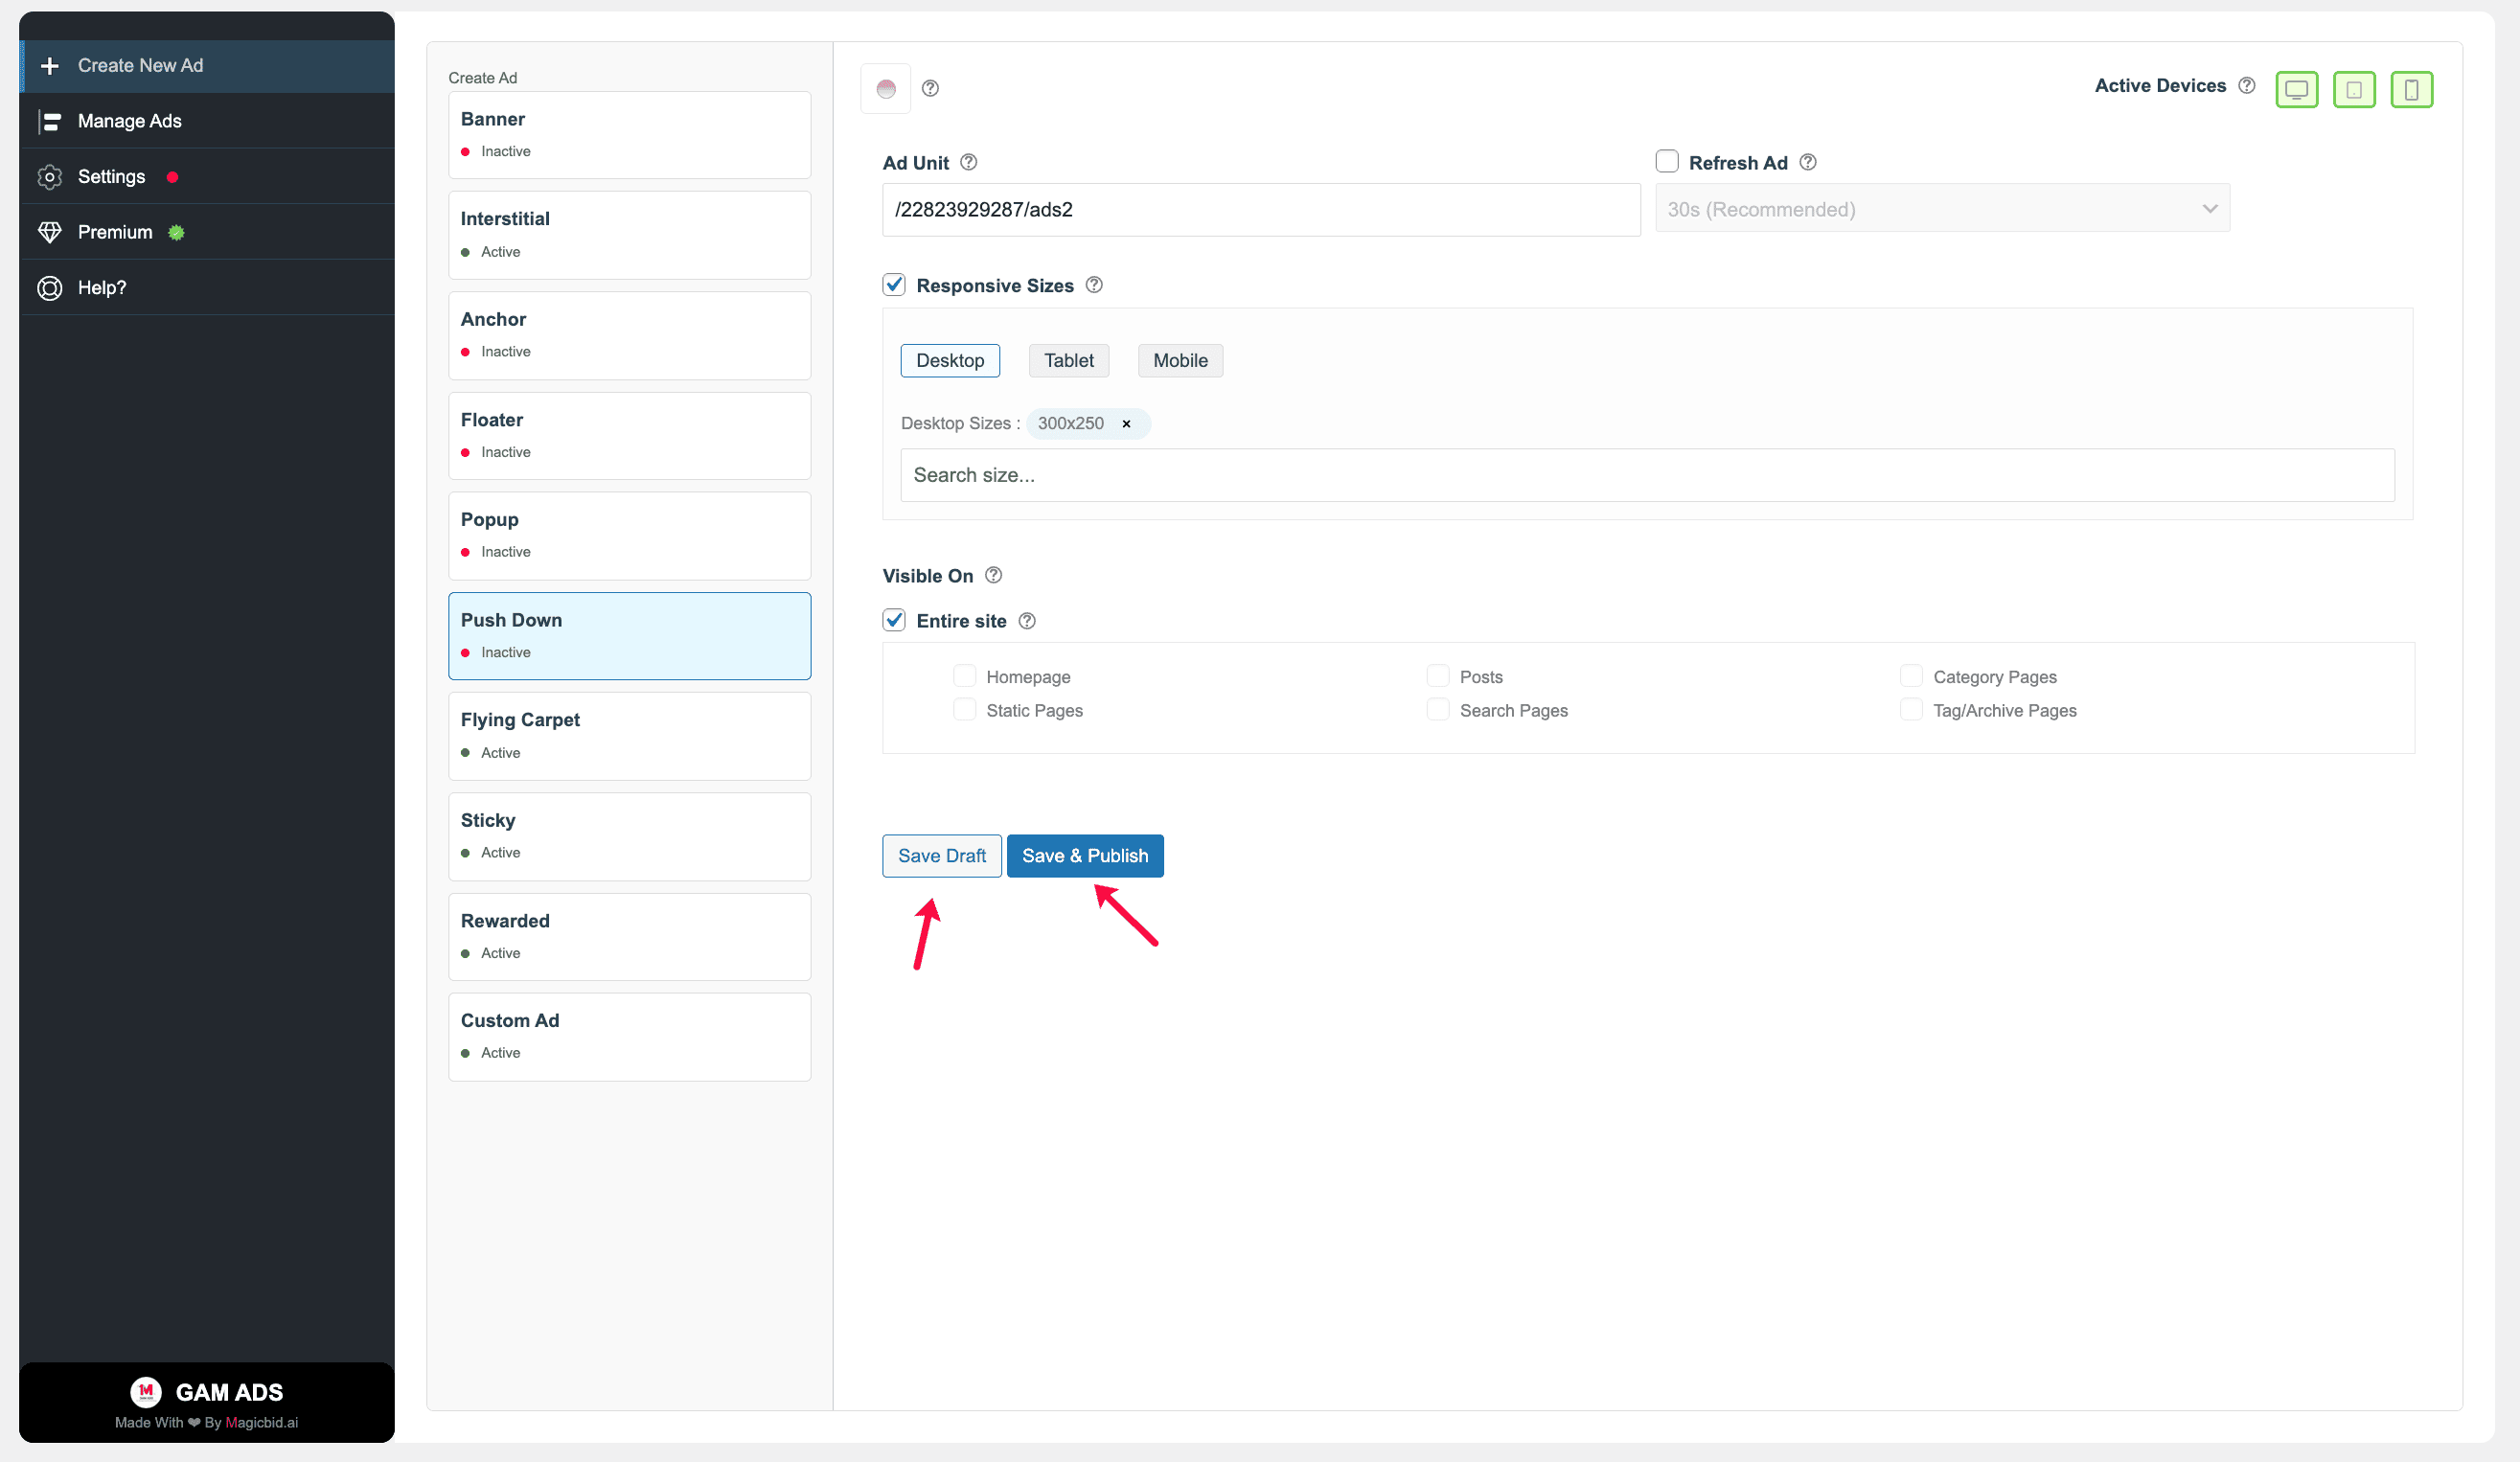
Step 8: Save Your Ad
Save Draft: Saves the ad without publishing it.
Save & Publish: Saves the ad and makes it live immediately.
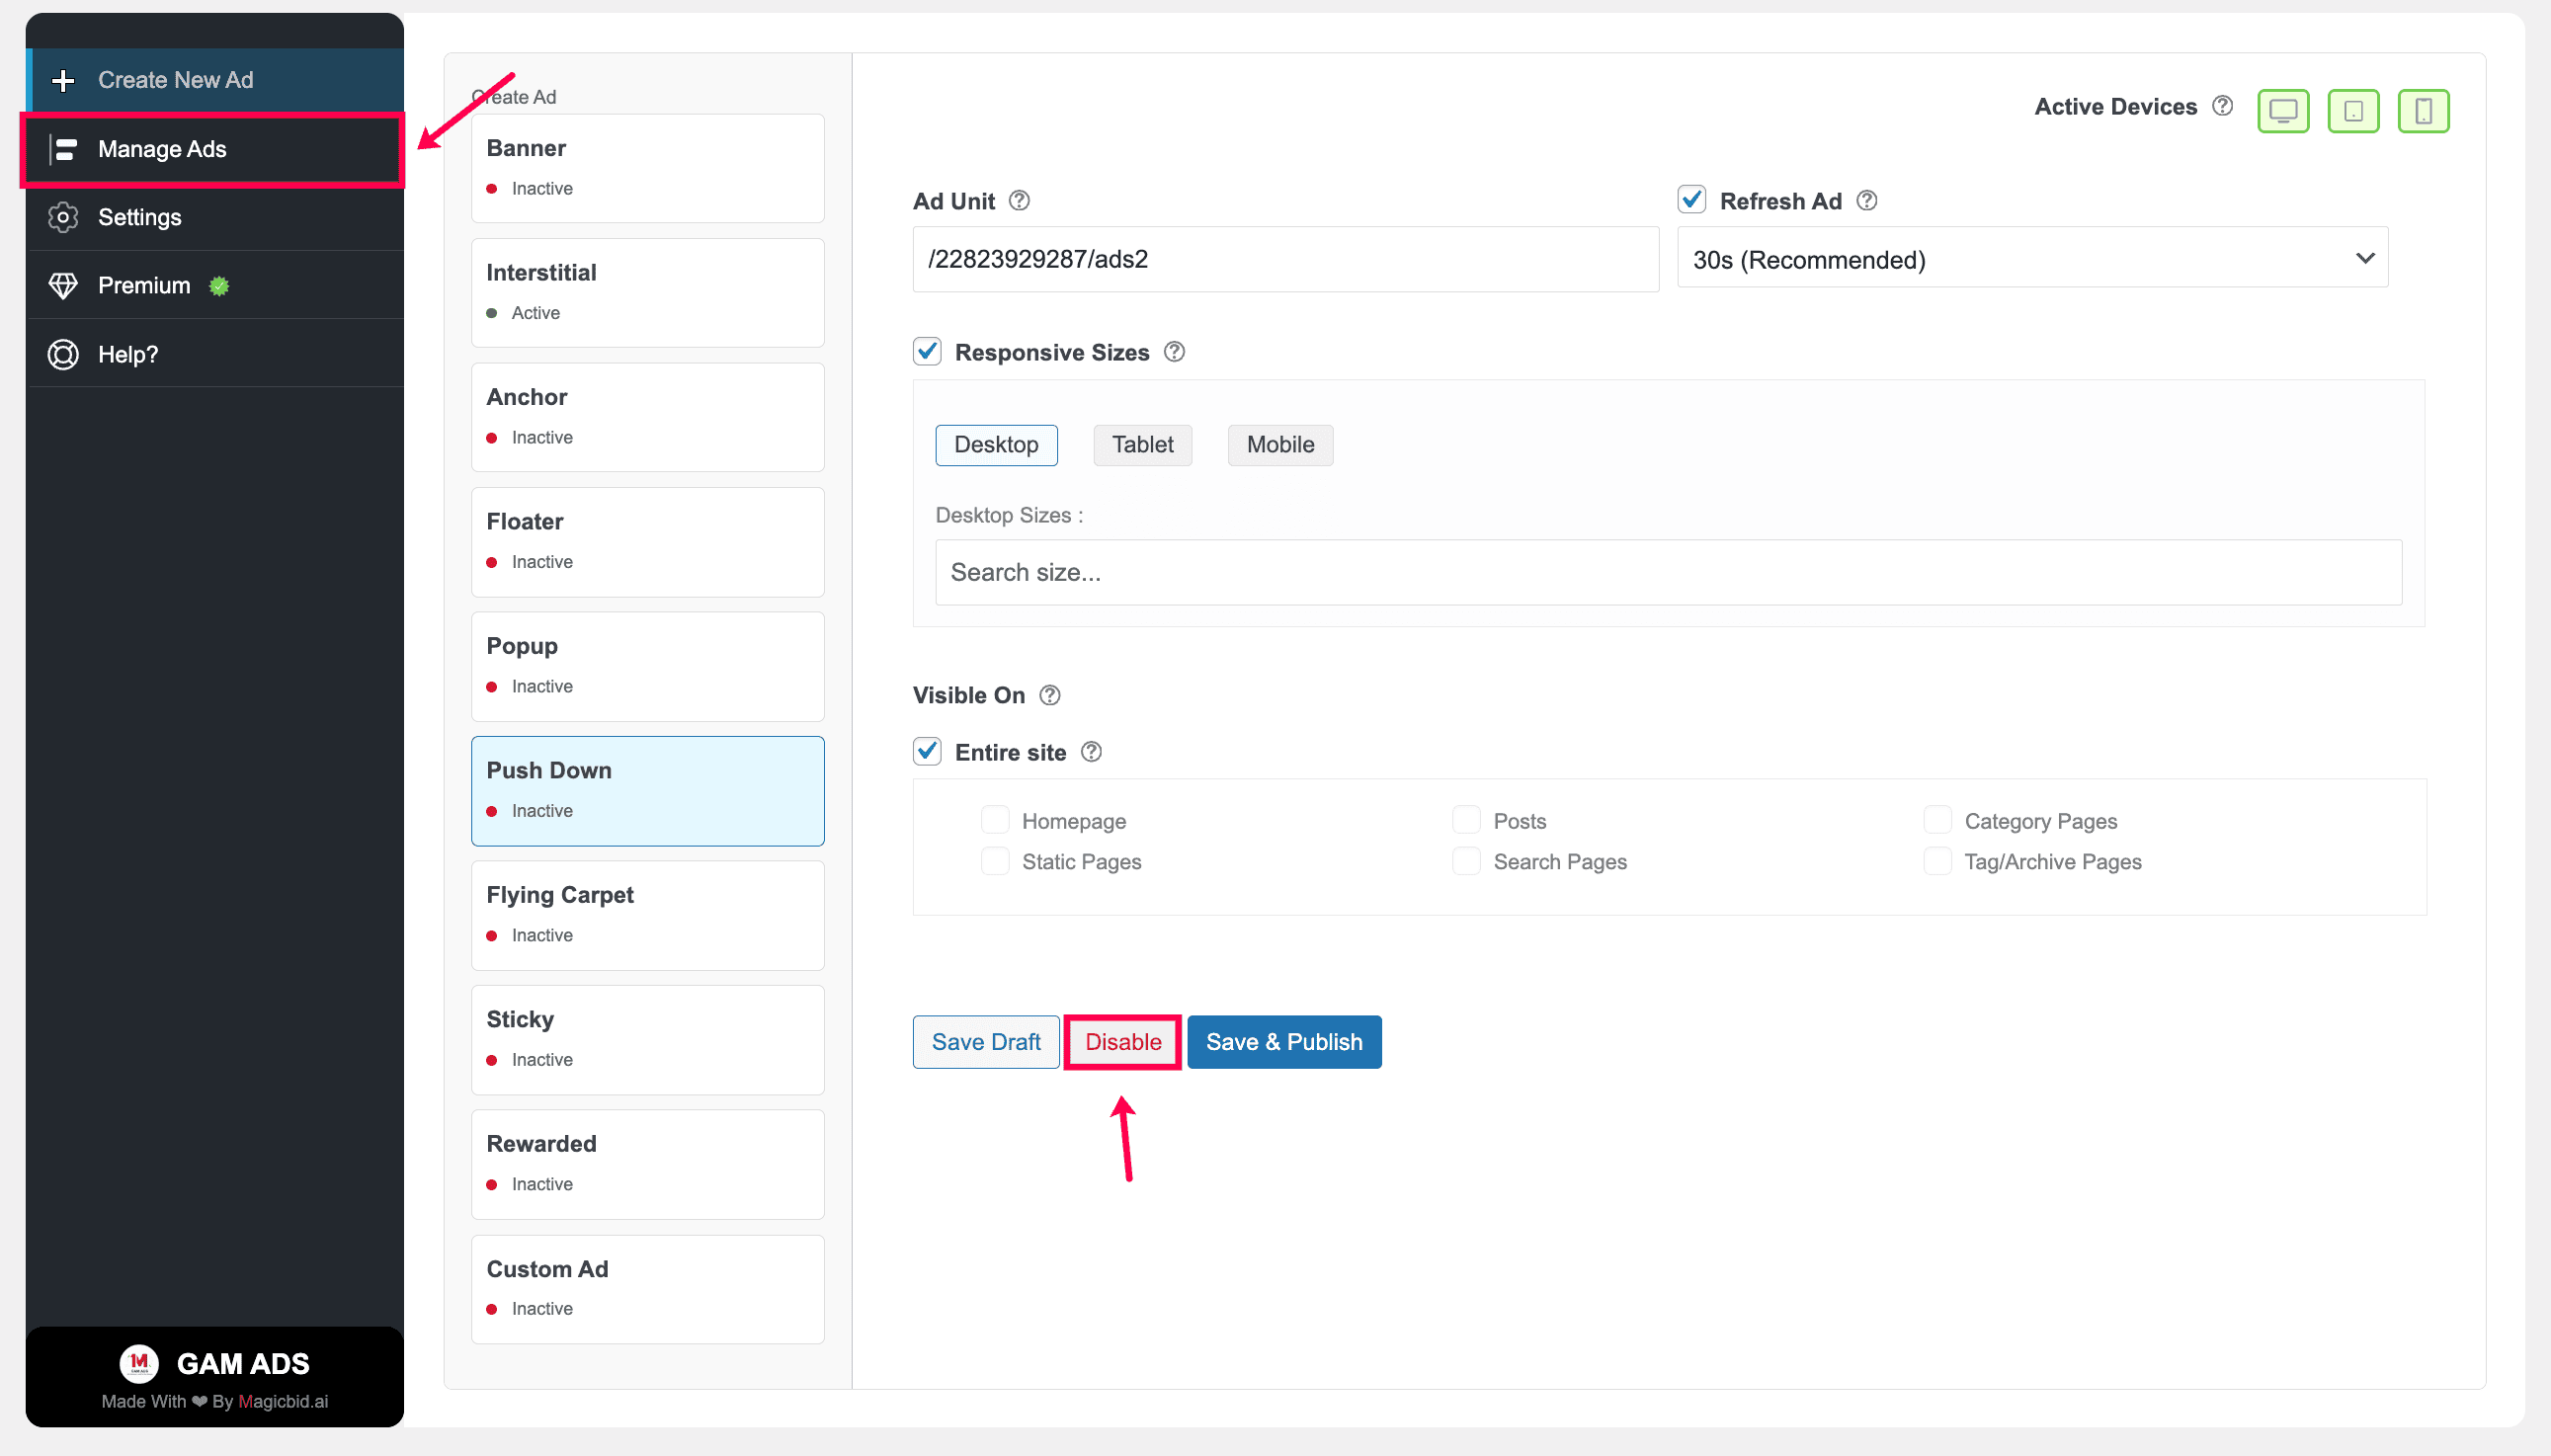
Step 9: Manage Ad Status
After publishing, you can manage the ad status:
- Disable: Pause the ad anytime
- Save & Publish: Apply updates and keep the ad live
You can manage all ads later from: GAM ADS → Manage Ads
Creating Flying Carpet Ads
Overview
- Select Flying Carpet as the ad type
- Choose where it runs (Desktop, Tablet, Mobile)
- Pick your Google Ad Manager ad unit
- Enable Ad Refresh if needed (Premium)
- Turn Responsive ON or OFF
- Choose ad sizes for each device
- Decide placement (Entire site or specific pages)
- Set ad position and alignment
- Click Save & Publish to make it live
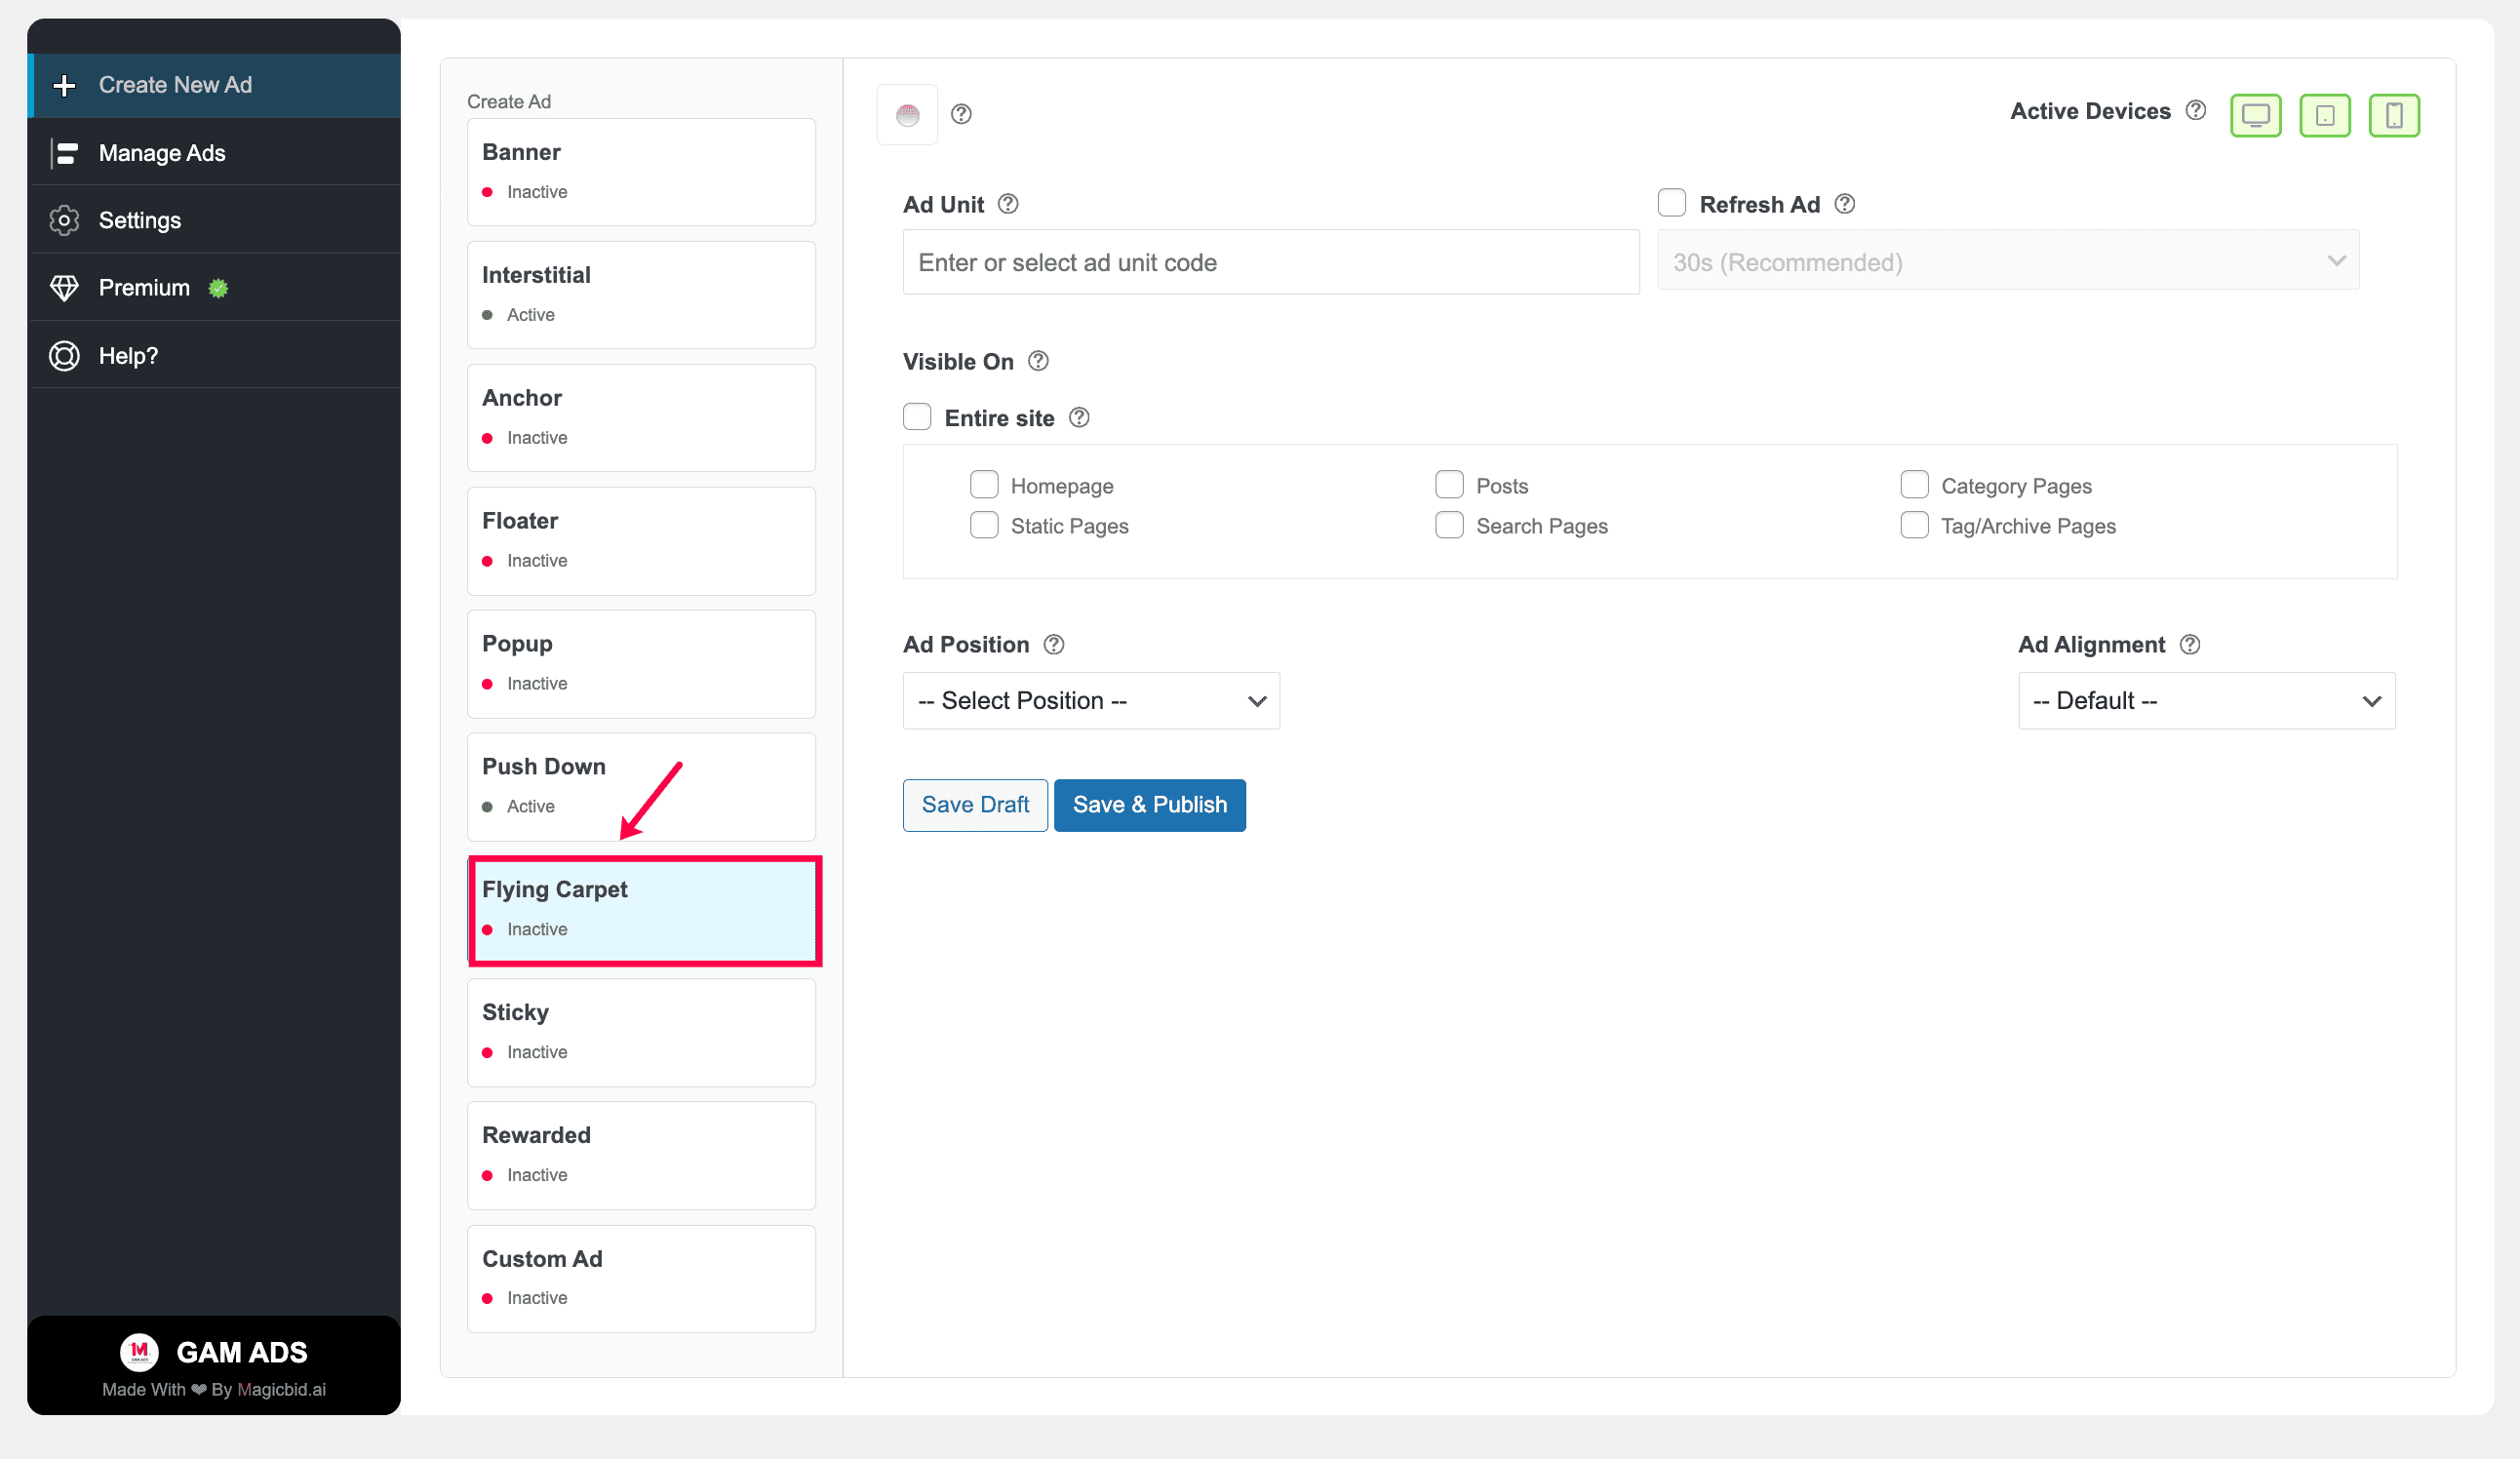
Step 1: Choose Ad Type
Go to Create New Ad and select Flying Carpet.
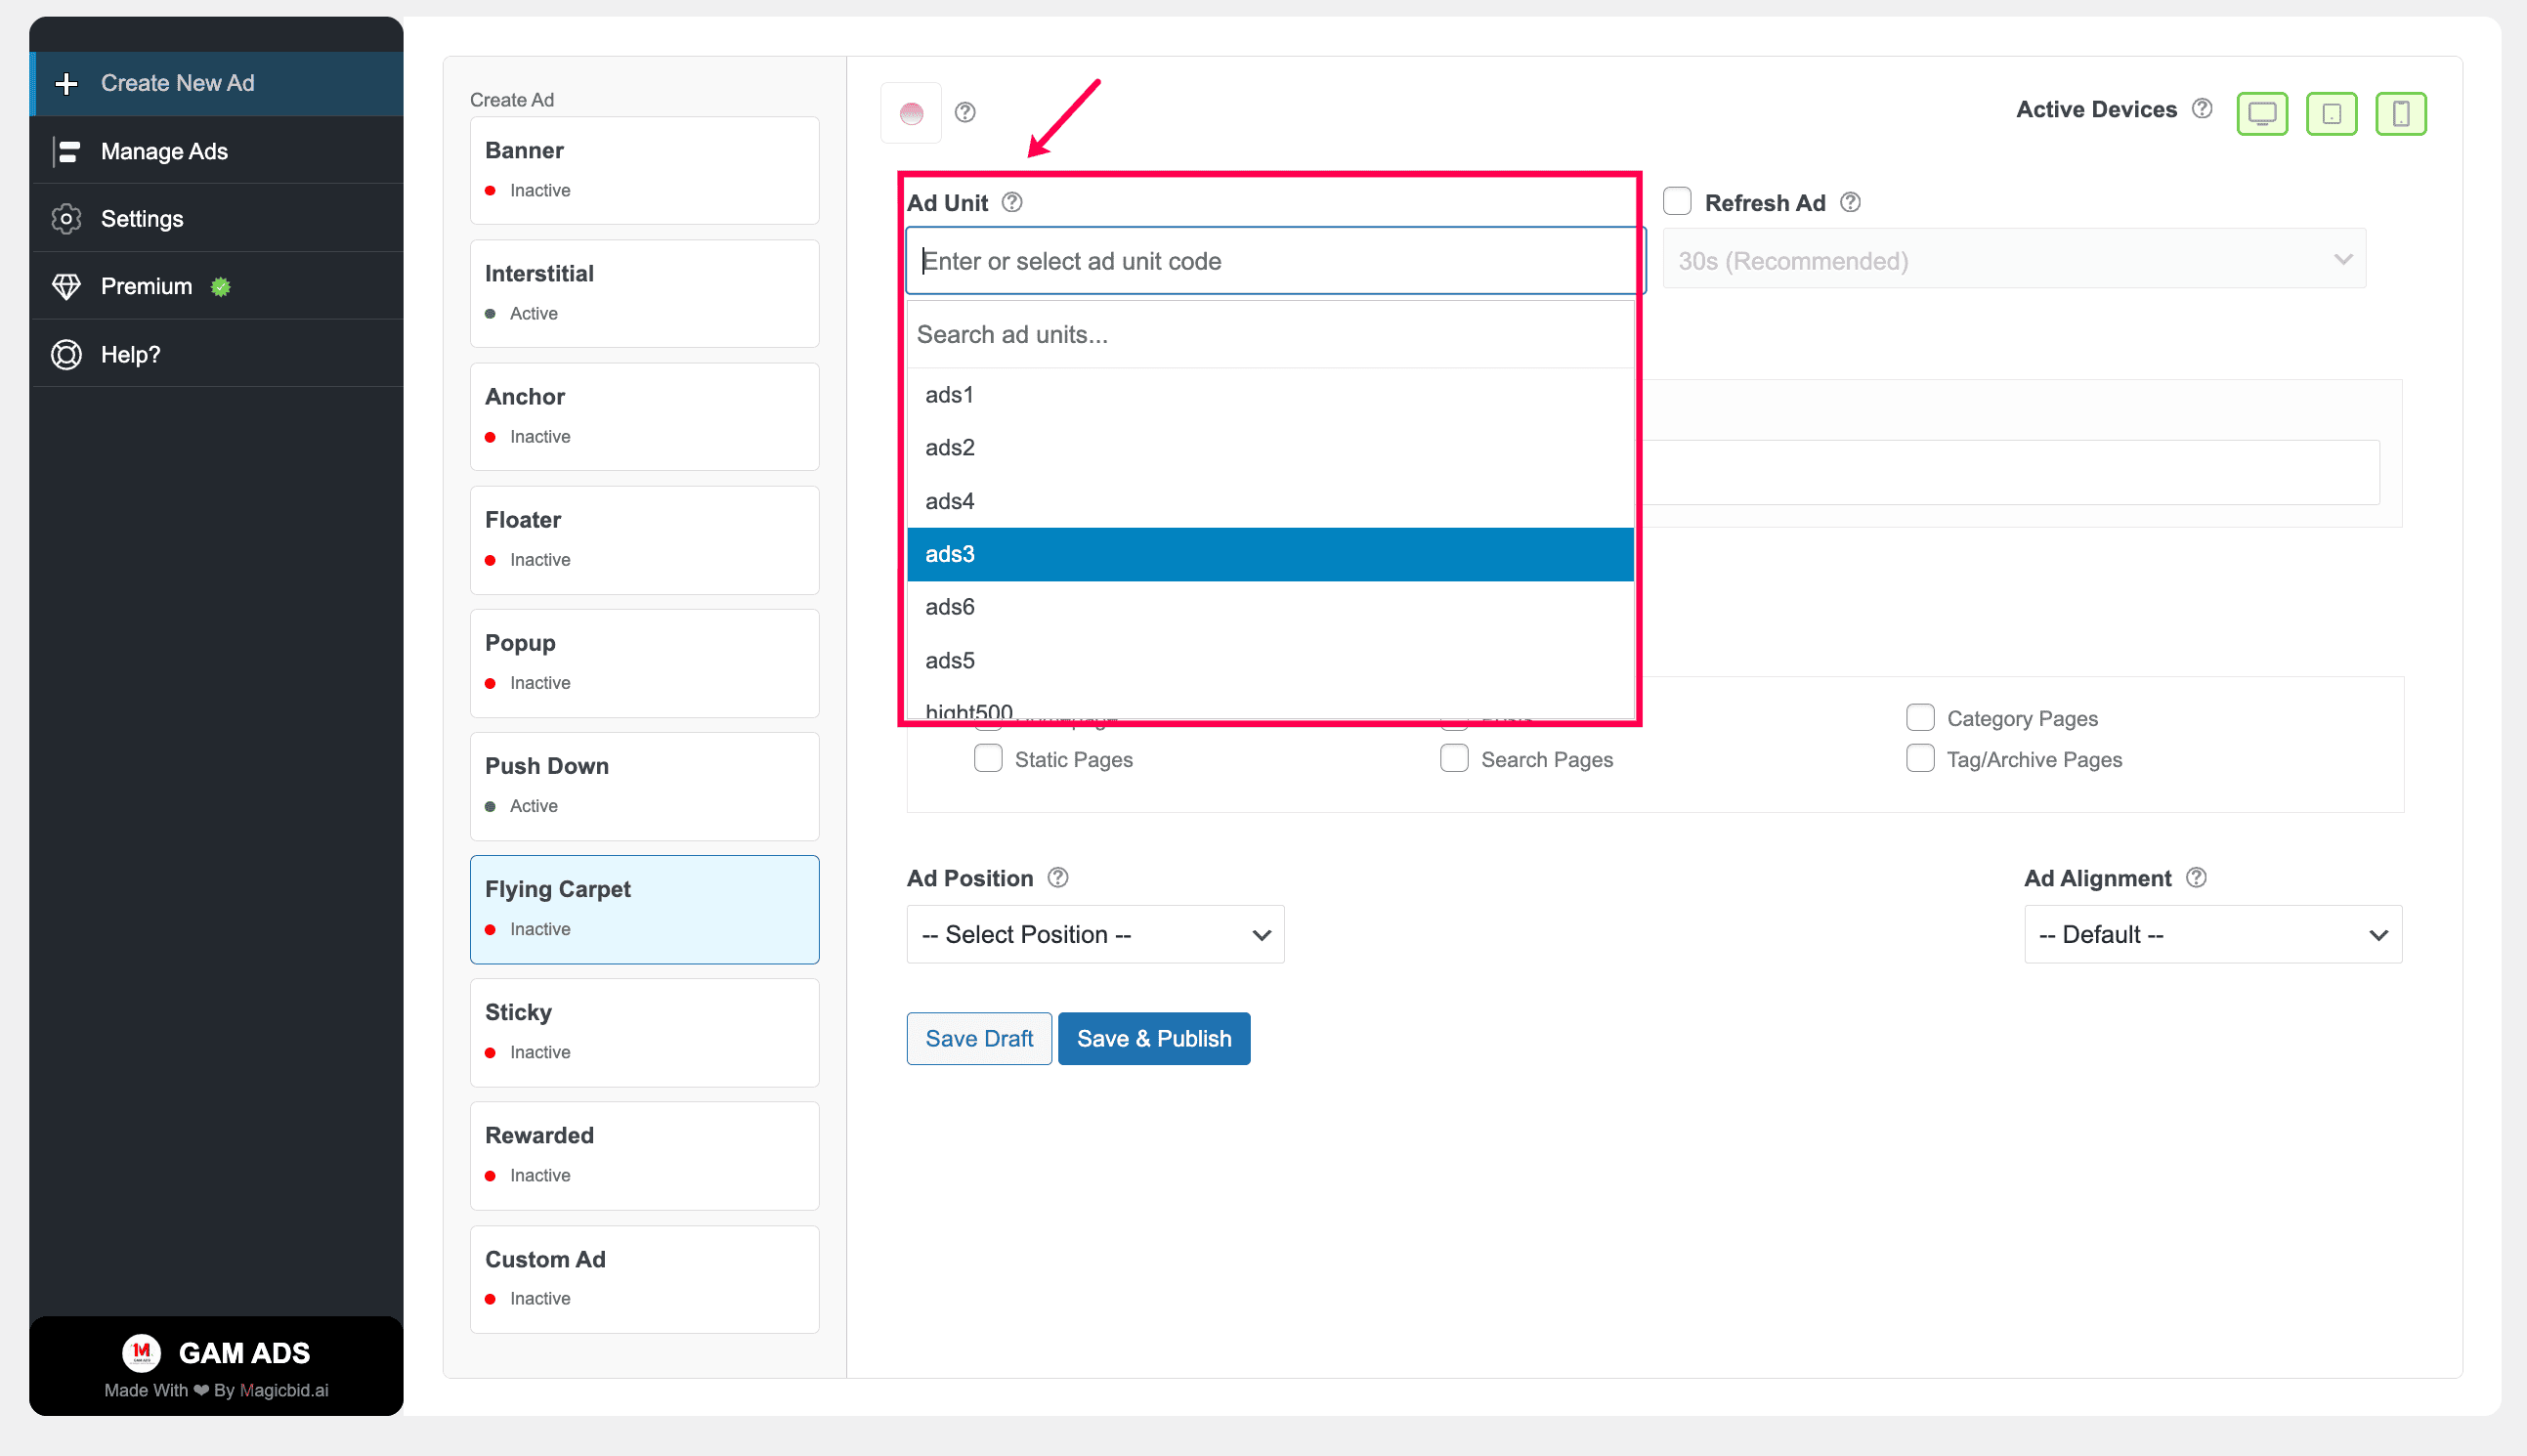
Step 2: Select Ad Unit
Choose the Google Ad Manager ad unit you want to serve.
Note: The ad unit must already exist in your Google Ad Manager account in order to appear in this list.
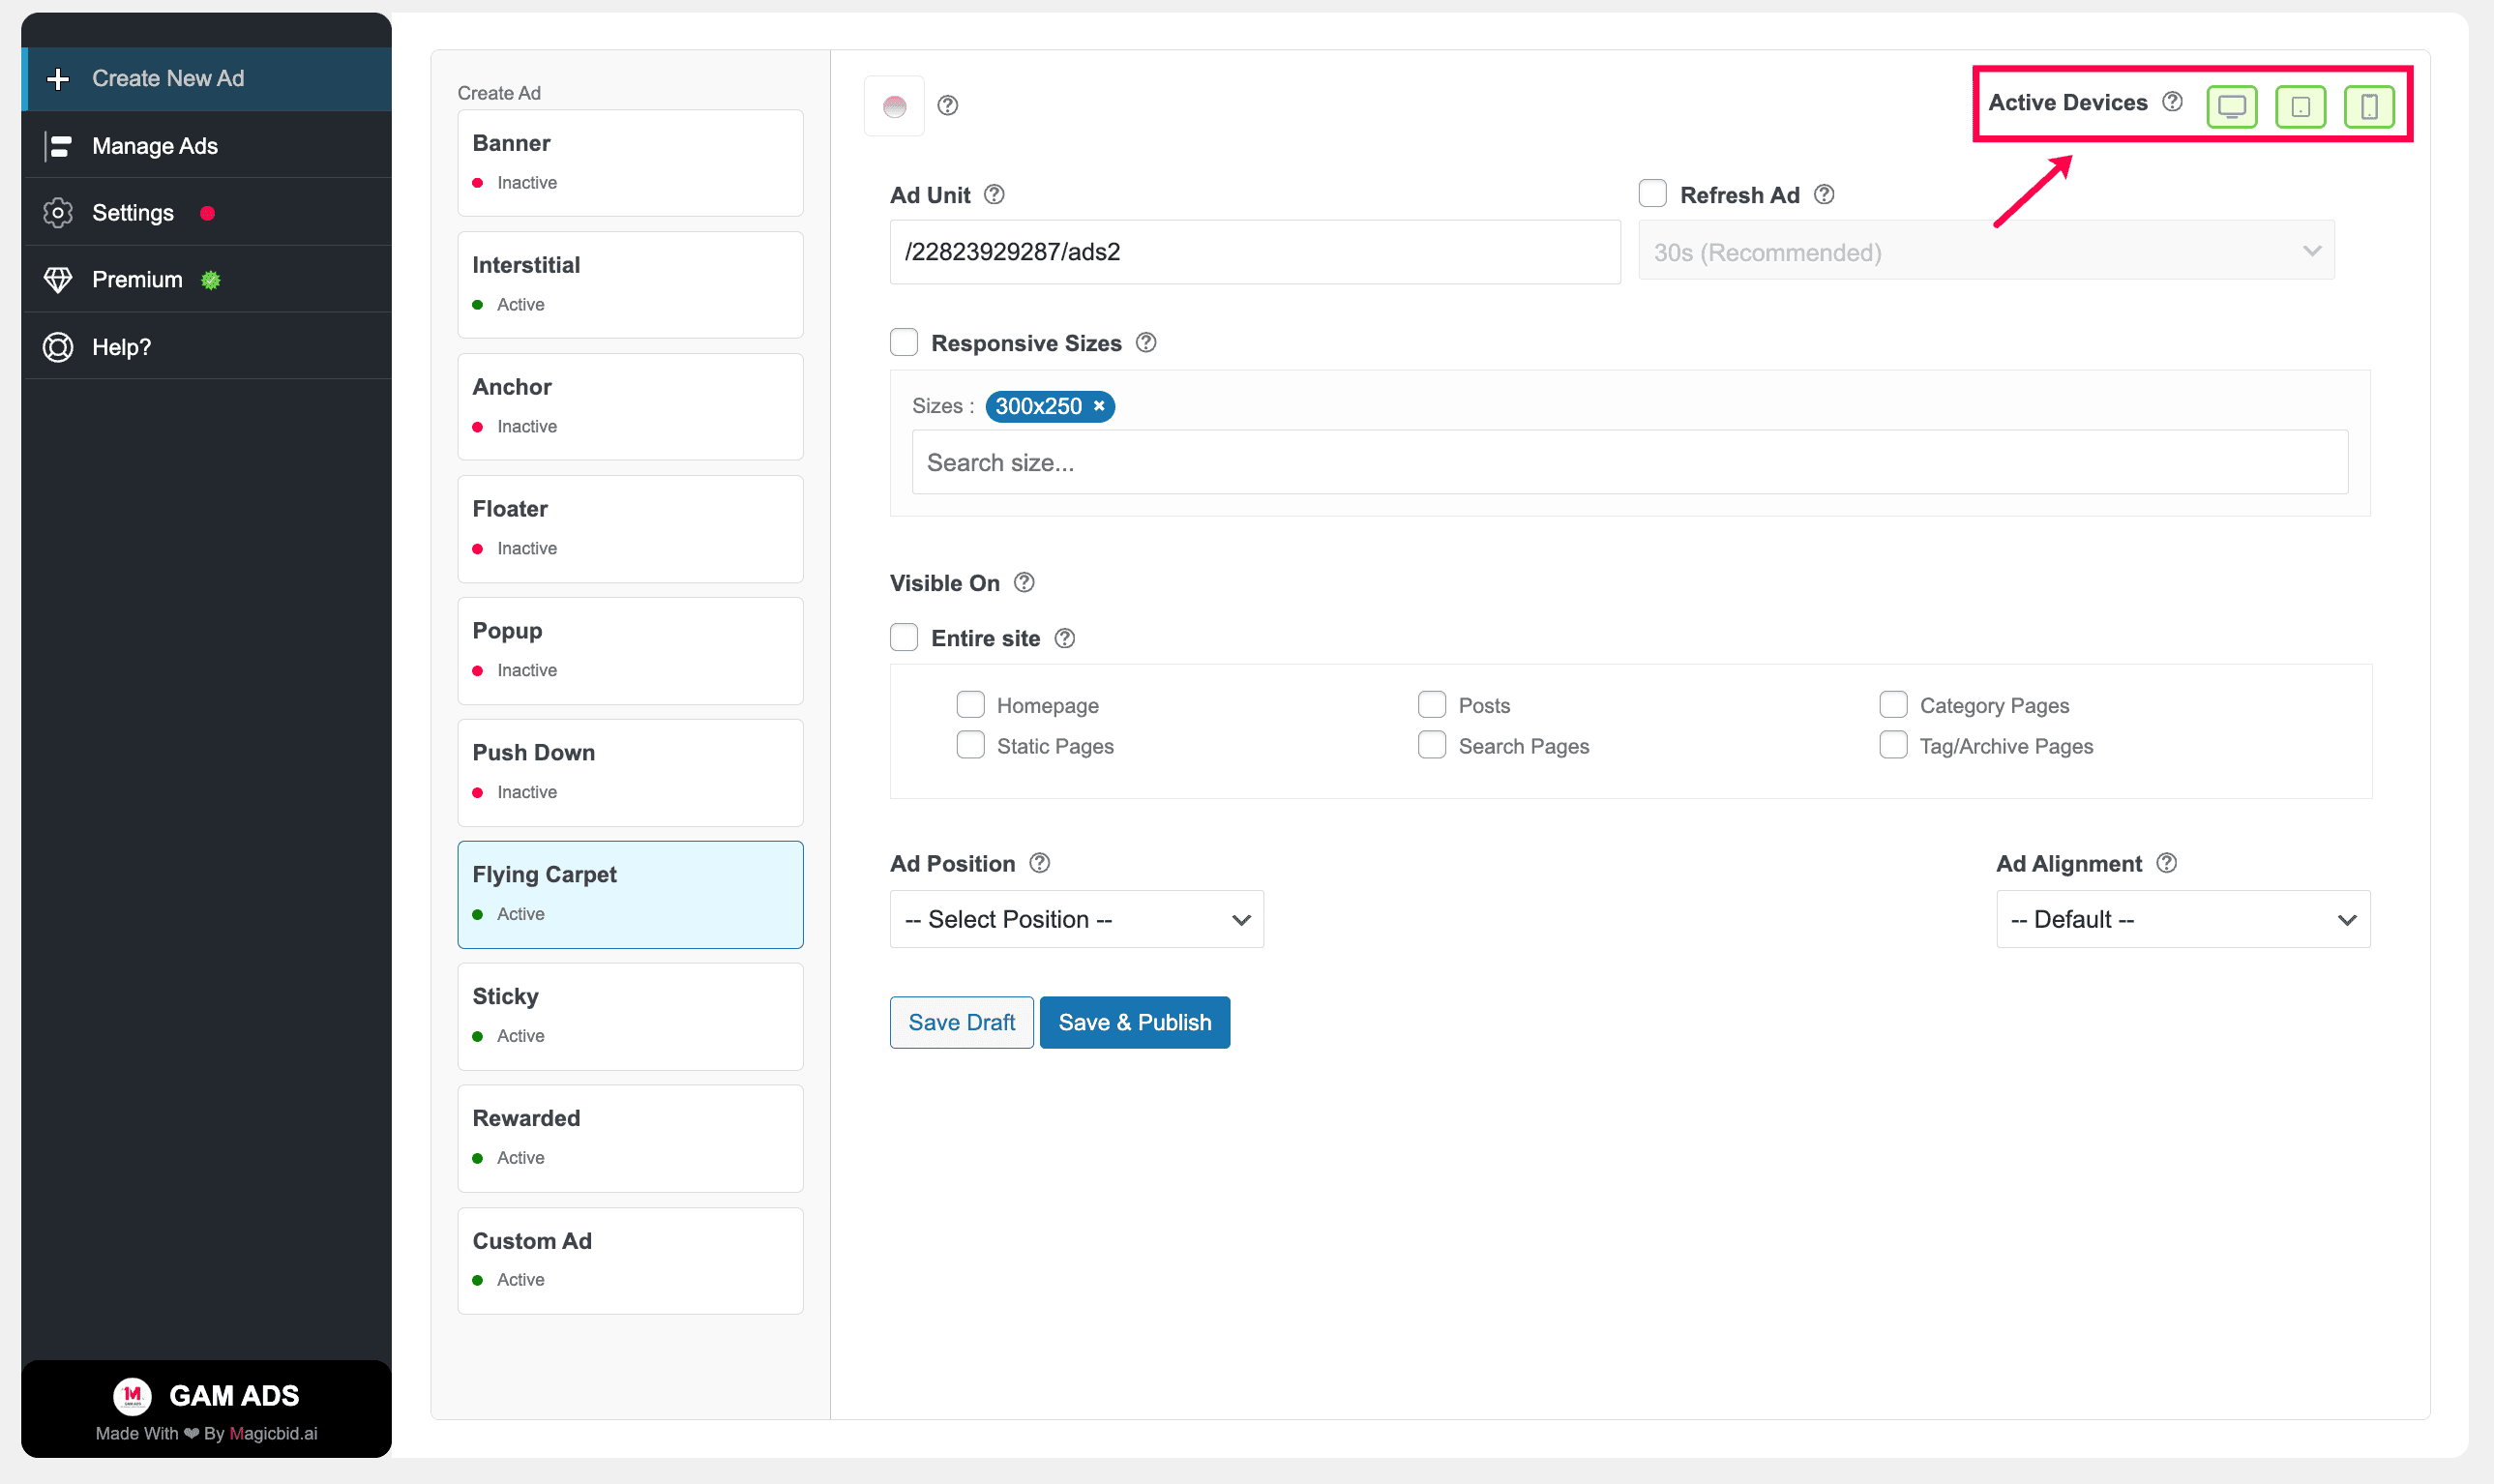
Step 3: Choose Devices
Under Active Devices, select where this ad should run:
- Desktop
- Tablet
- Mobile
You may enable one, two, or all three device types.
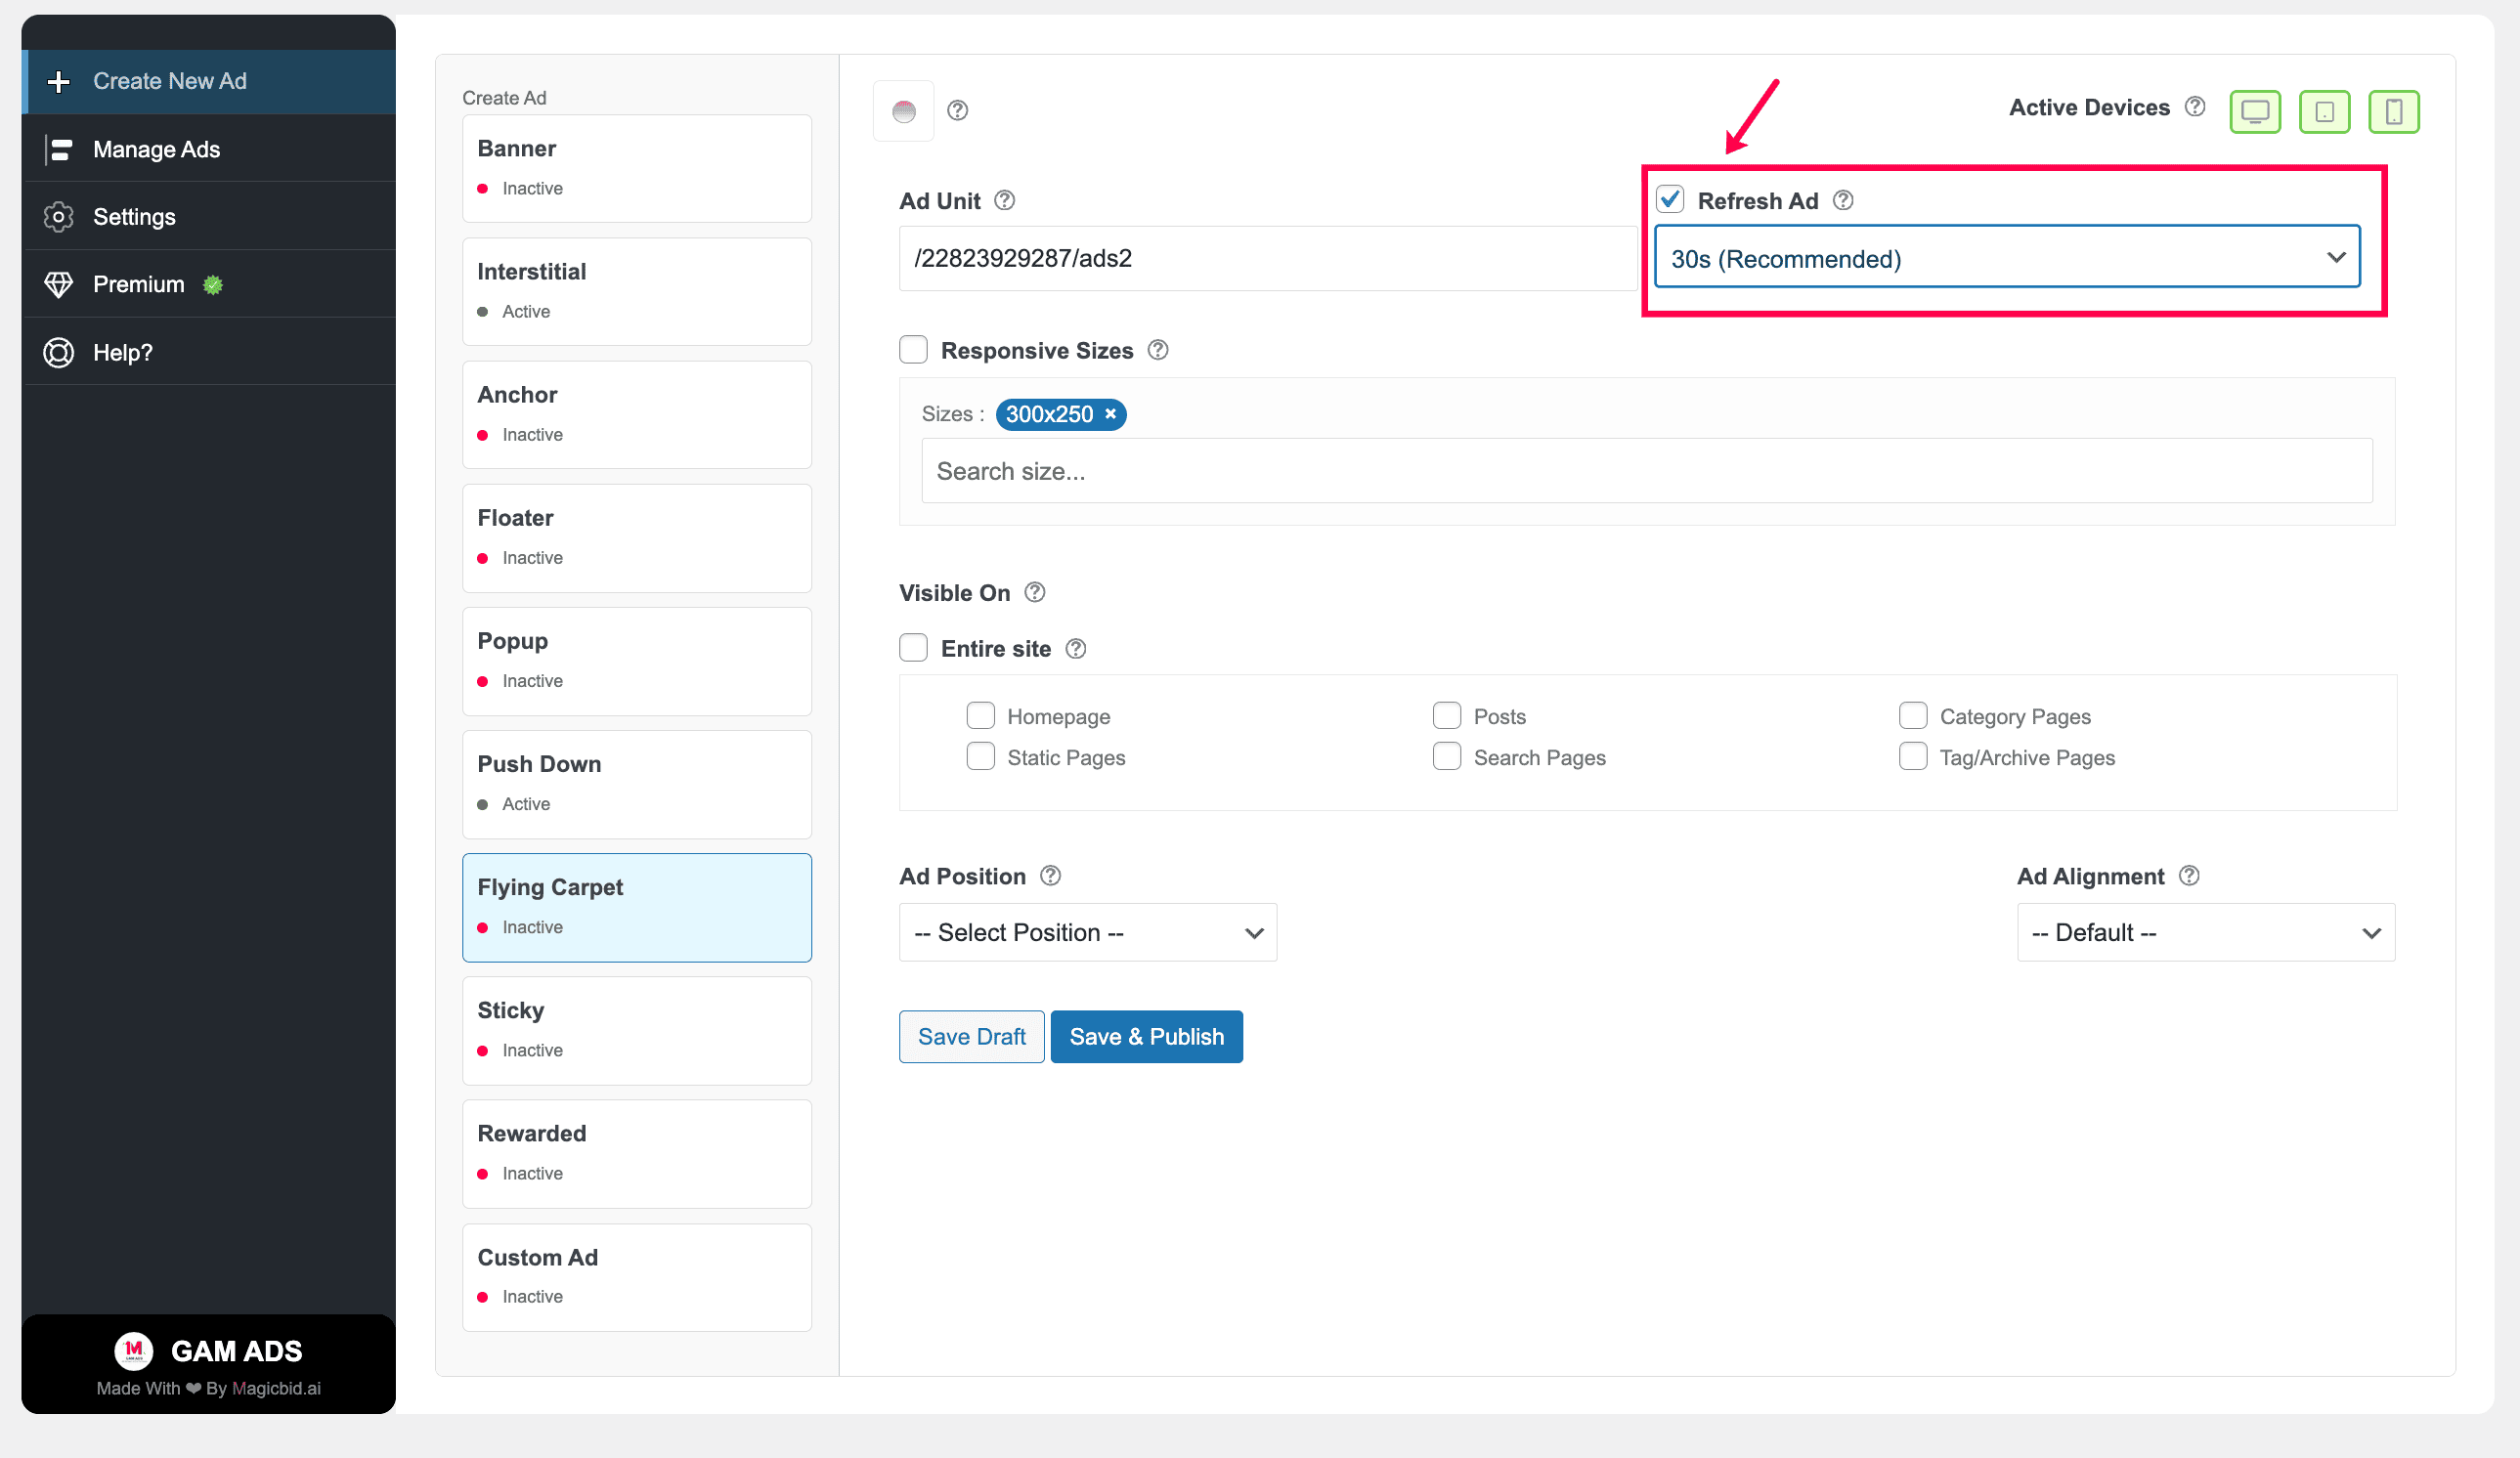
Step 4: Ad Refresh (Premium Feature)
Enable or disable ad refresh.
- ON: Reloads ads after a set interval
- OFF: Keeps the ad static
Note: This feature is available for premium users only.
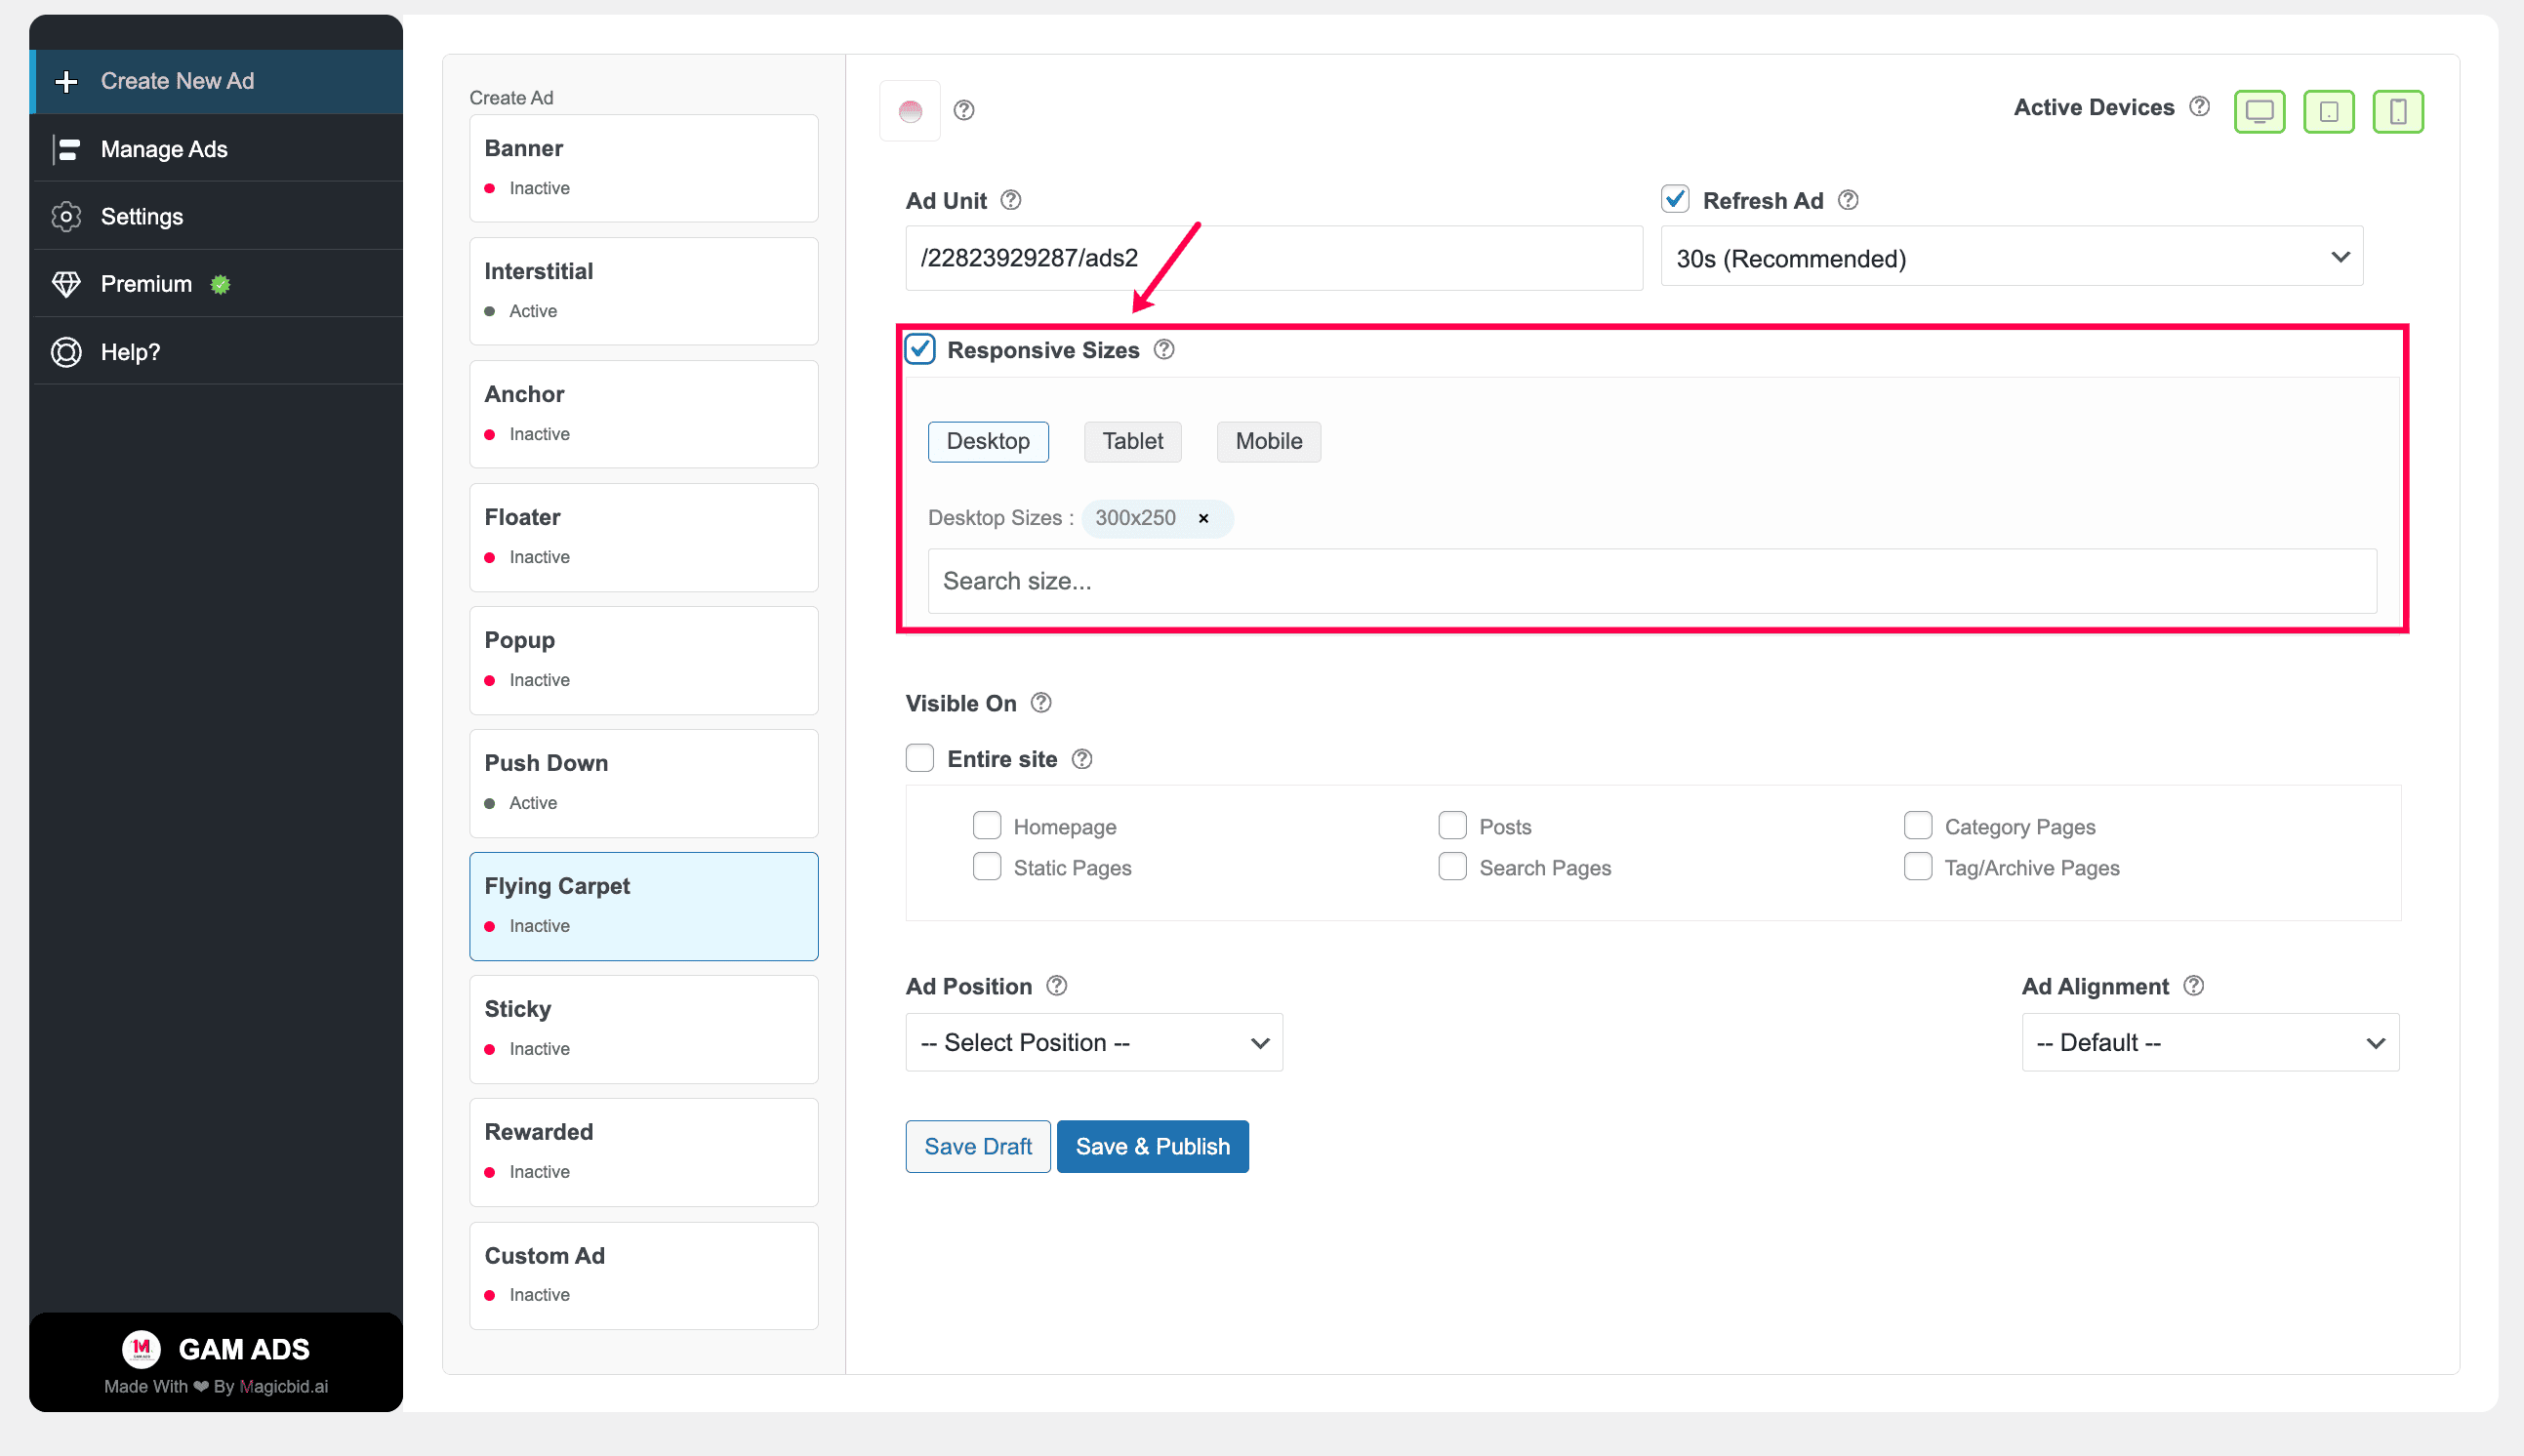
Step 5: Responsive Setting
Decide if the ad should be responsive.
- ON: Automatically adjusts to screen size
- OFF: Uses only fixed ad sizes
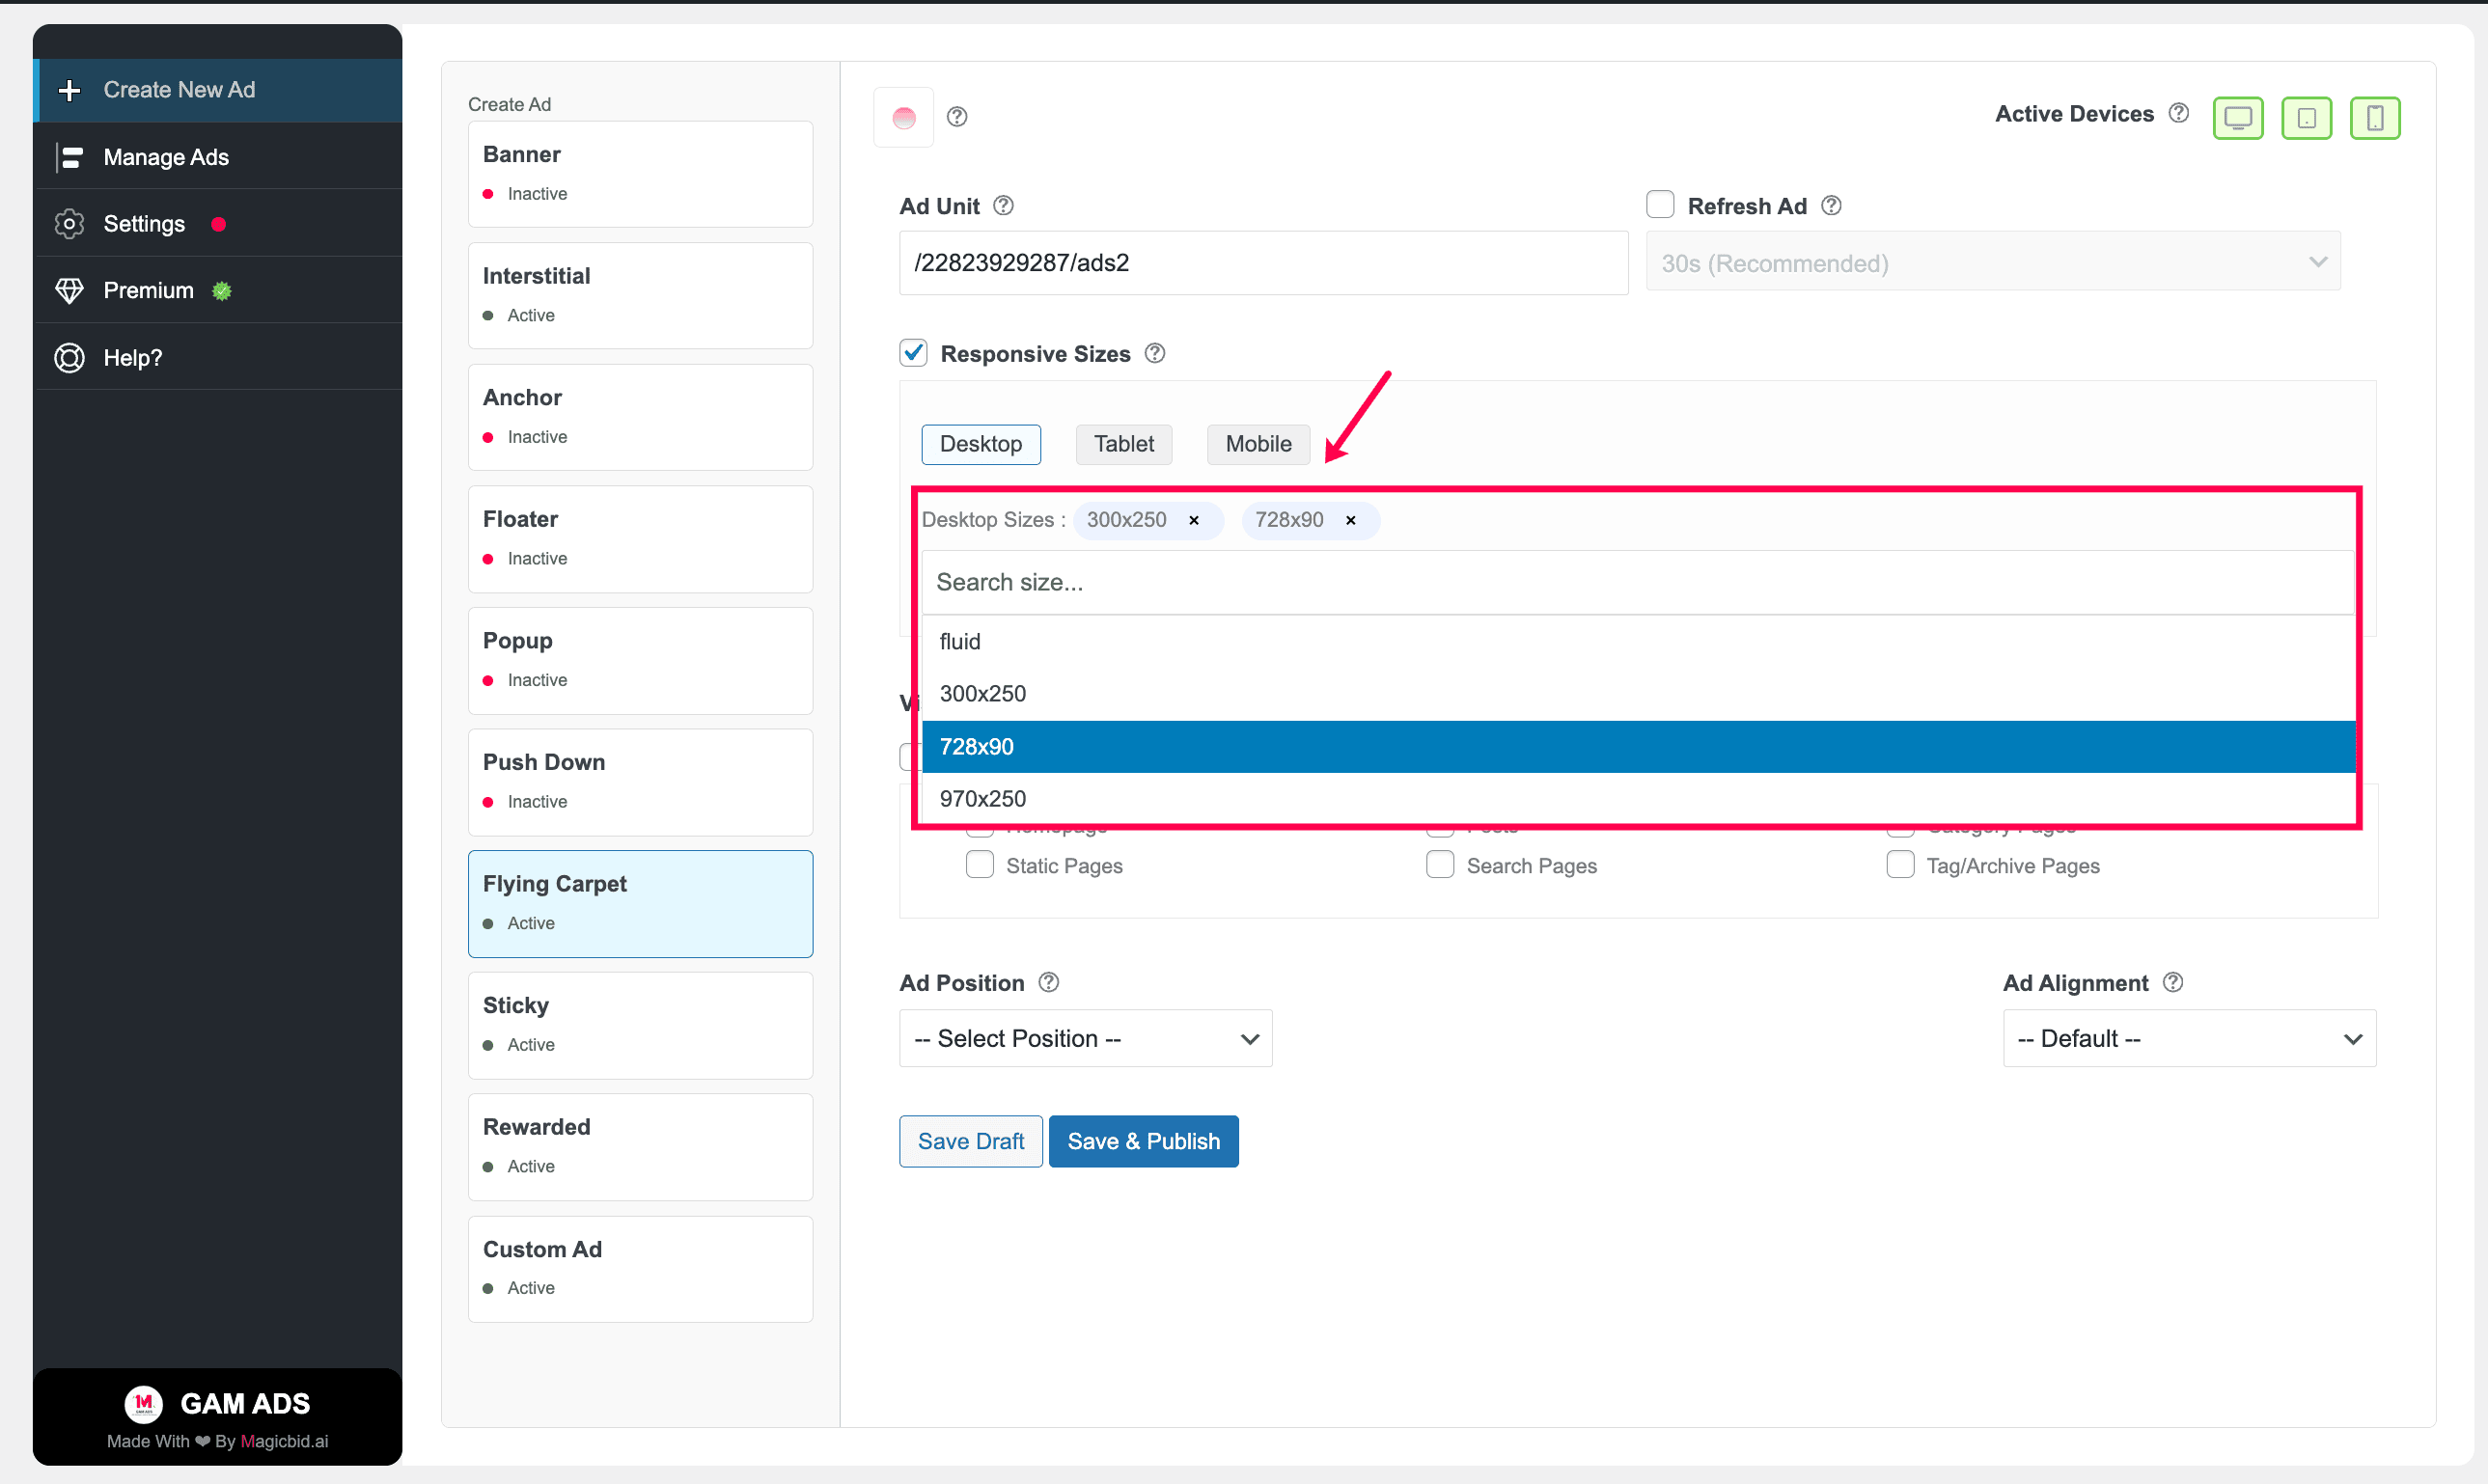
Step 6: Choose Ad Sizes
Select ad sizes for each device.
Example:
- Desktop: 728×90, 300×250
- Mobile: 320×50, 300×250
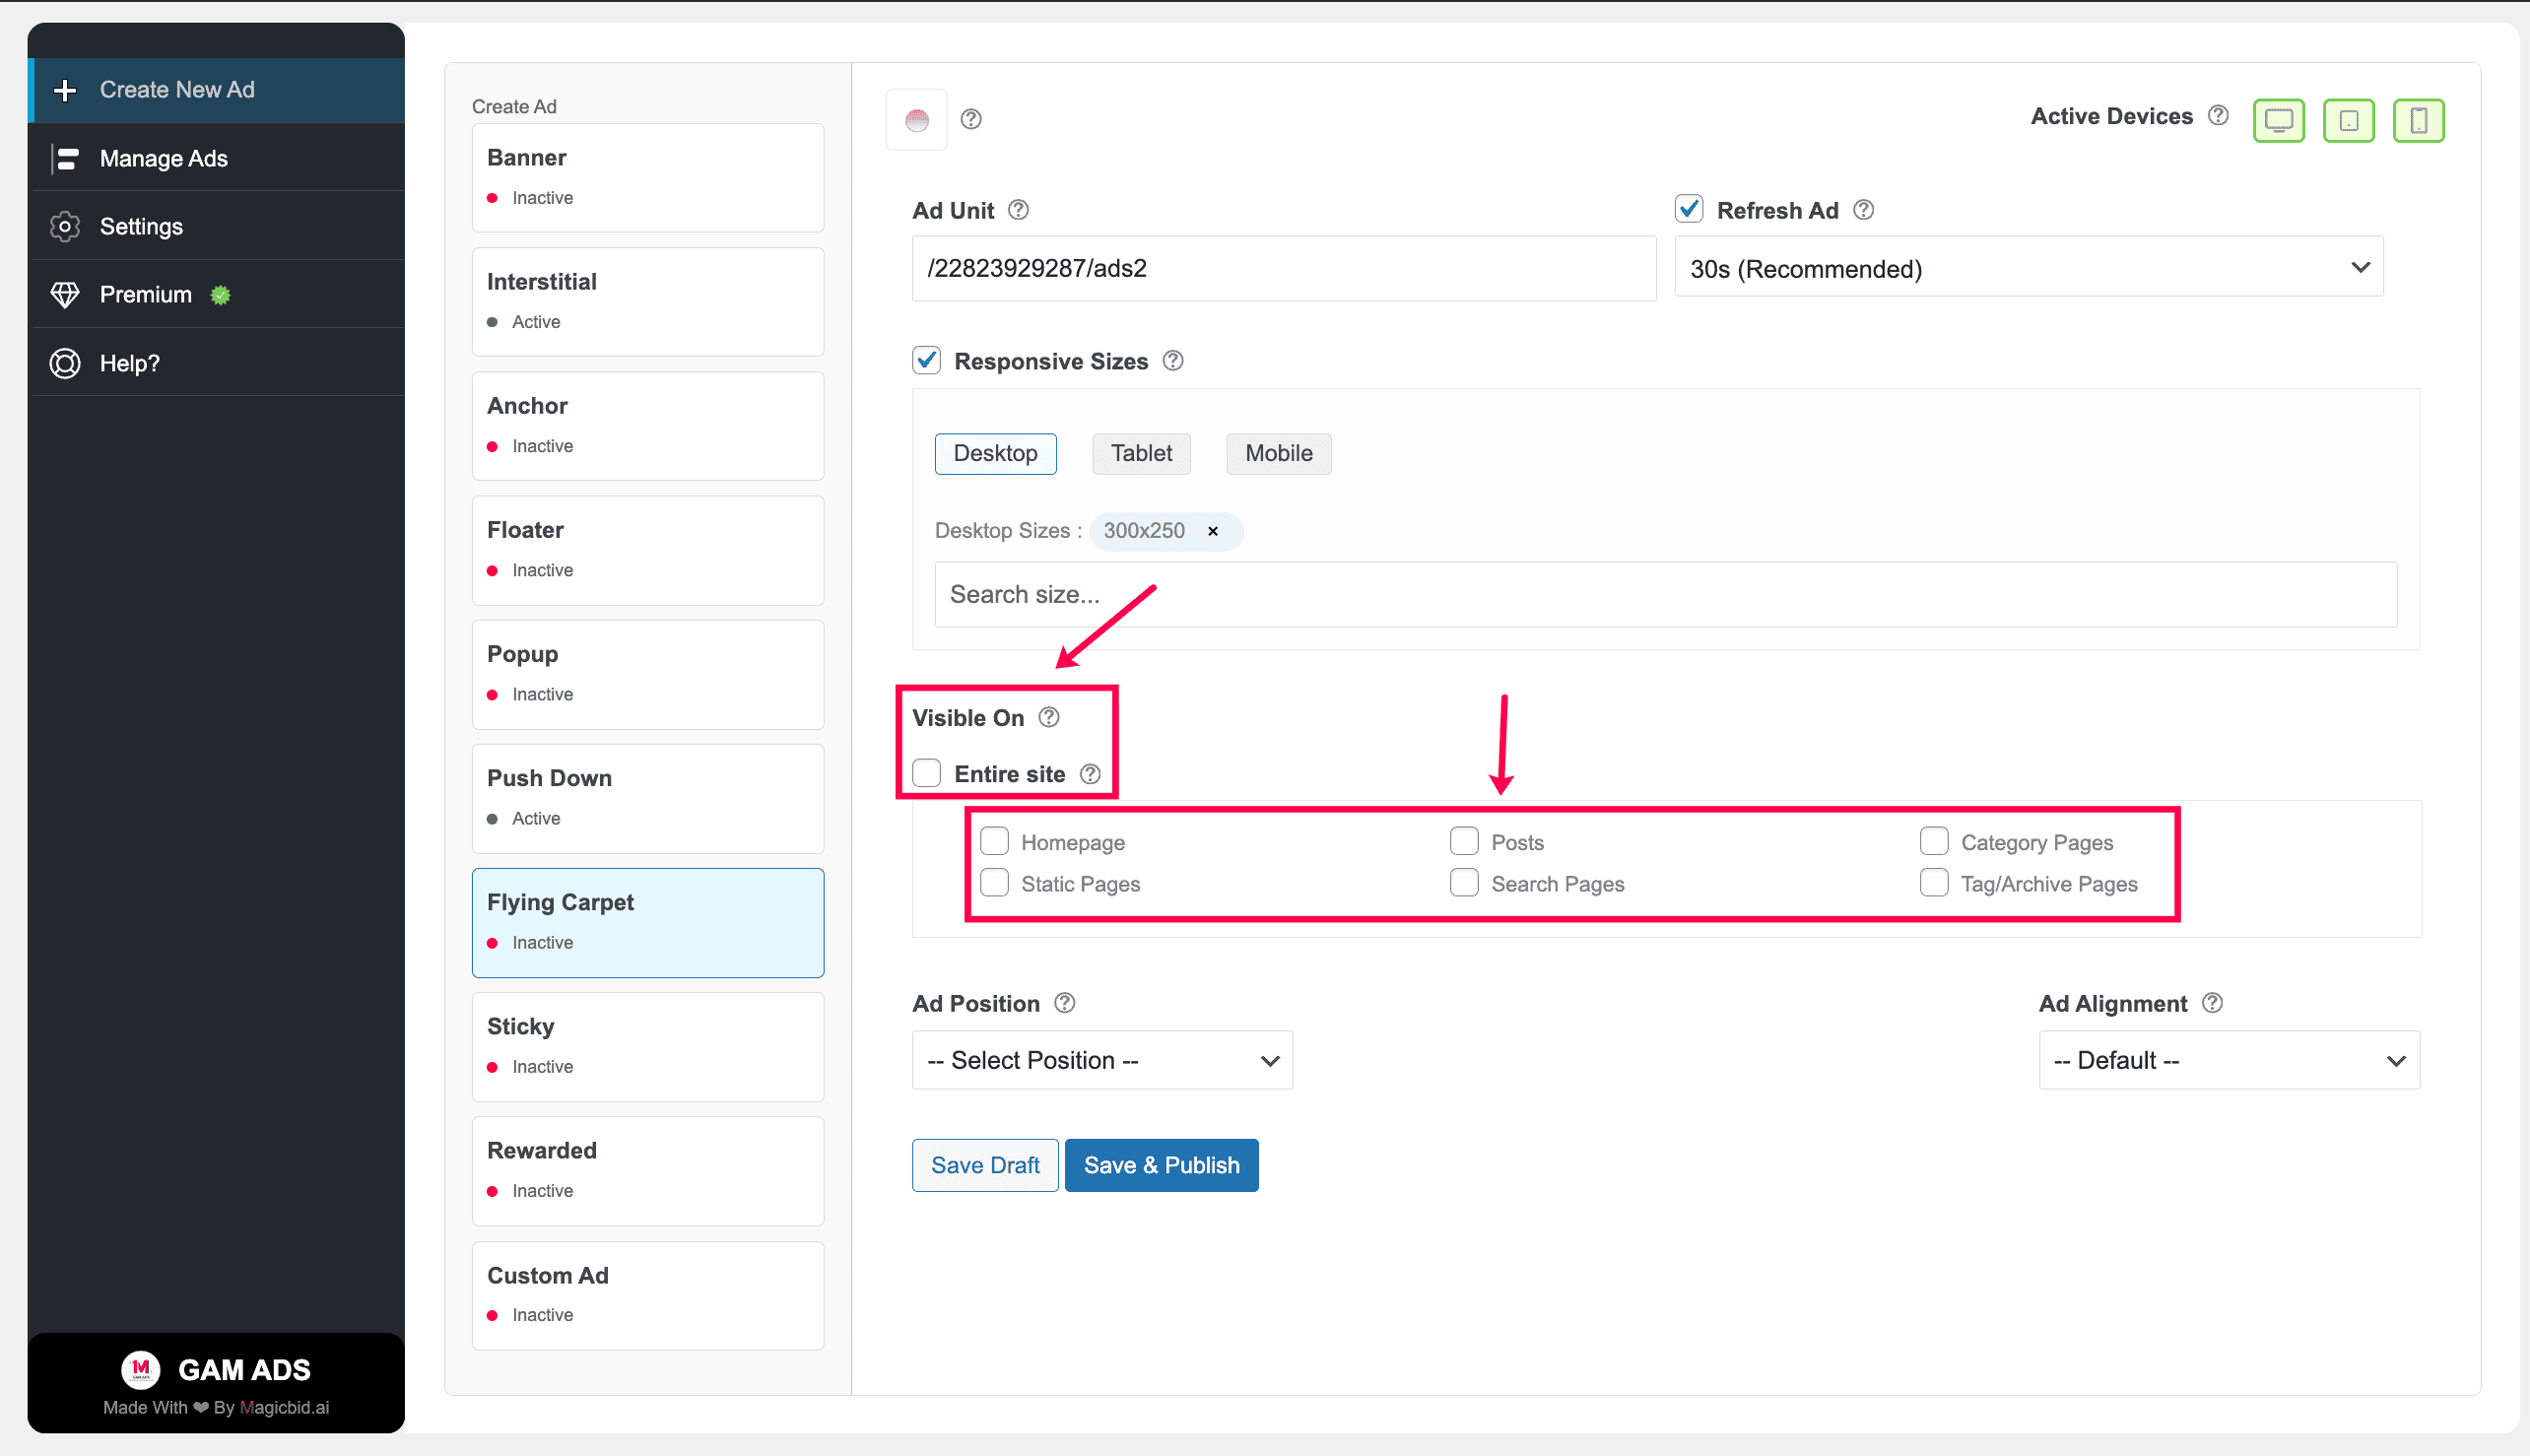
Step 7: Placement Rules
Choose where this ad should appear.
- Entire Site: Shows on all pages
- Specific Pages: Shows only on selected posts, pages, or categories
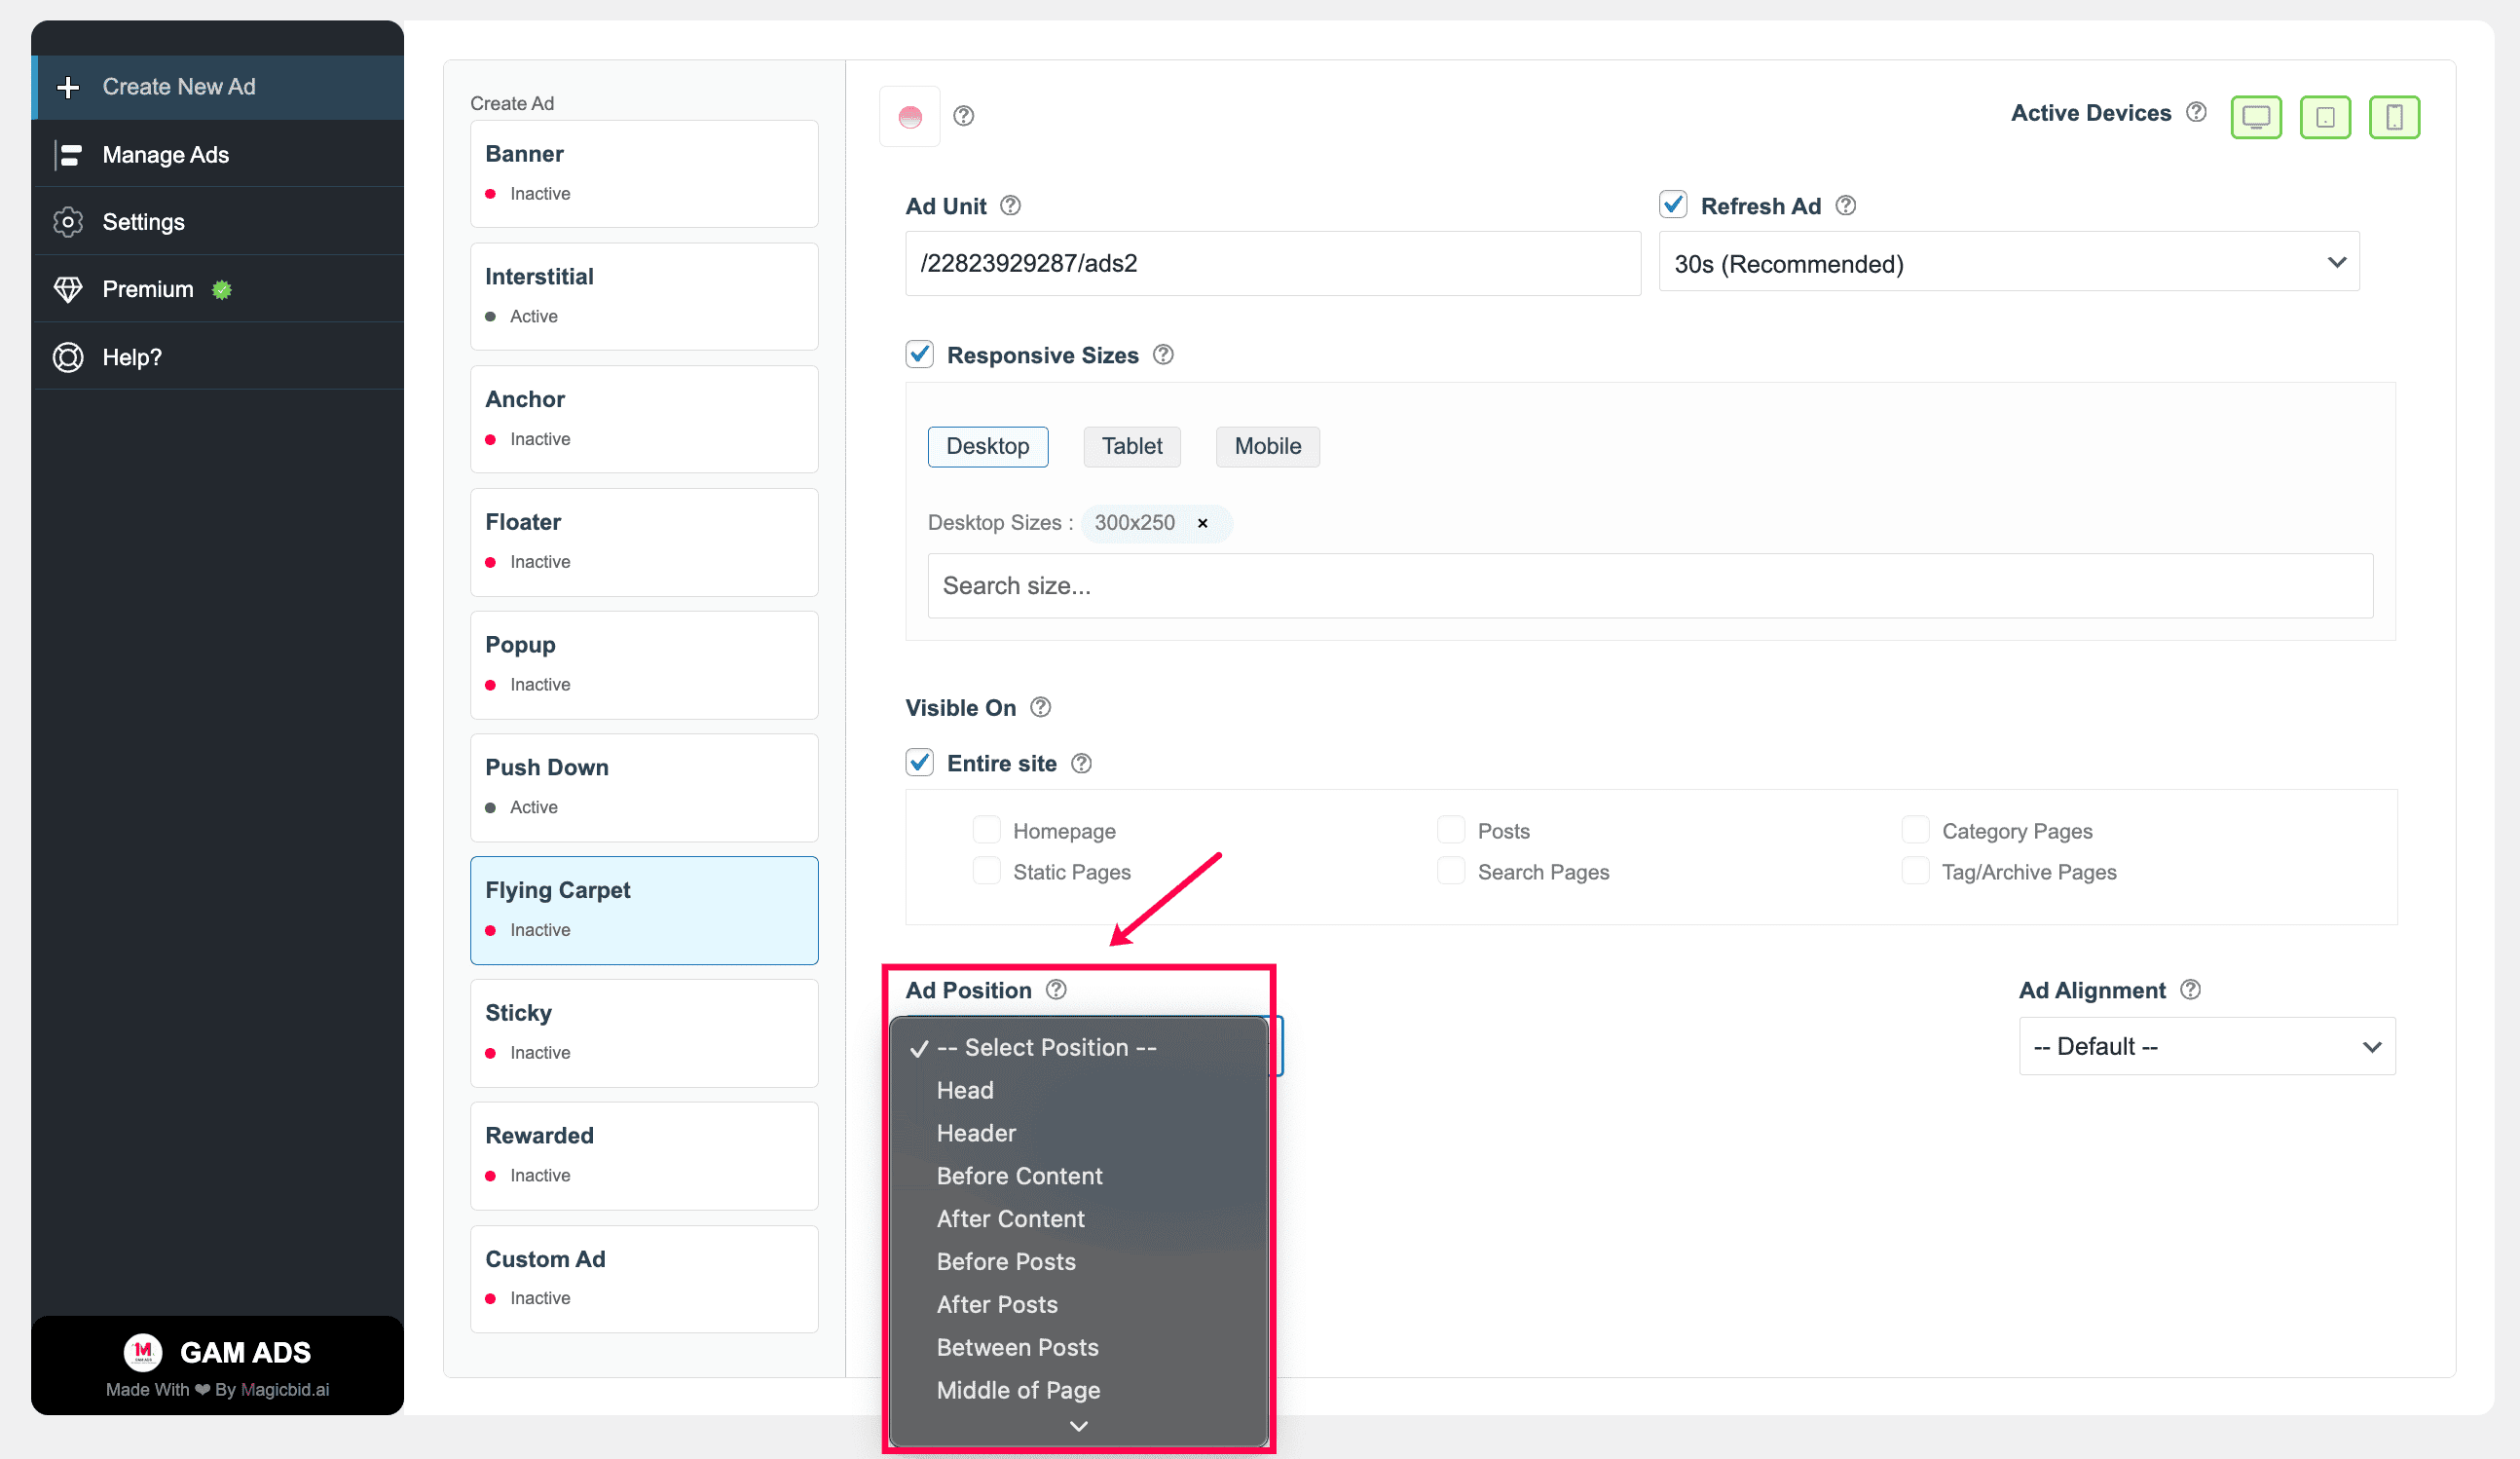
Step 8: Ad Position
Select where the ad should appear on the page.
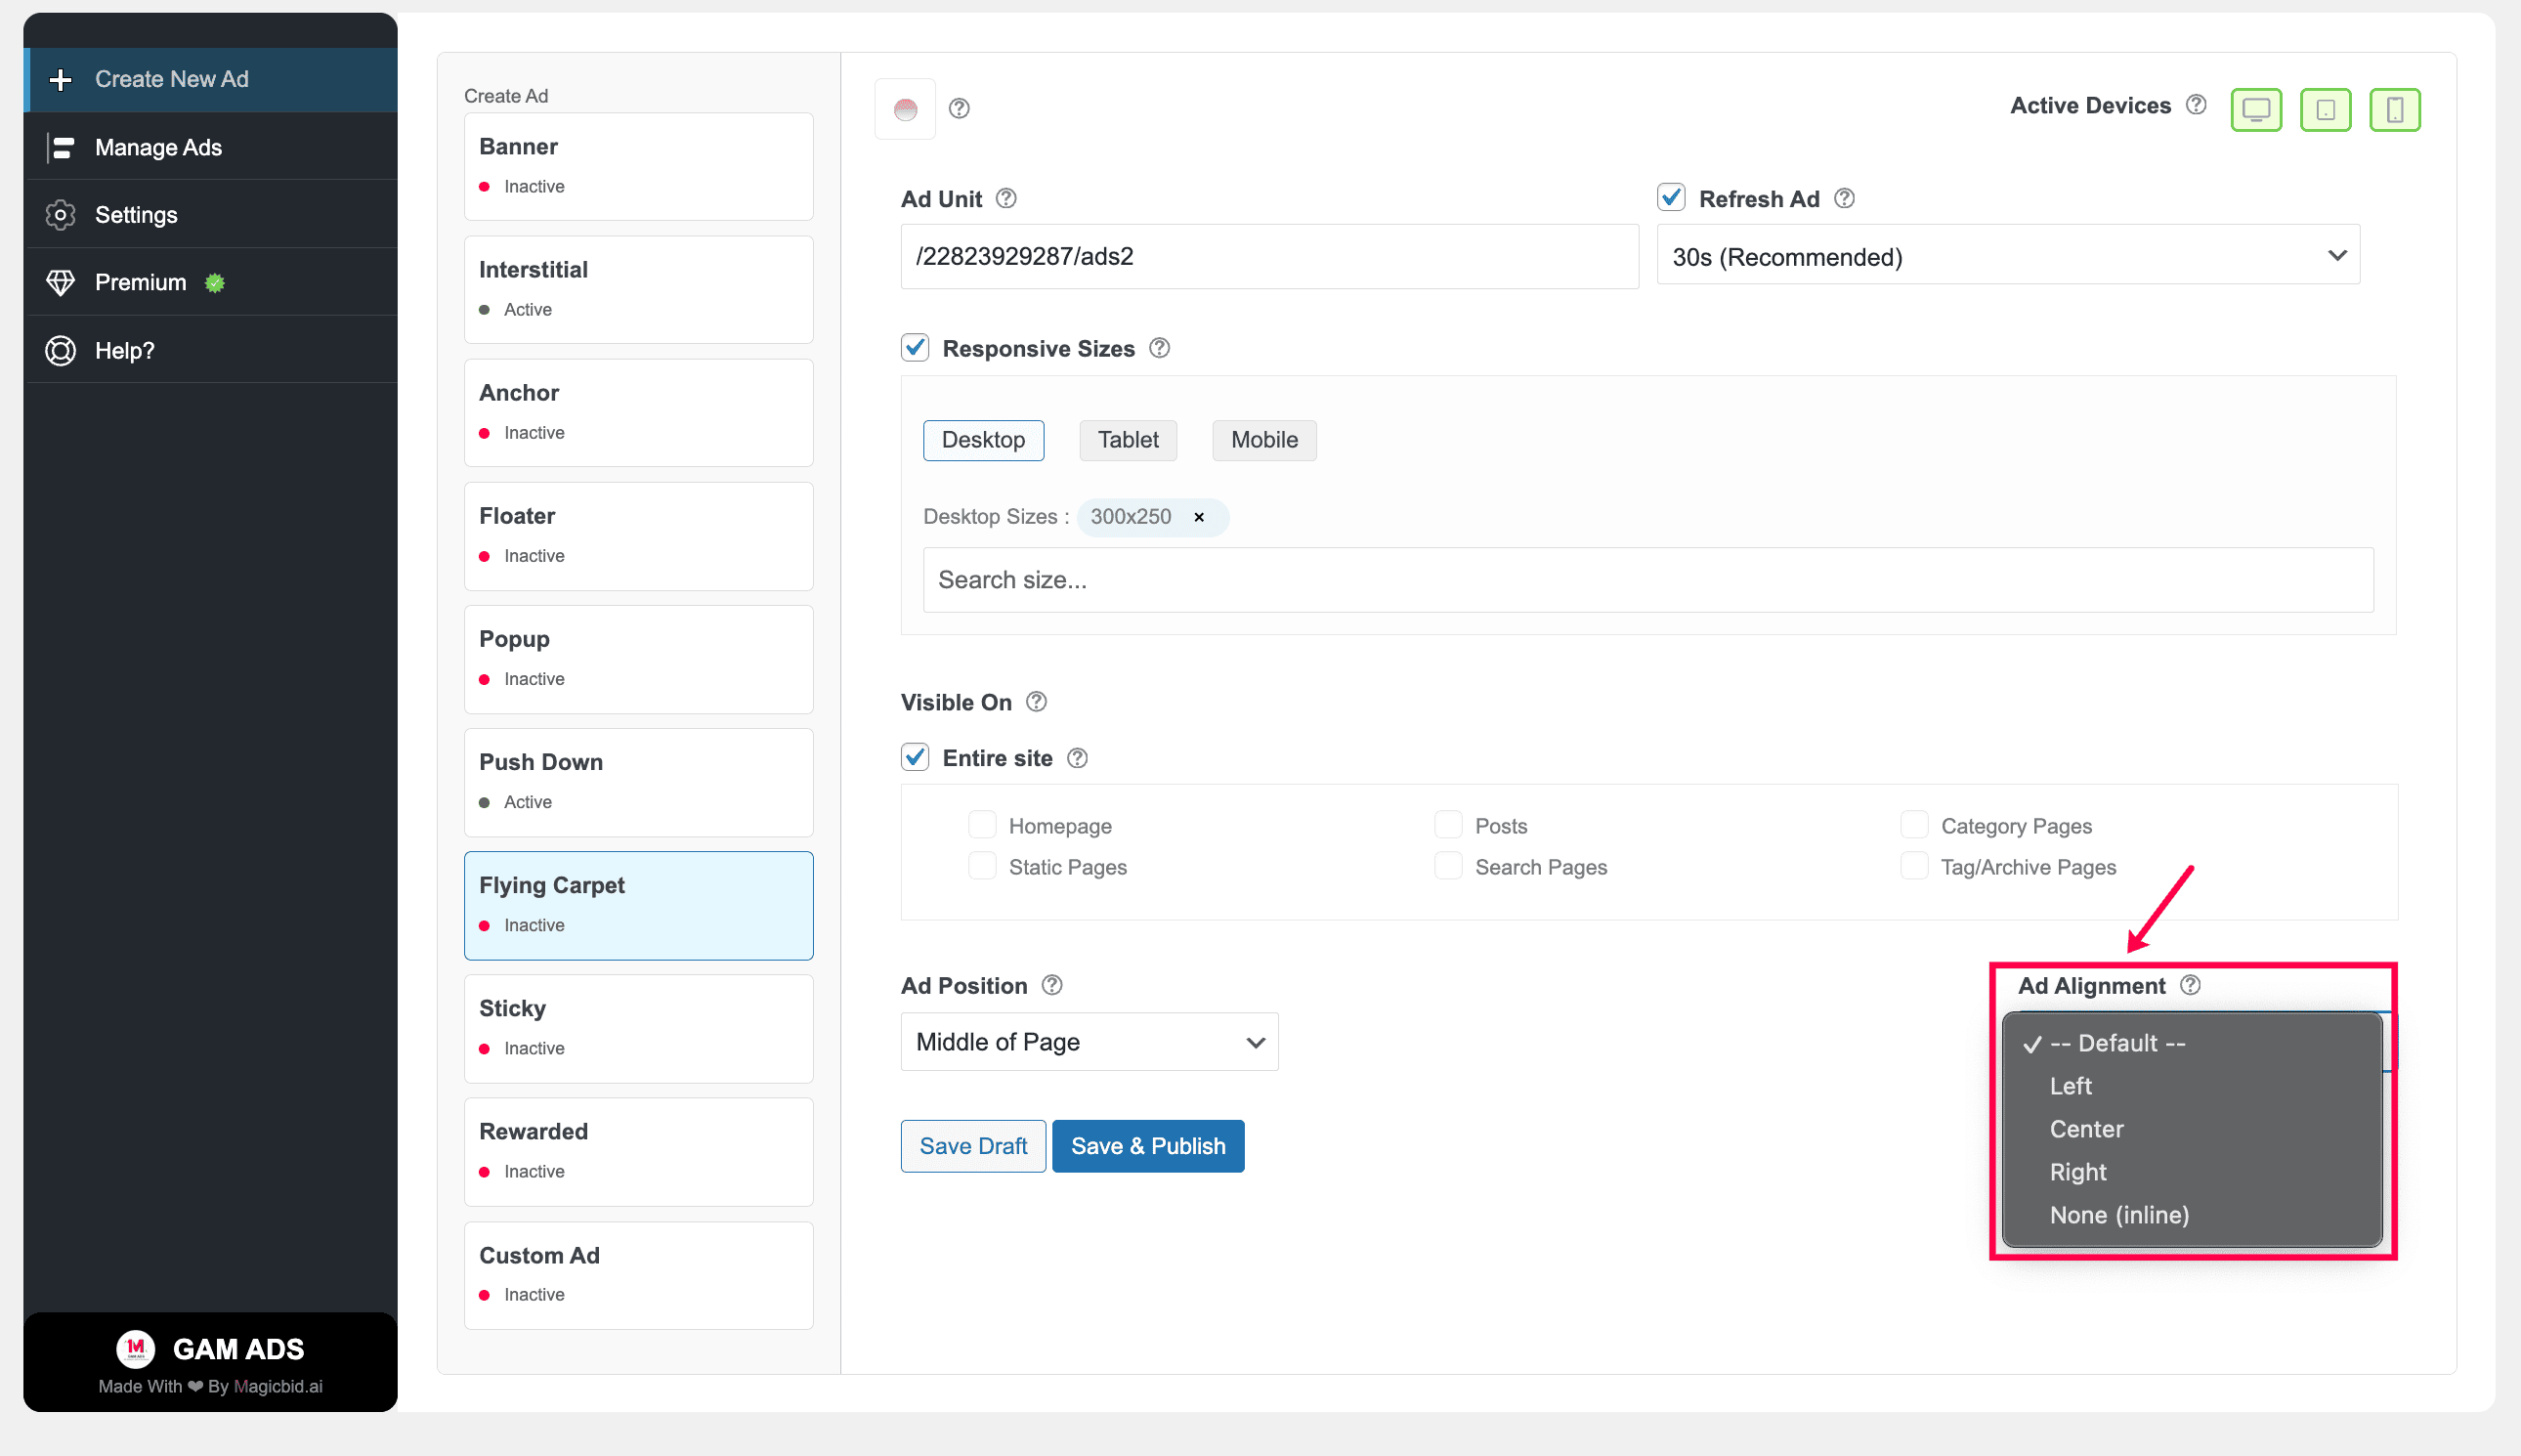
Step 9: Ad Alignment
Controls how the ad is positioned inside its placement container.
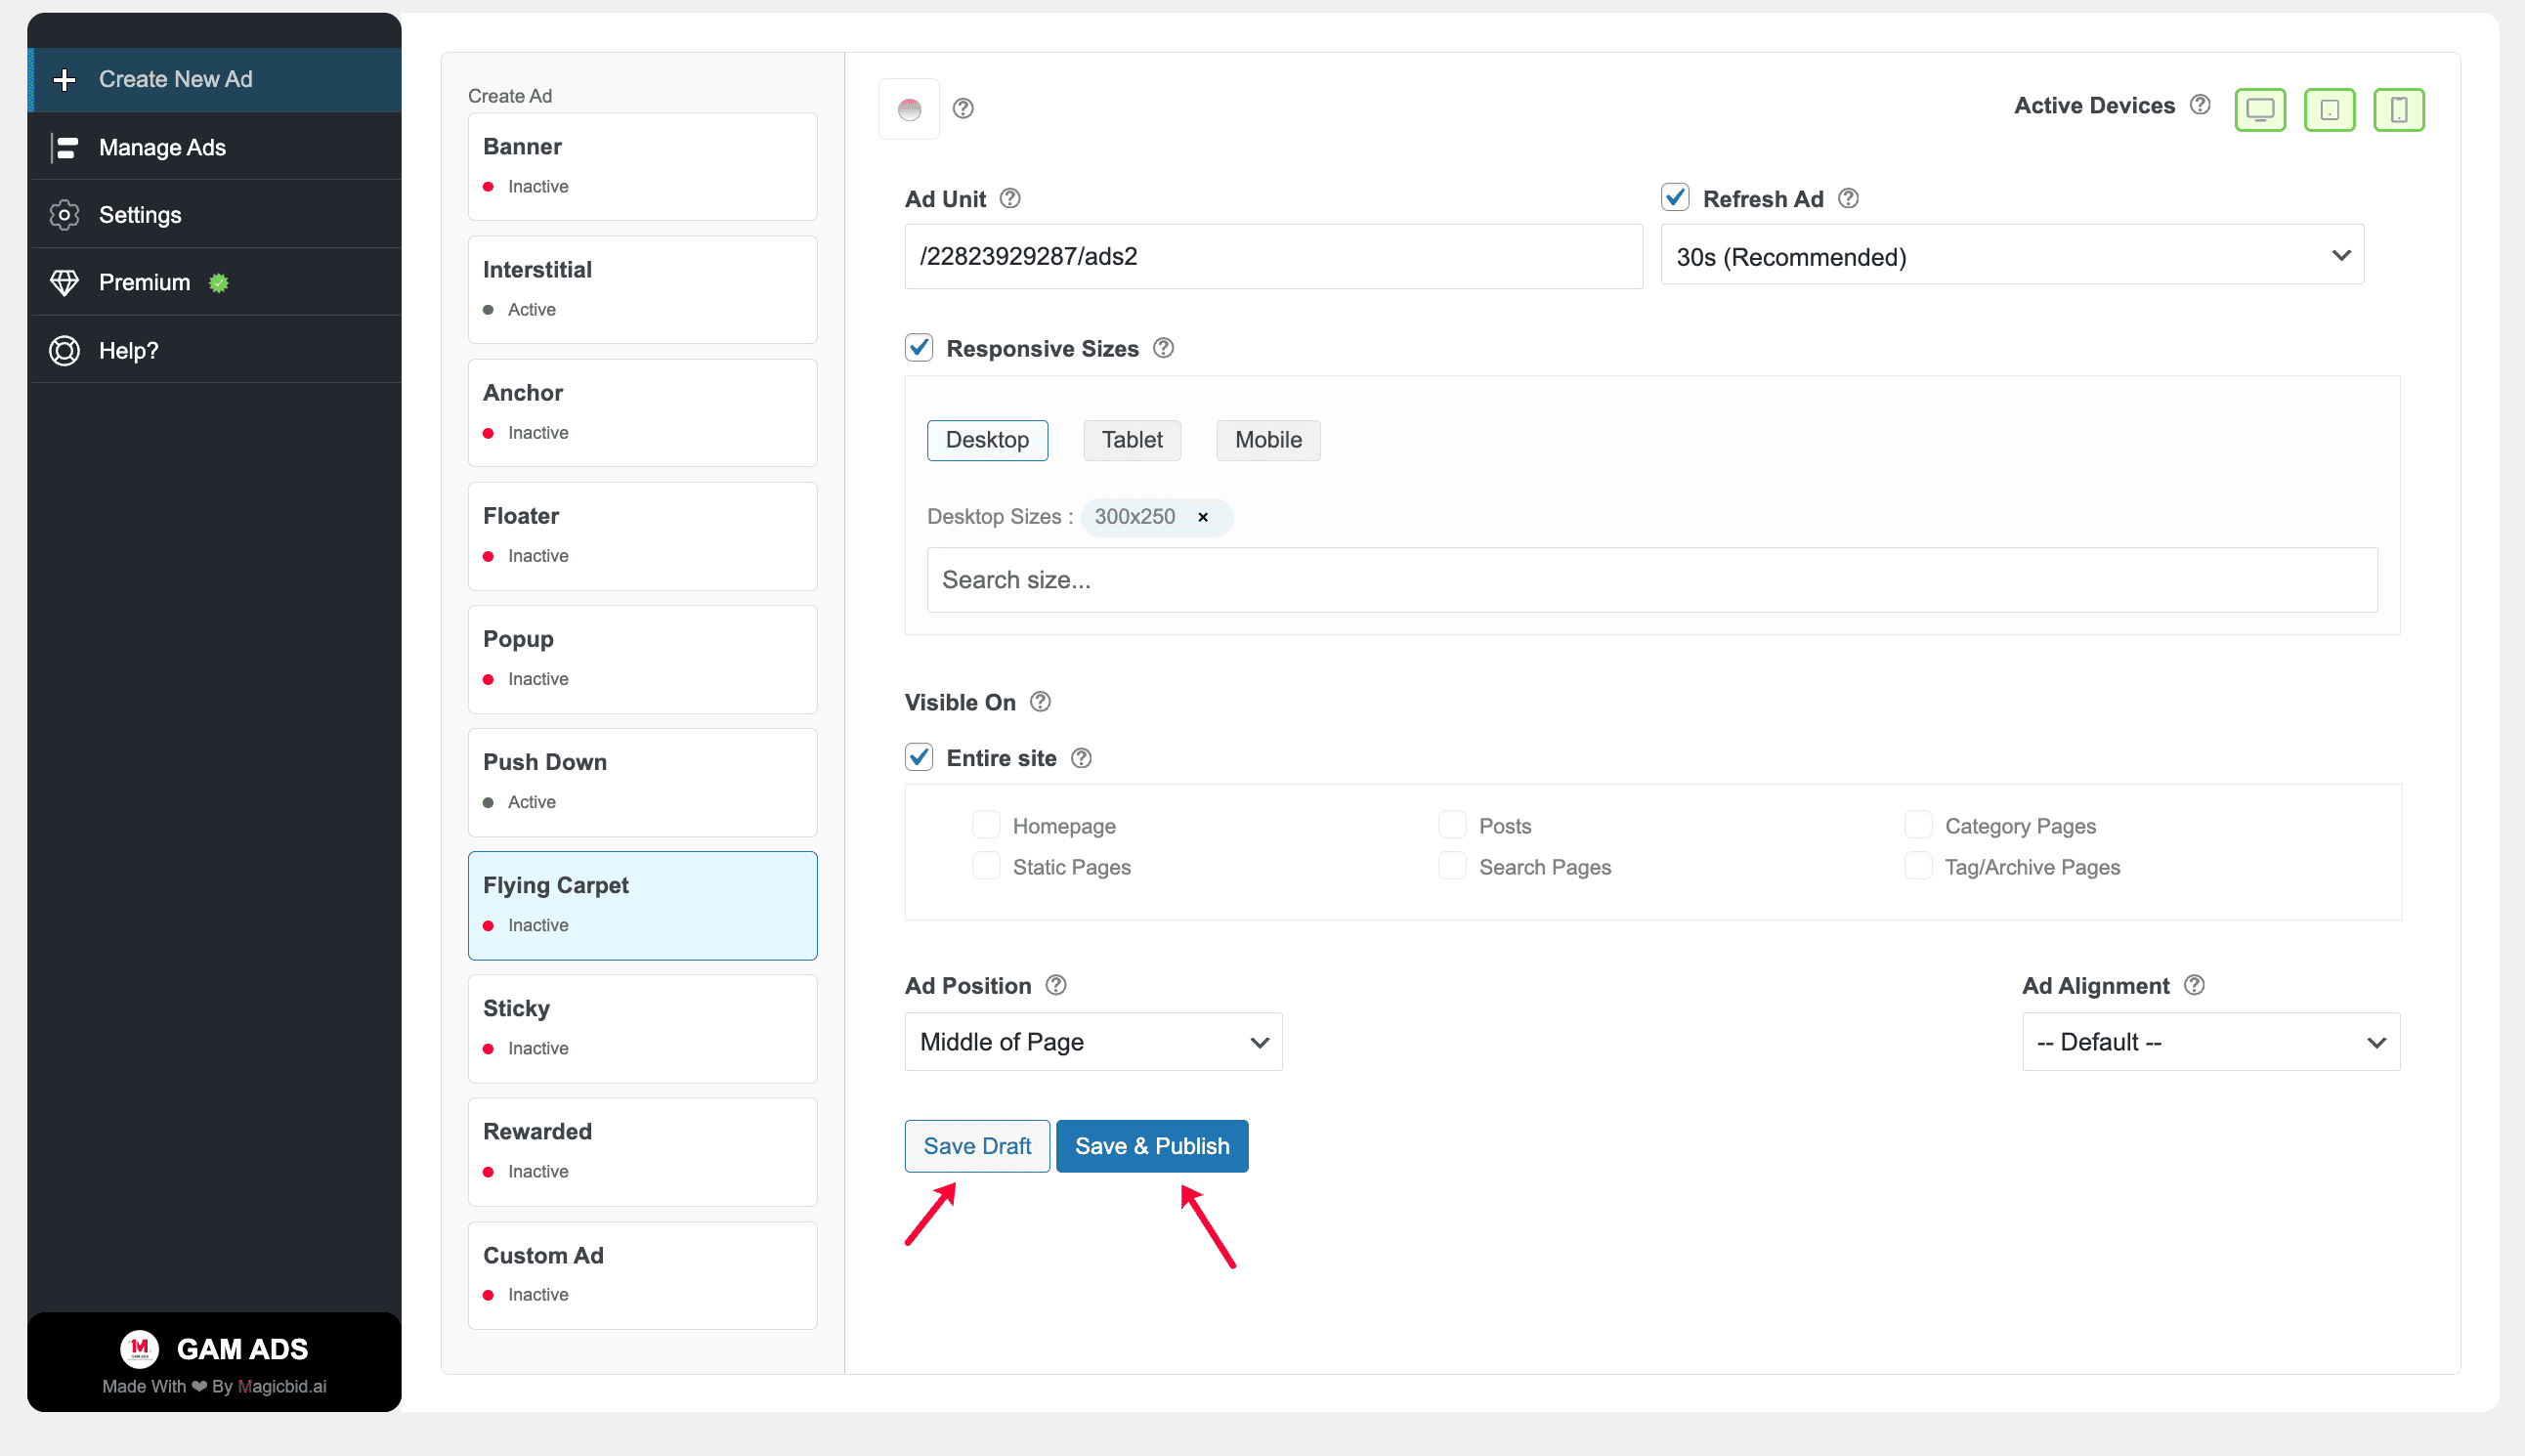
Step 10: Save Your Ad
Save Draft: Saves the ad without publishing it.
Save & Publish: Saves the ad and makes it live immediately.
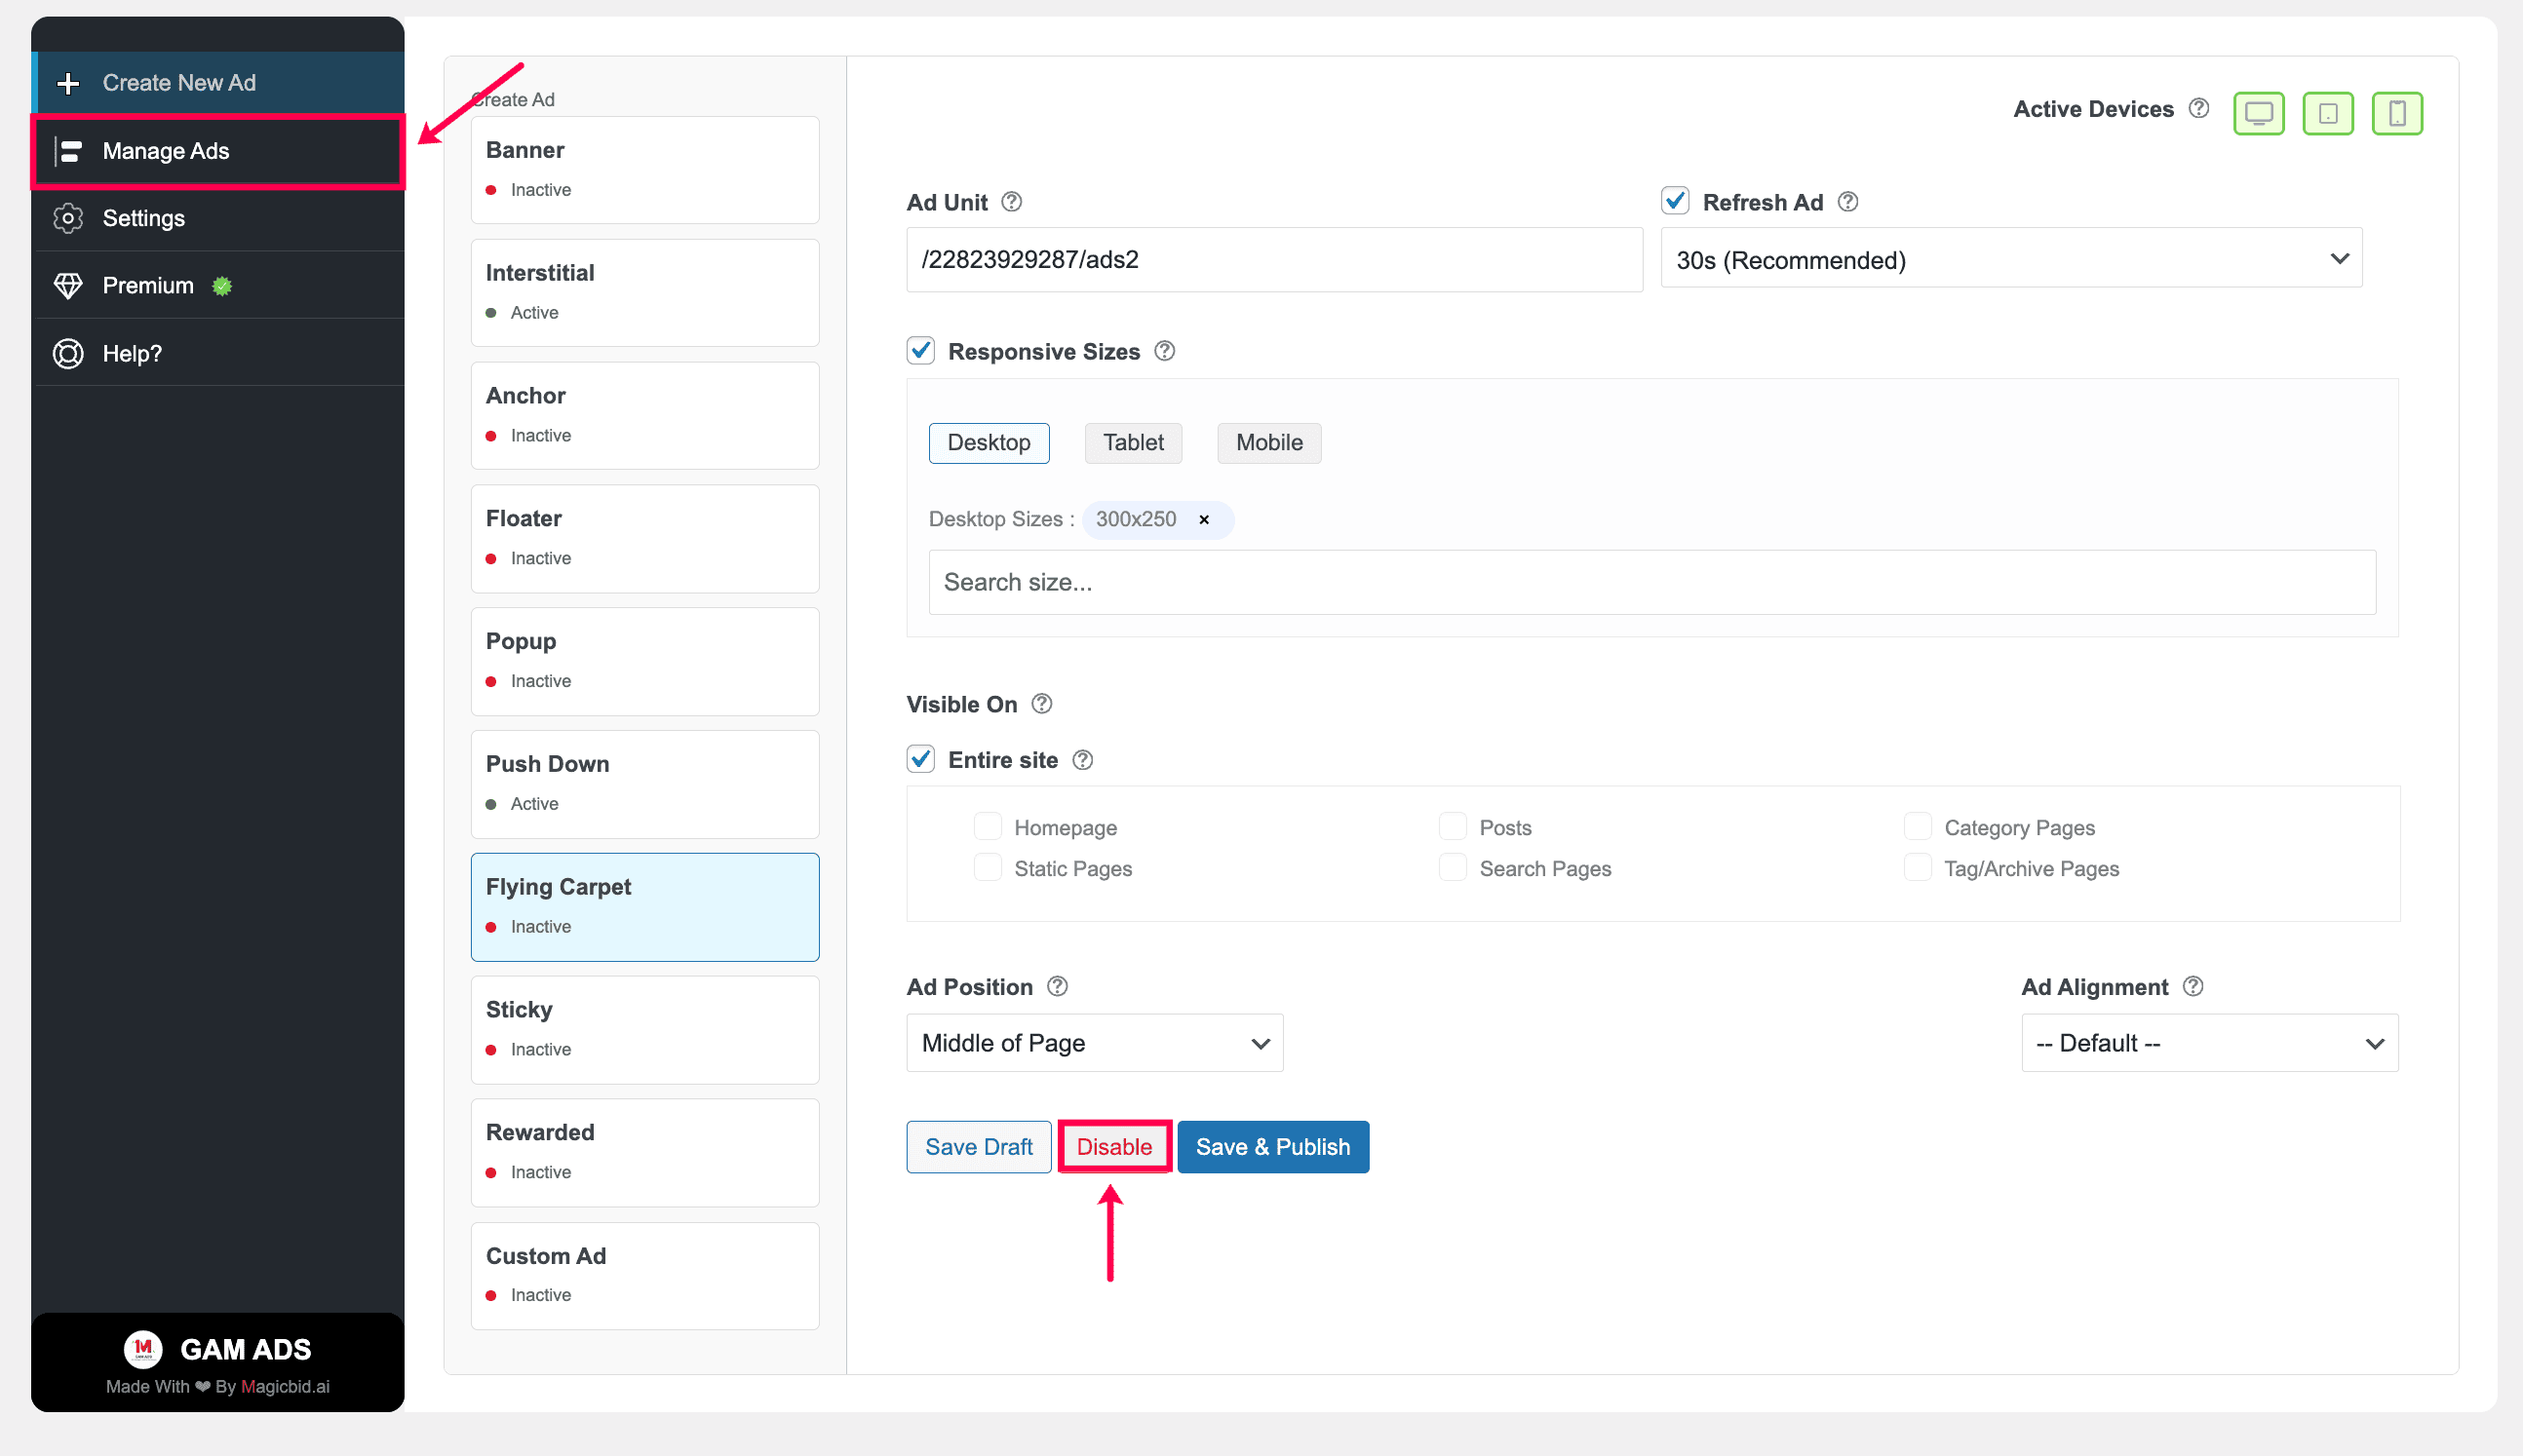
Step 11: Manage Ad Status
After publishing, you can manage the ad status:
- Disable: Pause the ad anytime
- Save & Publish: Apply updates and keep the ad live
You can manage all ads later from: GAM ADS → Manage Ads
Creating Sticky Ads
Overview
- Select Sticky as the ad type
- Choose where it runs (Desktop, Tablet, Mobile)
- Pick your Google Ad Manager ad unit
- Enable Ad Refresh if needed (Premium)
- Turn Responsive ON or OFF
- Choose ad sizes for each device
- Decide placement (Entire site or specific pages)
- Set ad alignment
- Click Save & Publish to make it live
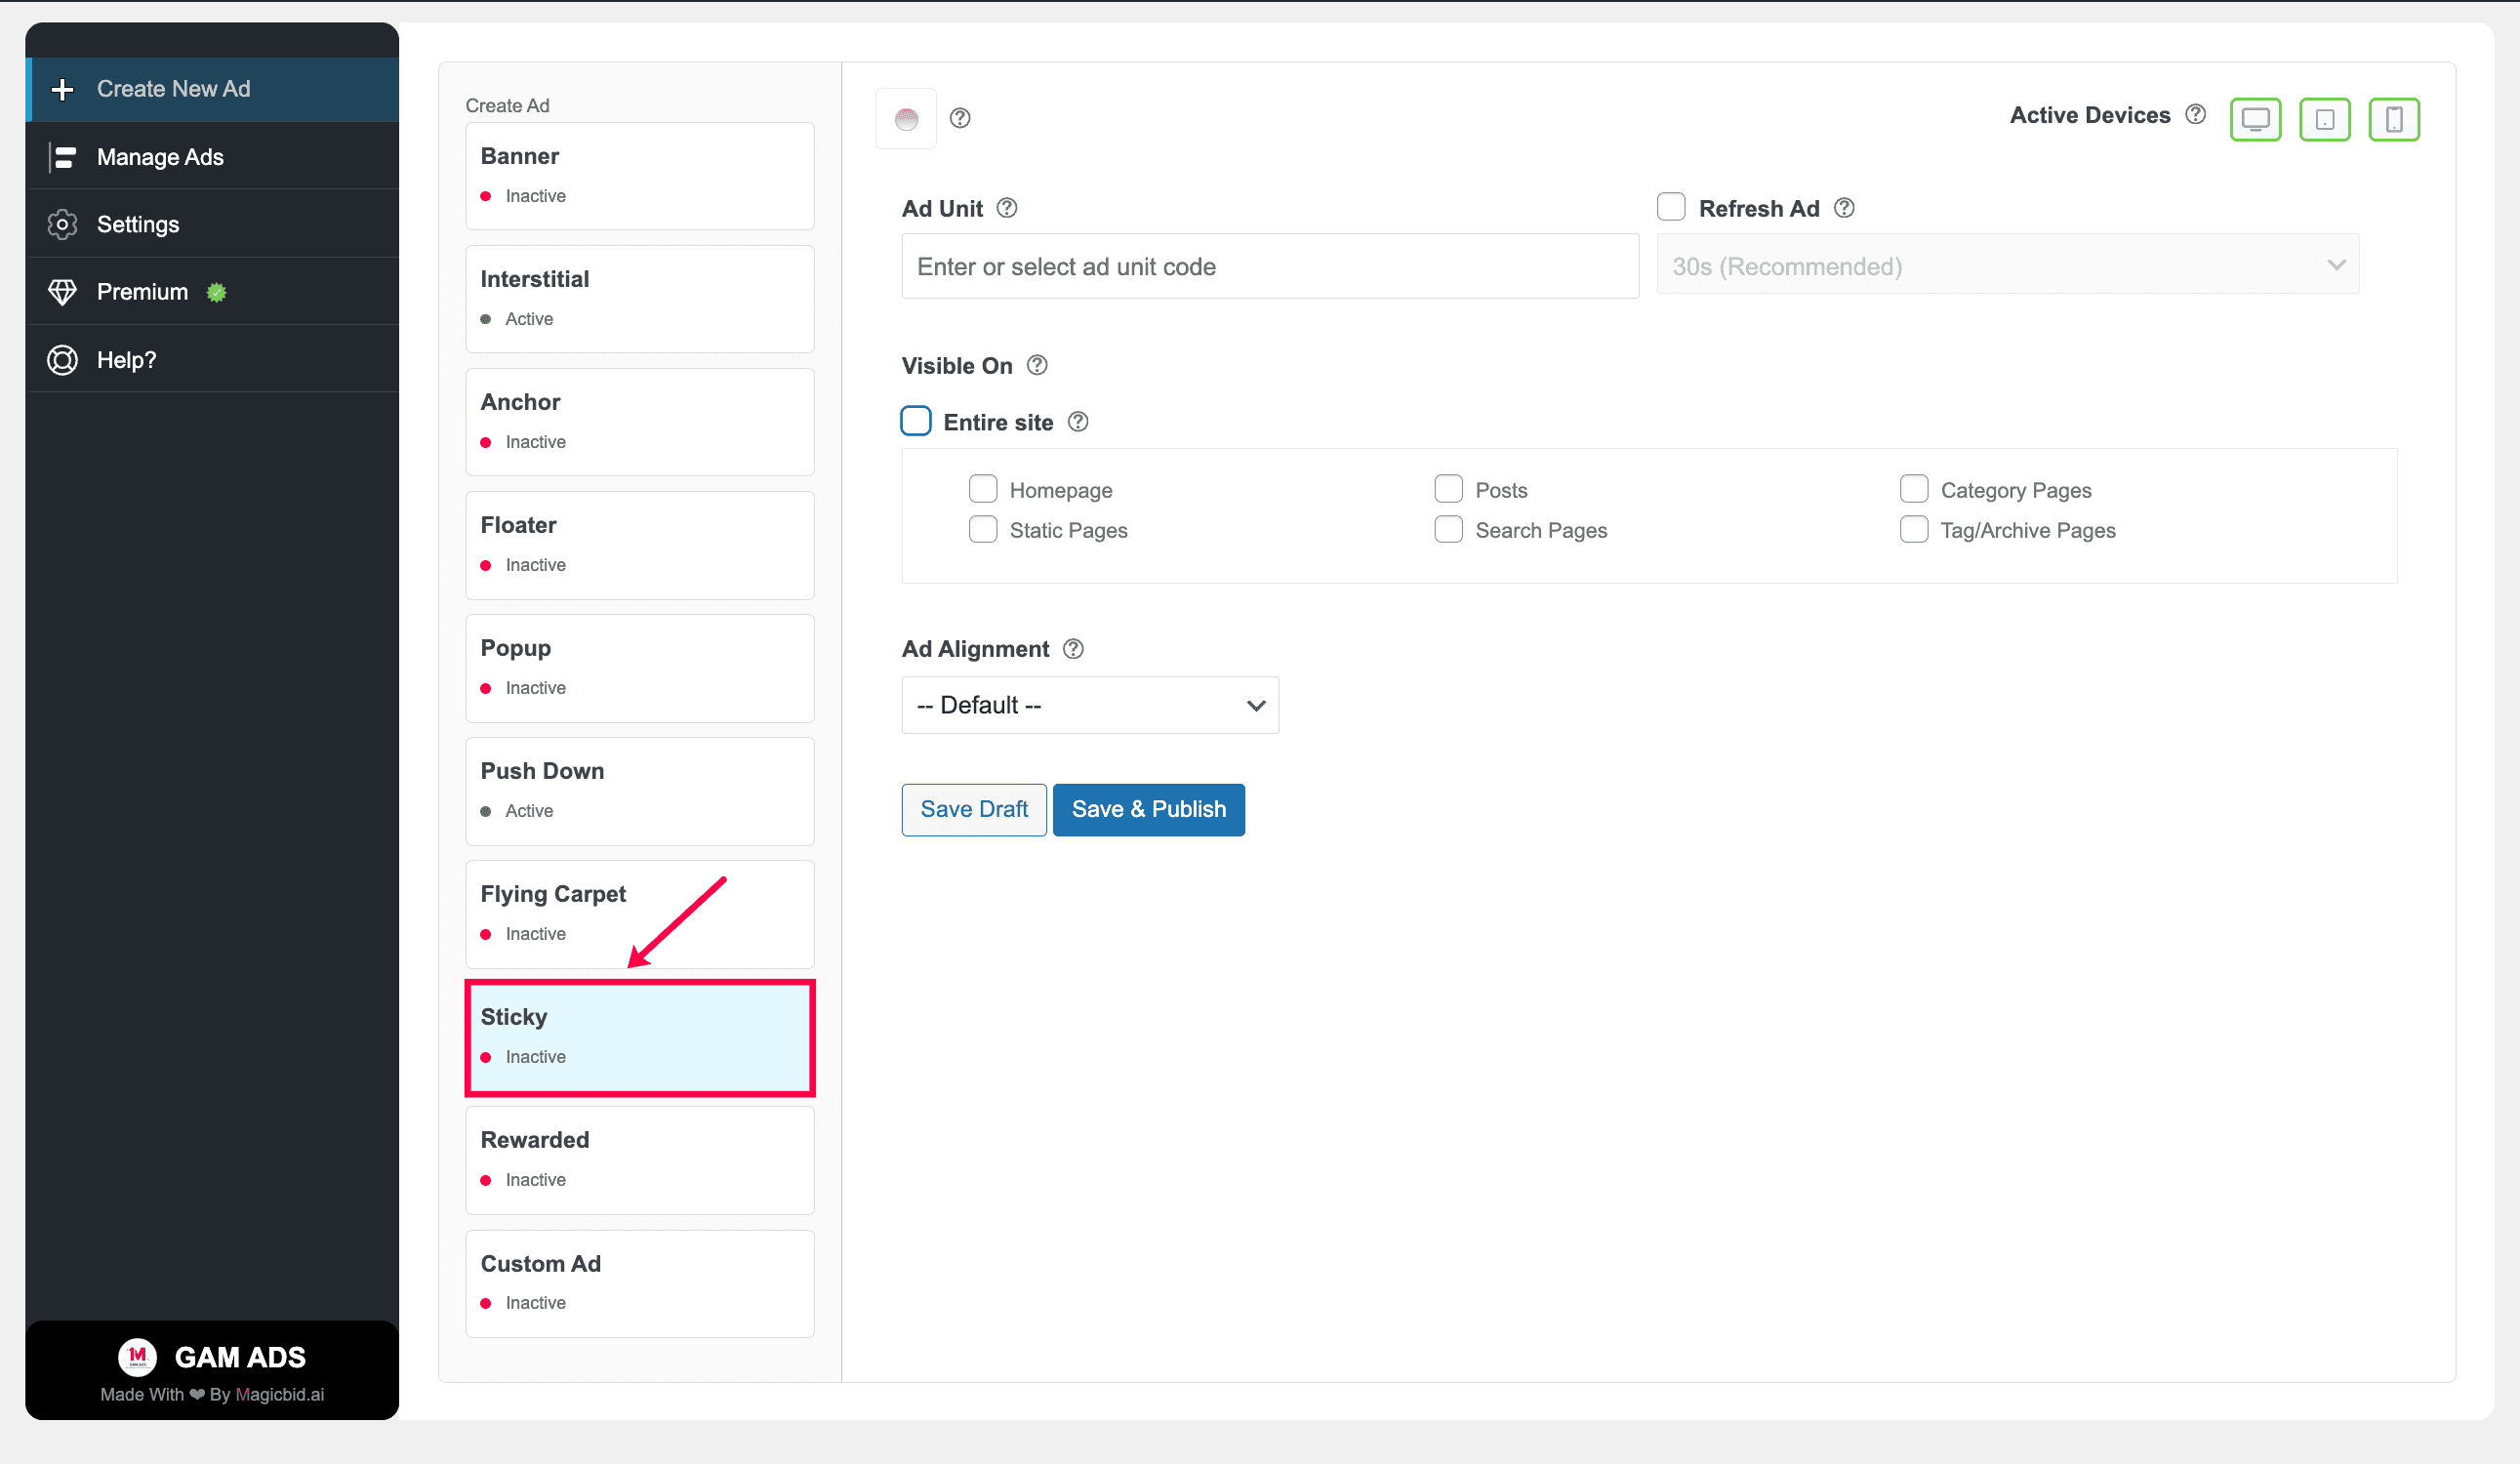
Step 1: Choose Ad Type
Go to Create New Ad and select Sticky.
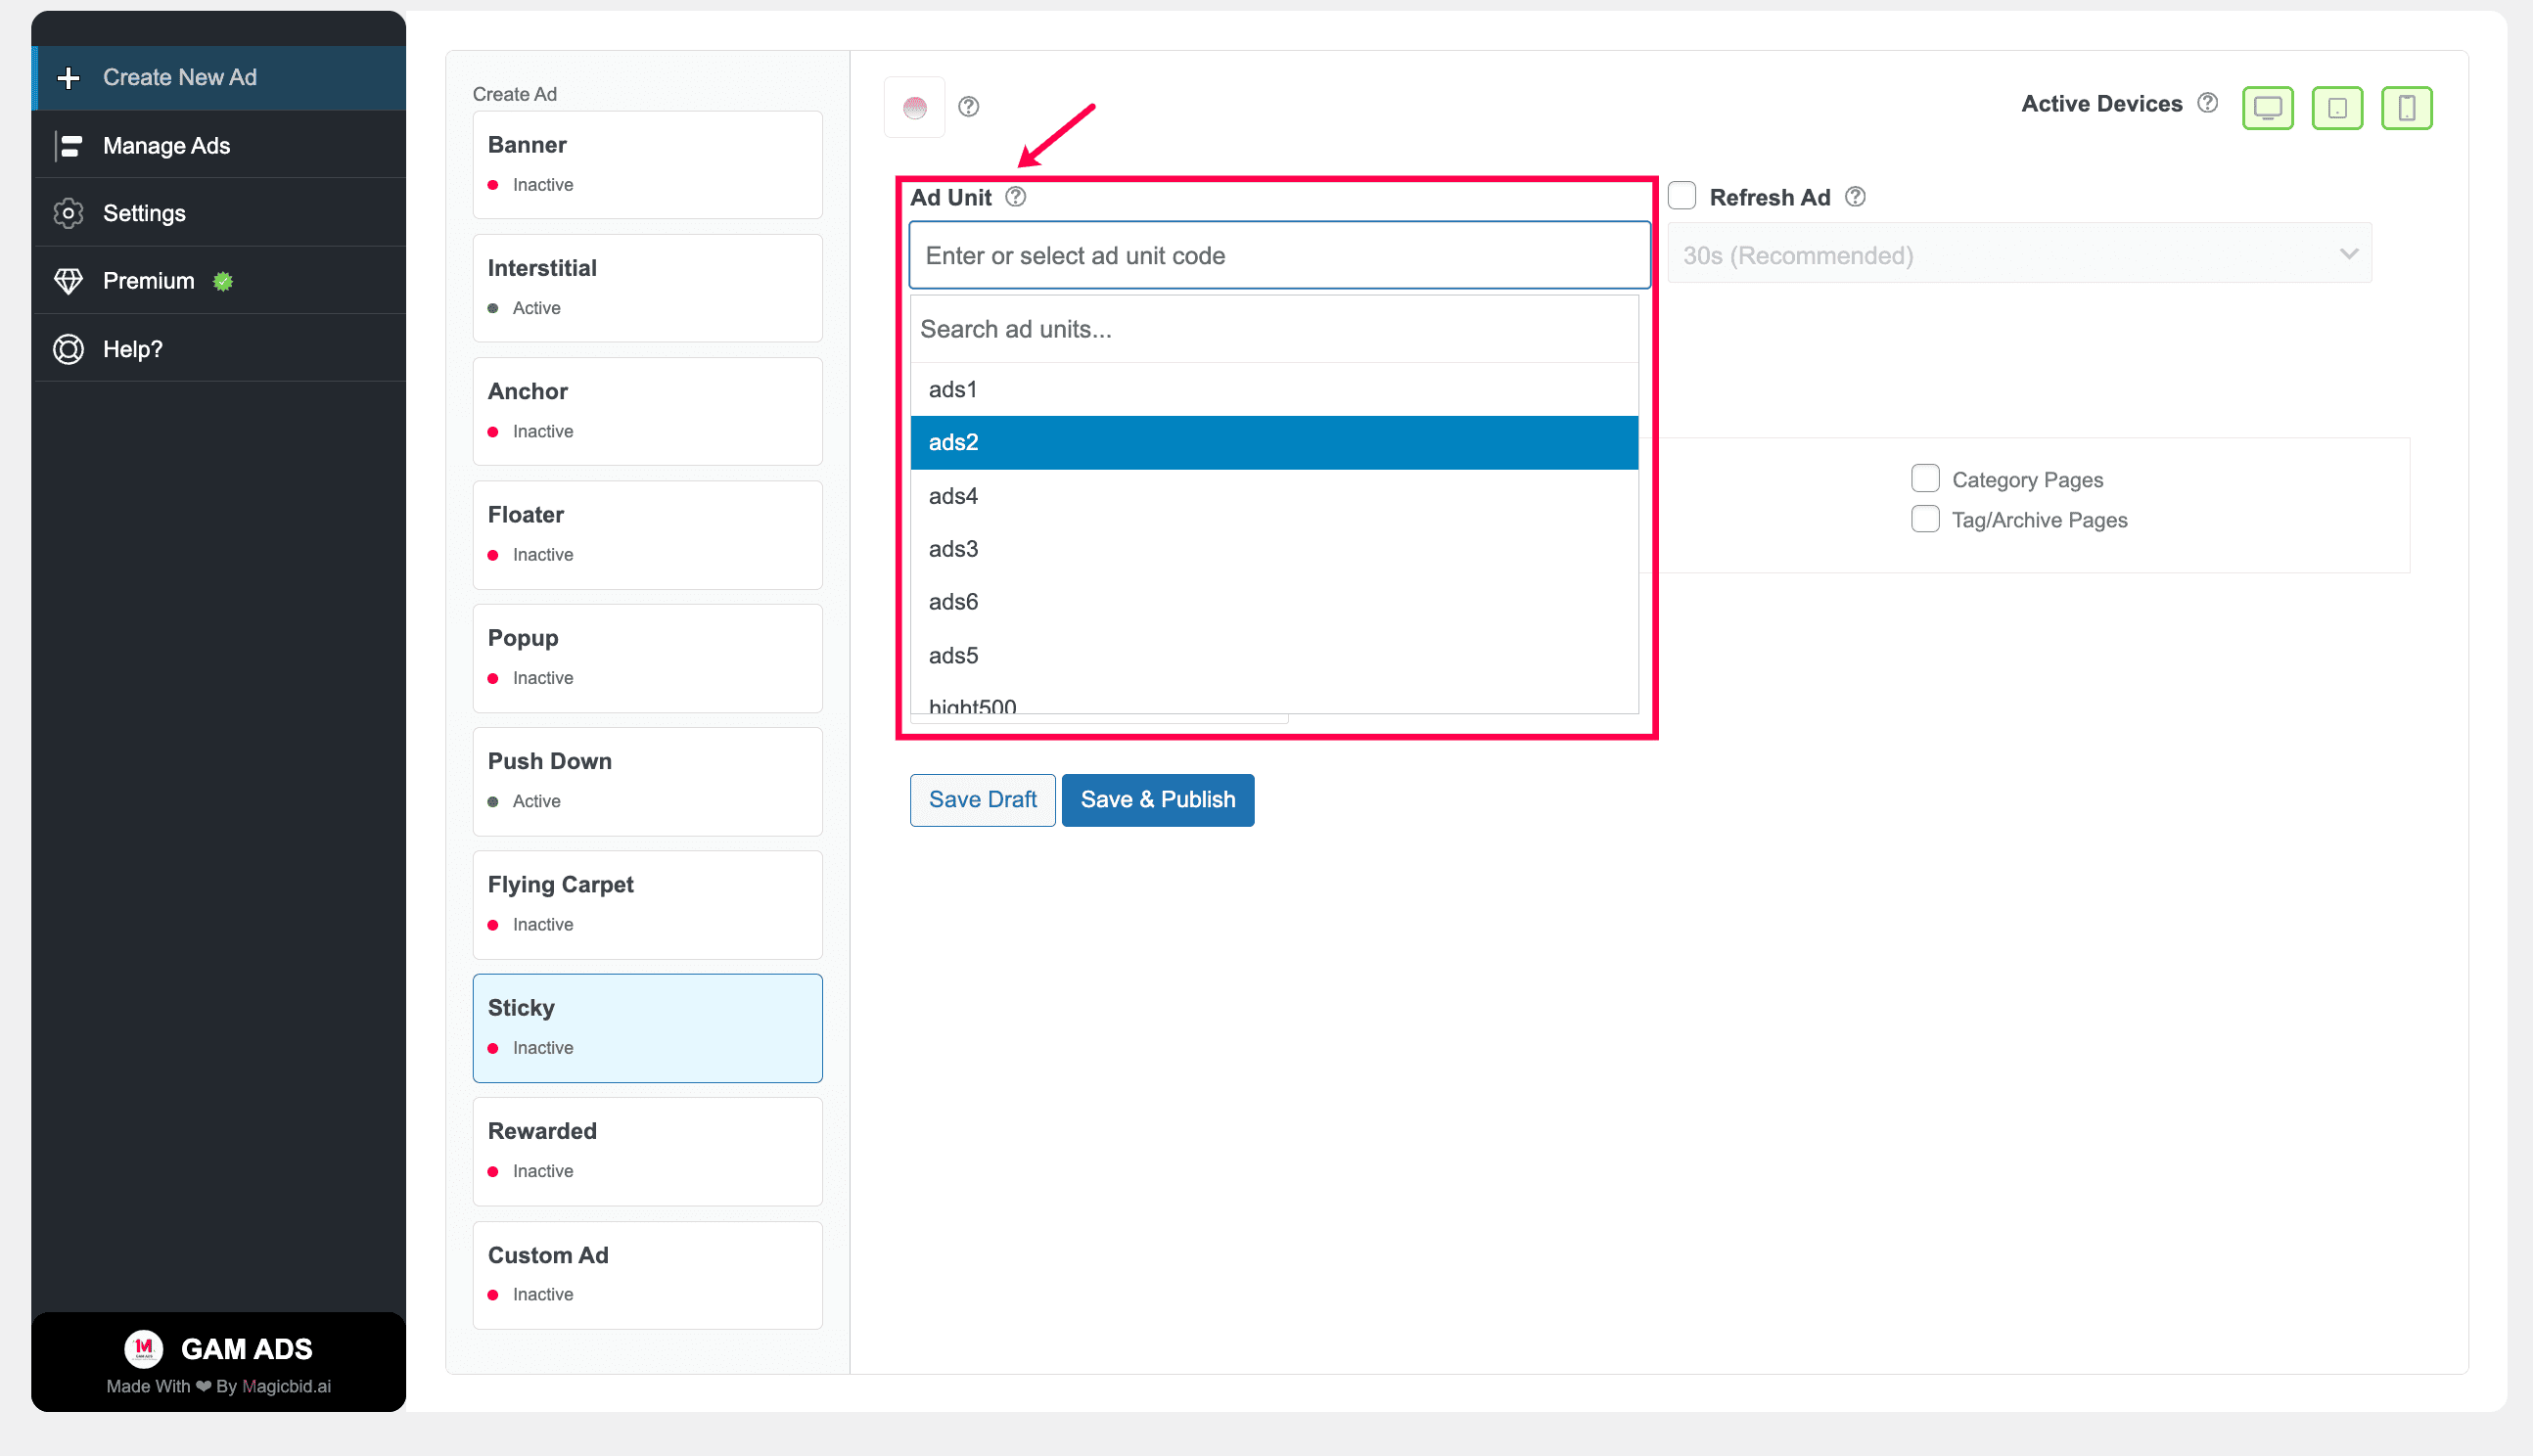
Step 2: Select Ad Unit
Choose the Google Ad Manager ad unit you want to serve.
Note: The ad unit must already exist in your Google Ad Manager account in order to appear in this list.
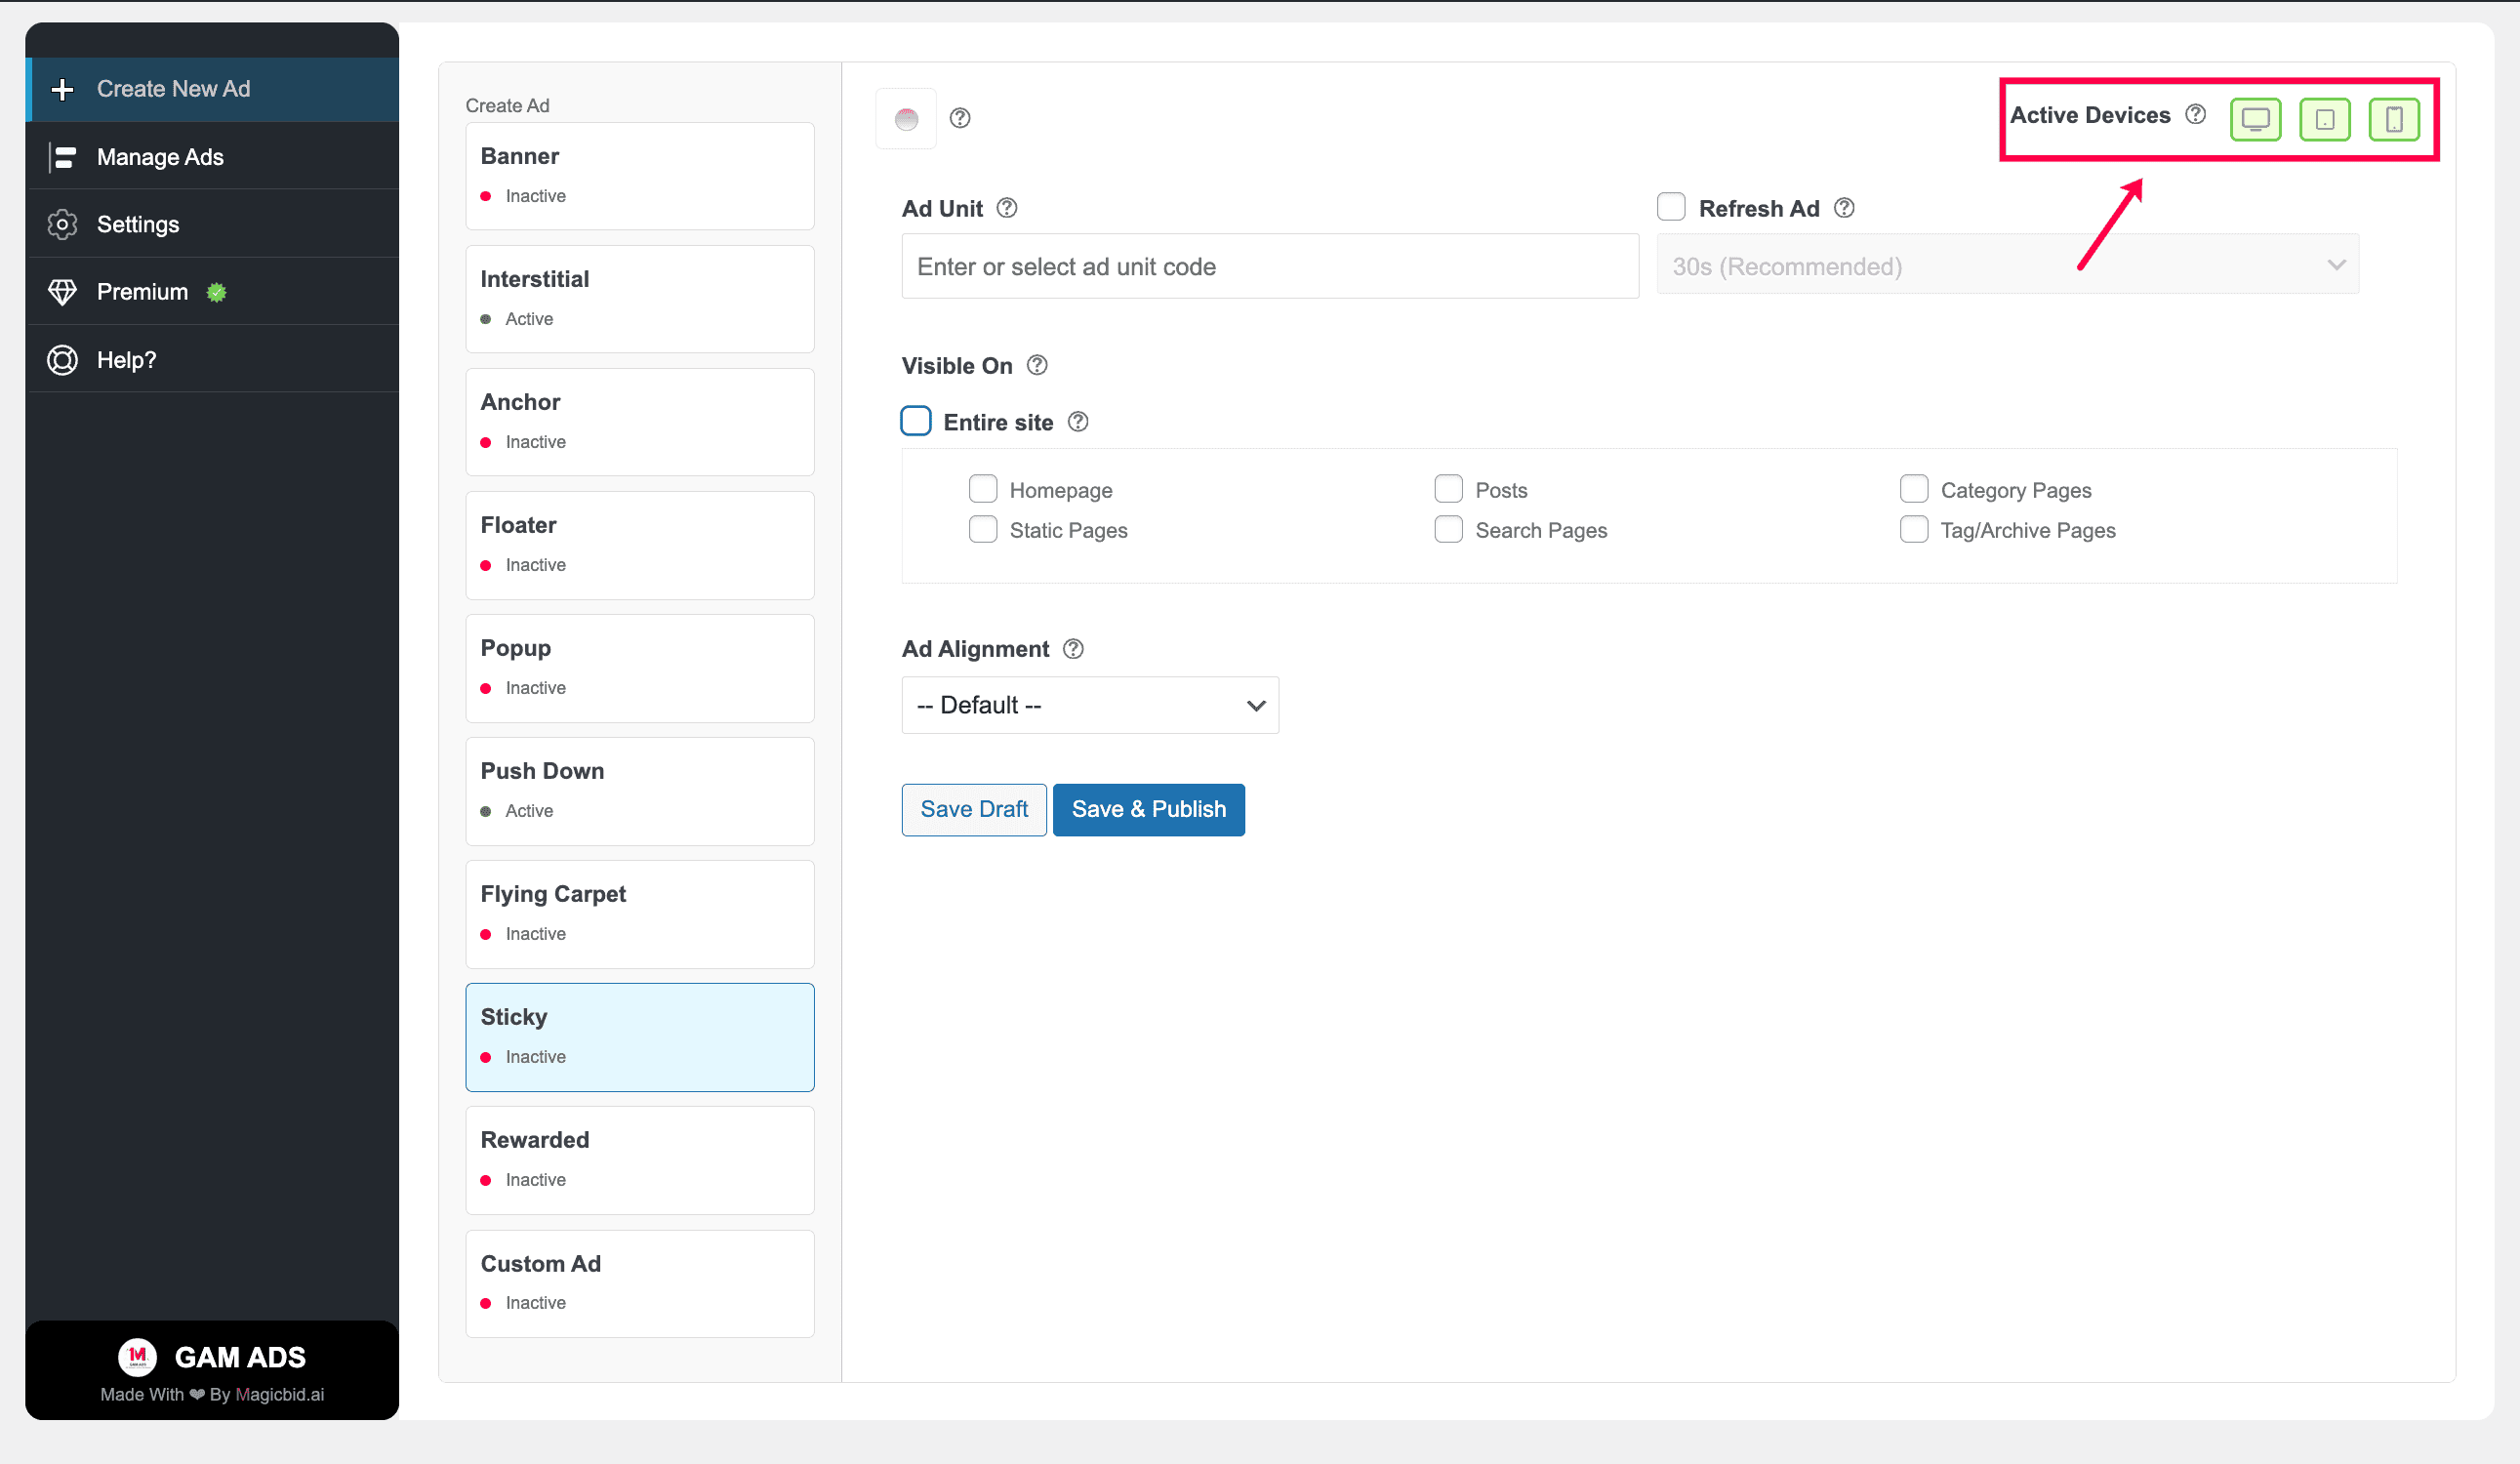
Step 3: Choose Devices
Under Active Devices, select where this ad should run:
- Desktop
- Tablet
- Mobile
You may enable one, two, or all three device types.
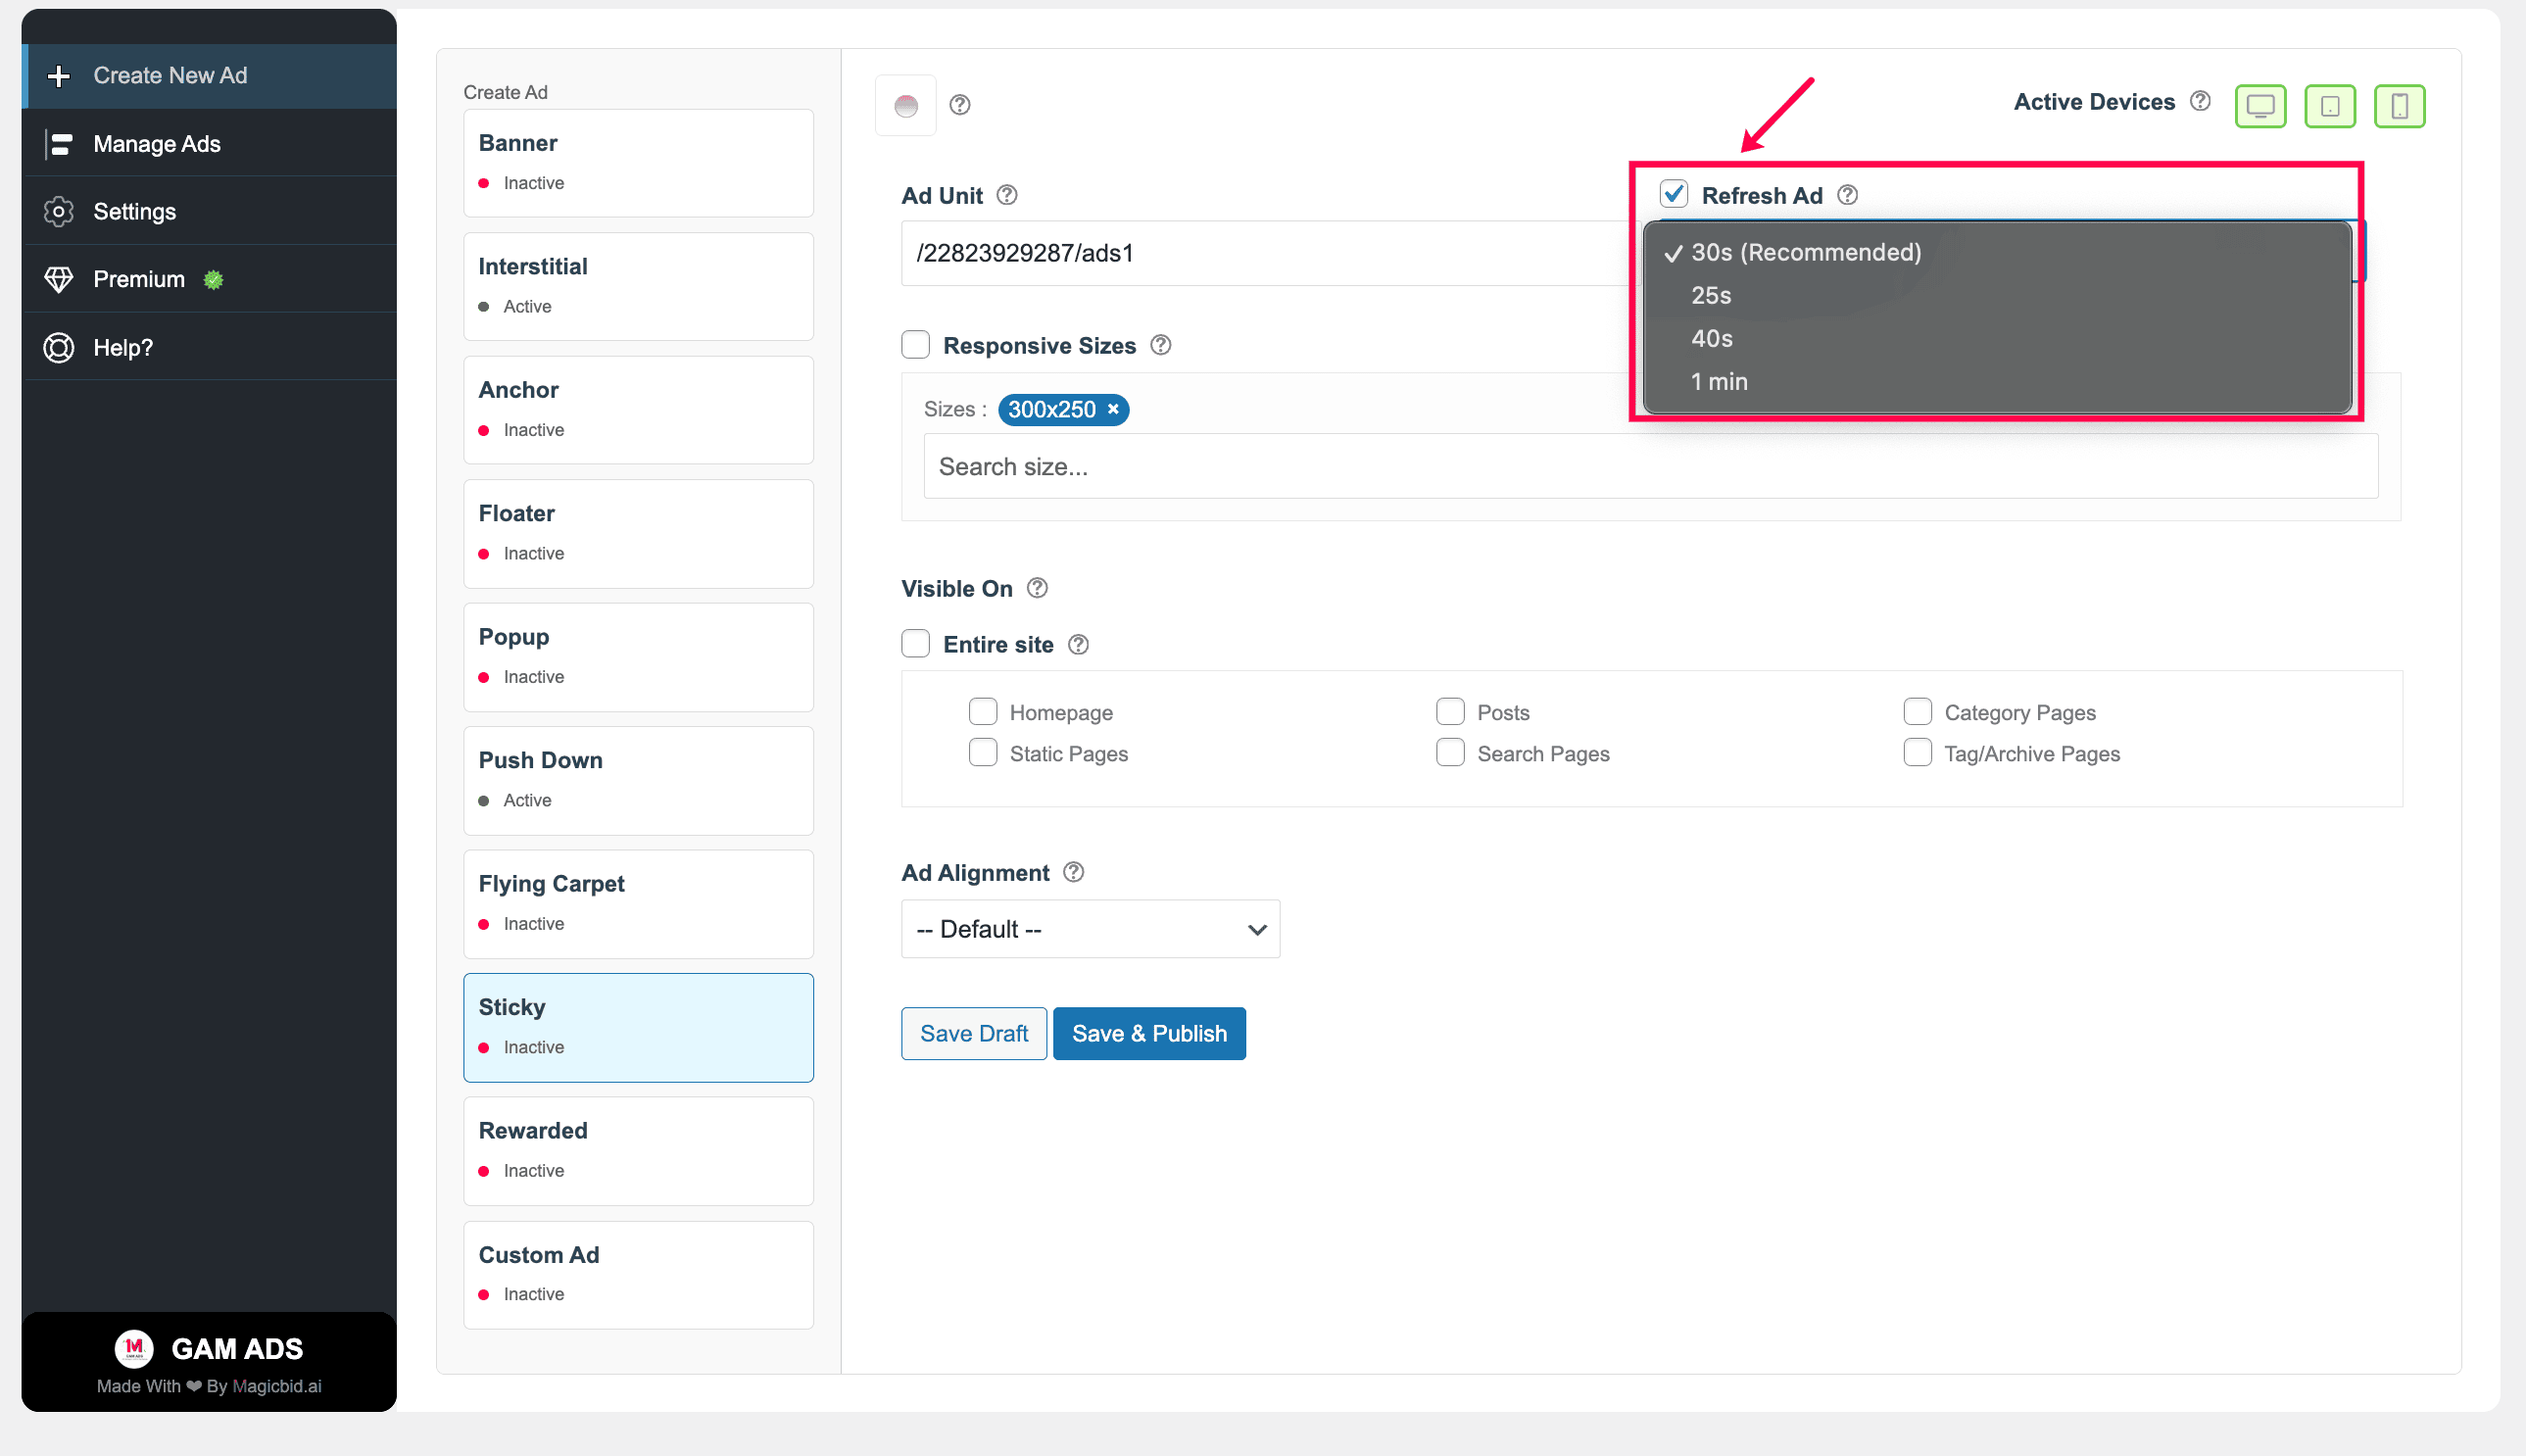
Step 4: Ad Refresh (Premium Feature)
Enable or disable ad refresh.
- ON: Reloads ads after a set interval
- OFF: Keeps the ad static
Note: This feature is available for premium users only.
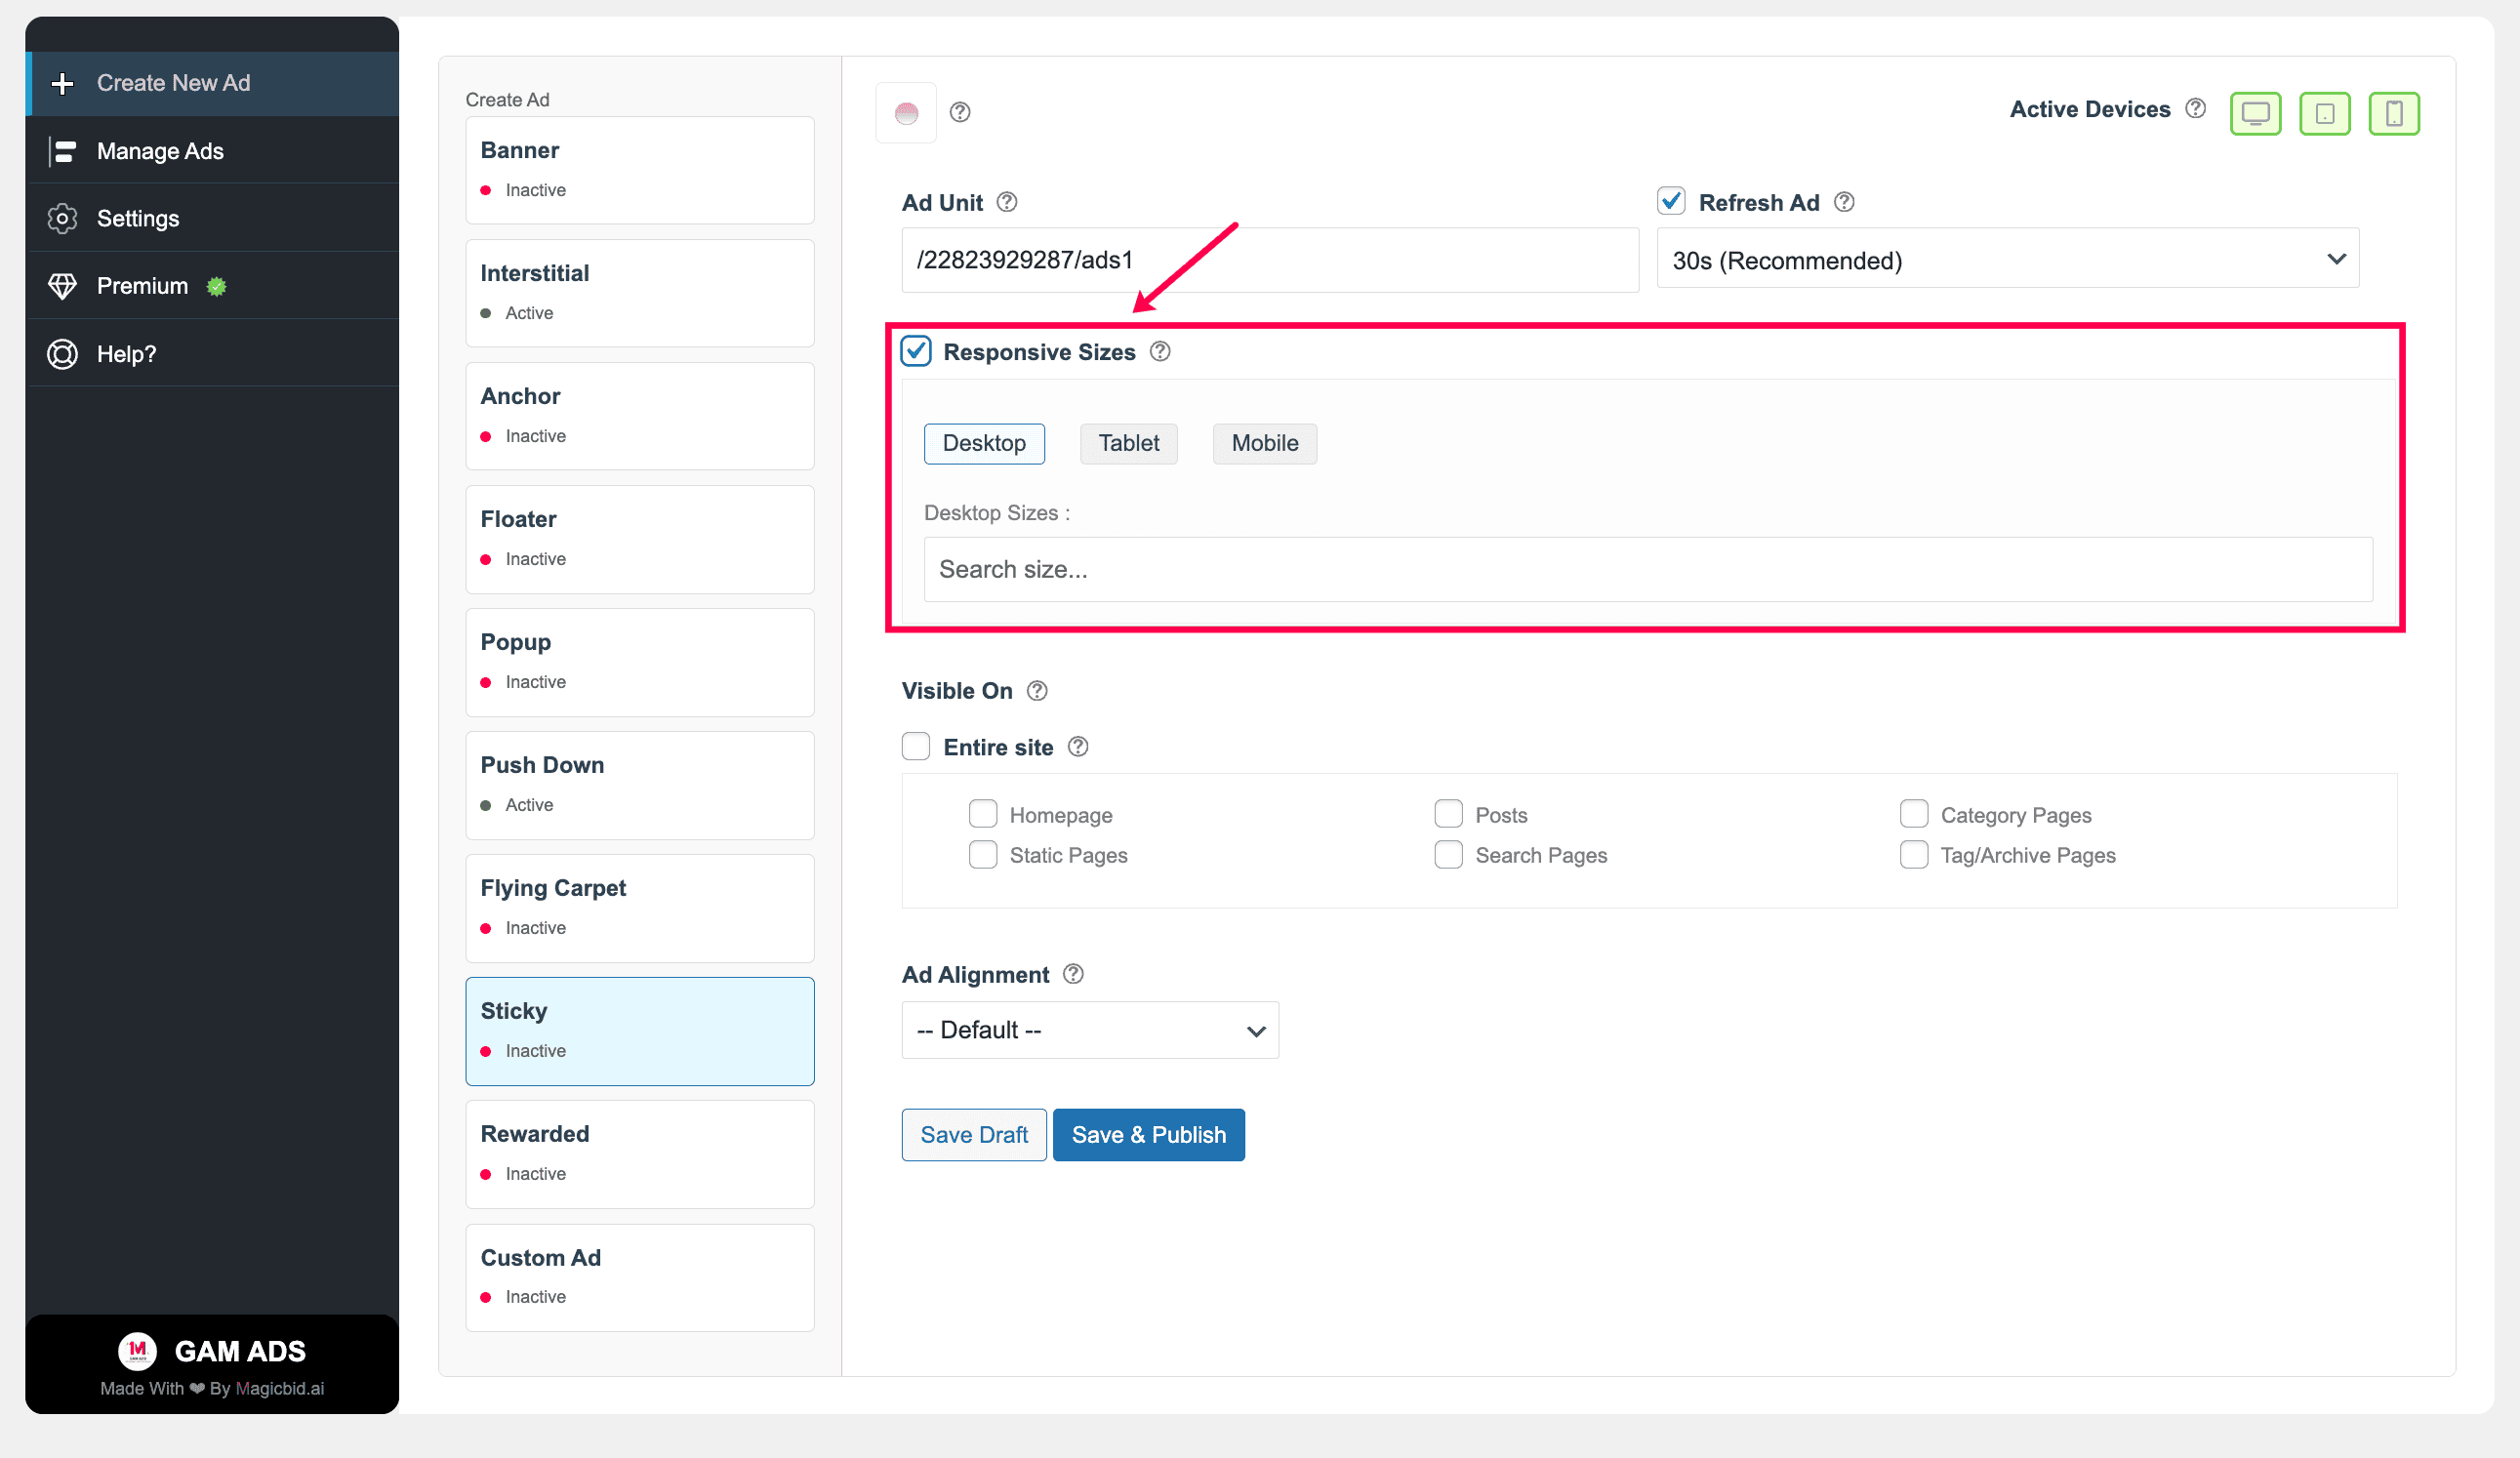
Step 5: Responsive Setting
Decide if the ad should be responsive.
- ON: Automatically adjusts to screen size
- OFF: Uses only fixed ad sizes
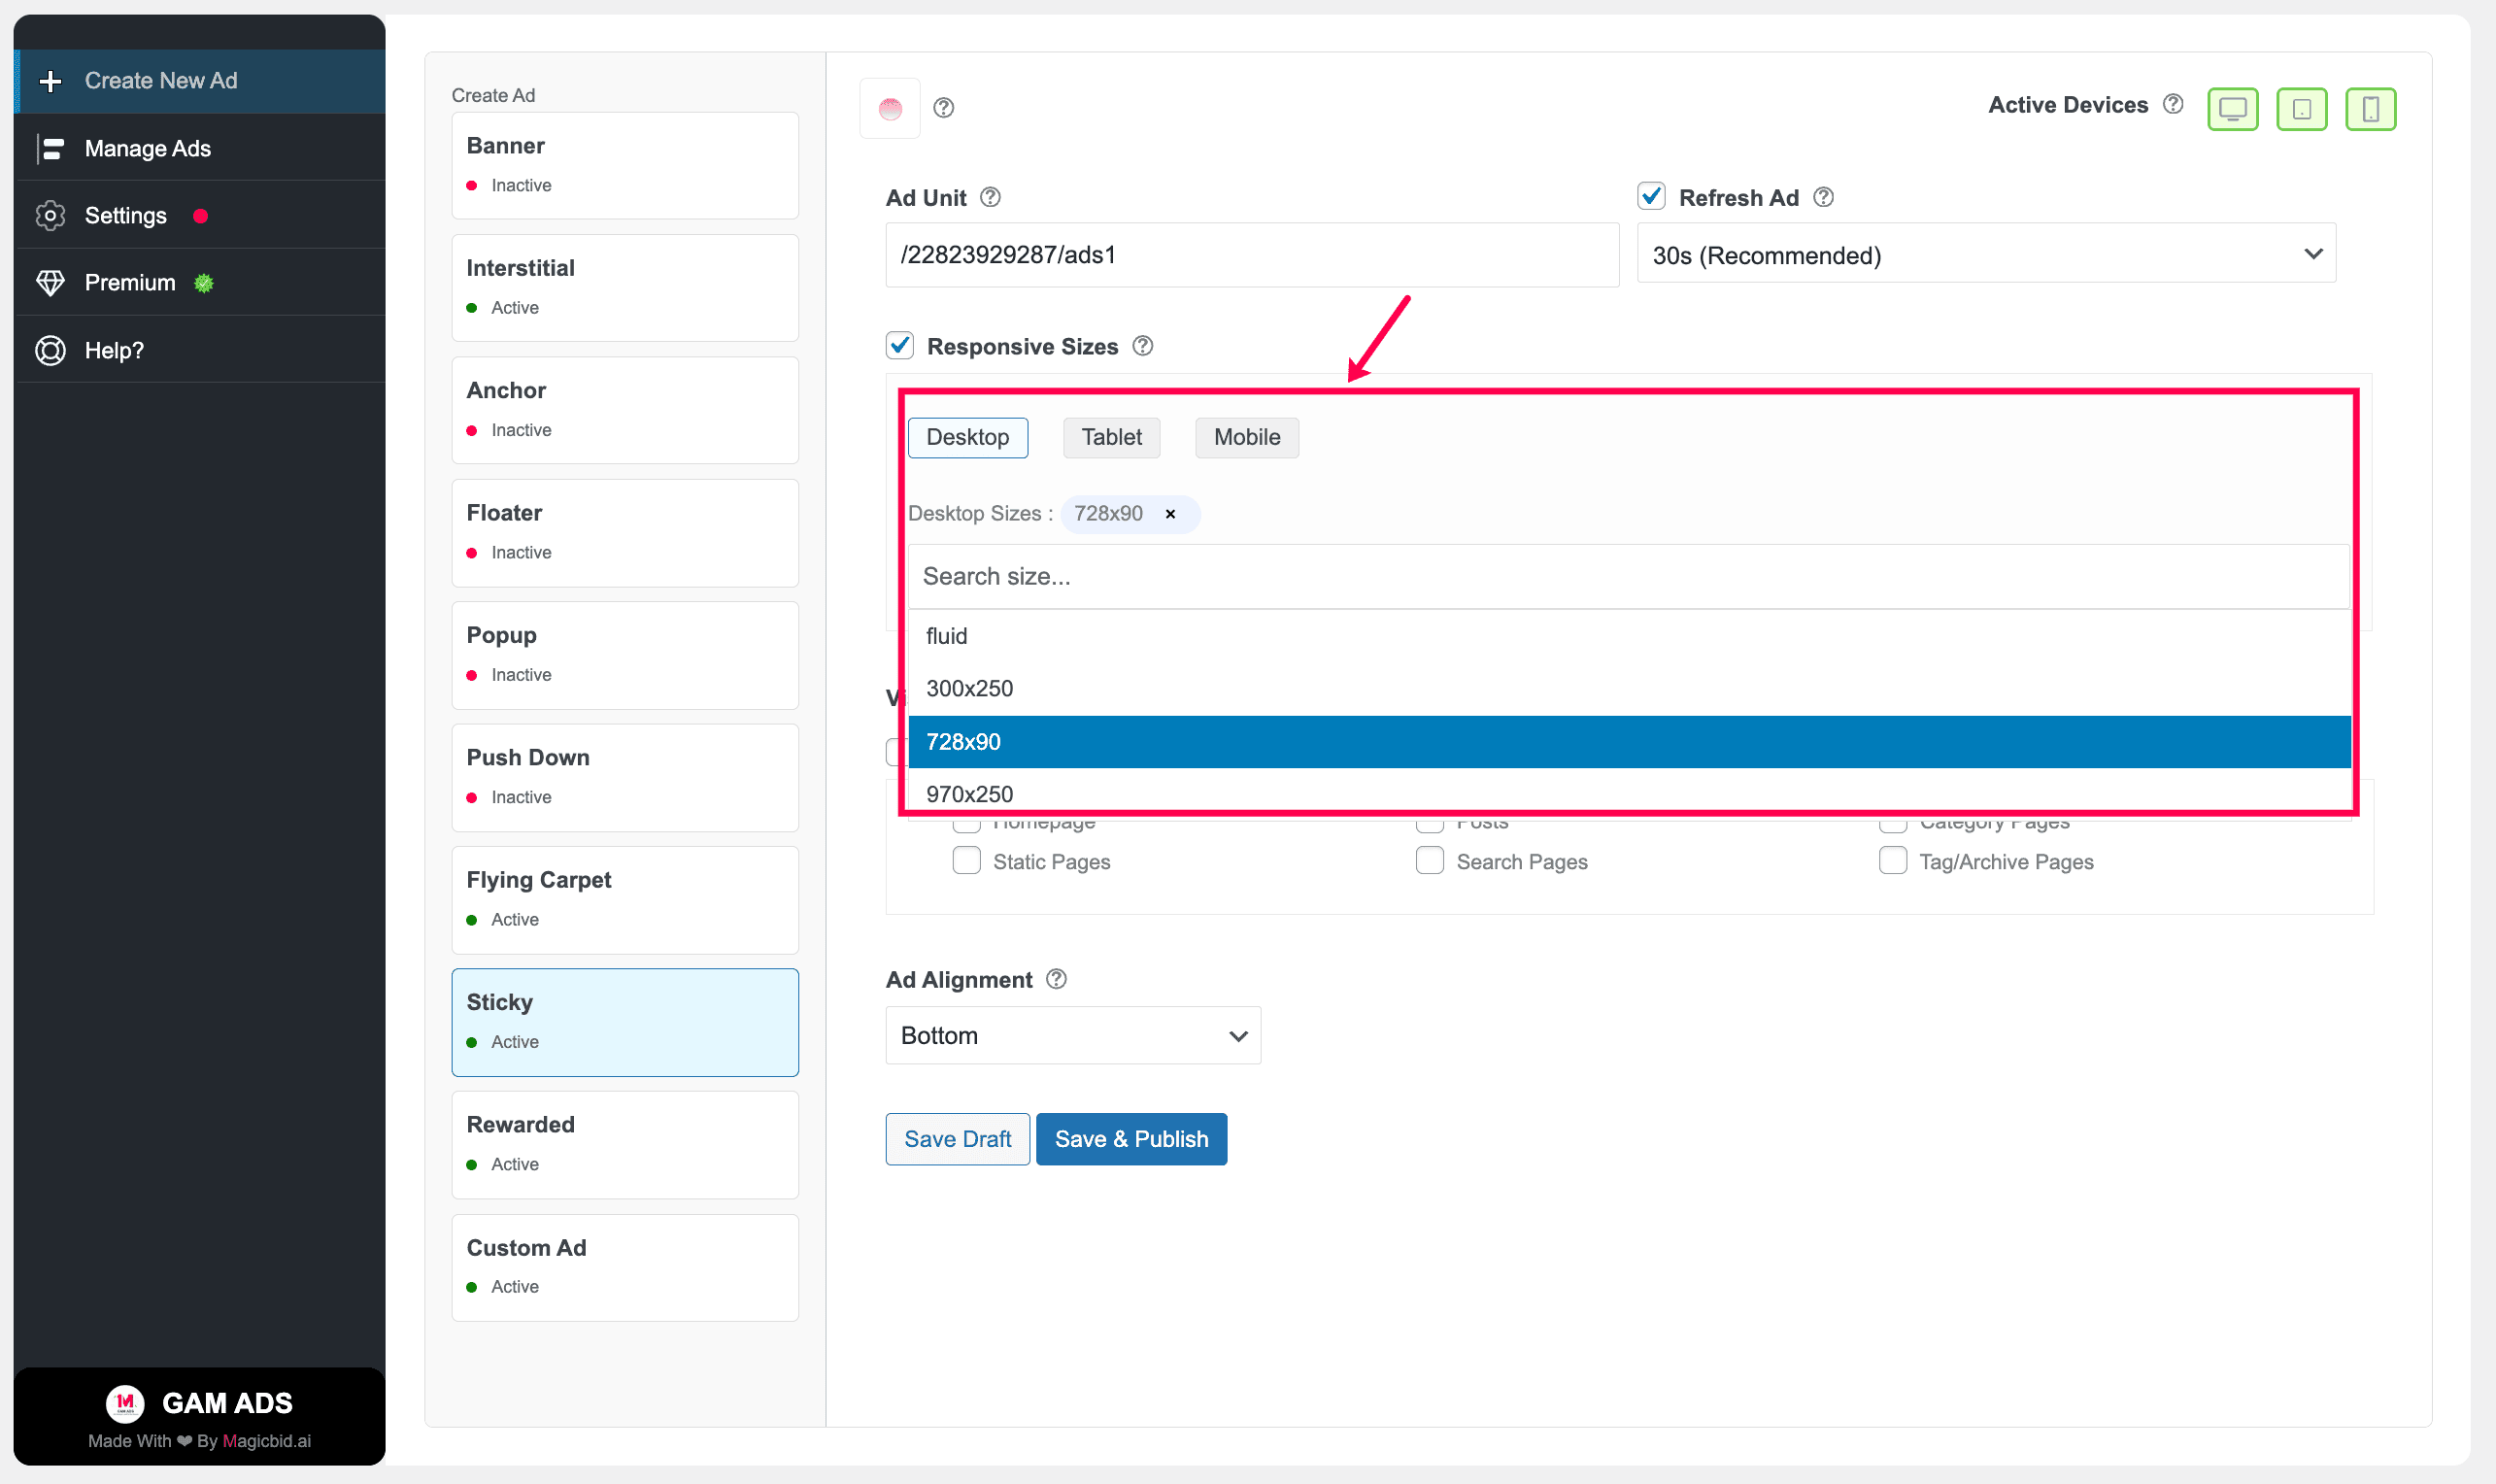
Step 6: Choose Ad Sizes
Select ad sizes for each device.
Example:
- Desktop: 728×90, 300×250
- Mobile: 320×50, 300×250
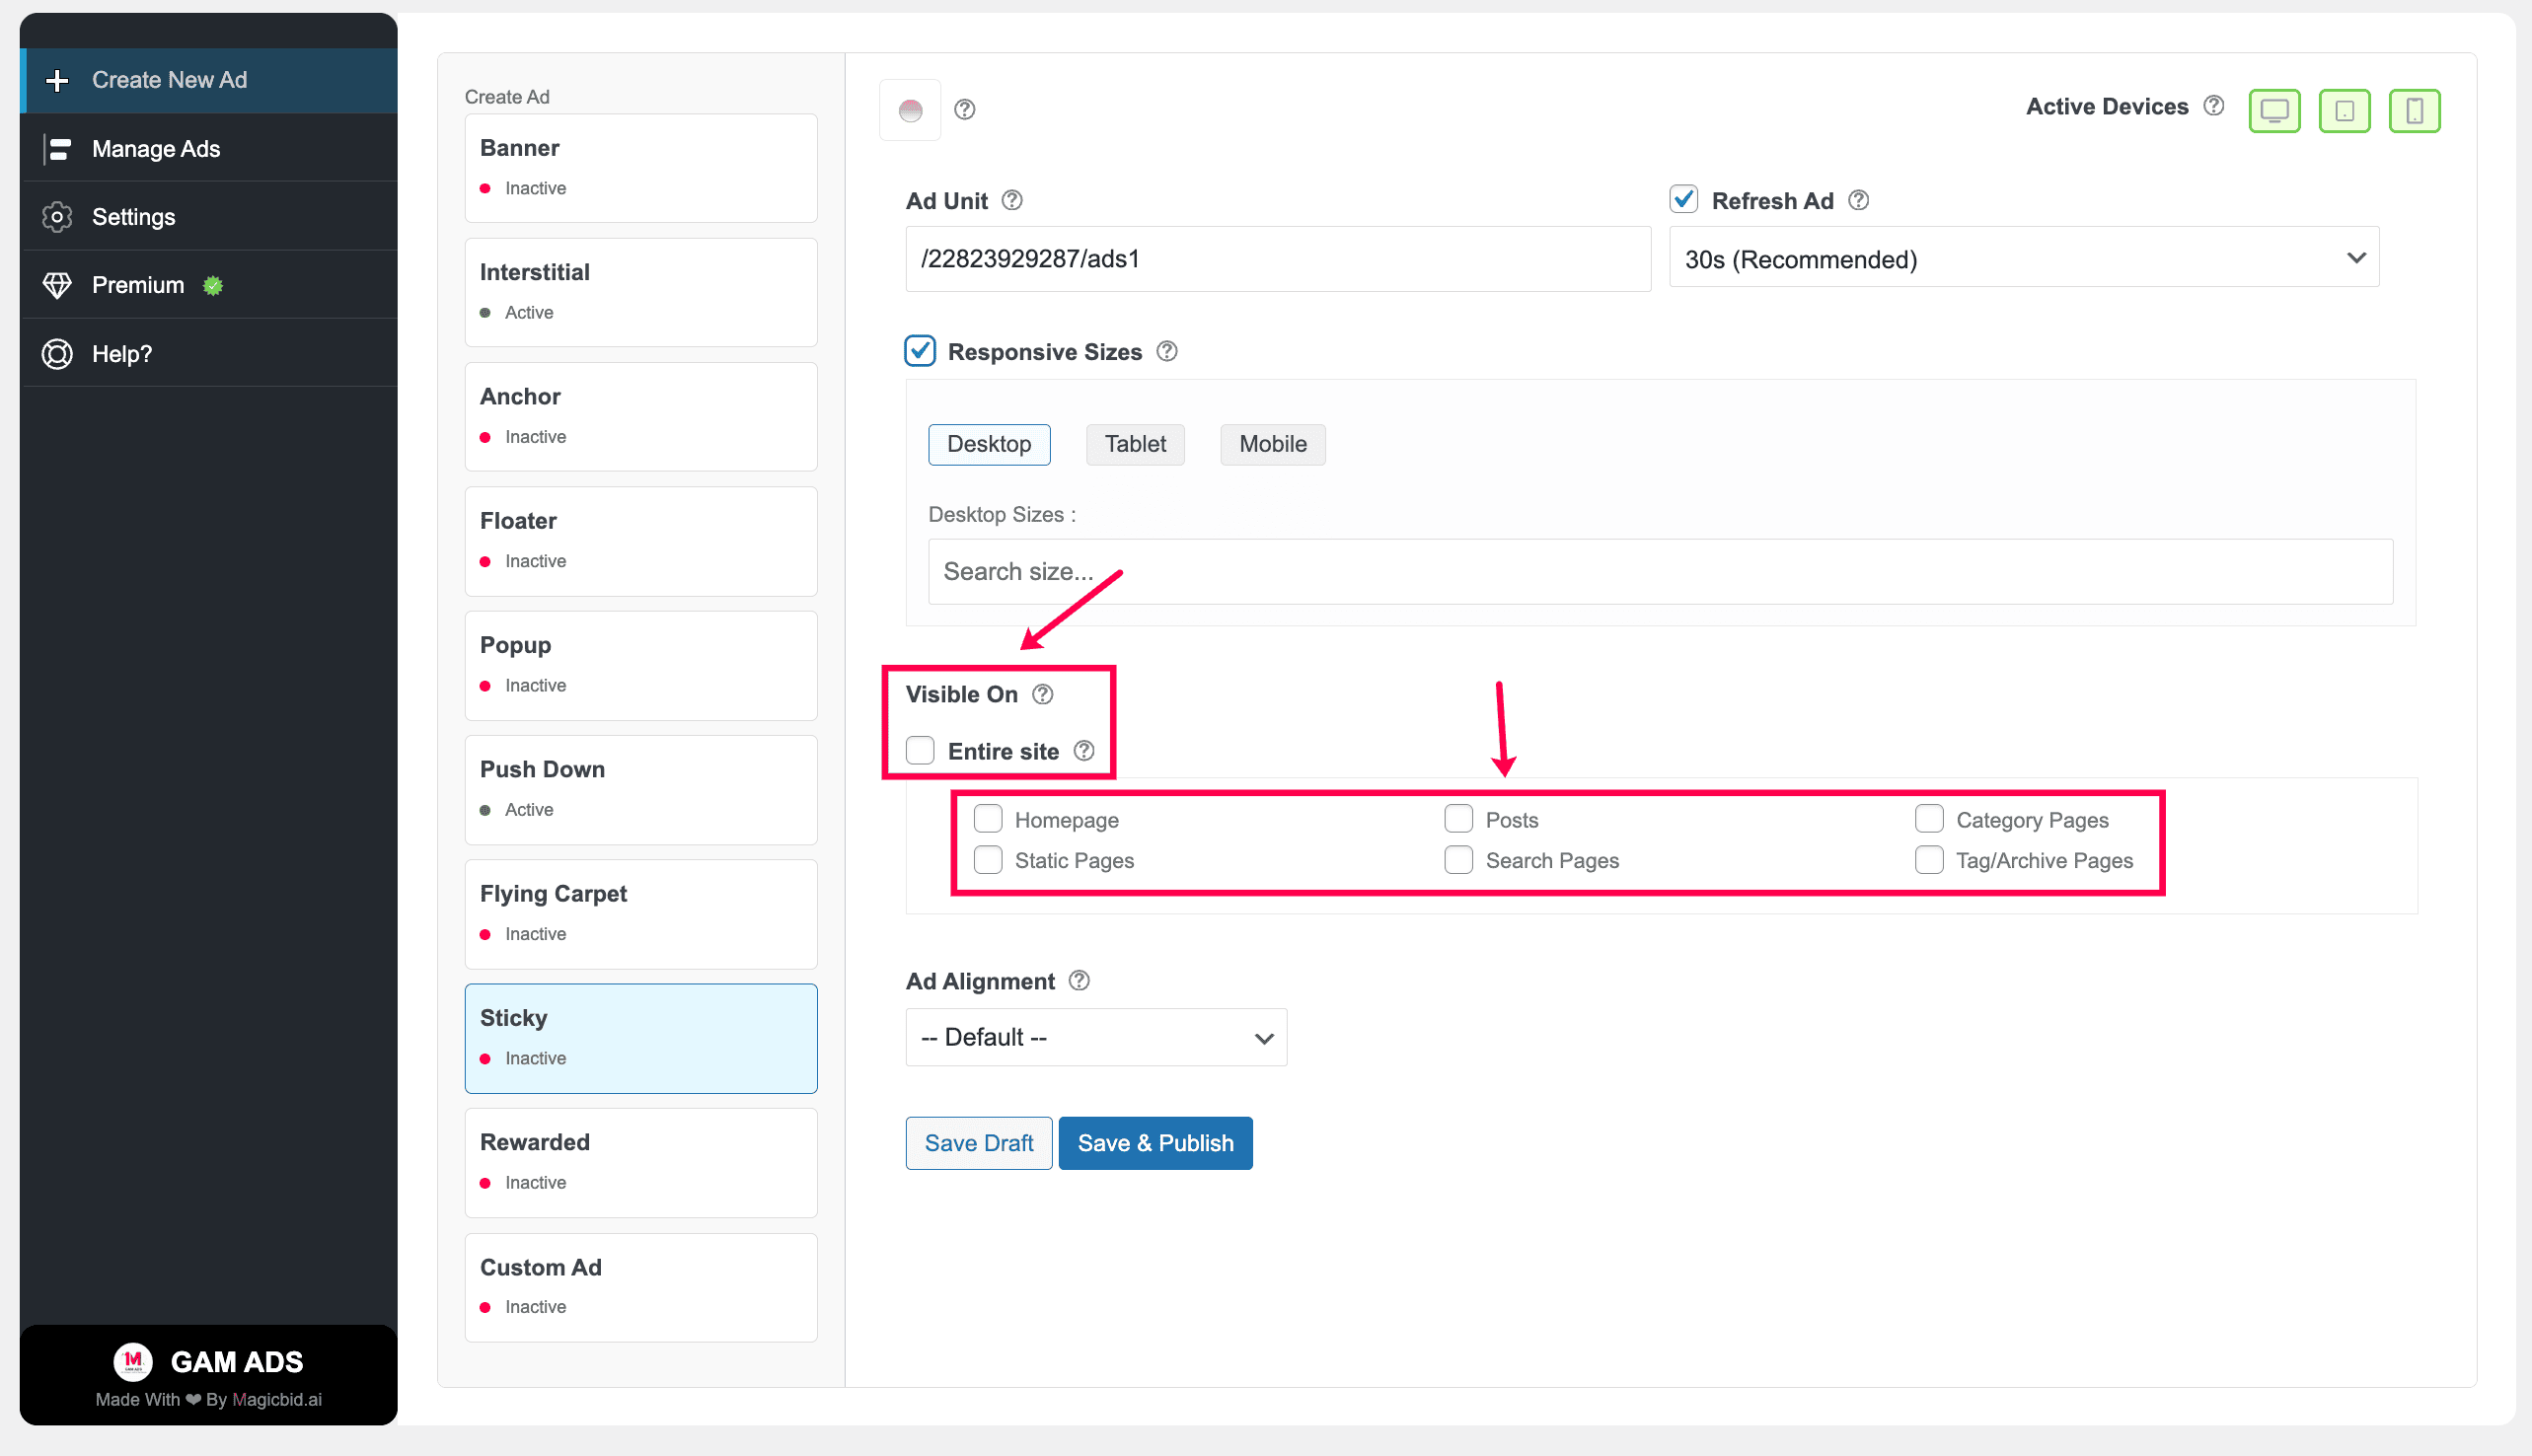
Step 7: Placement Rules
Choose where this ad should appear.
- Entire Site: Shows on all pages
- Specific Pages: Shows only on selected posts, pages, or categories
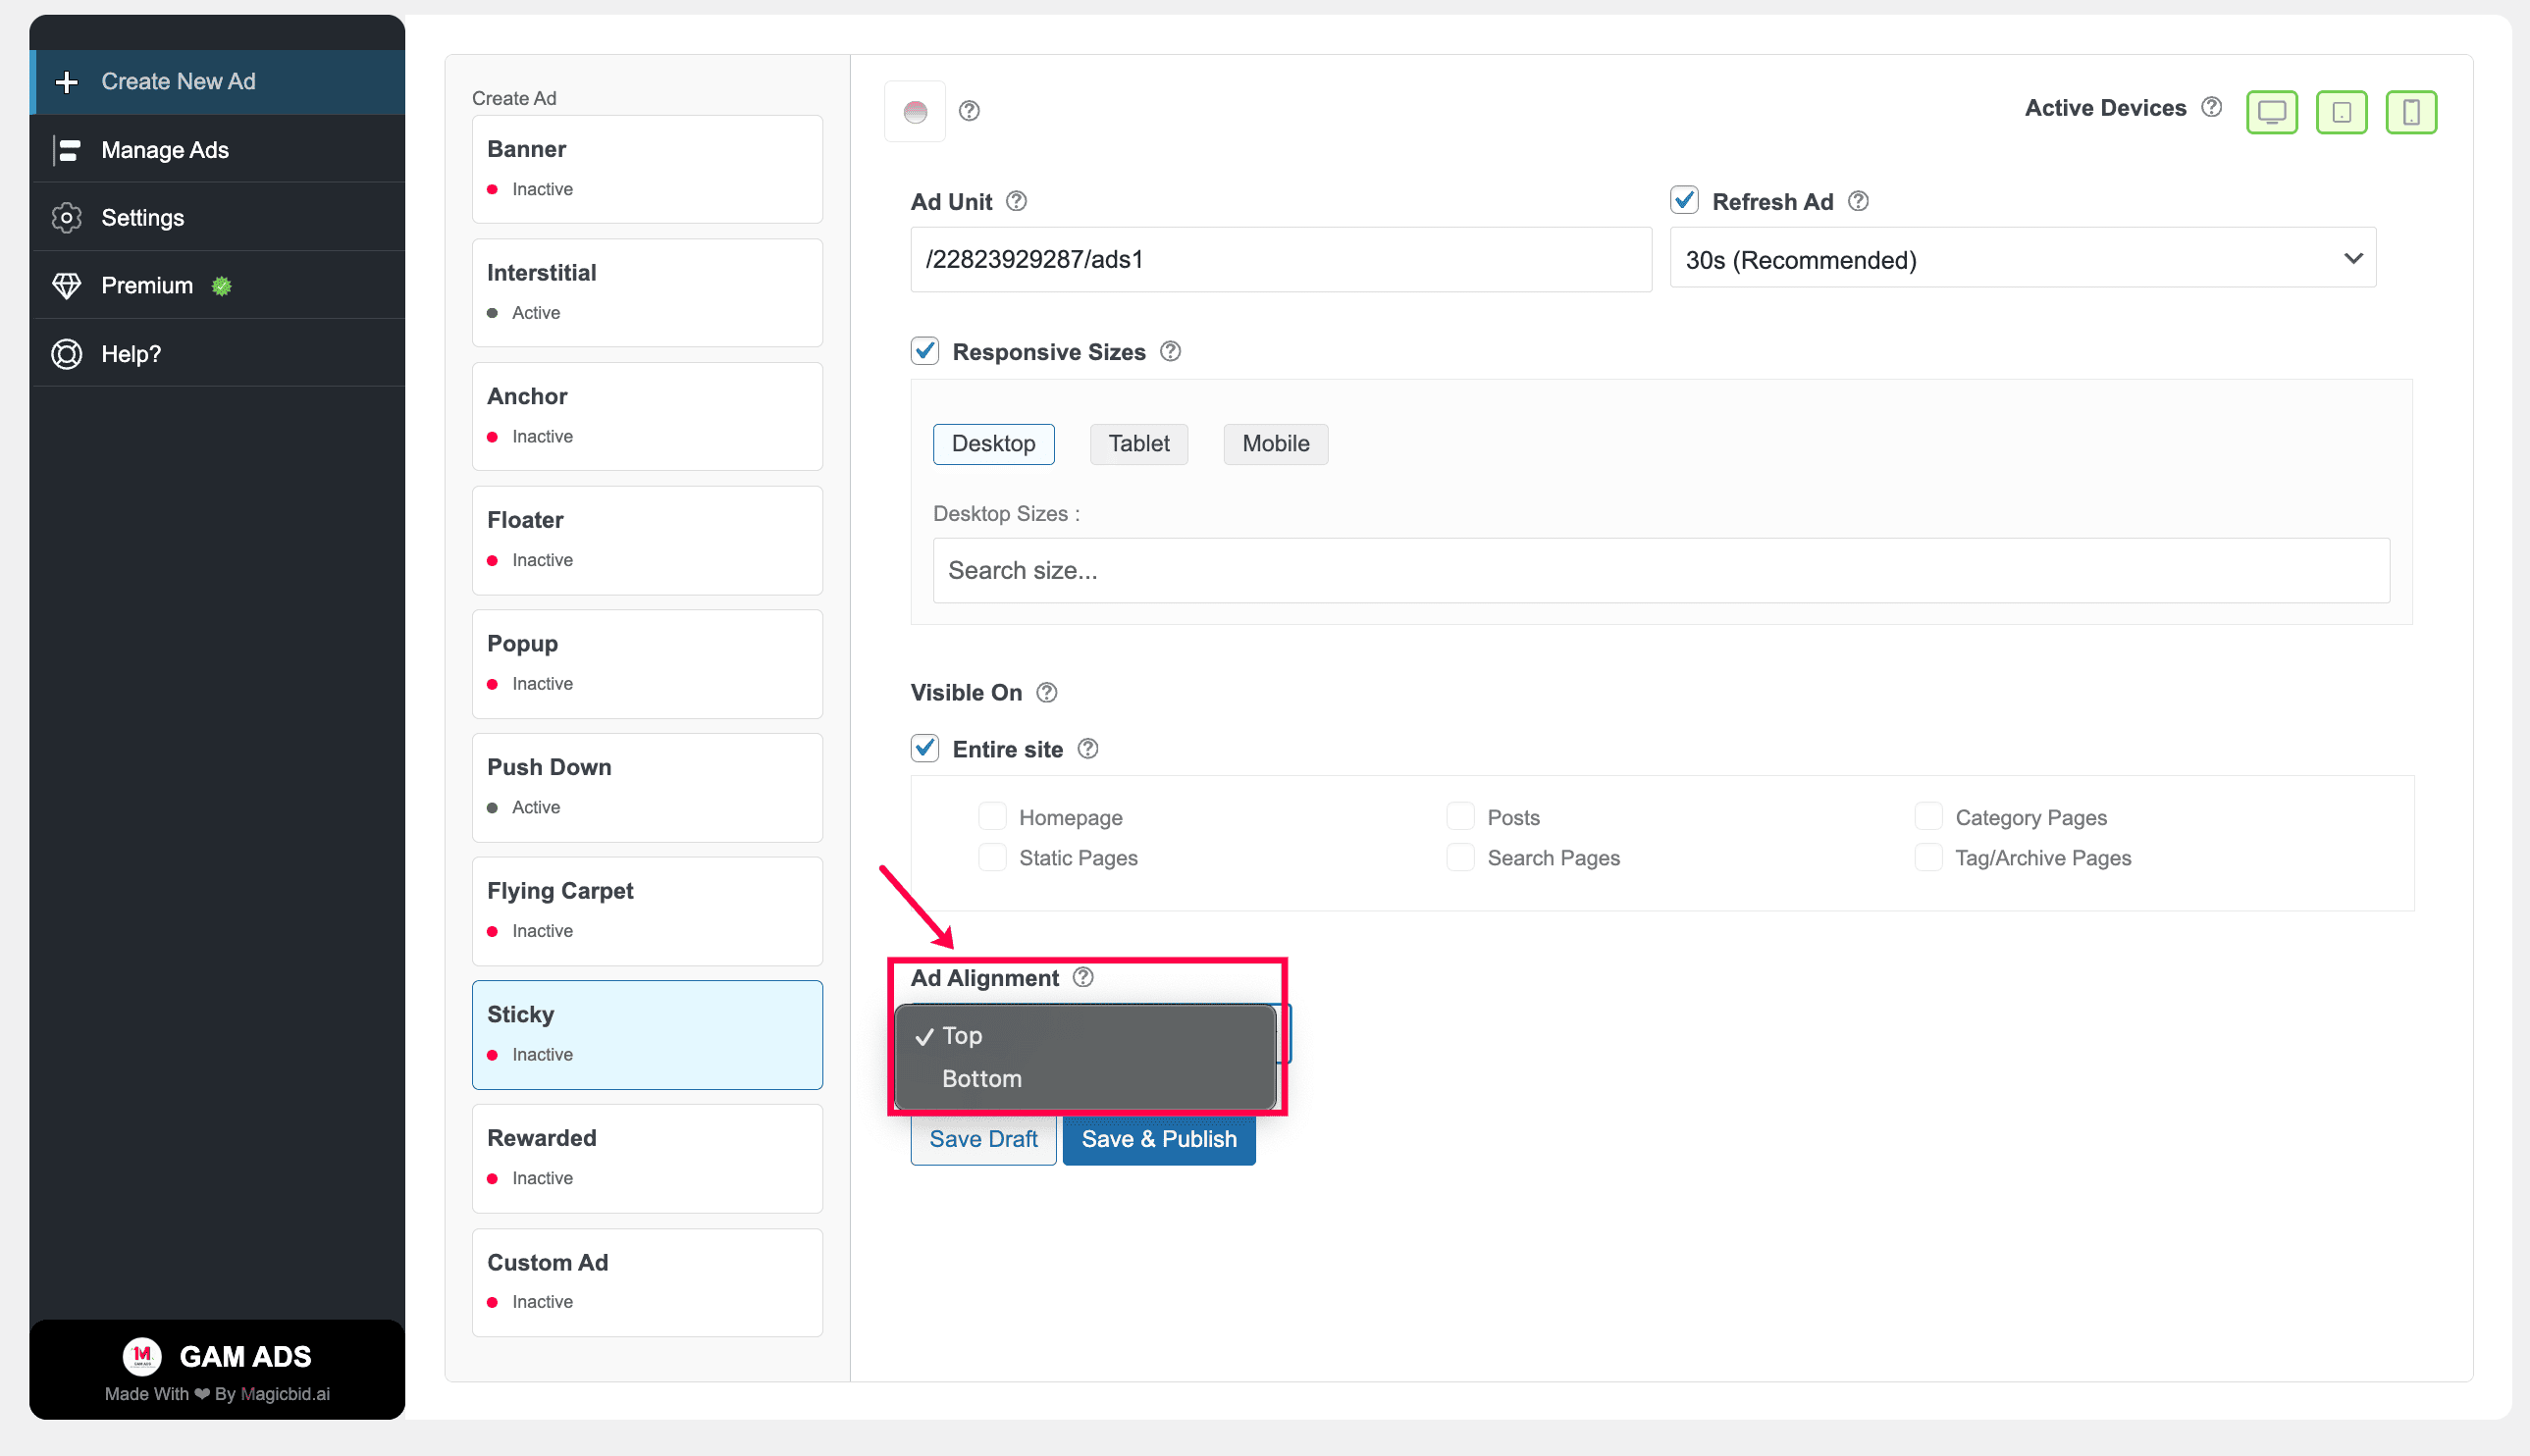
Step 8: Ad Alignment
Controls how the ad is positioned inside its placement container.
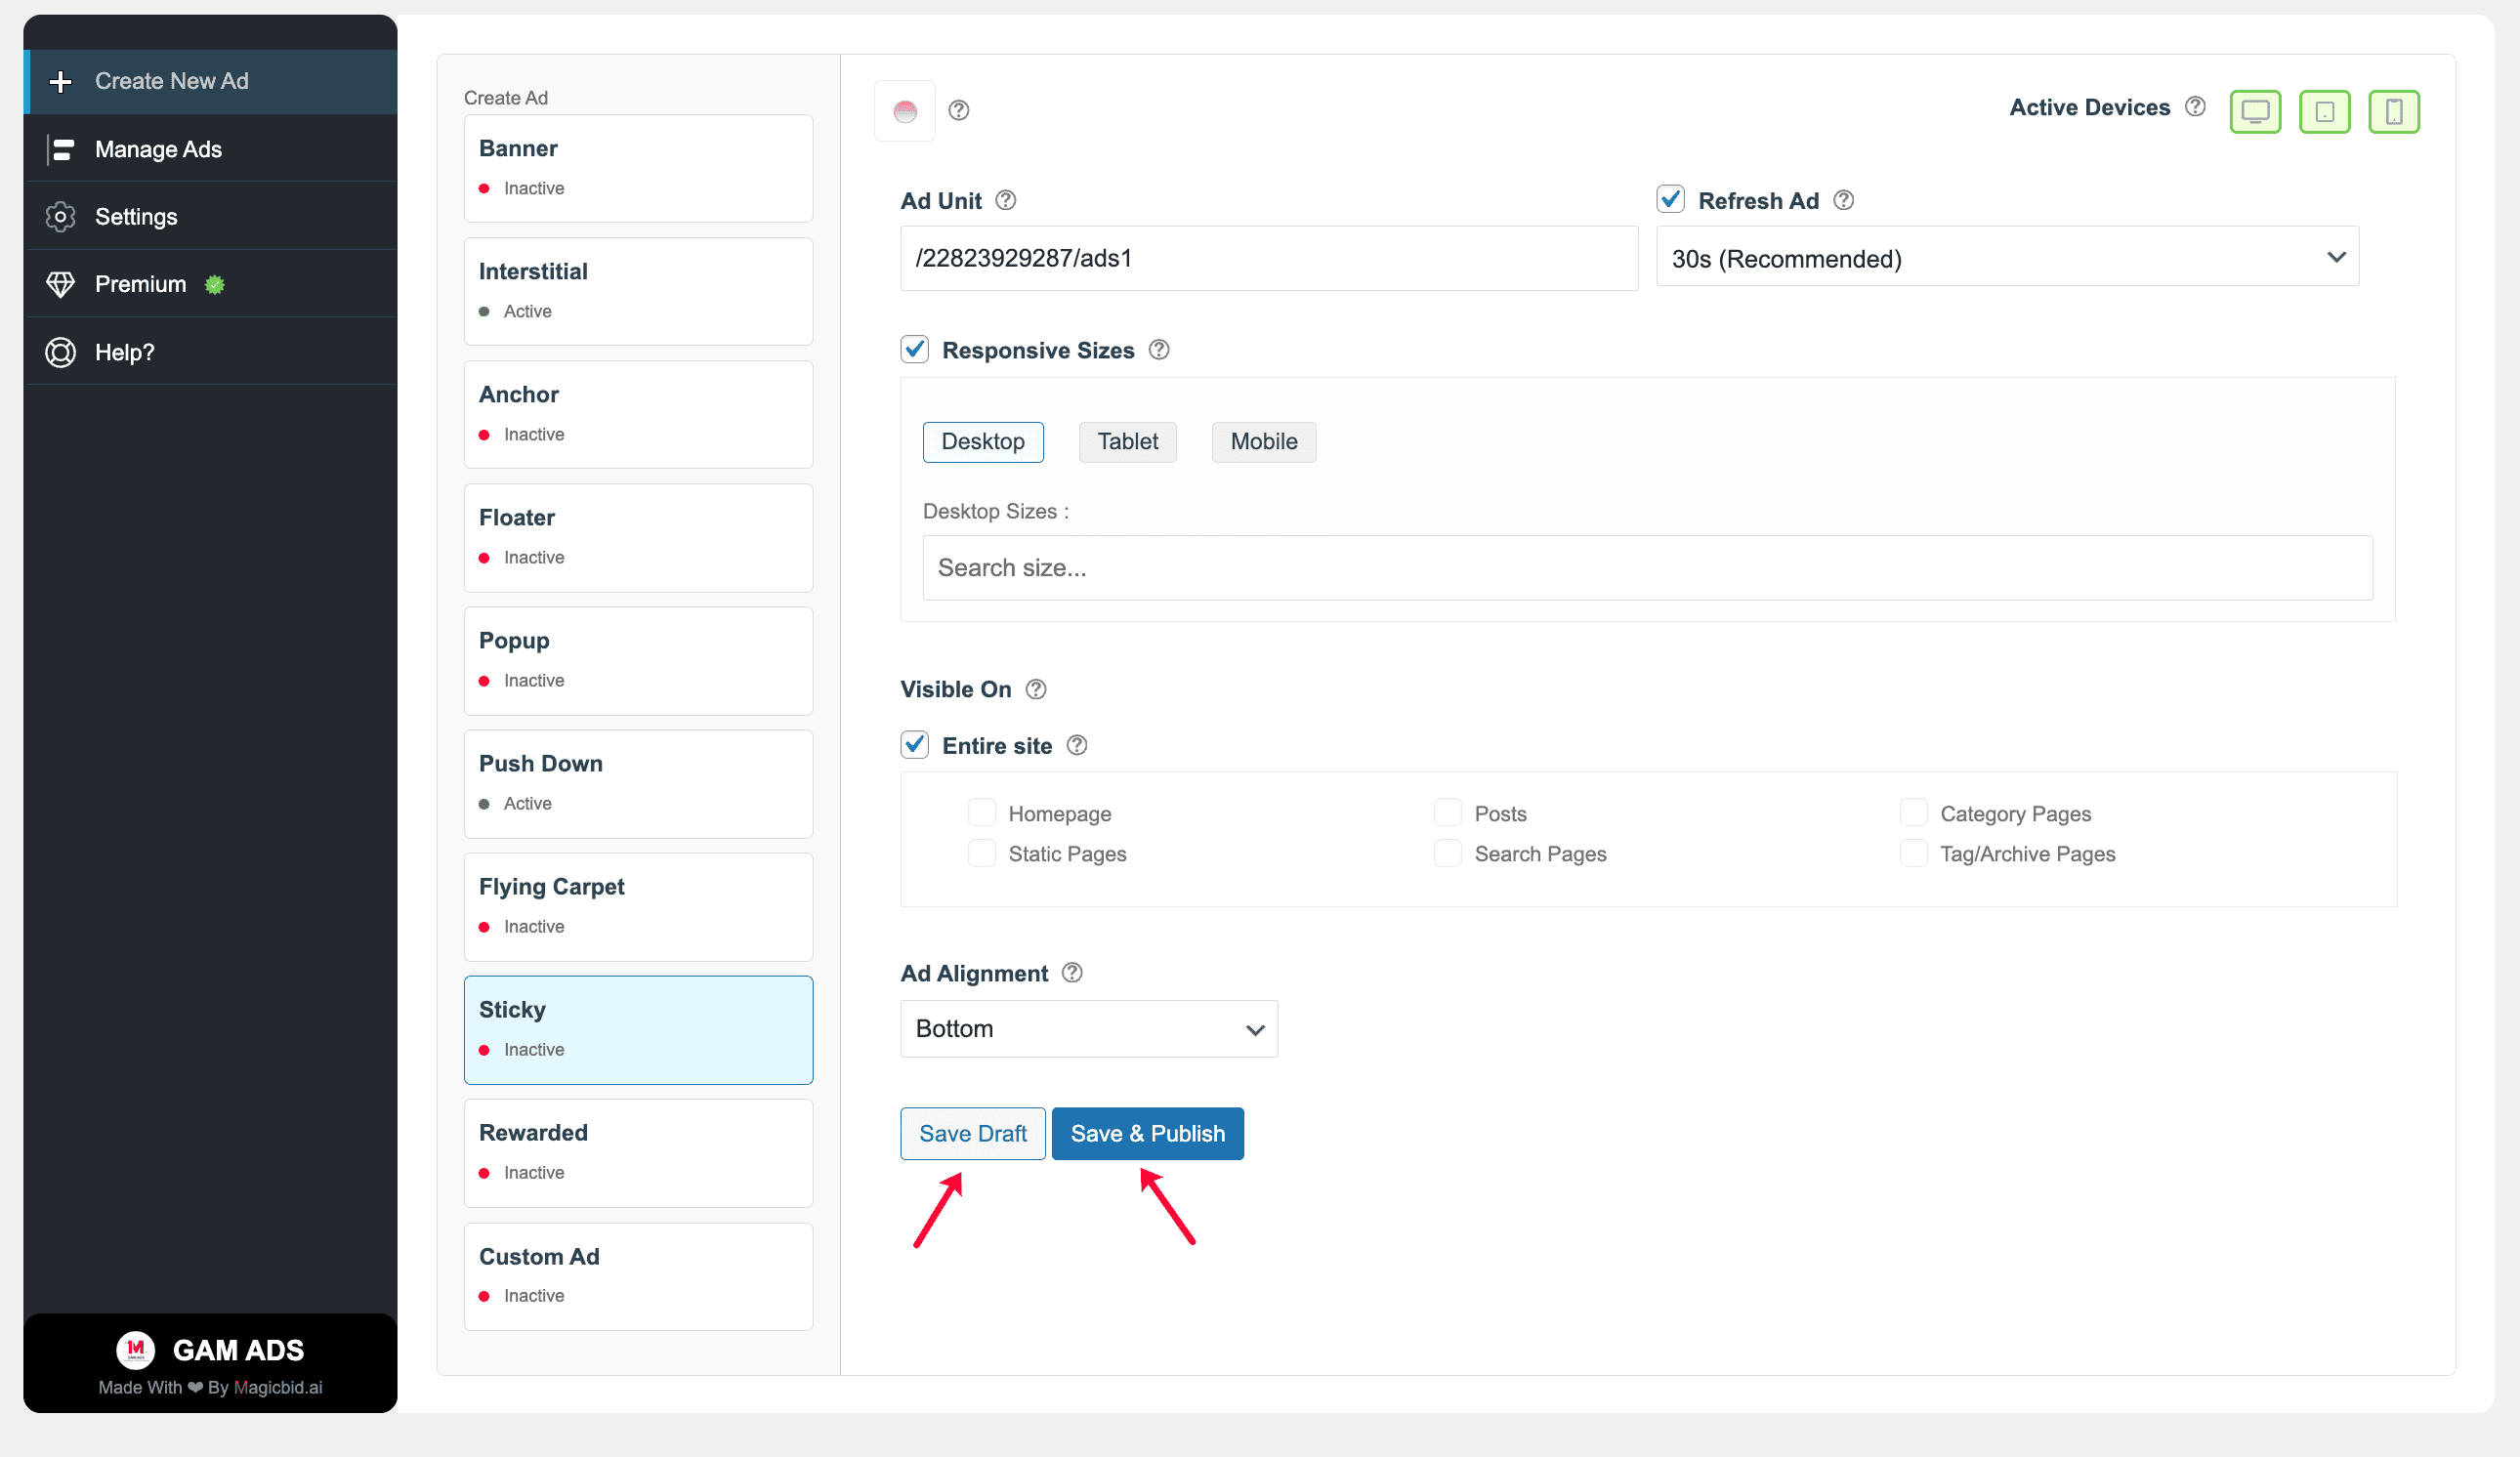
Step 9: Save Your Ad
Save Draft: Saves the ad without publishing it.
Save & Publish: Saves the ad and makes it live immediately.
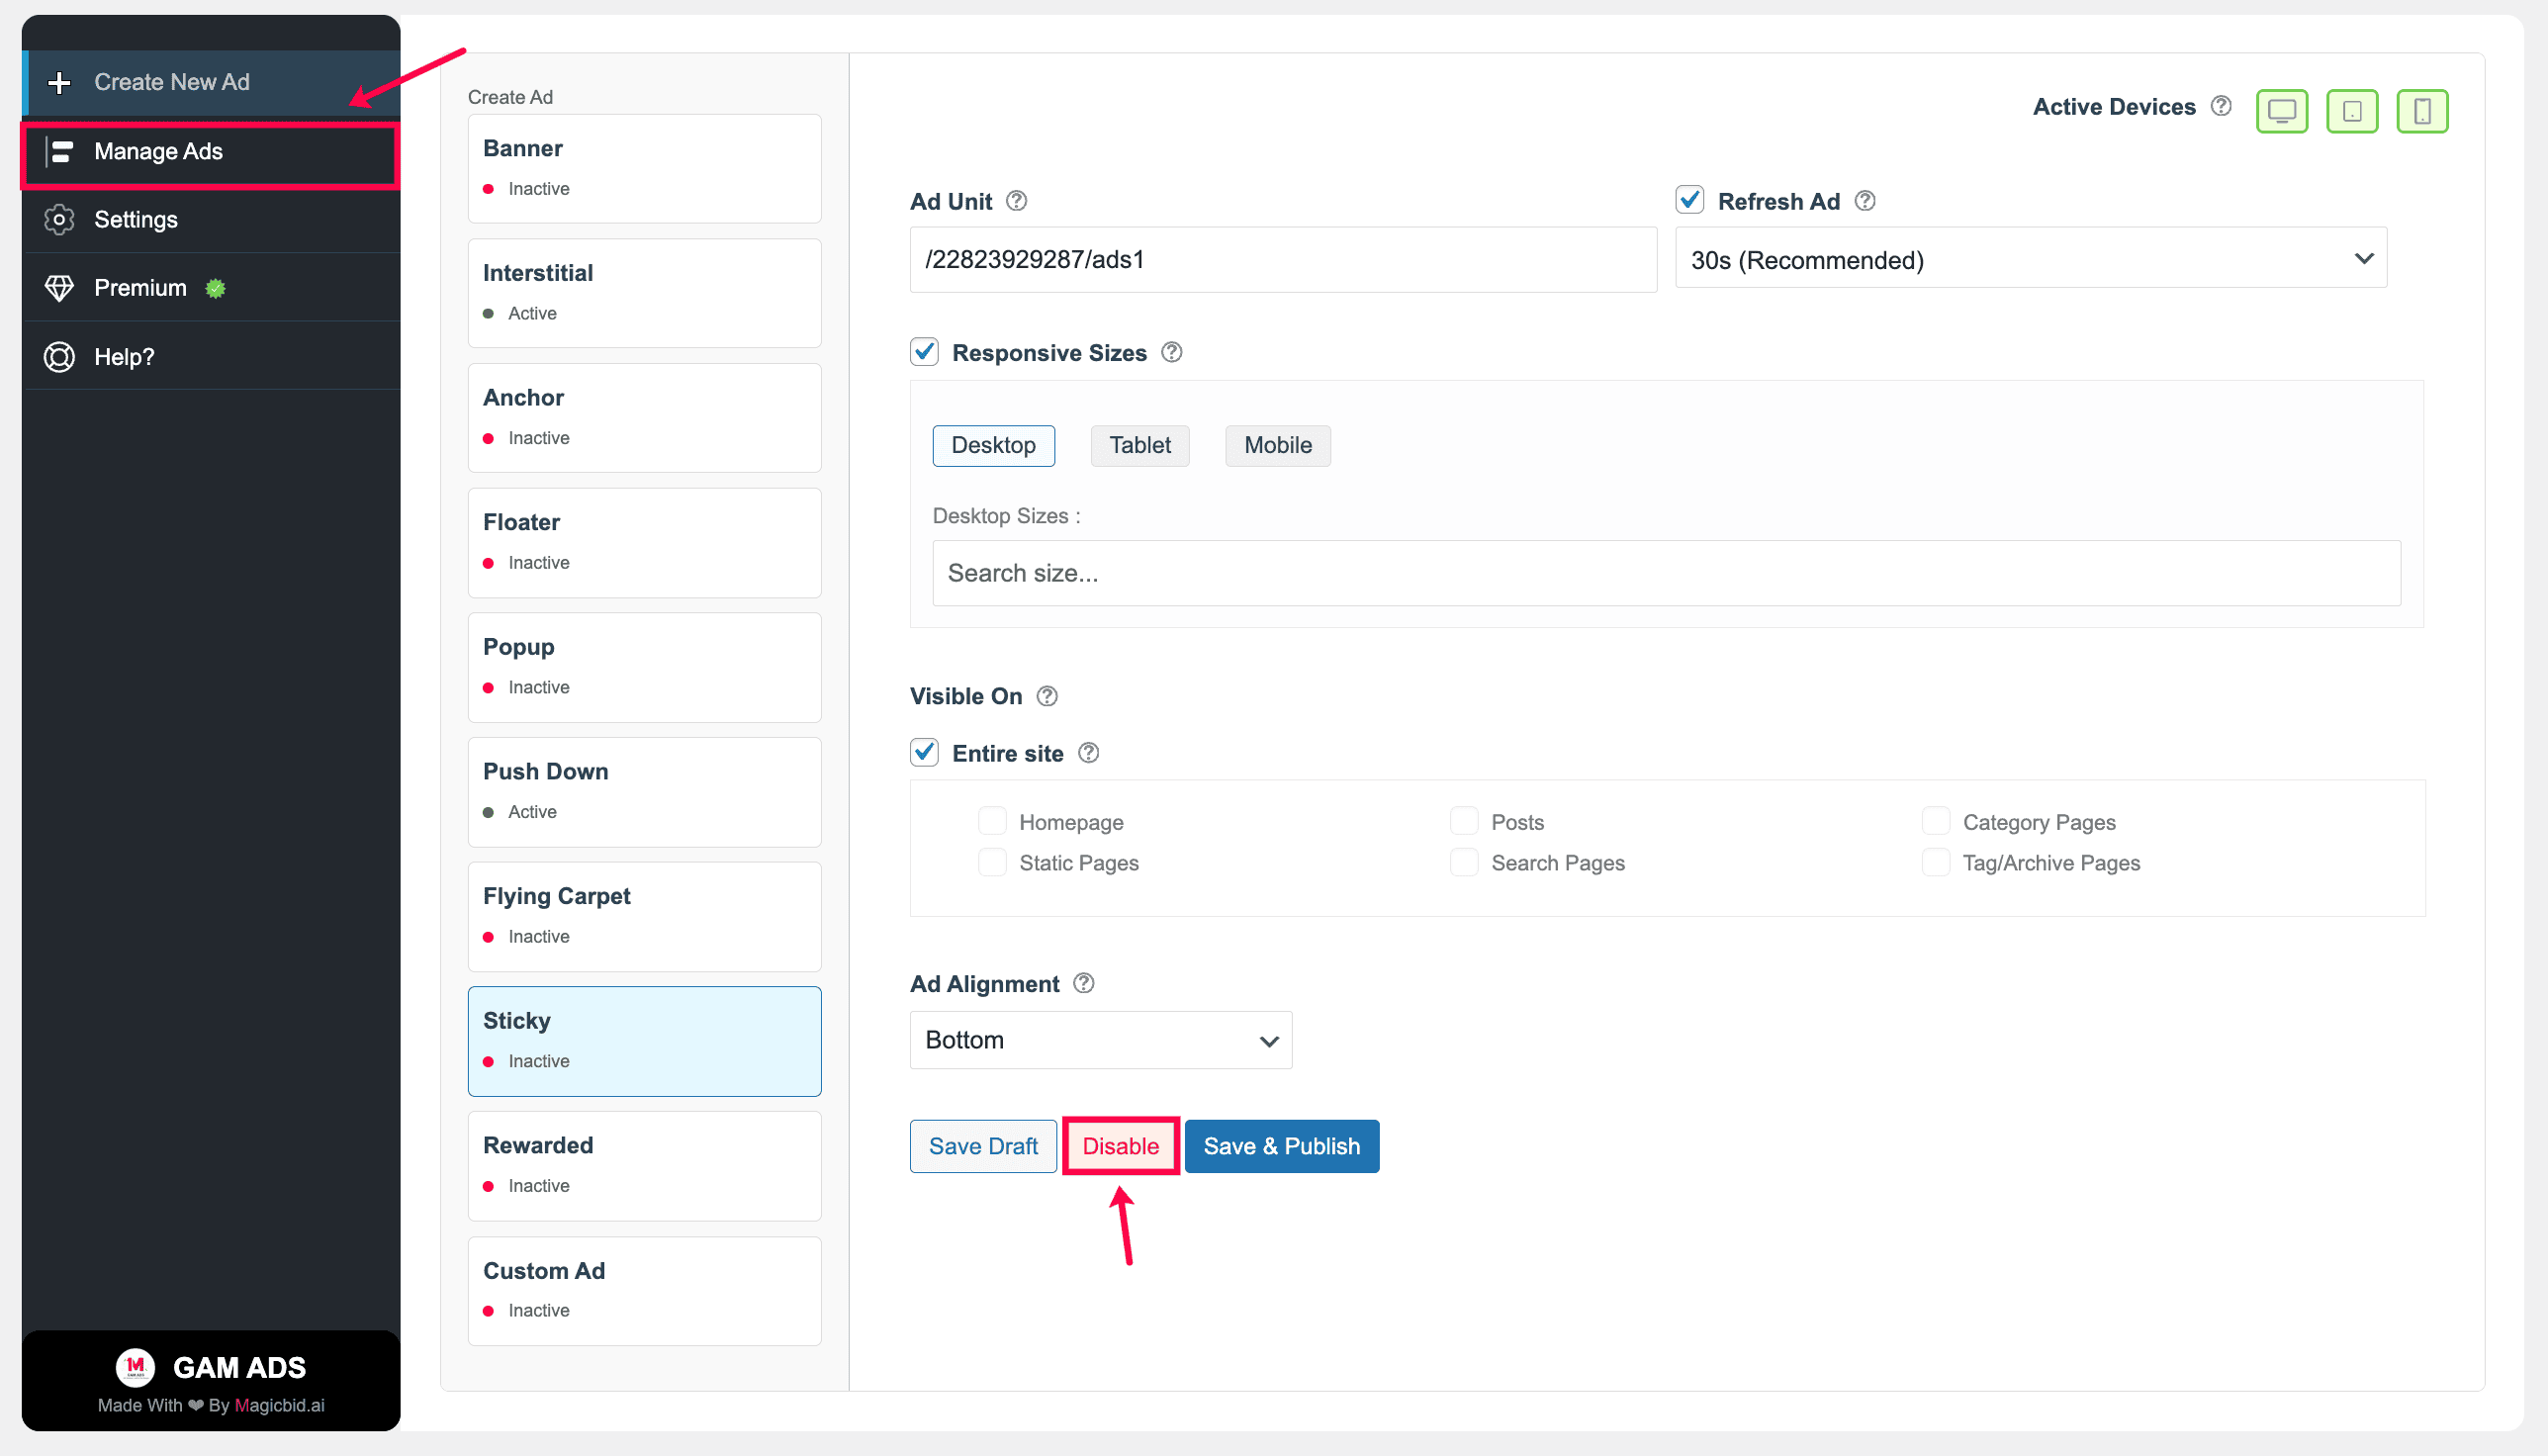
Step 10: Manage Ad Status
After publishing, you can manage the ad status:
- Disable: Pause the ad anytime
- Save & Publish: Apply updates and keep the ad live
You can manage all ads later from: GAM ADS → Manage Ads
Creating Rewarded Ads
Overview
- Select Rewarded Ads as the ad type
- Choose where it runs (Desktop, Tablet, Mobile)
- Pick your Google Ad Manager ad unit
- Set which button triggers the ad
- Click Save & Publish to make it live
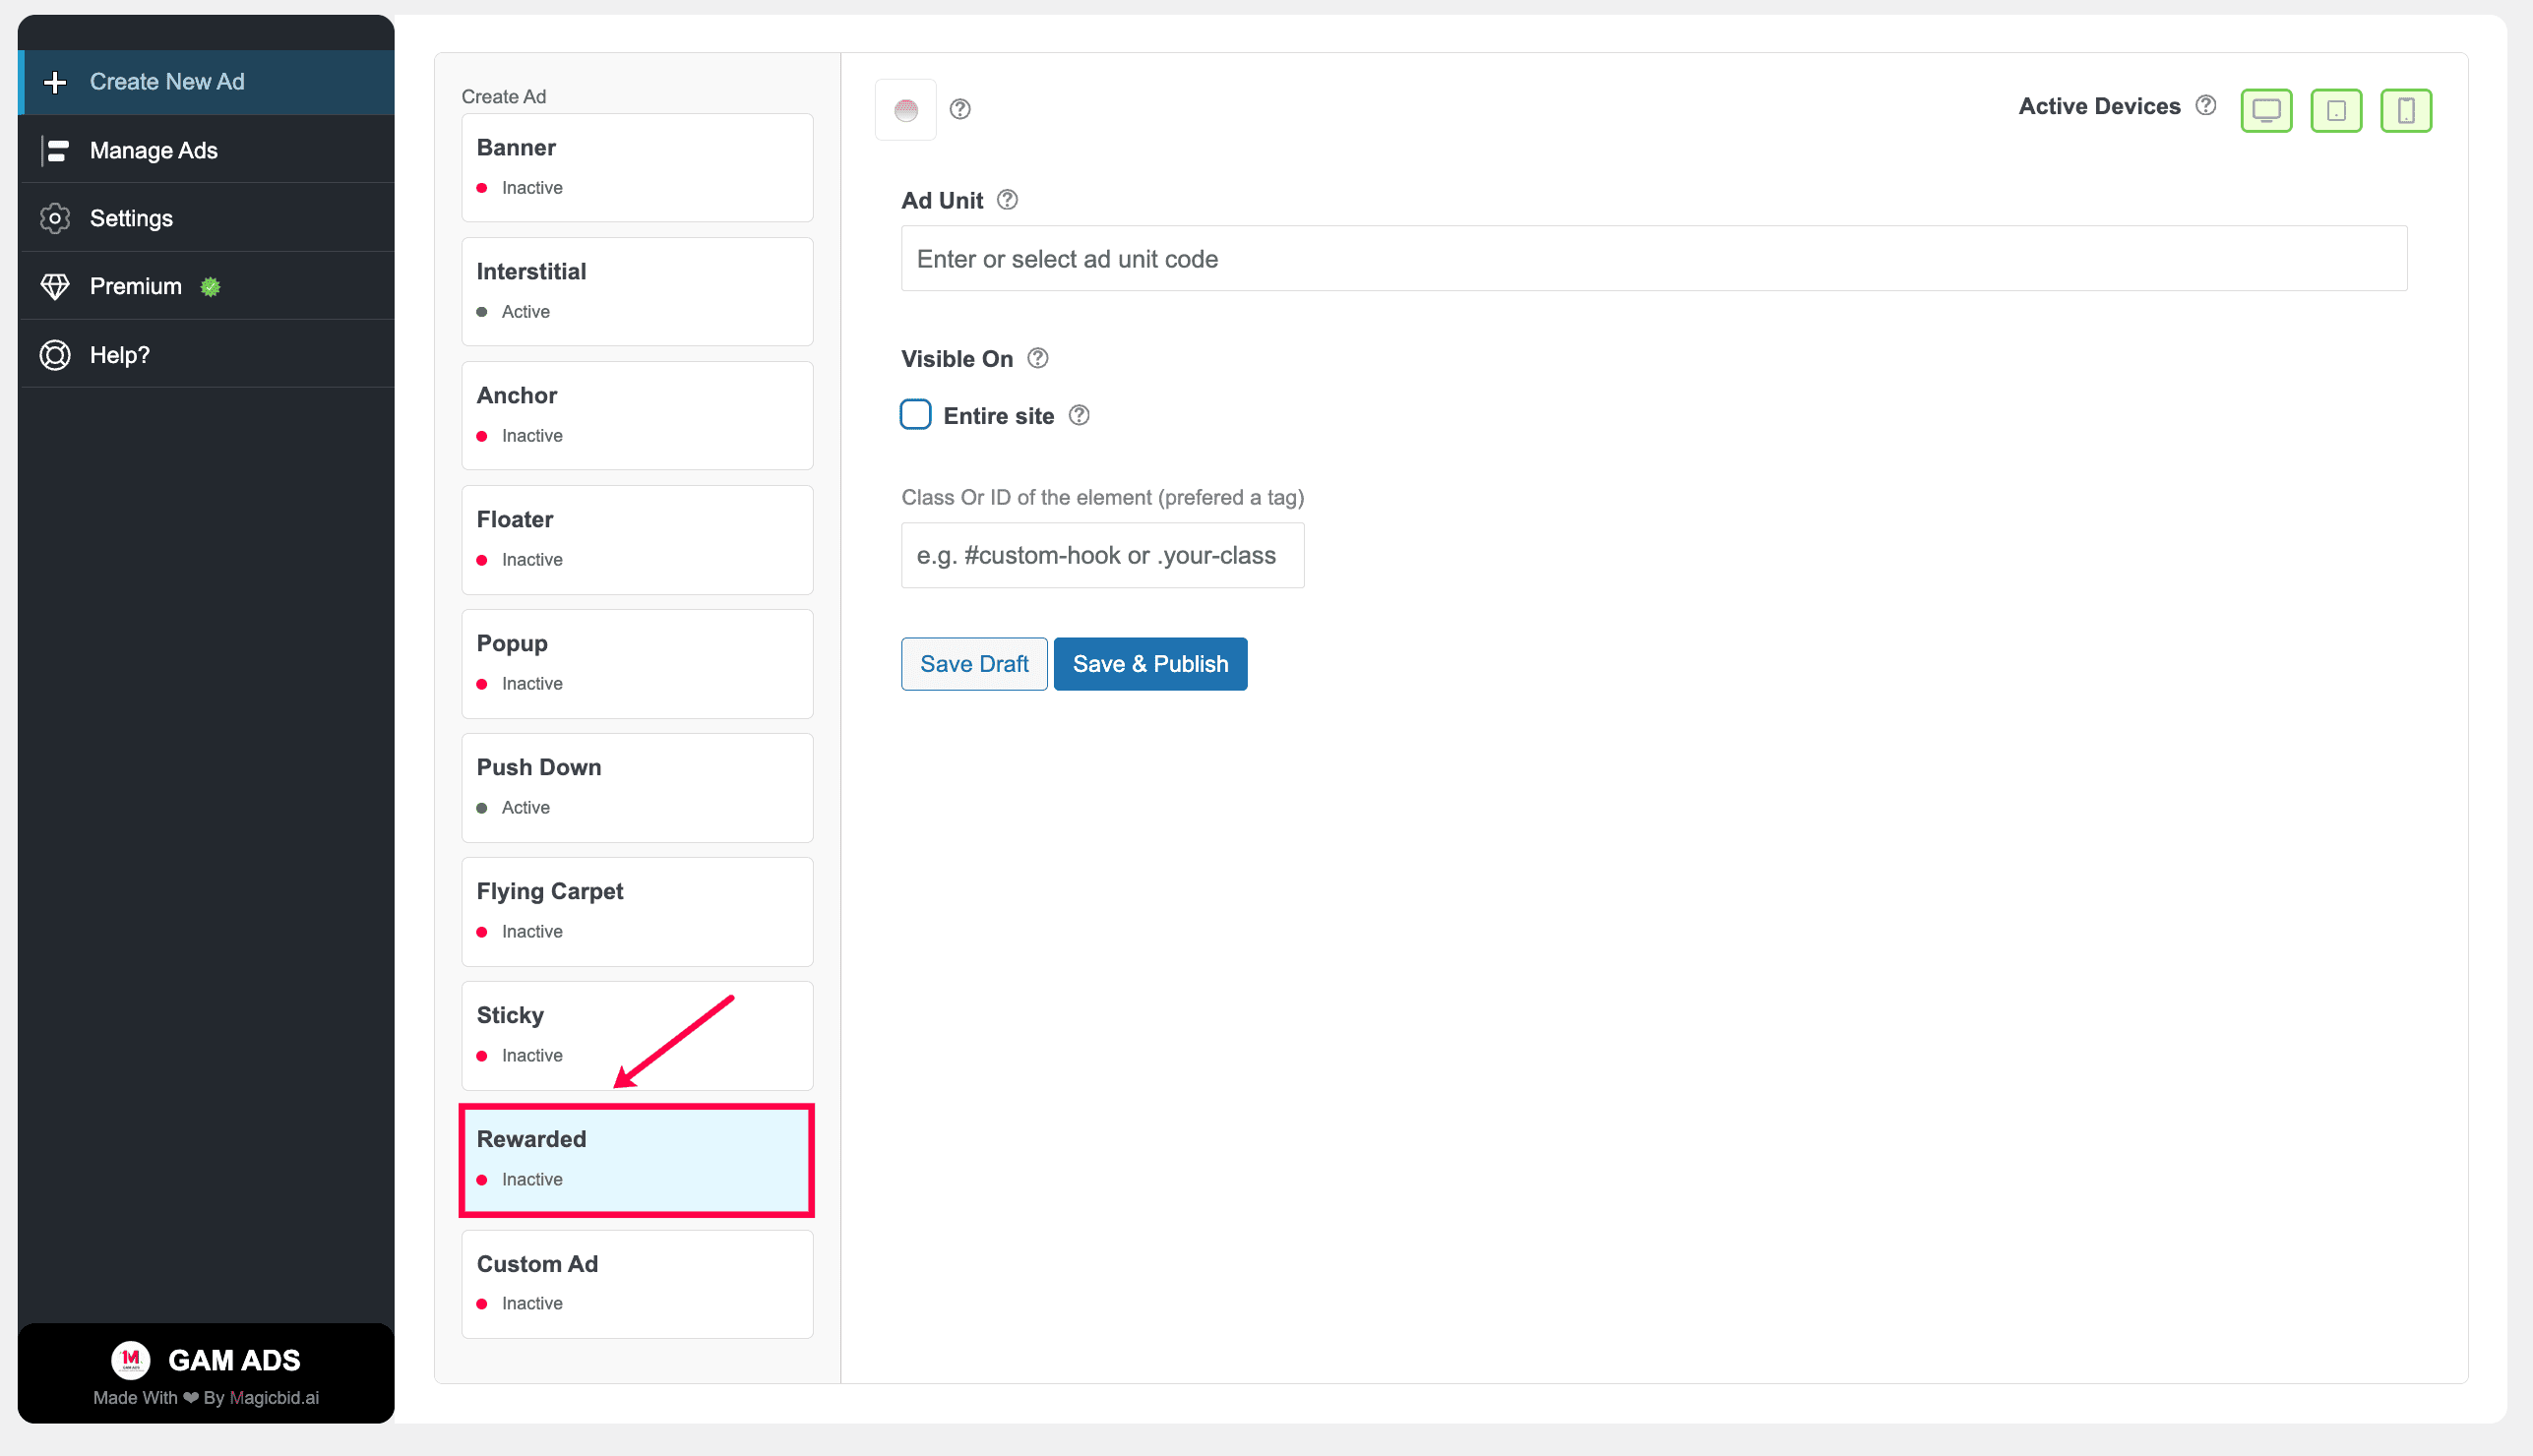
Step 1: Choose Ad Type
Go to Create New Ad and select Rewarded Ads.
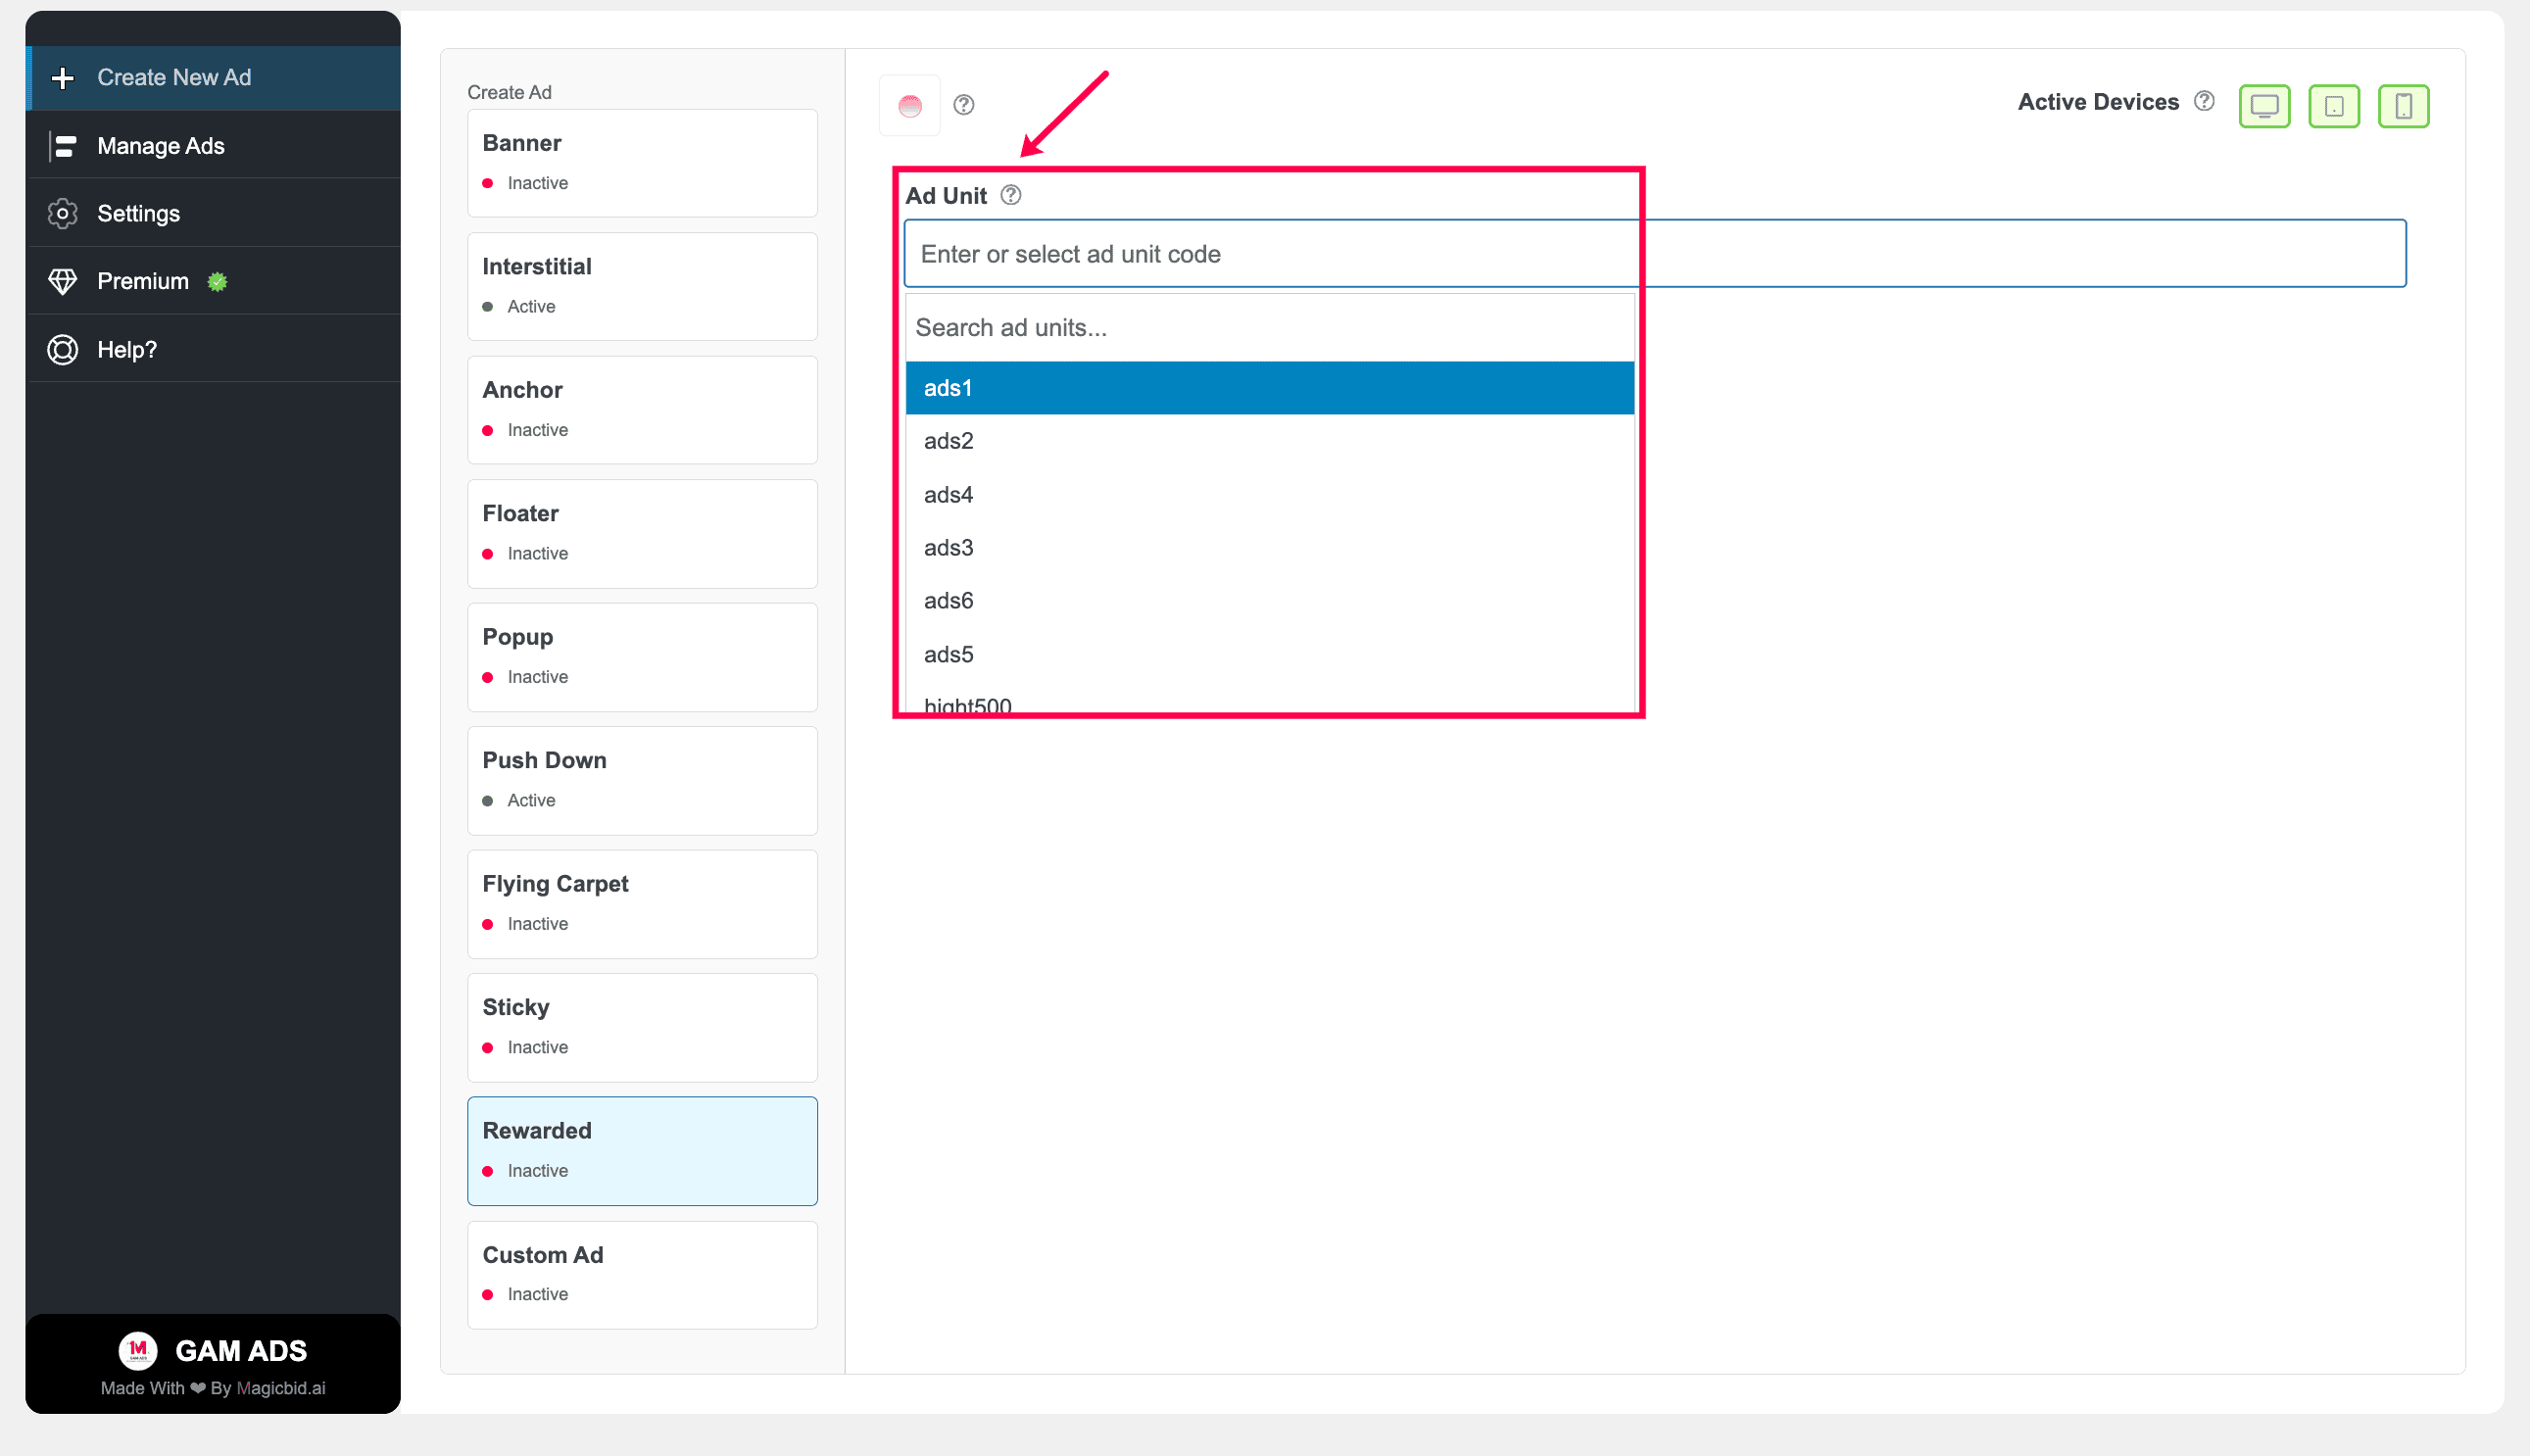
Step 2: Select Ad Unit
Choose the Google Ad Manager ad unit you want to serve.
Note: The ad unit must already exist in your Google Ad Manager account in order to appear in this list.
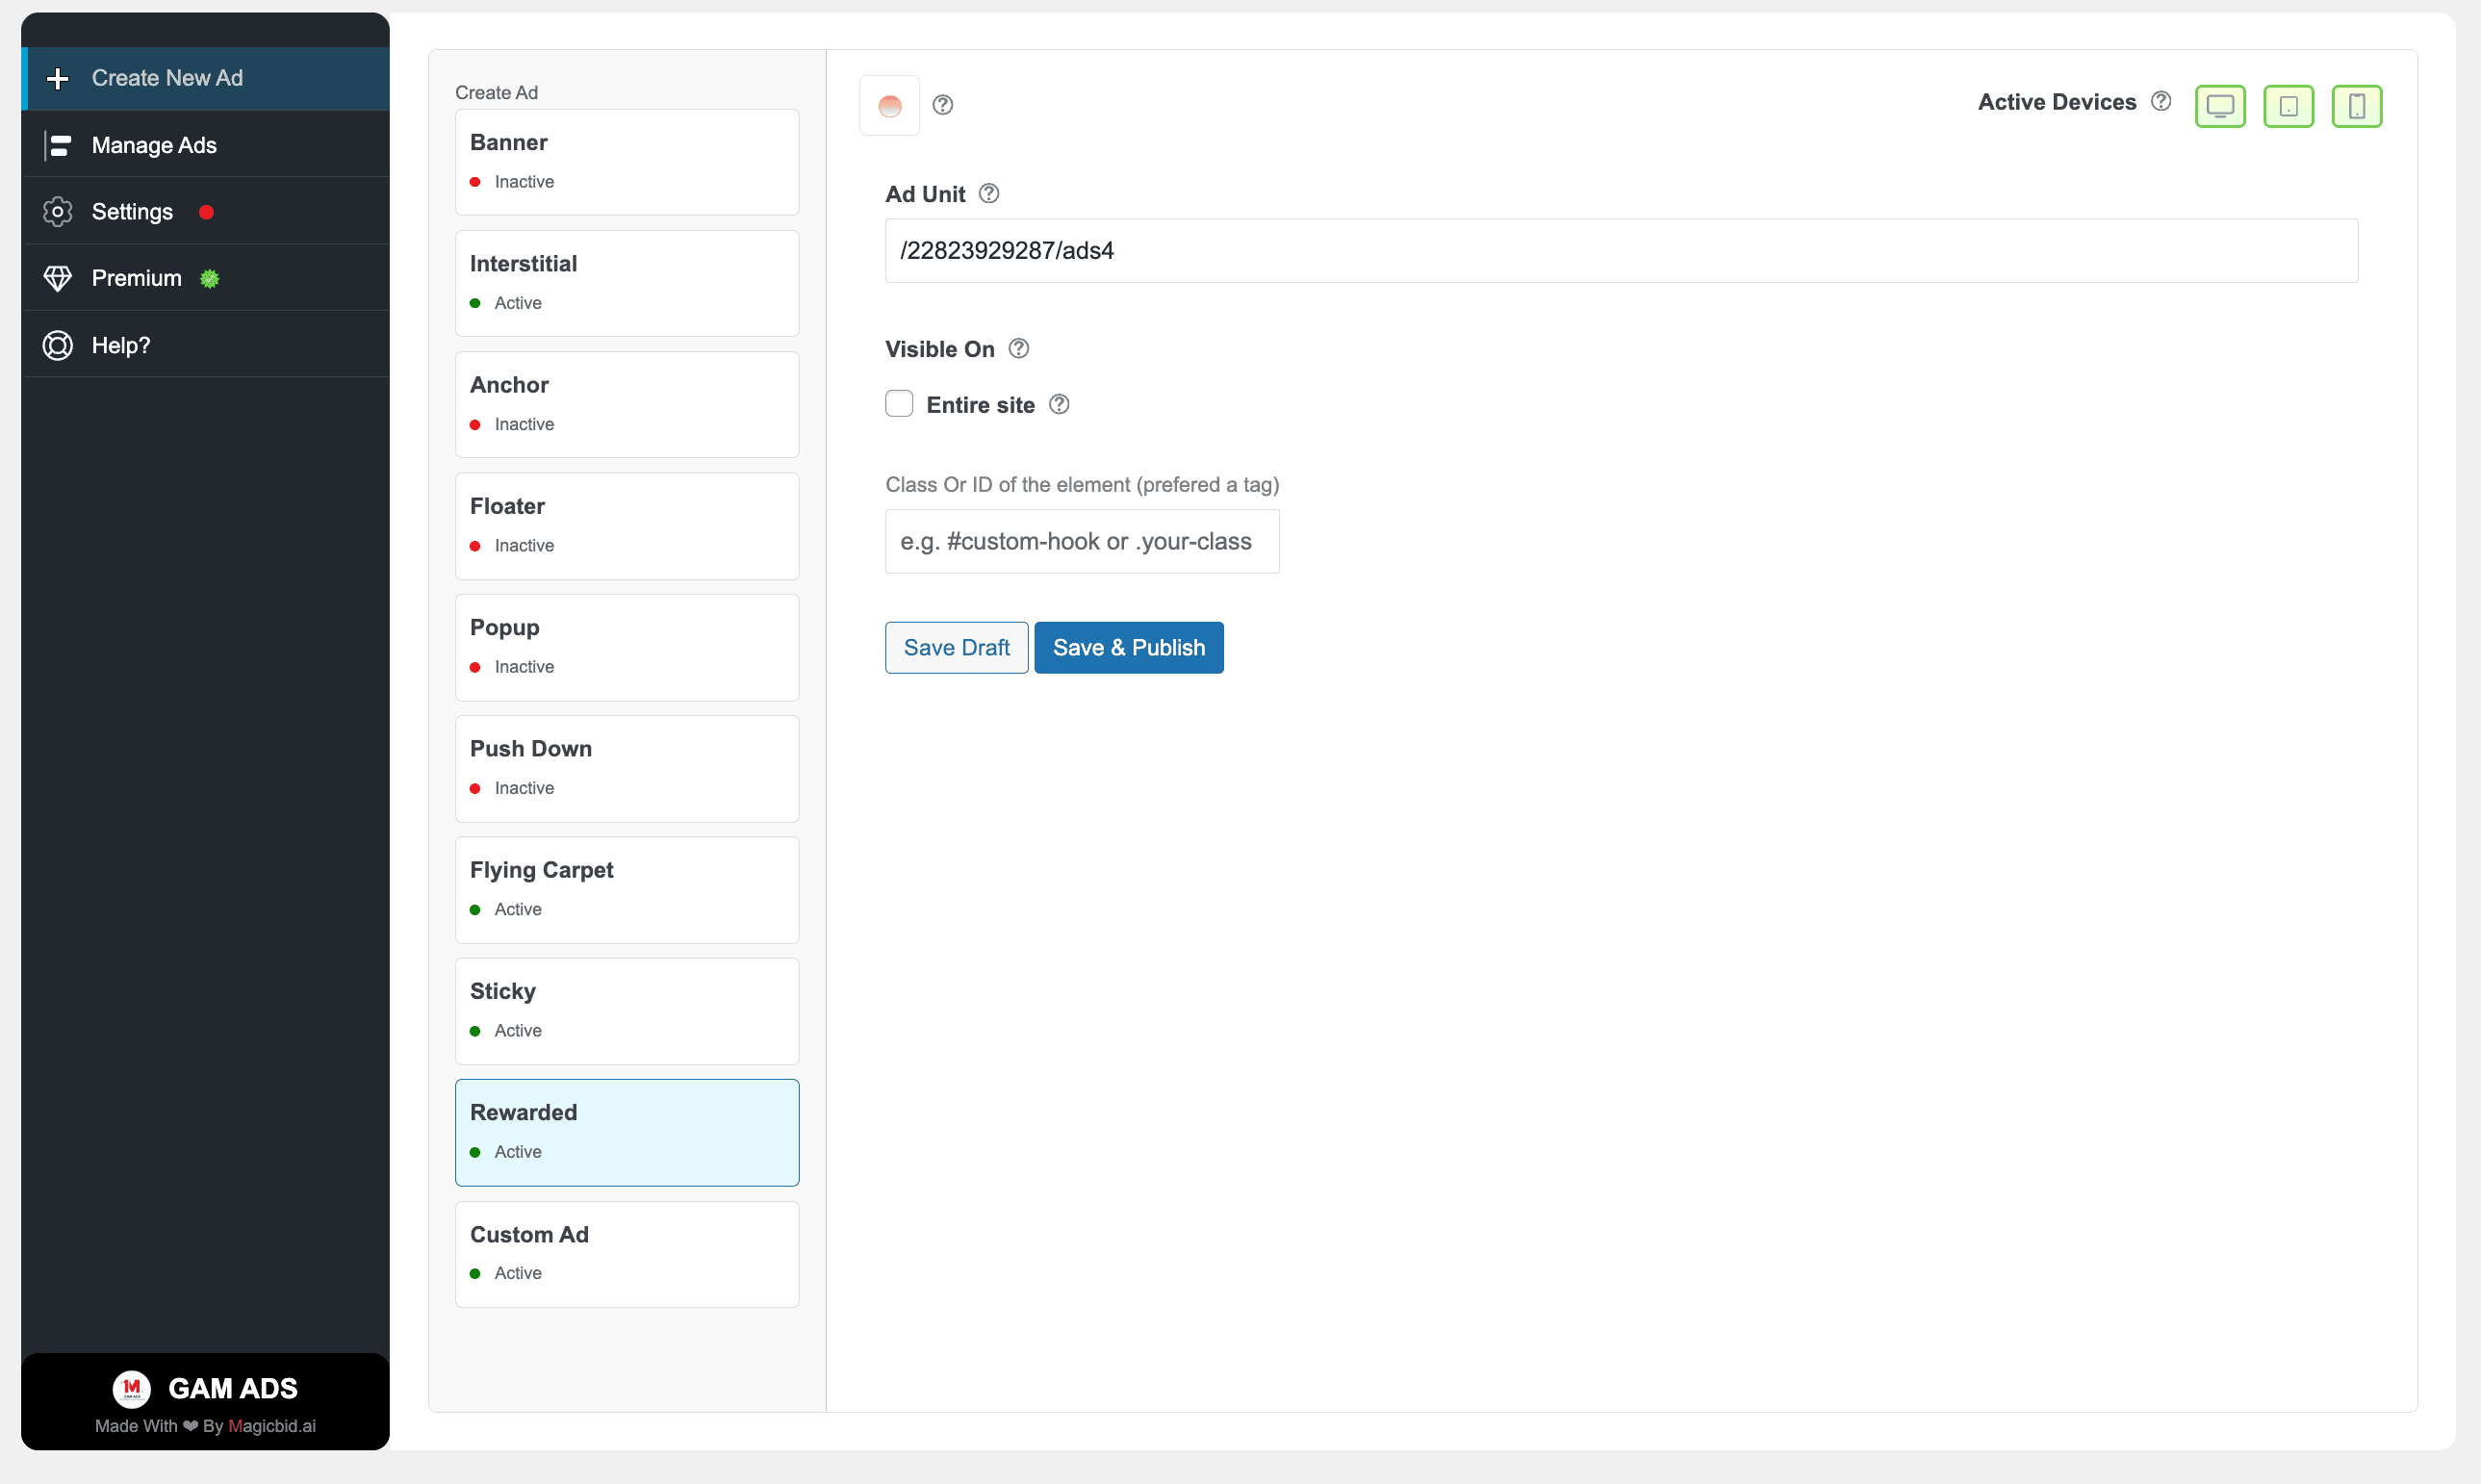
Step 3: Choose Devices
Under Active Devices, select where this ad should run:
- Desktop
- Tablet
- Mobile
You may enable one, two, or all three device types.
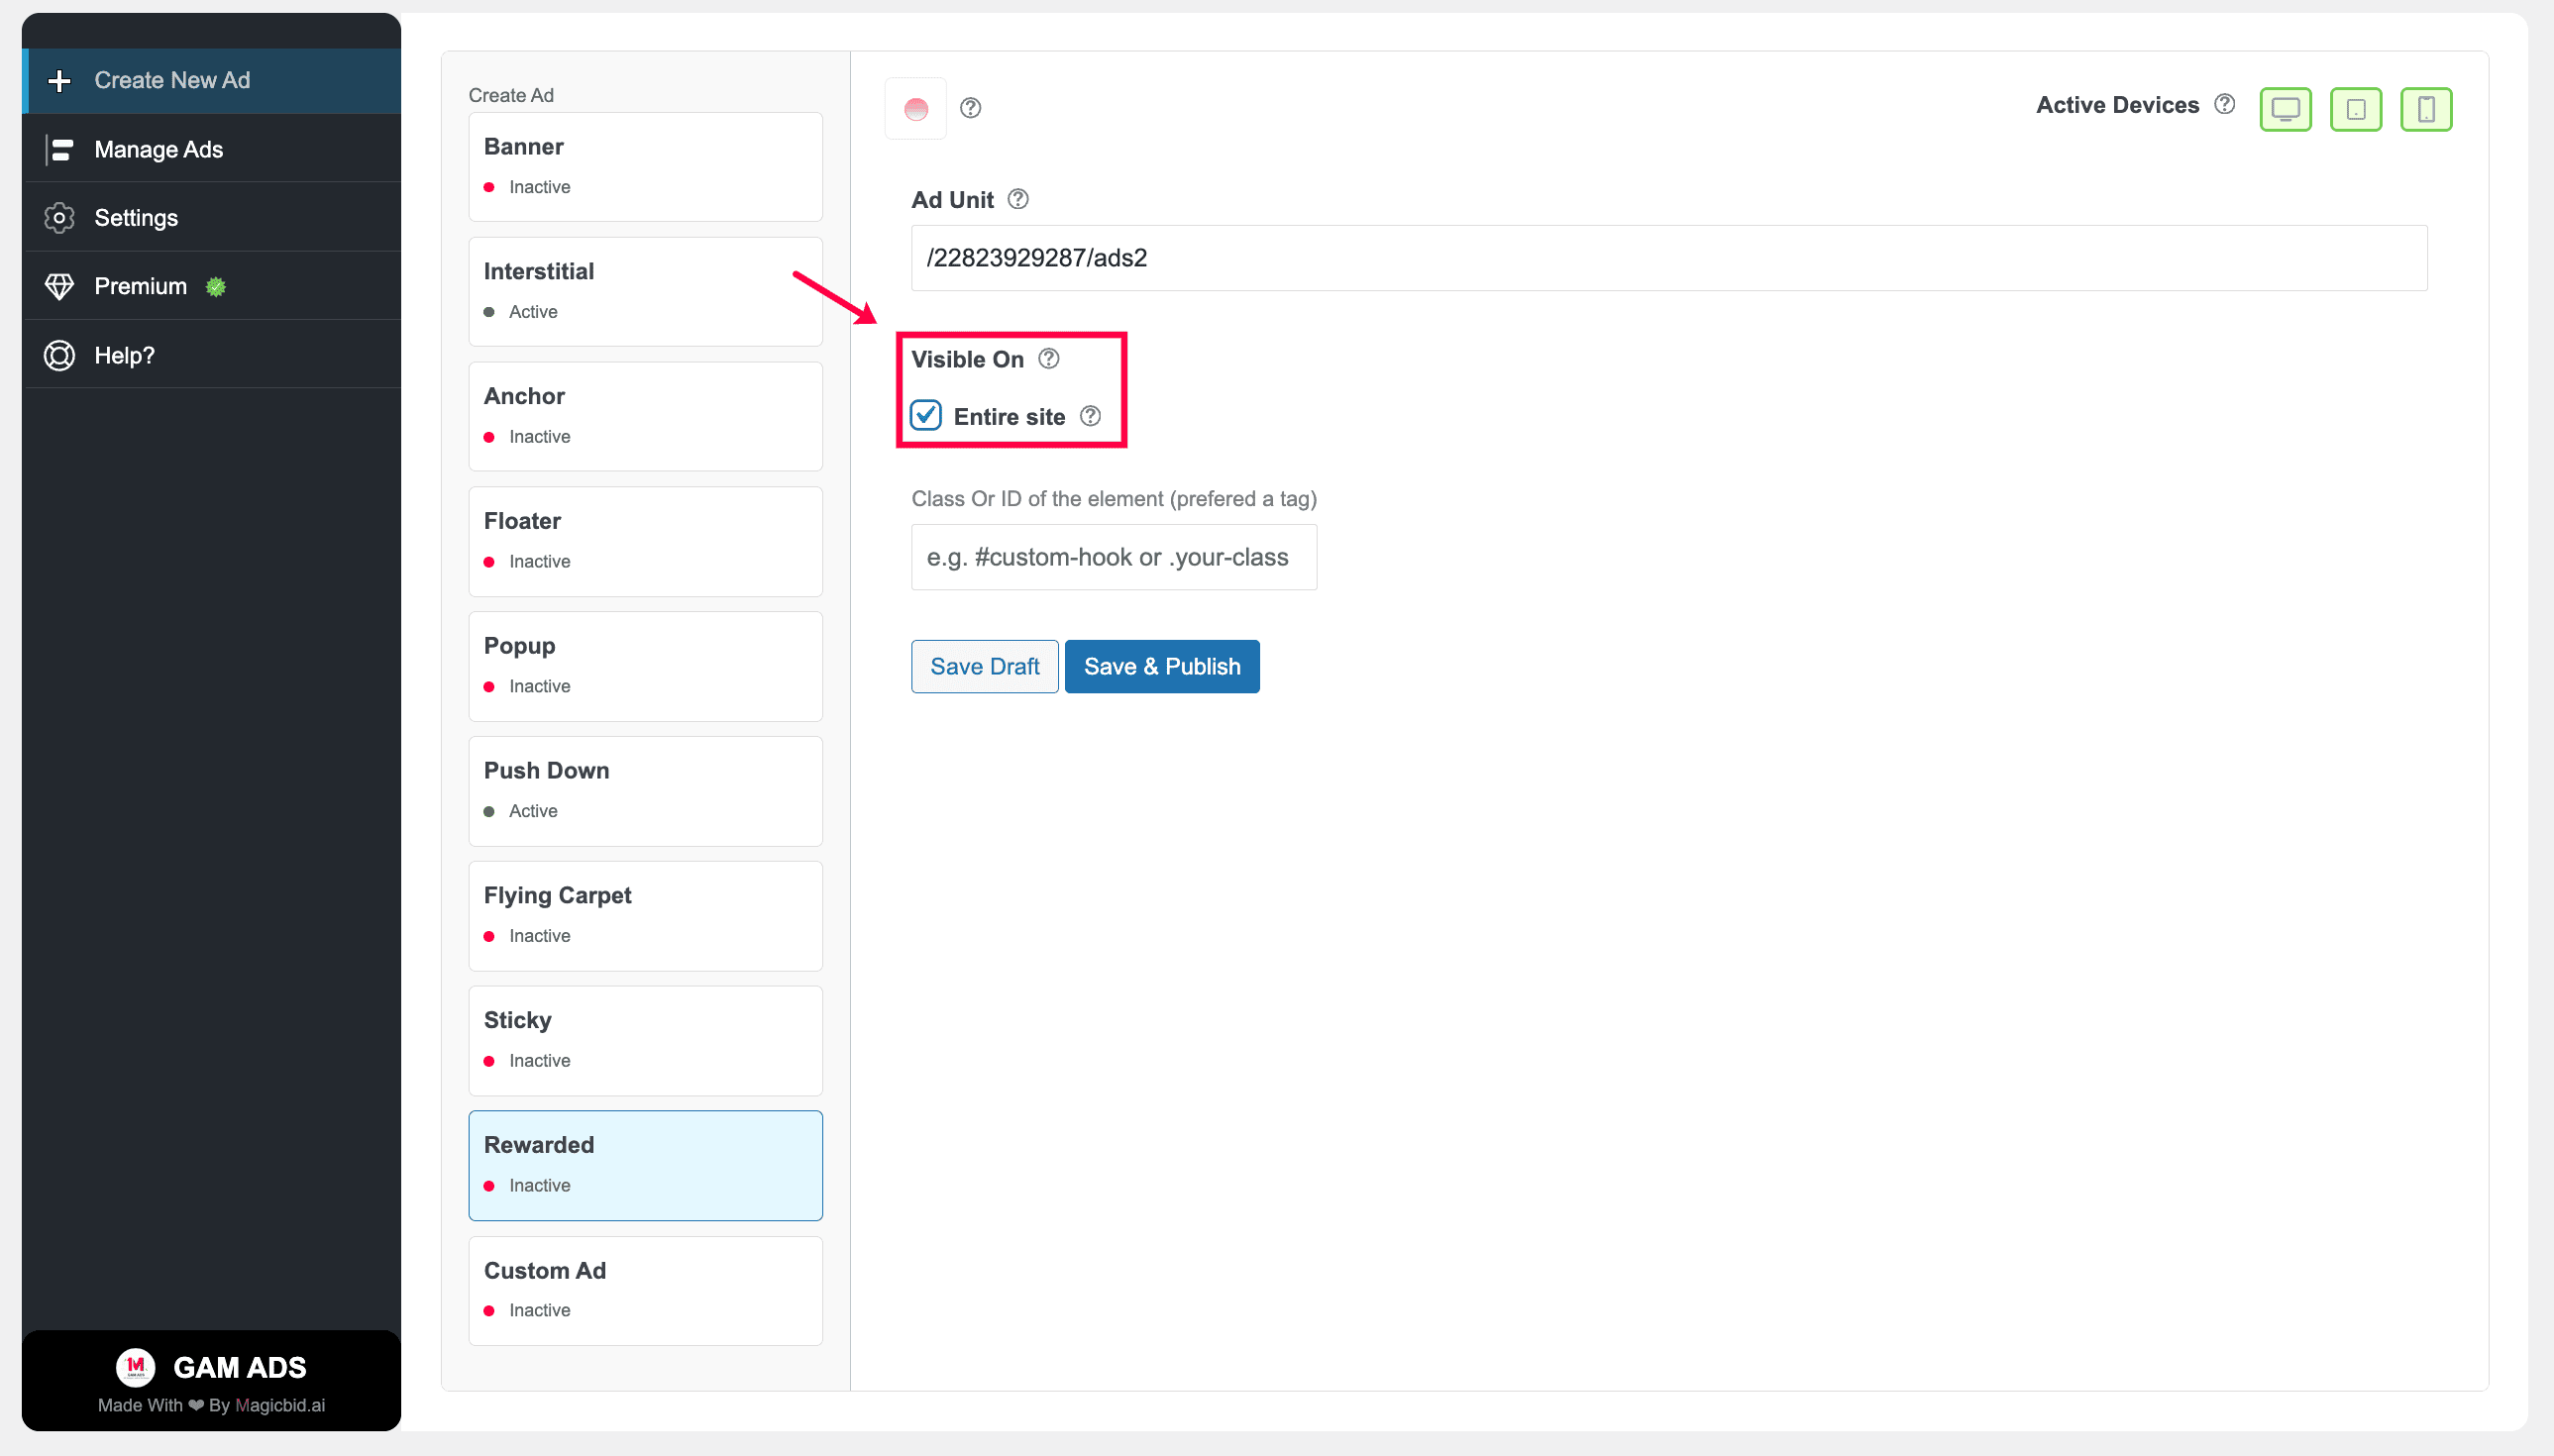
Step 4: Set Visibility
By default, Rewarded Ads are shown across the entire site.
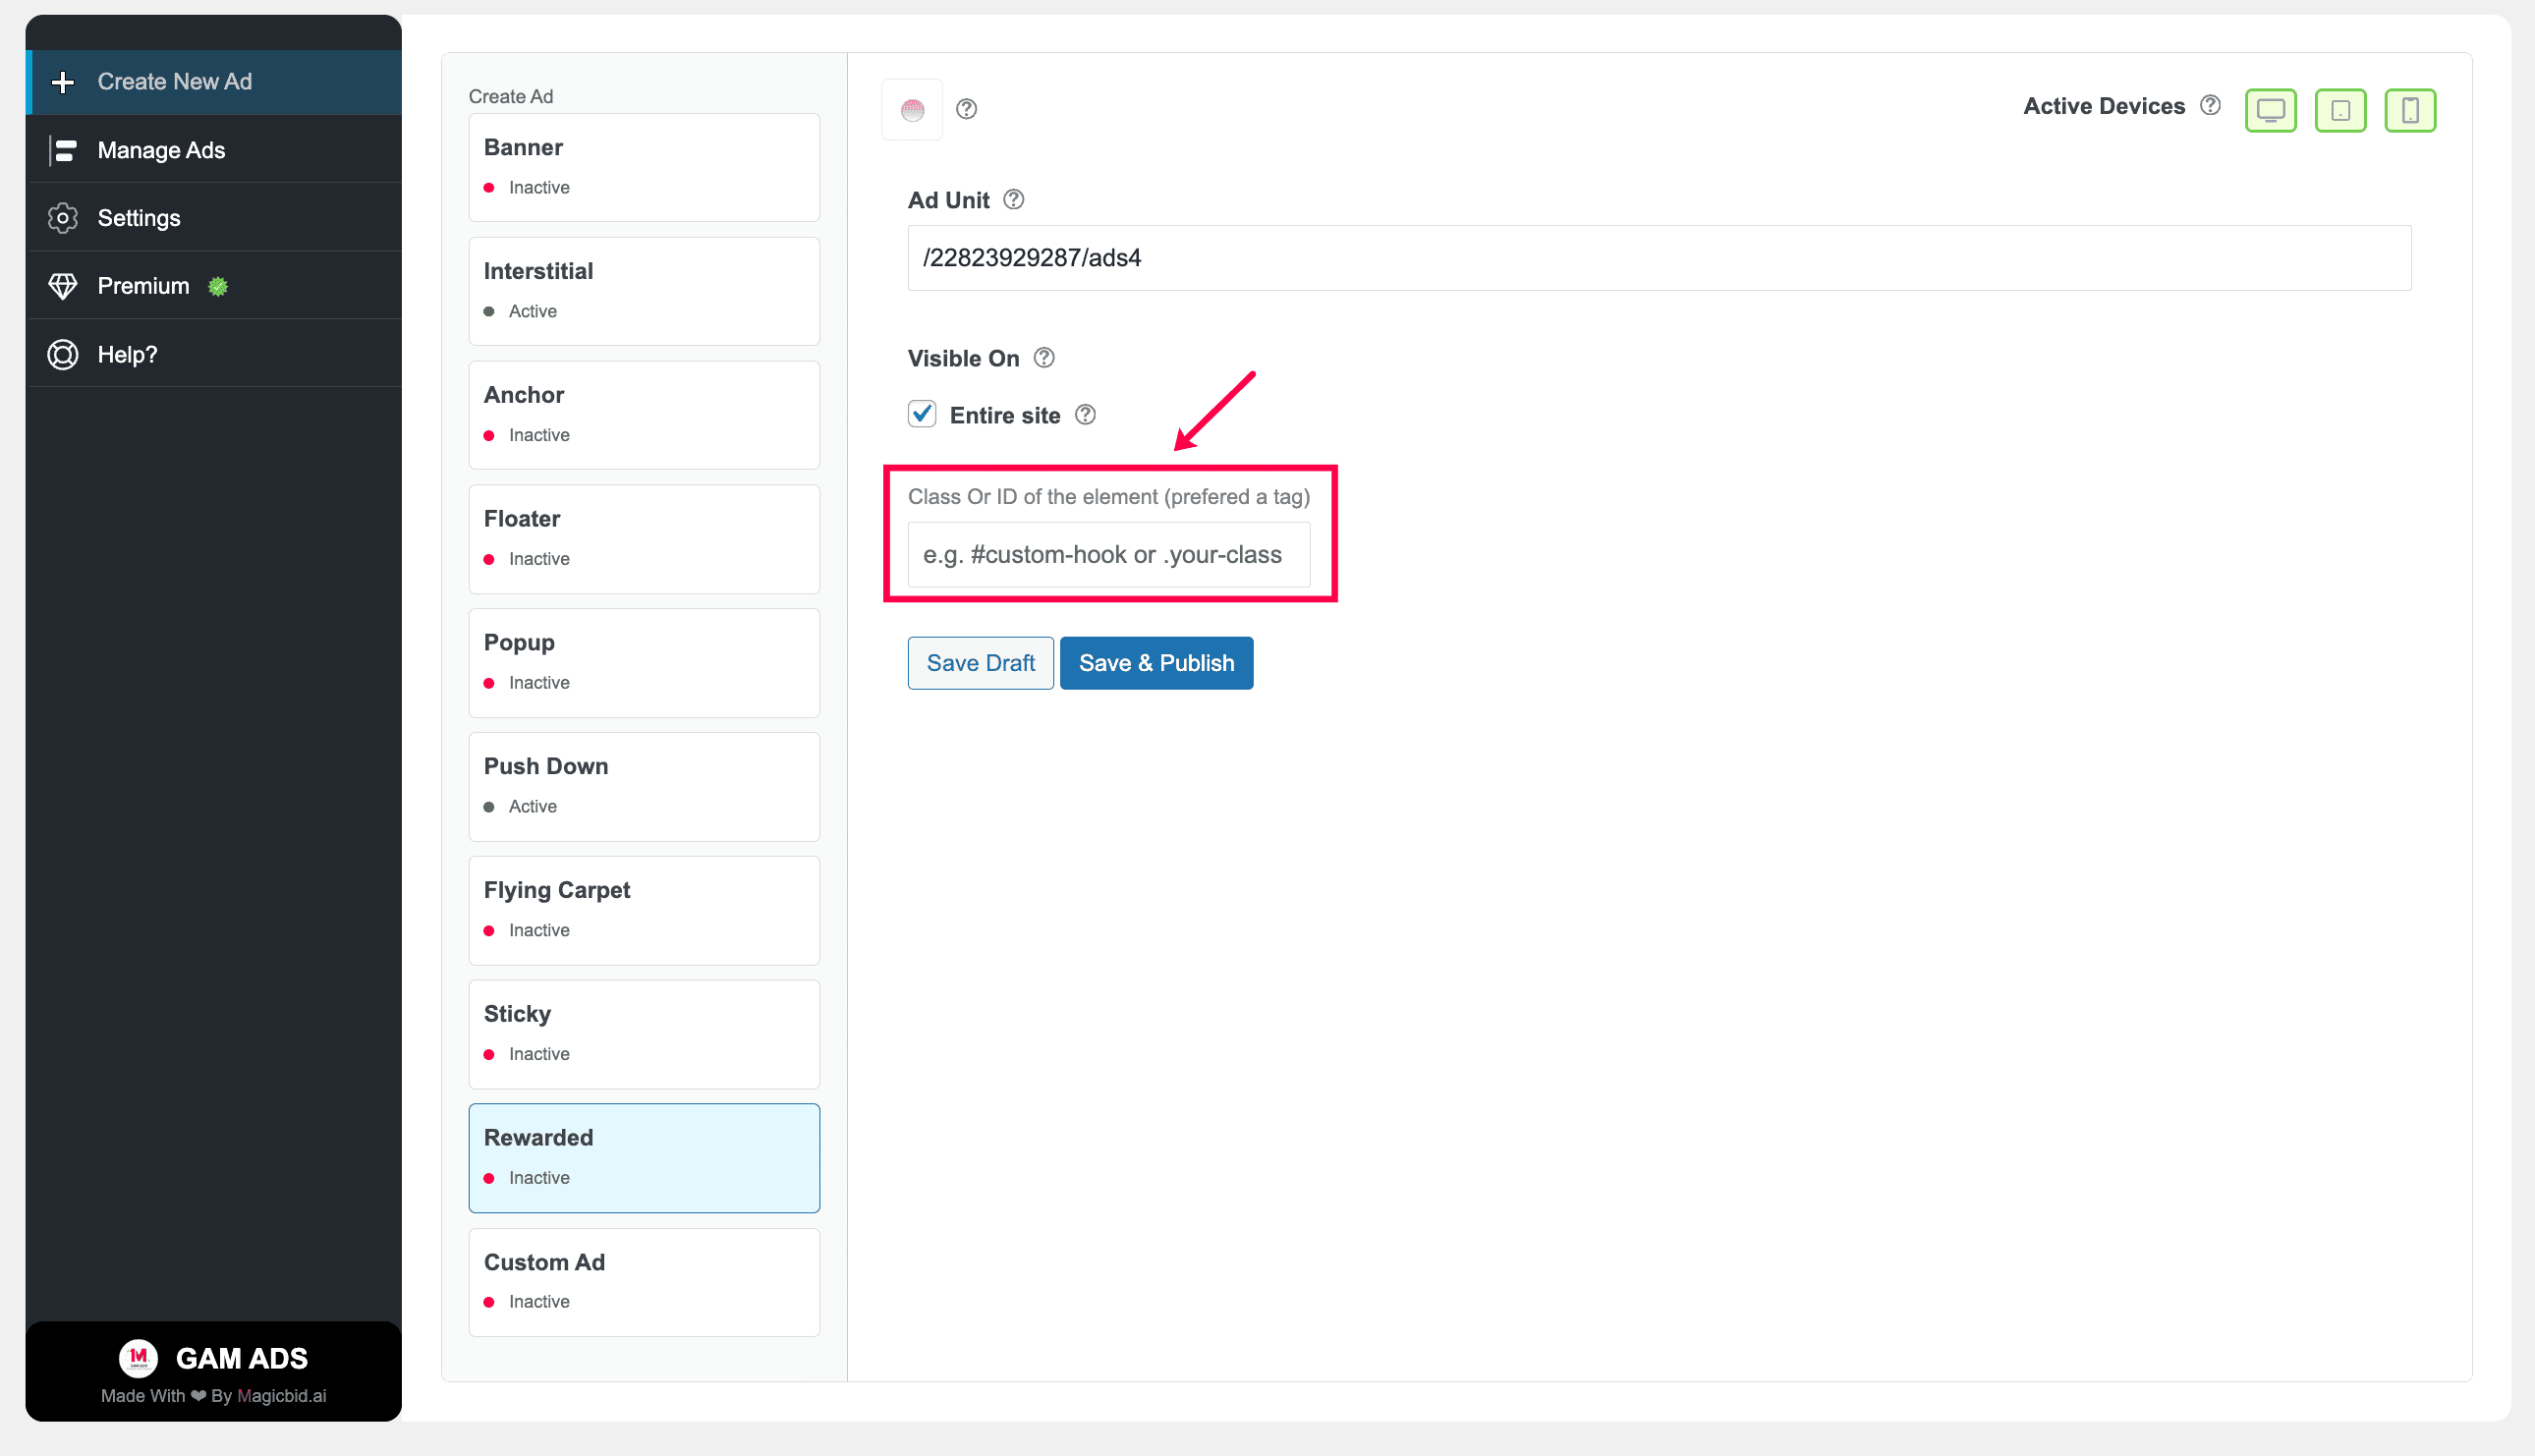
Step 5: Link Button (Trigger Button)
Enter the CSS selector of the button that should trigger the rewarded ad.
This tells the plugin which button the user must click in order to watch the ad.
Examples:
- Button Class:
.start-video - Button ID:
#unlockBtn - HTML Tag:
button,a,div #custom-hook.your-class
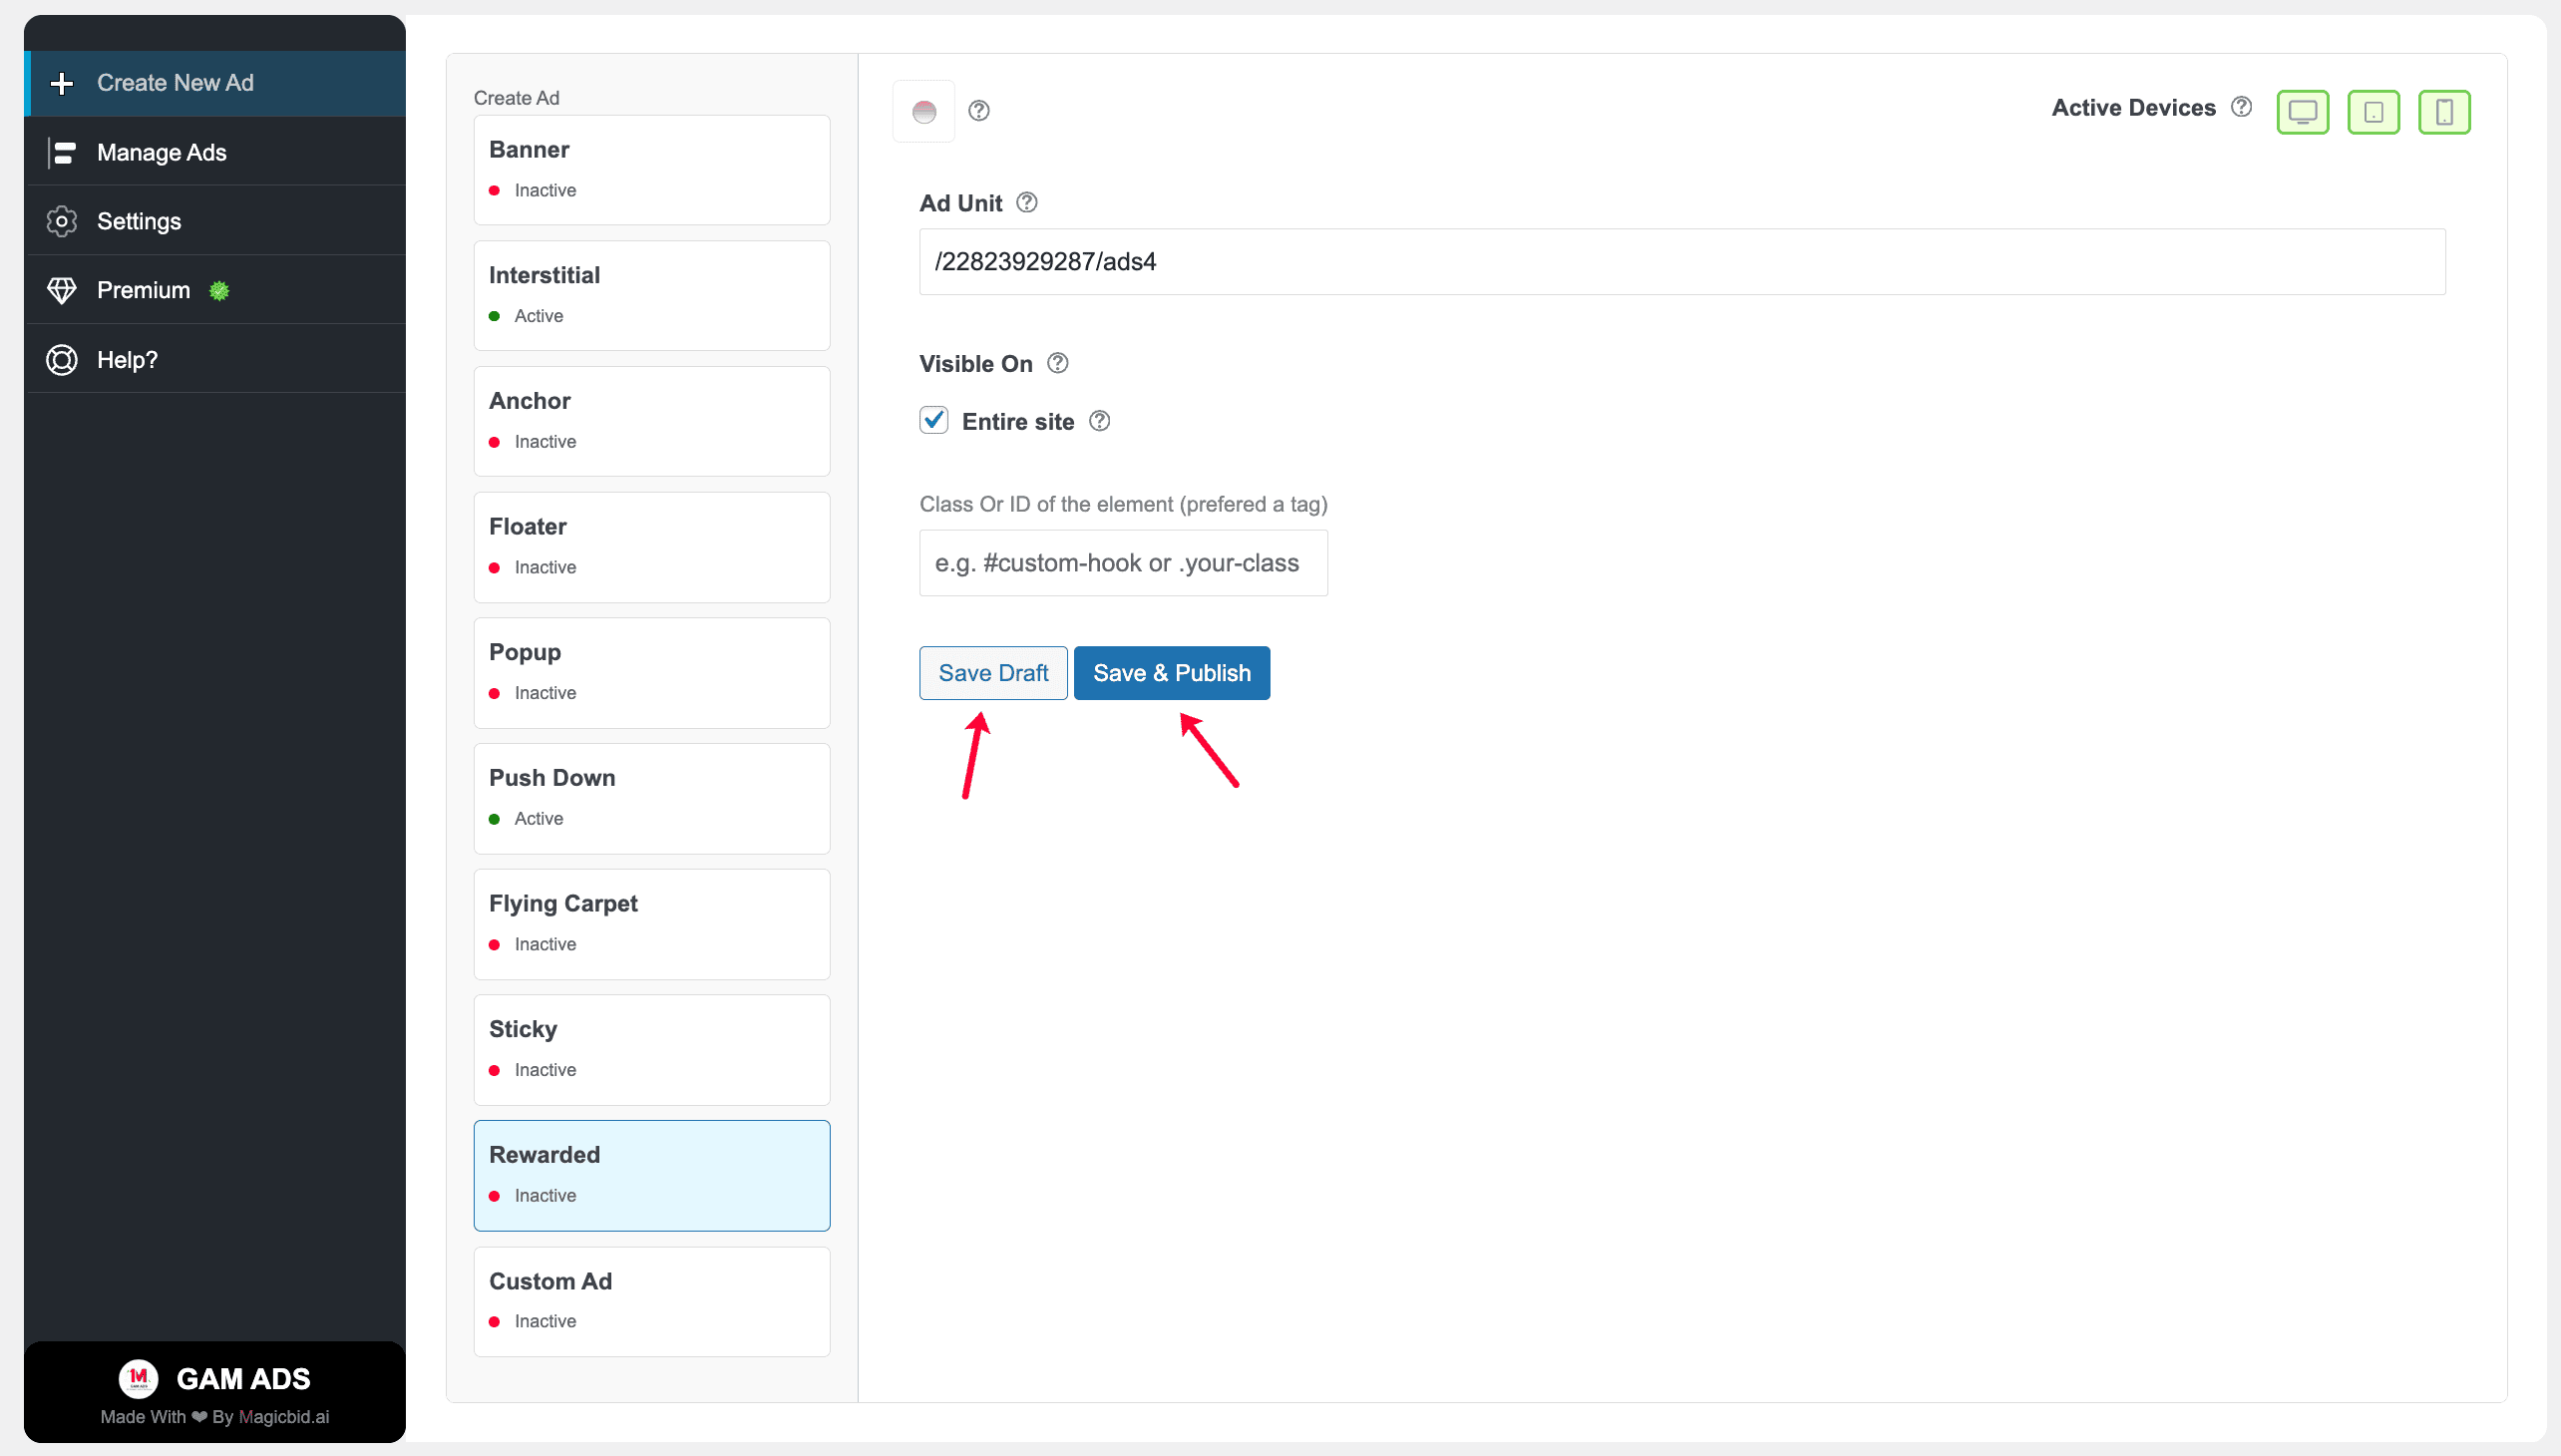
Step 6: Save Your Ad
Save Draft: Saves the ad without publishing it.
Save & Publish: Saves the ad and makes it live immediately.
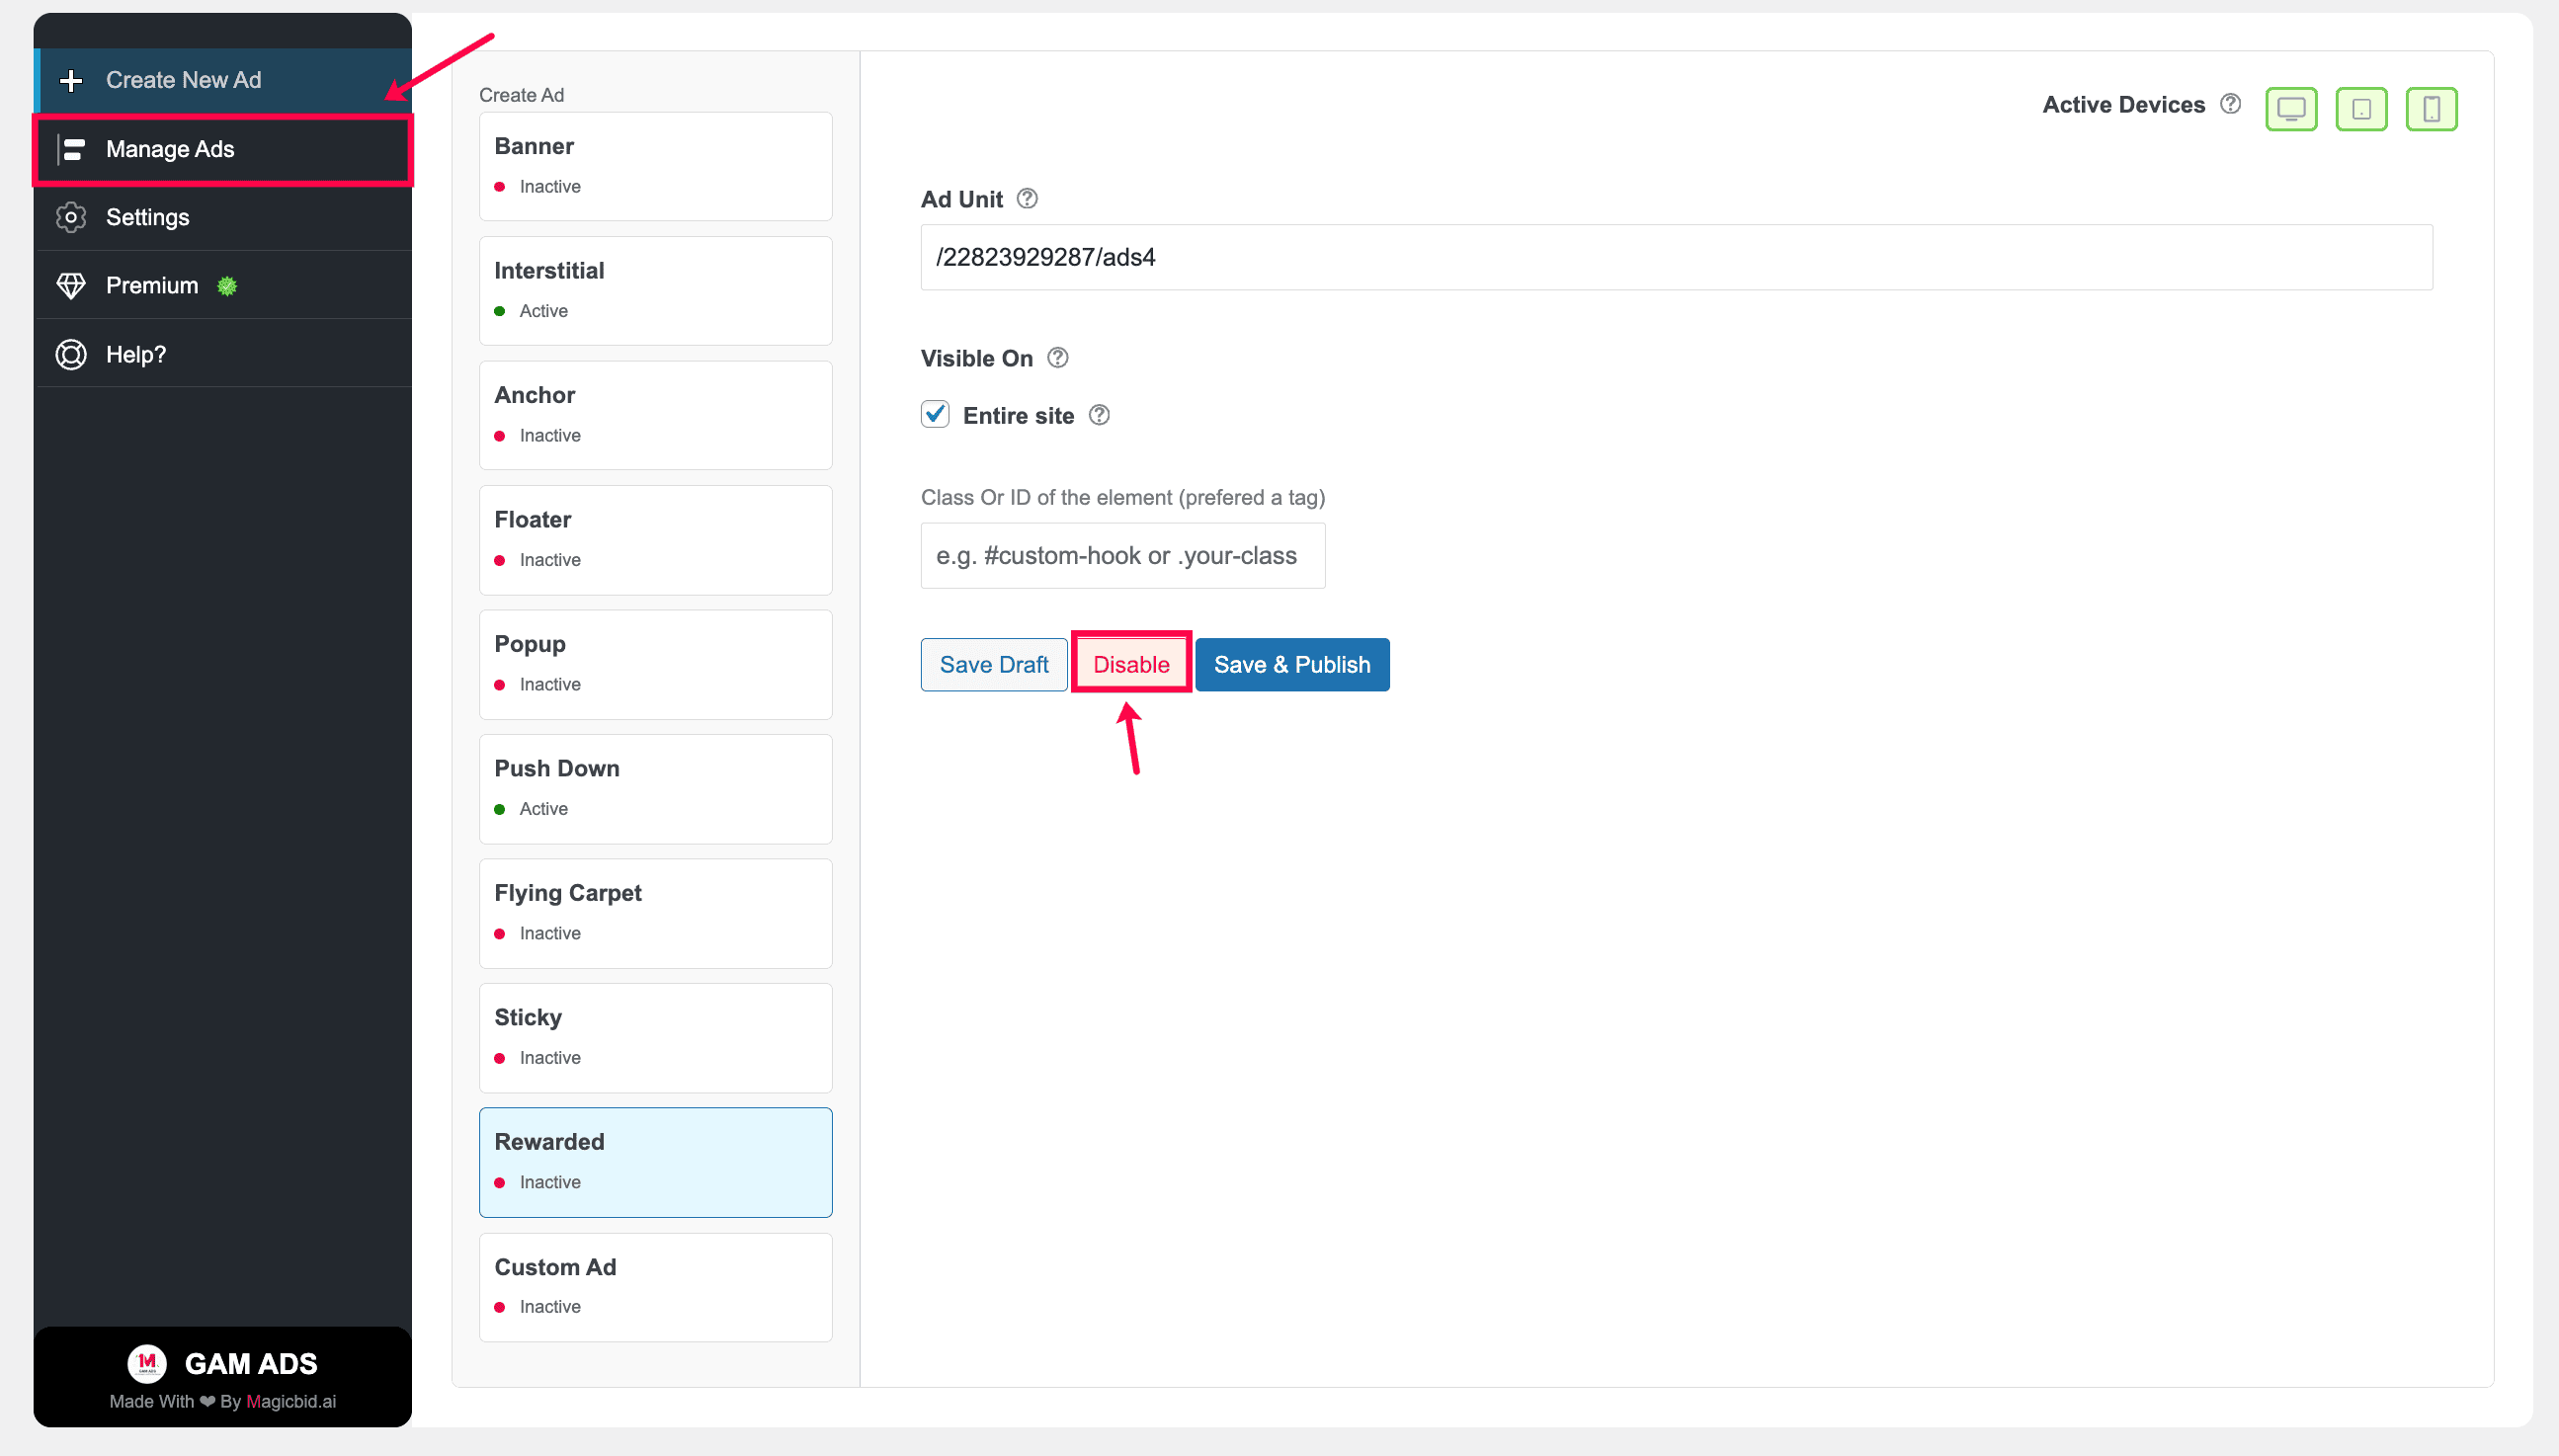
Step 7: Manage Ad Status
After publishing, you can manage the ad status:
- Disable: Pause the ad anytime
- Save & Publish: Apply changes and keep the ad live
You can manage all ads later from: GAM ADS → Manage Ads
Creating Custom Ads
Overview
- Select Custom Ad as the ad type
- Choose where it runs (Desktop, Tablet, Mobile)
- Paste your custom HTML or JavaScript
- Decide placement (Entire site or specific pages)
- Set ad position and alignment
- Click Save & Publish to make it live
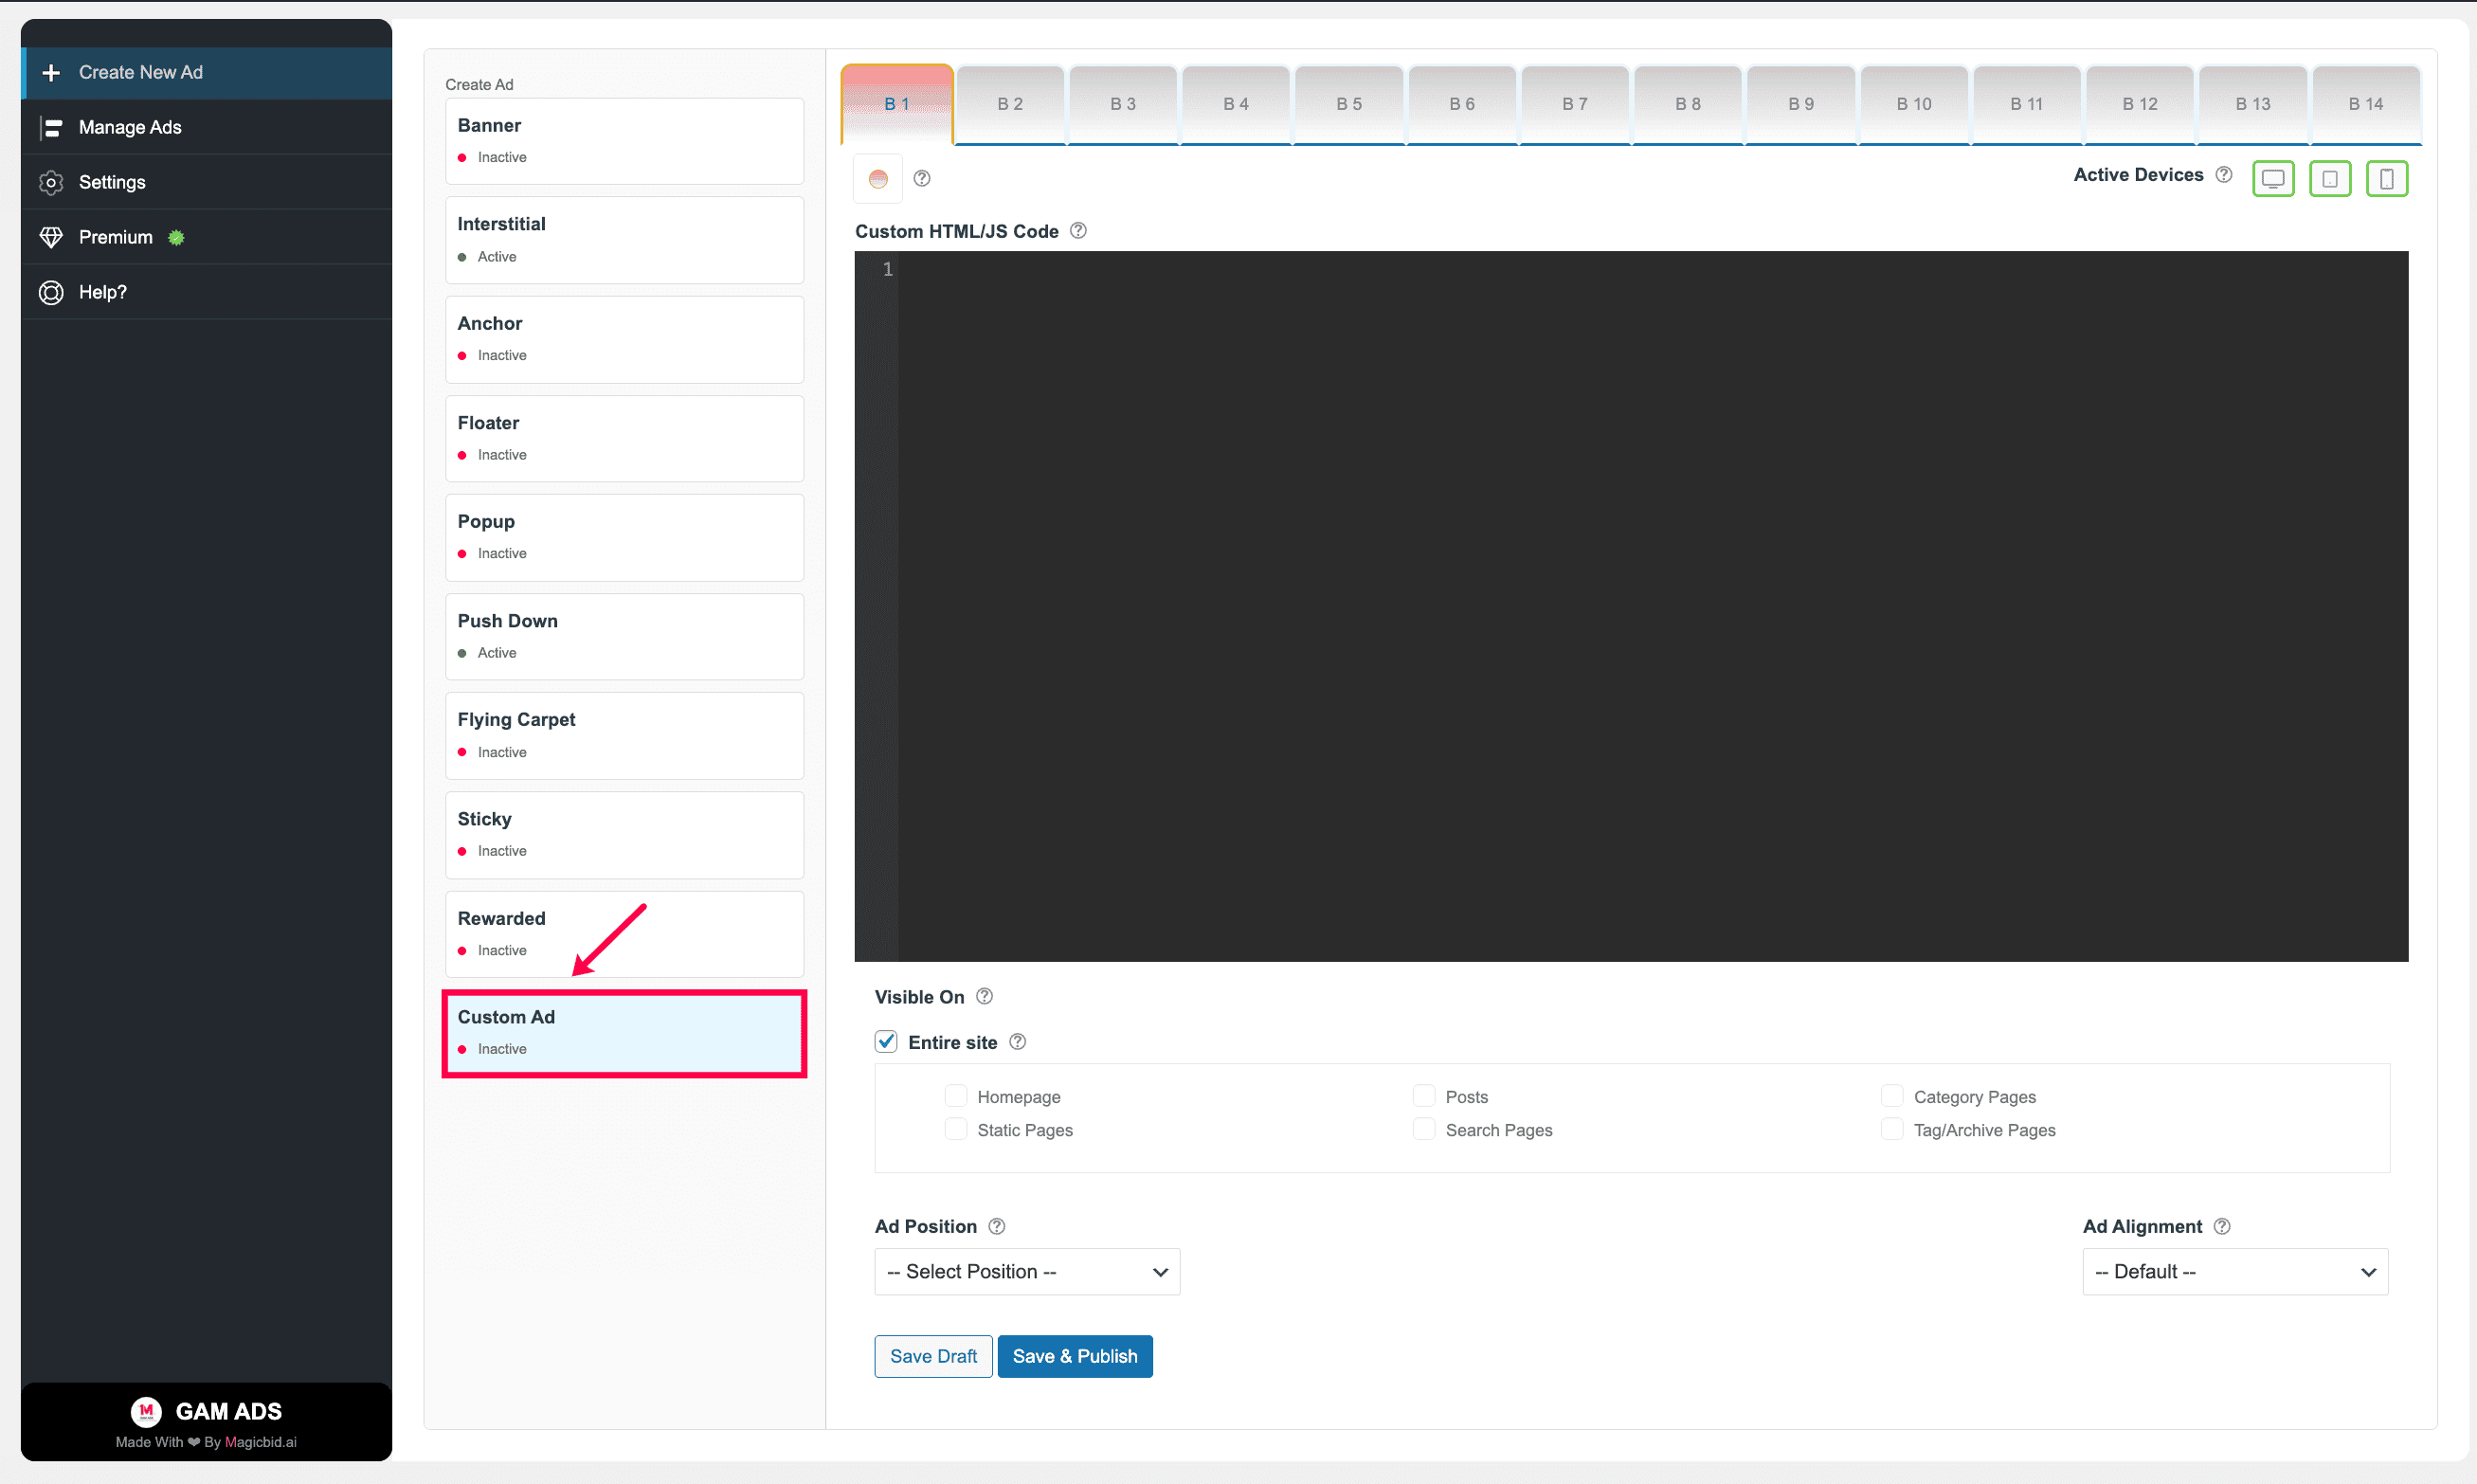
Step 1: Choose Ad Type
Go to Create New Ad and select Custom Ad.
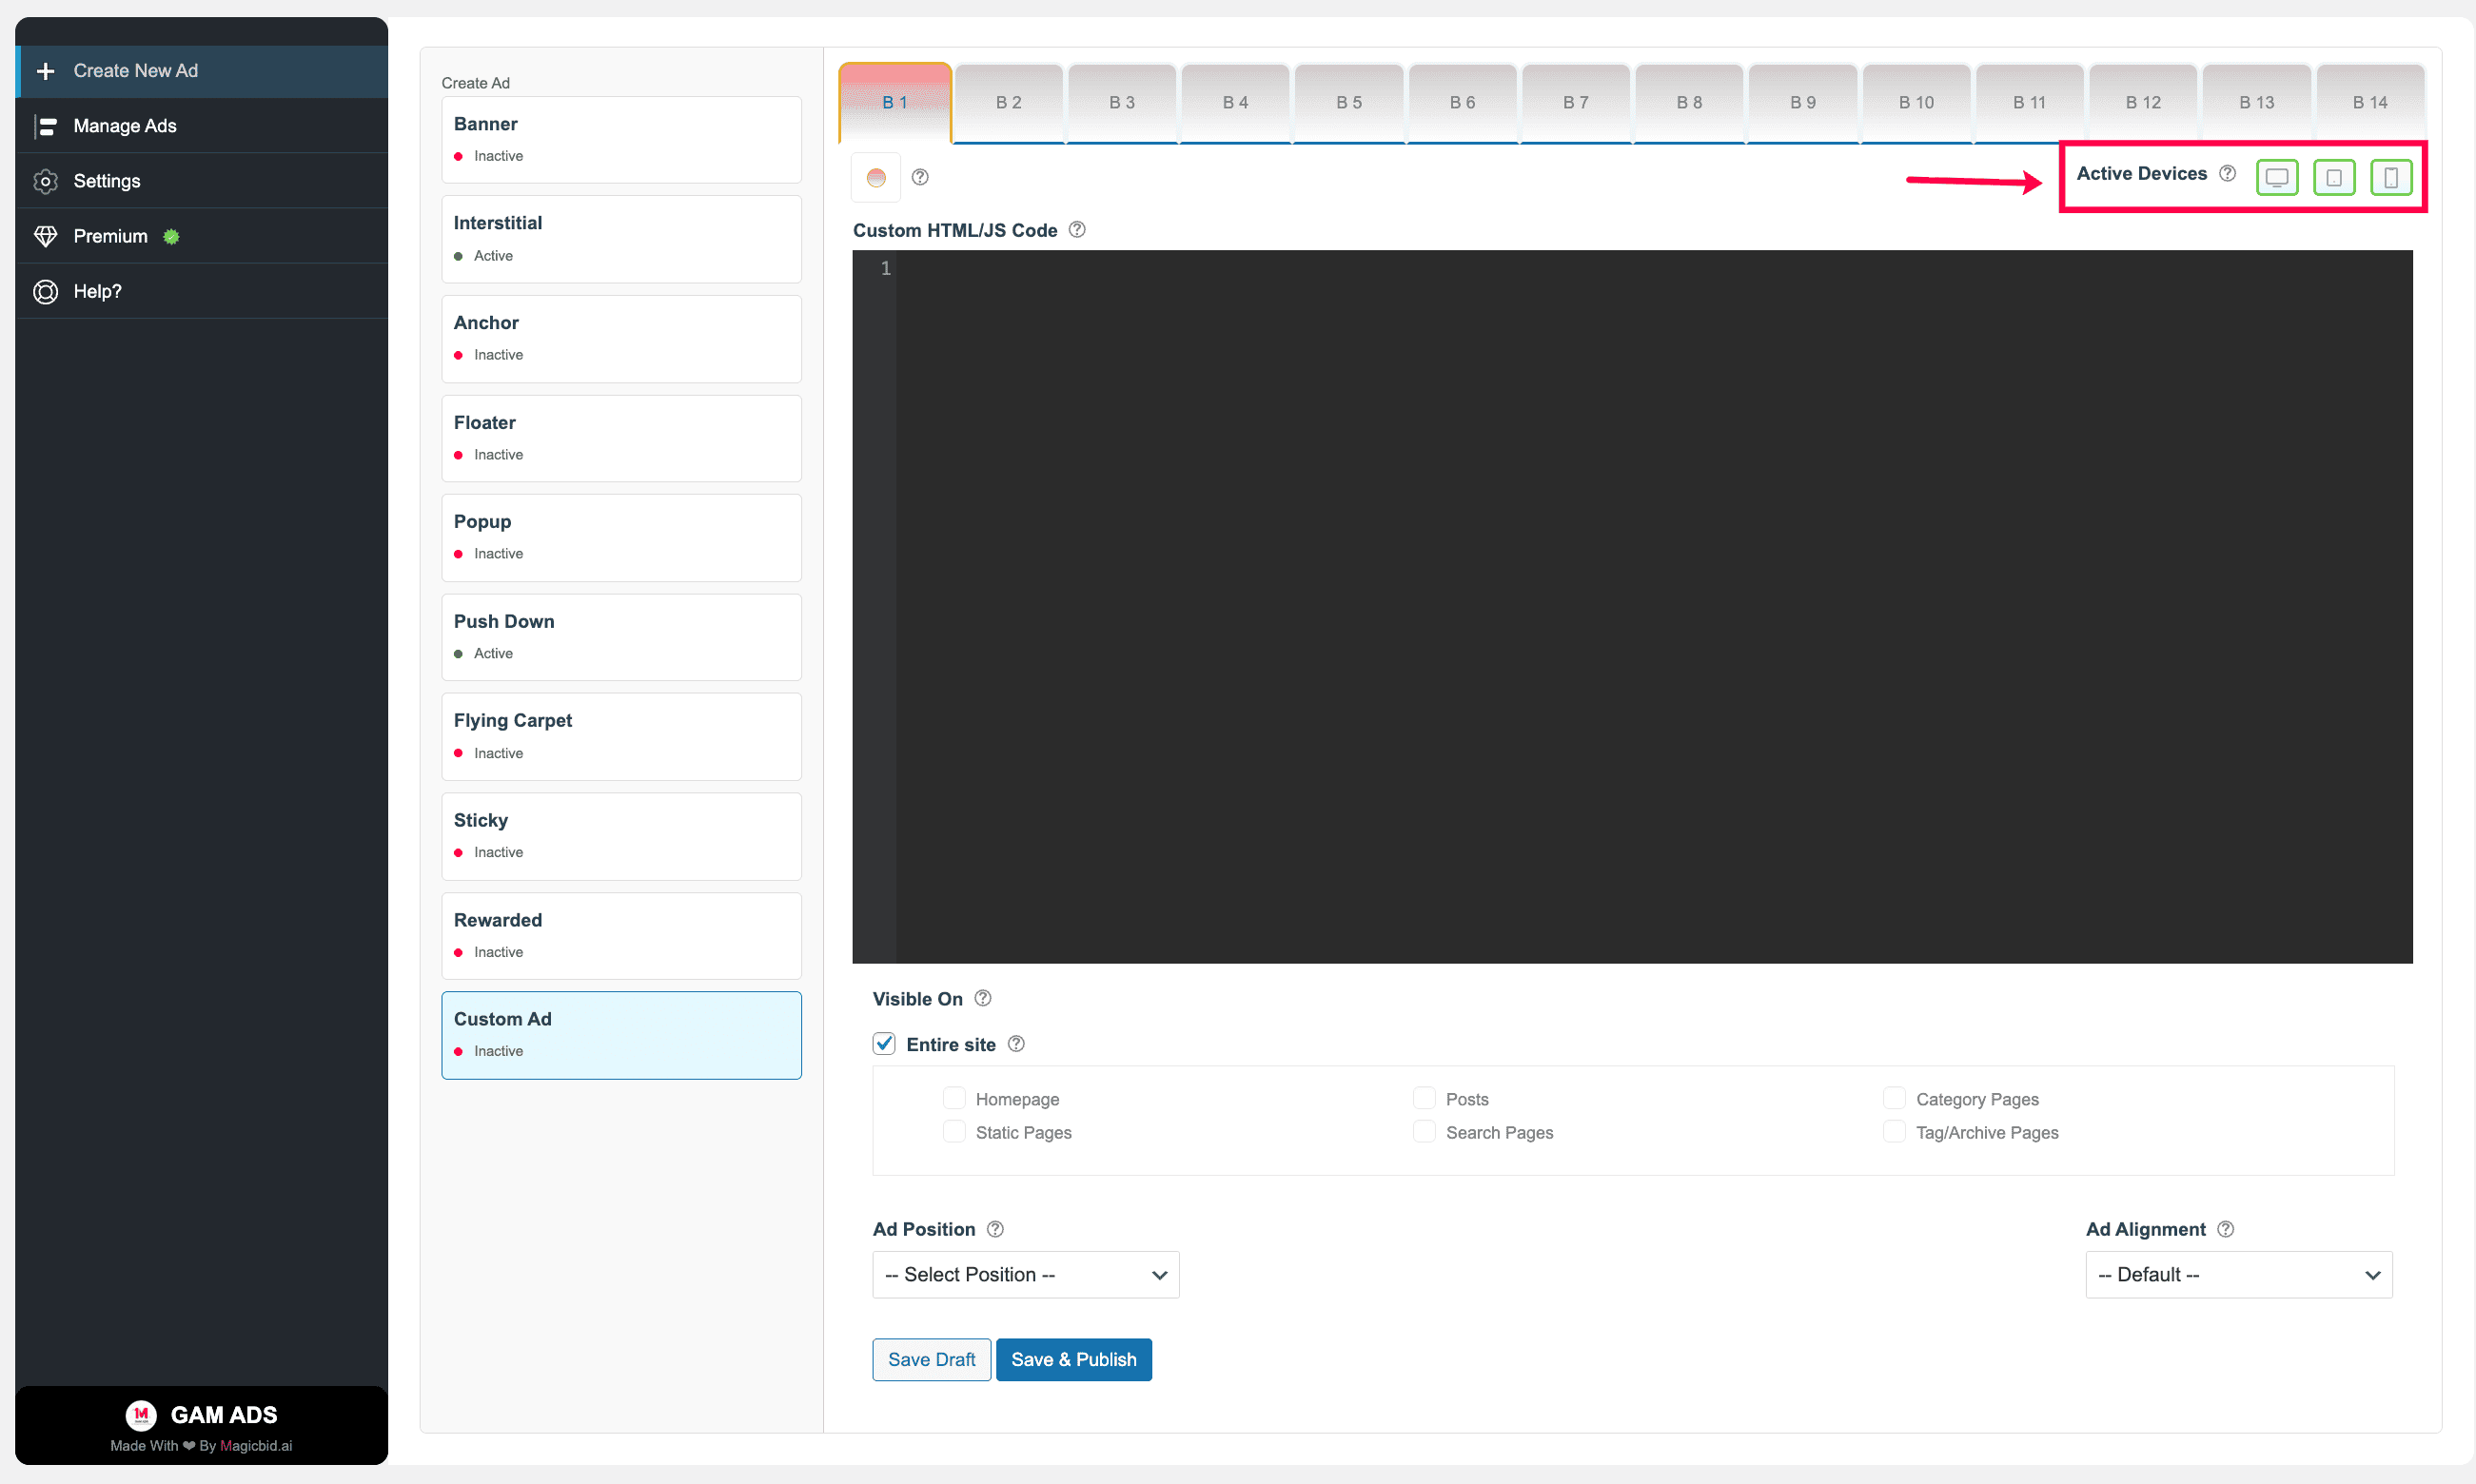
Step 2: Choose Devices
Under Active Devices, select where this ad should run:
- Desktop
- Tablet
- Mobile
You may enable one, two, or all three device types.
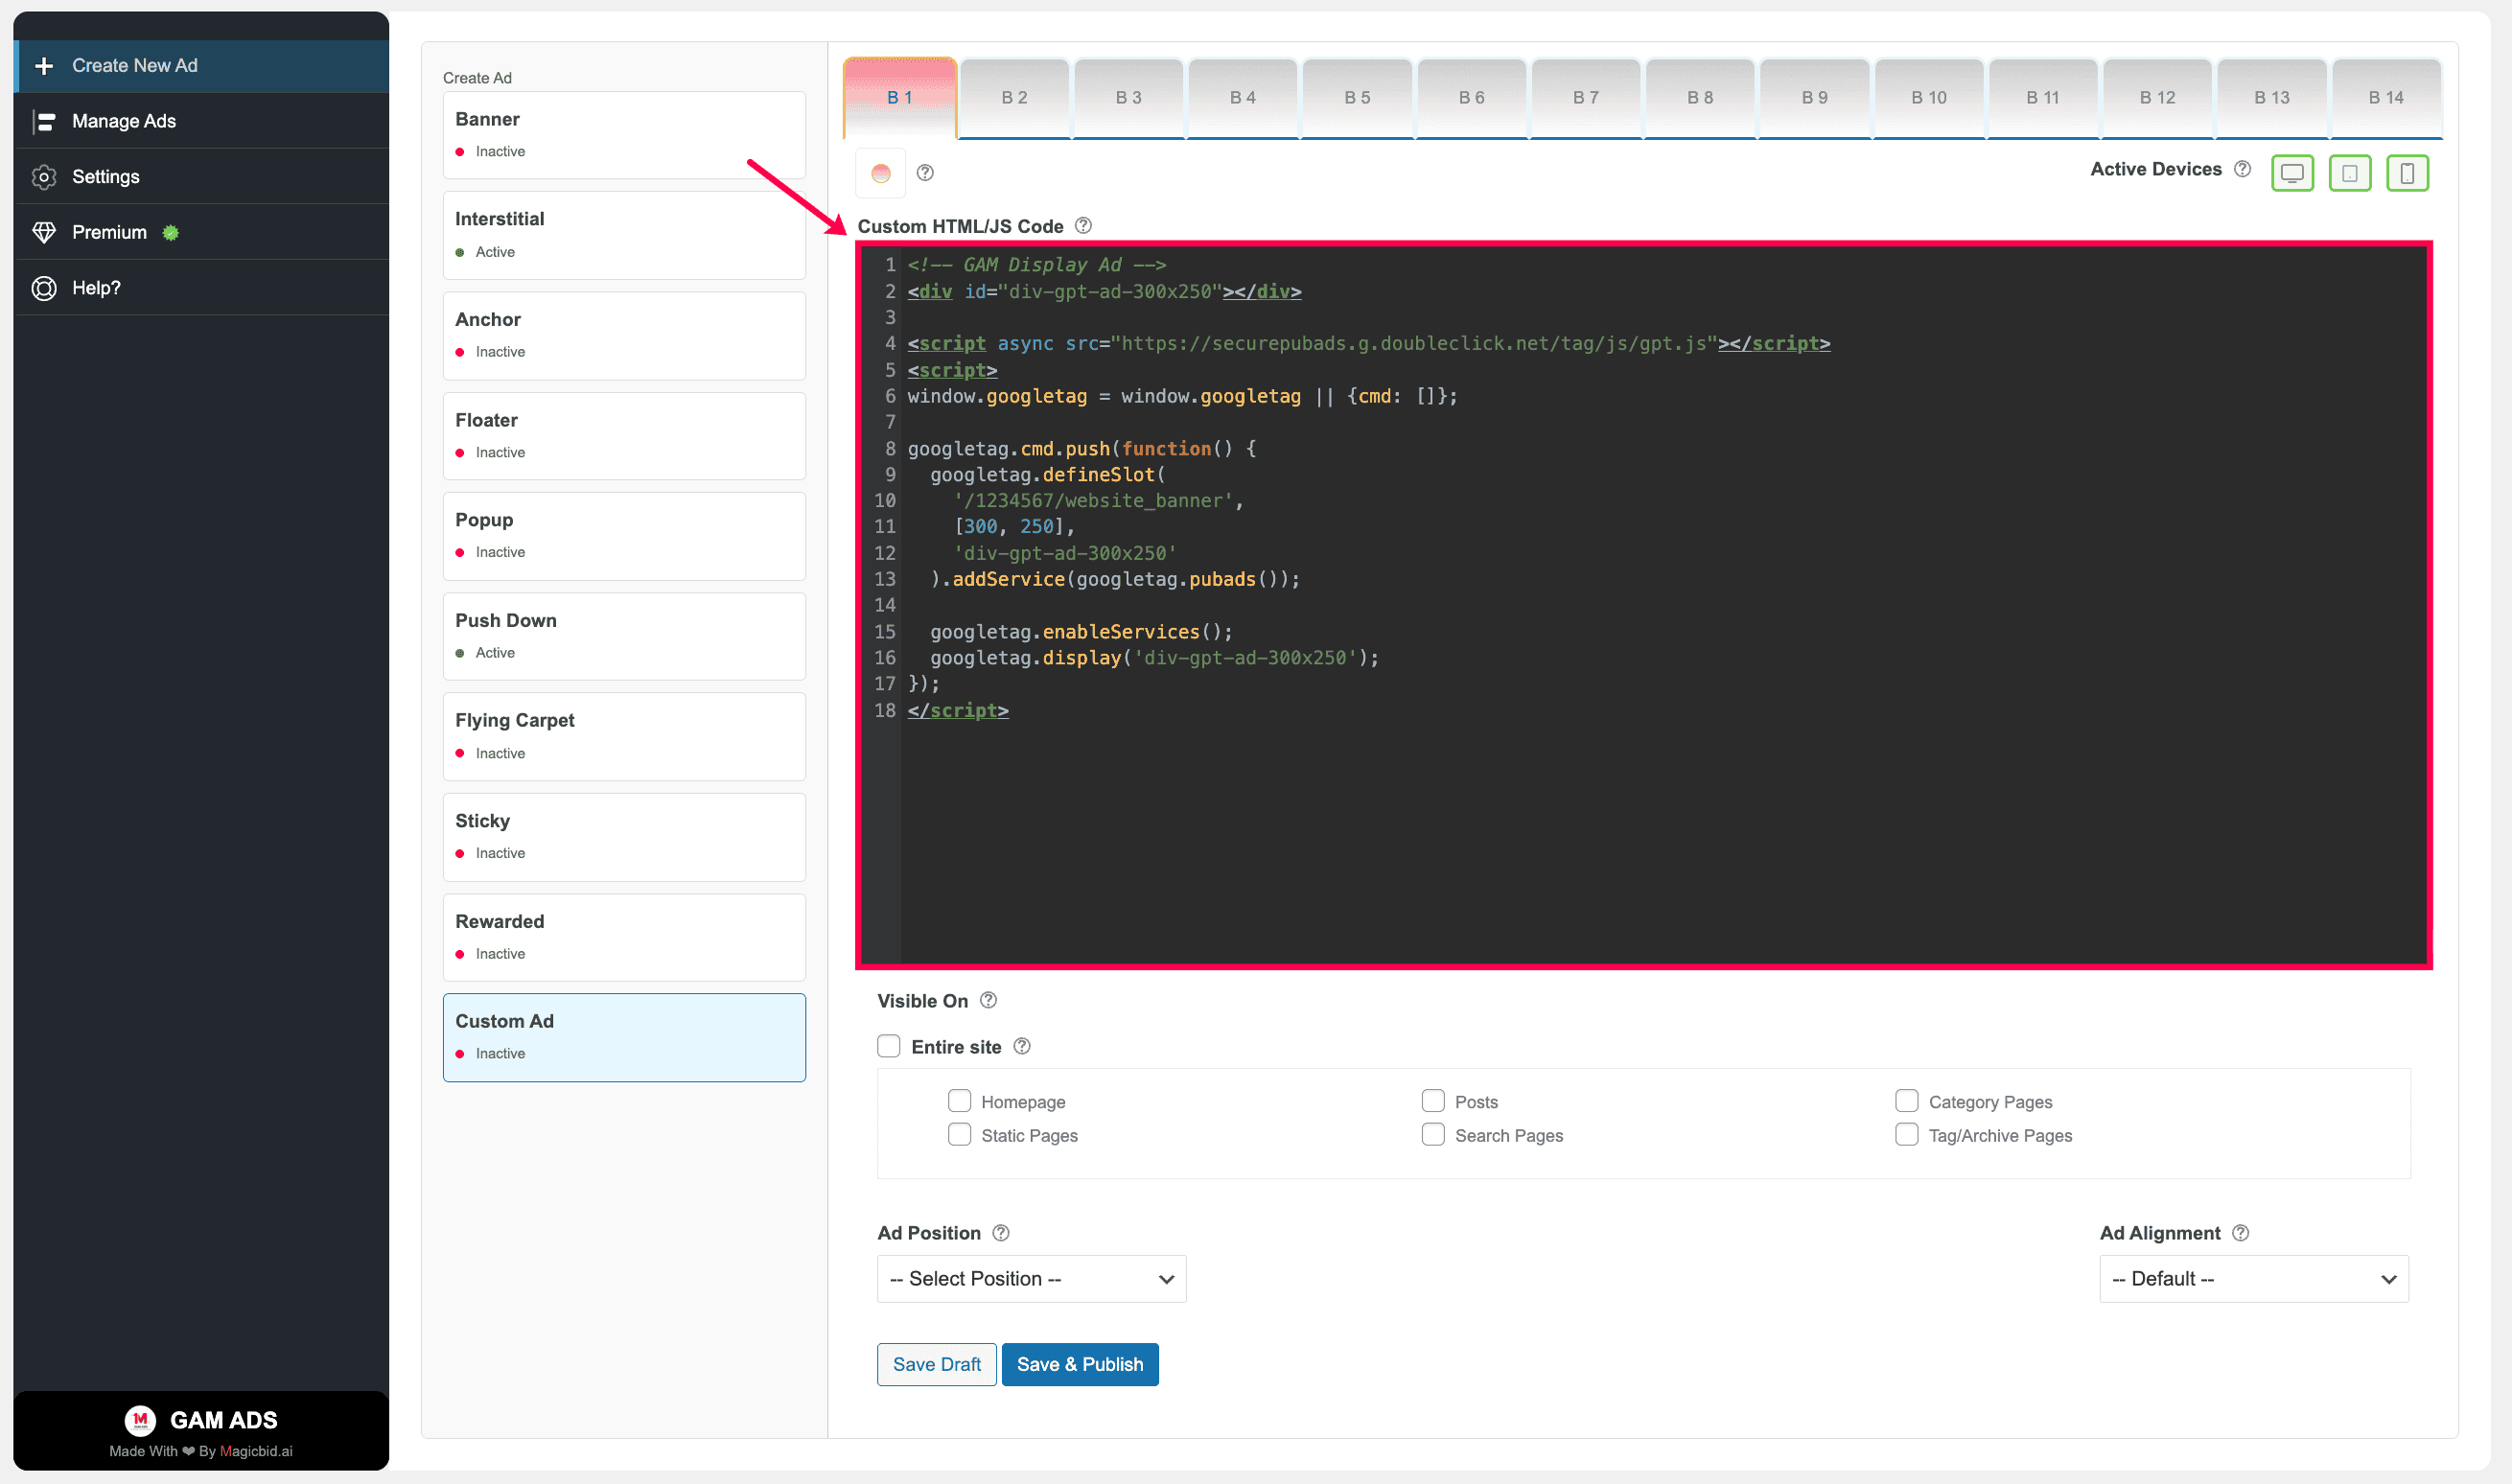
Step 3: Enter Custom Code
Paste your HTML or JavaScript ad code into the Custom Ad editor.
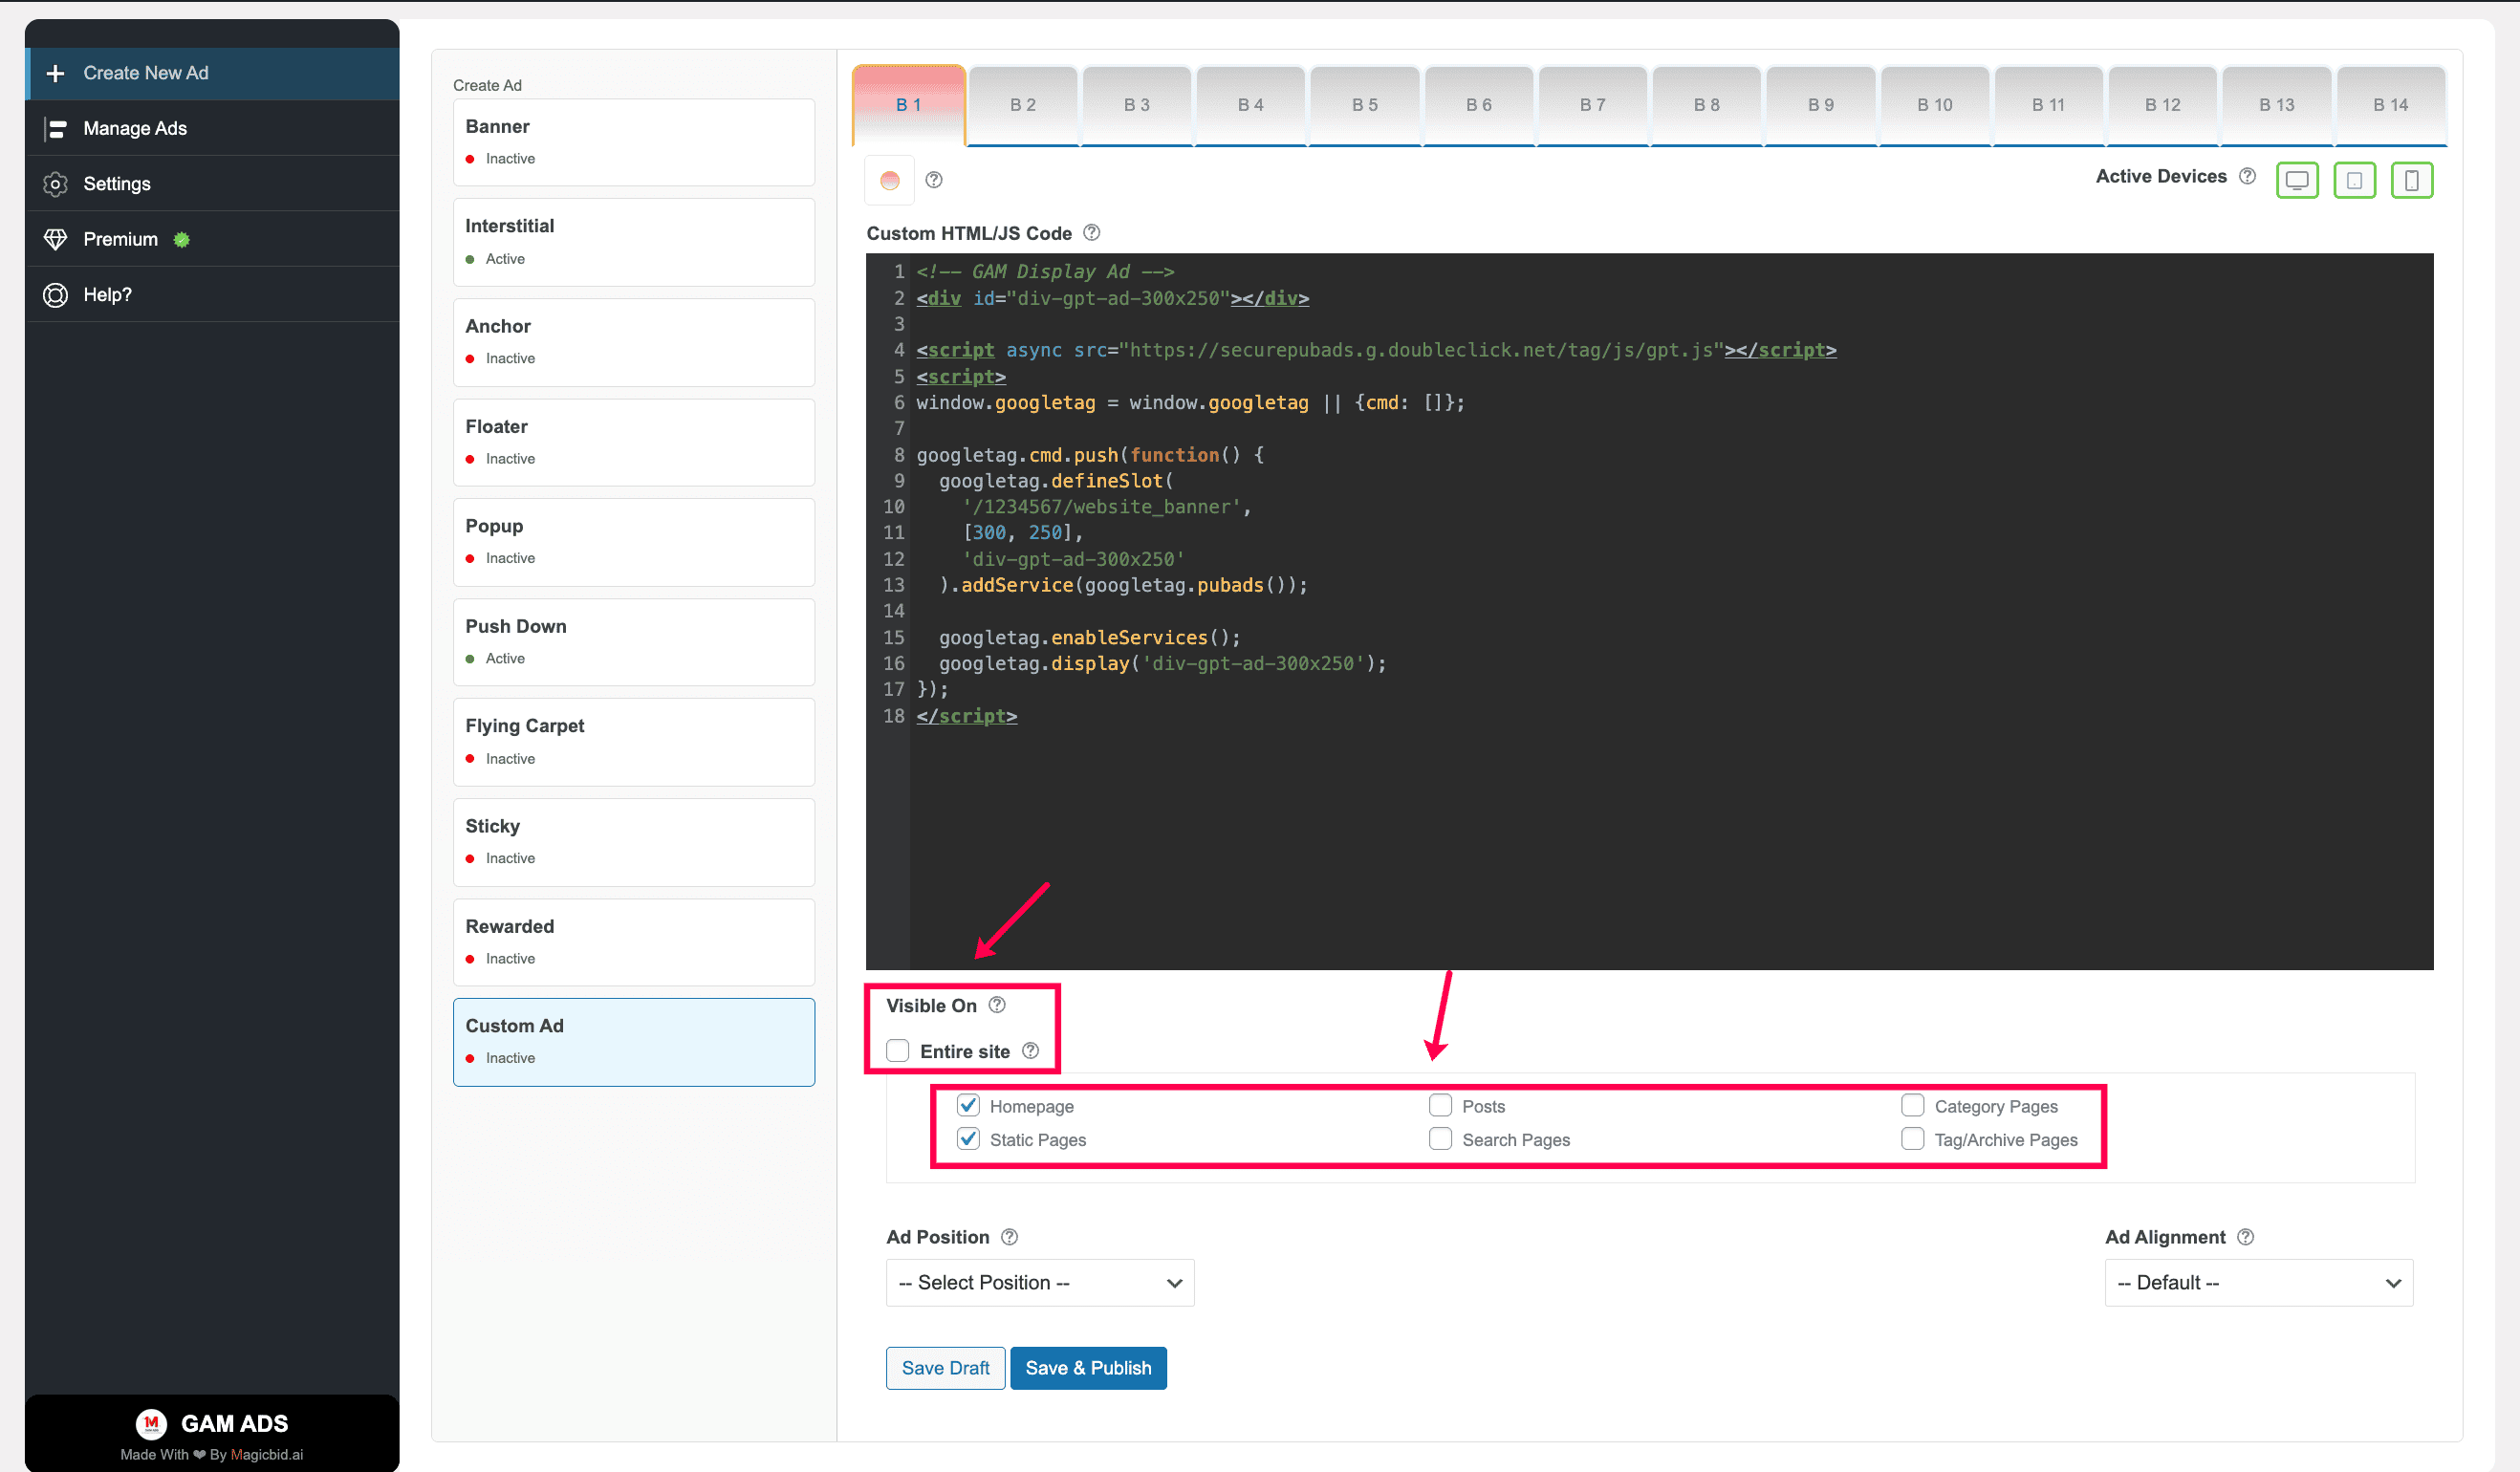
Step 4: Placement Rules
Choose where this ad should appear.
- Entire Site: Shows on all pages
- Specific Pages: Shows only on selected posts, pages, or categories
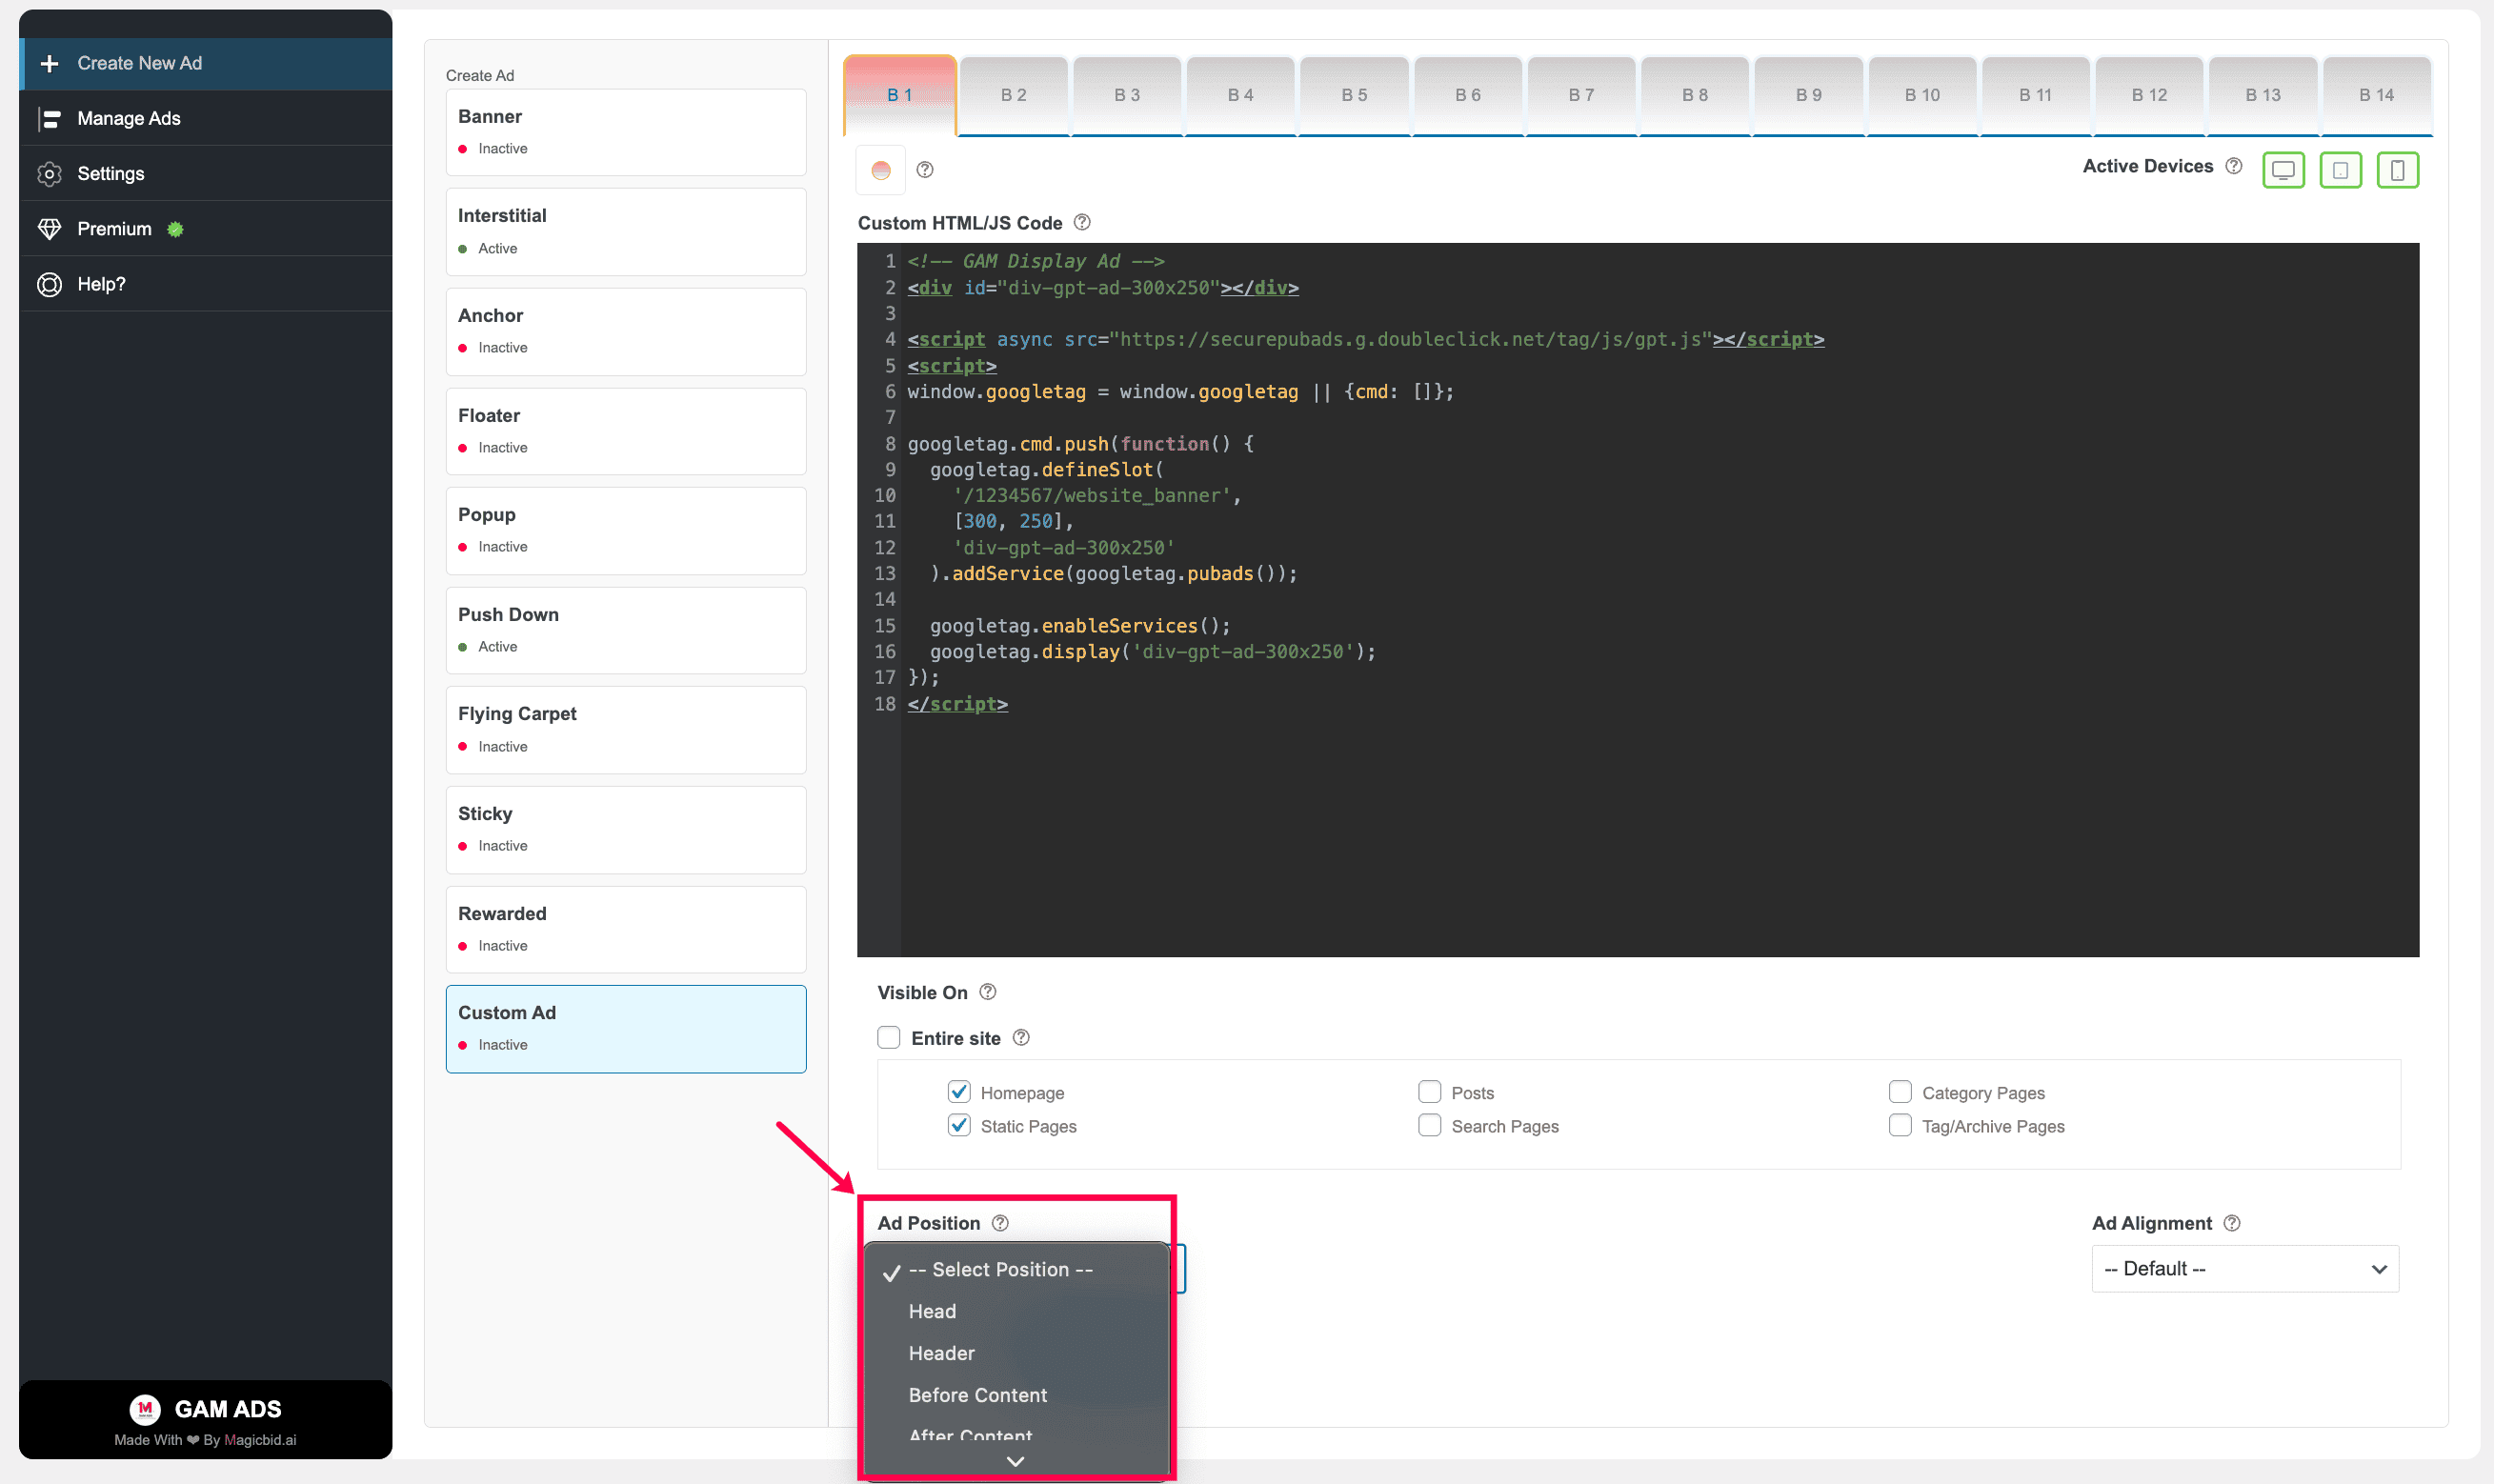
Step 5: Ad Position
Select where the ad should appear on the page.
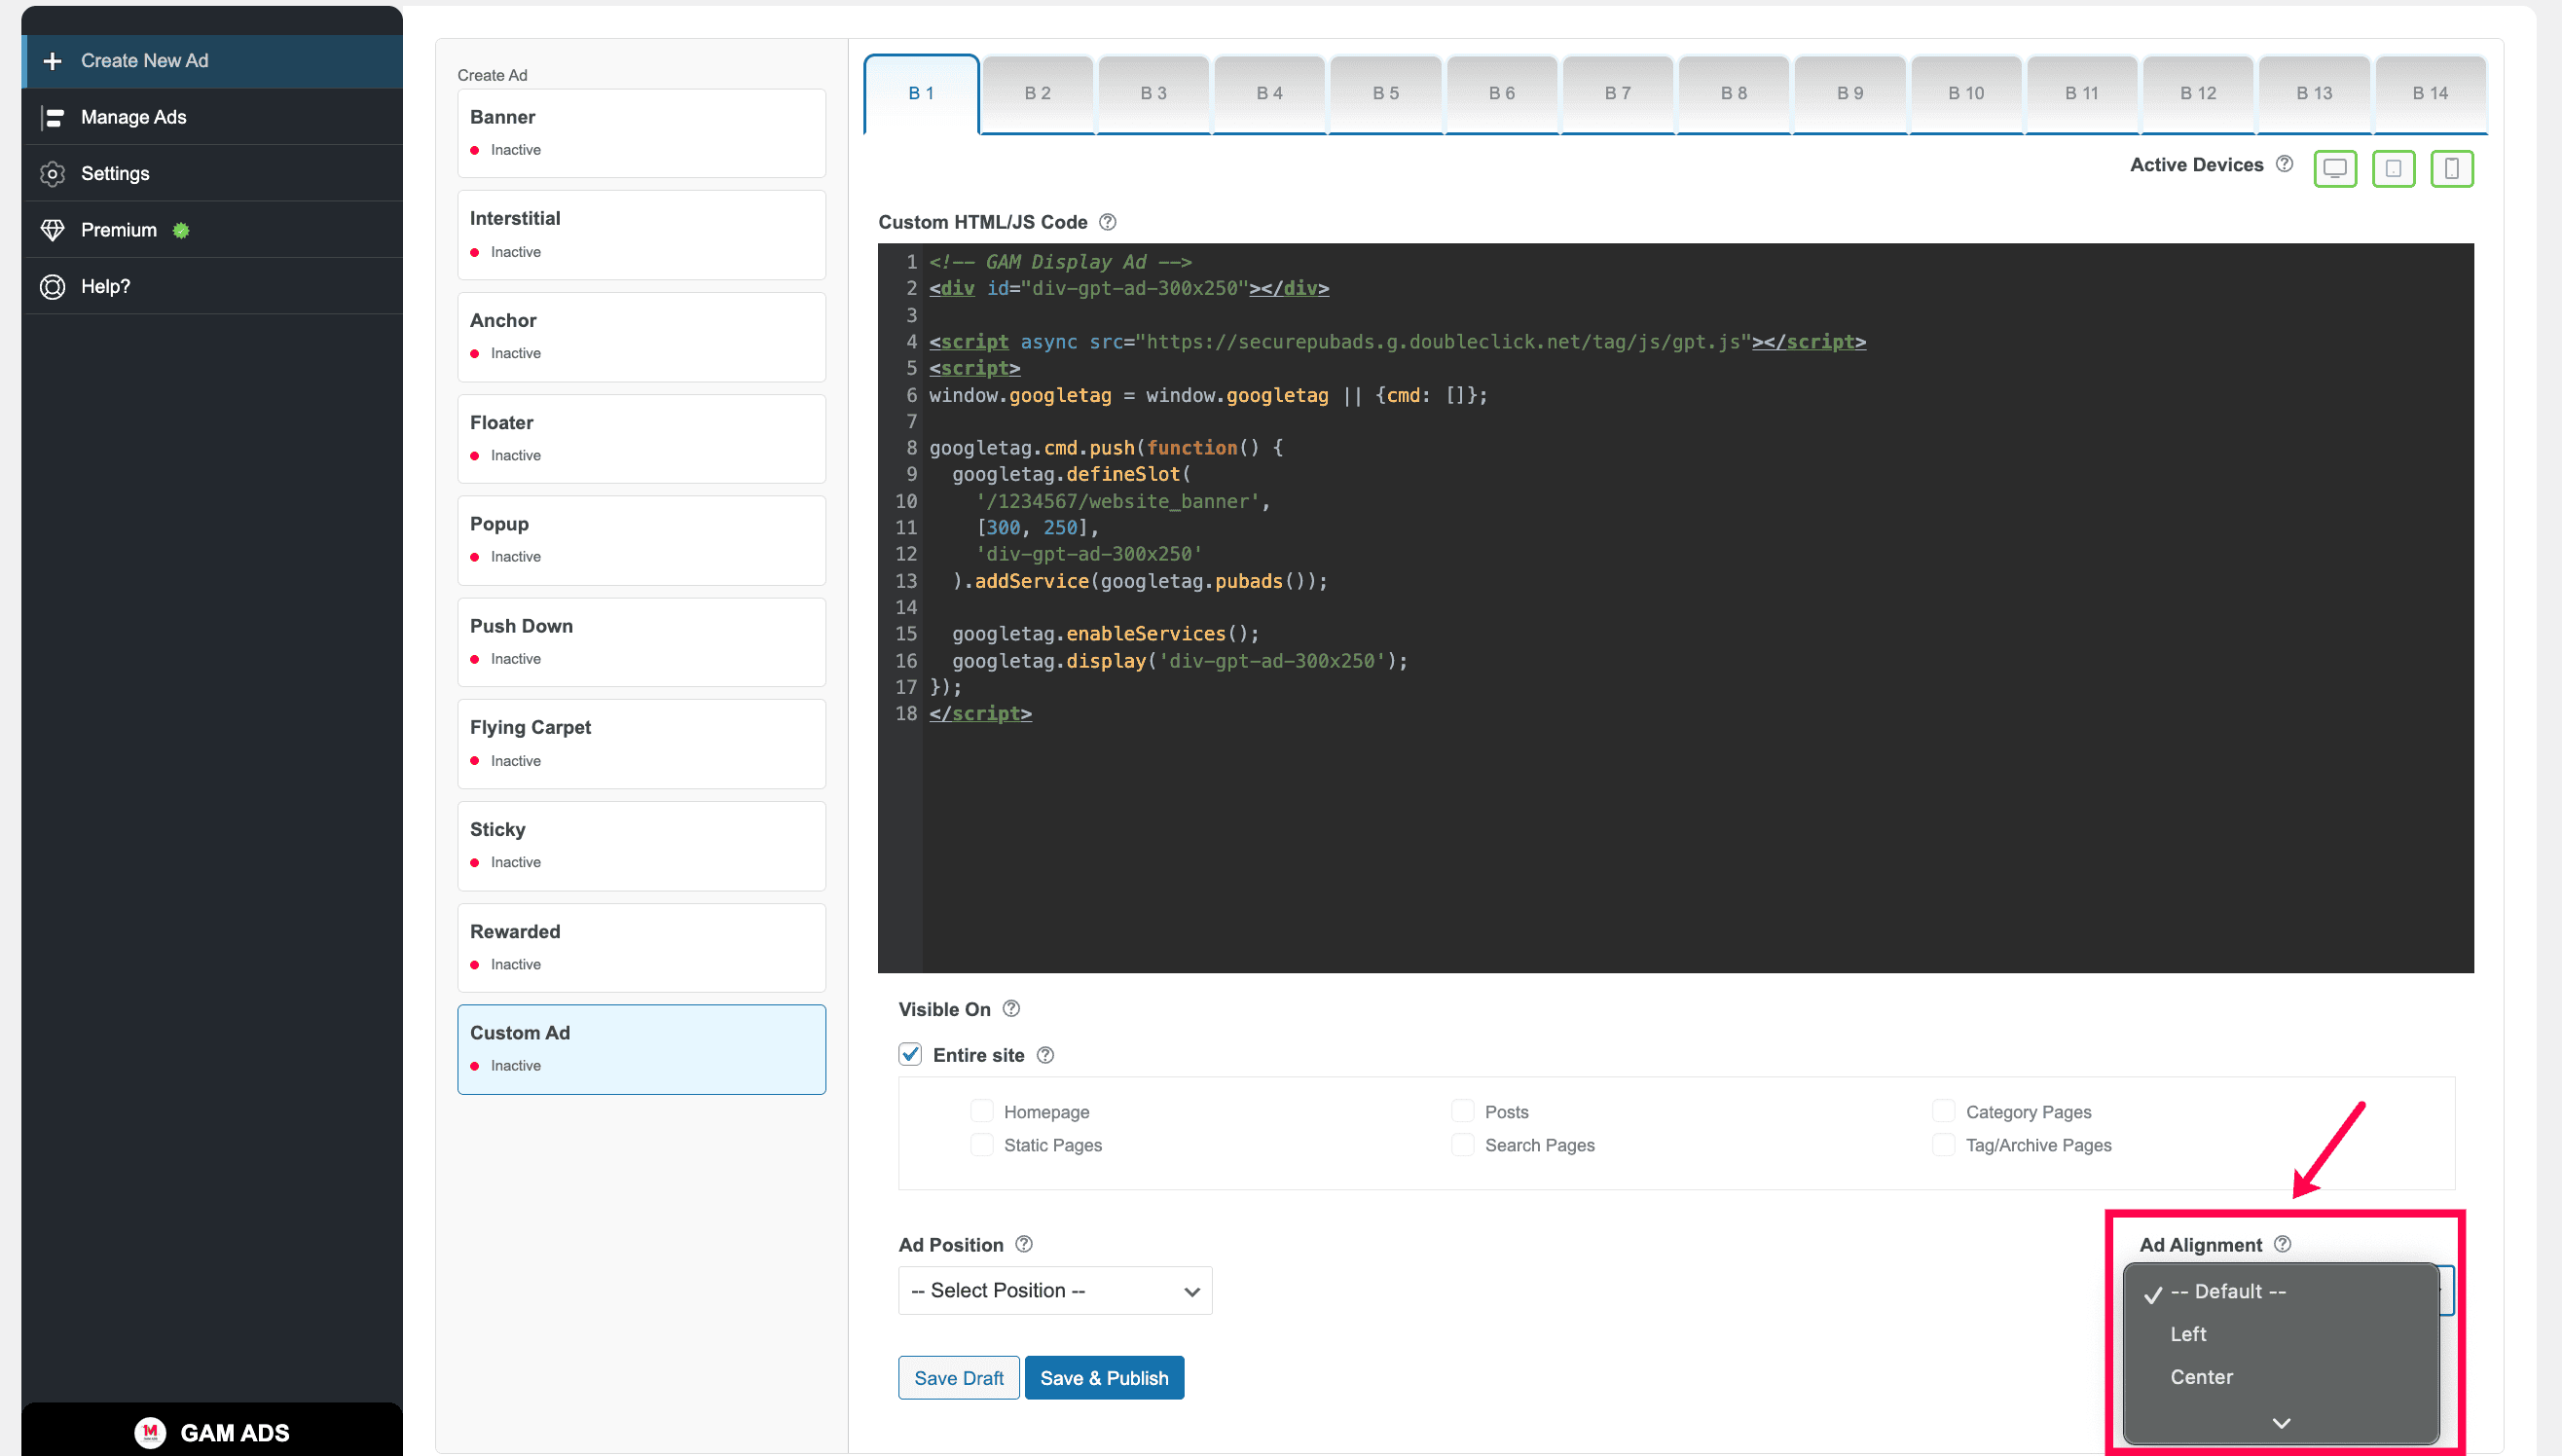
Step 6: Ad Alignment
Controls how the ad is positioned inside its placement container.
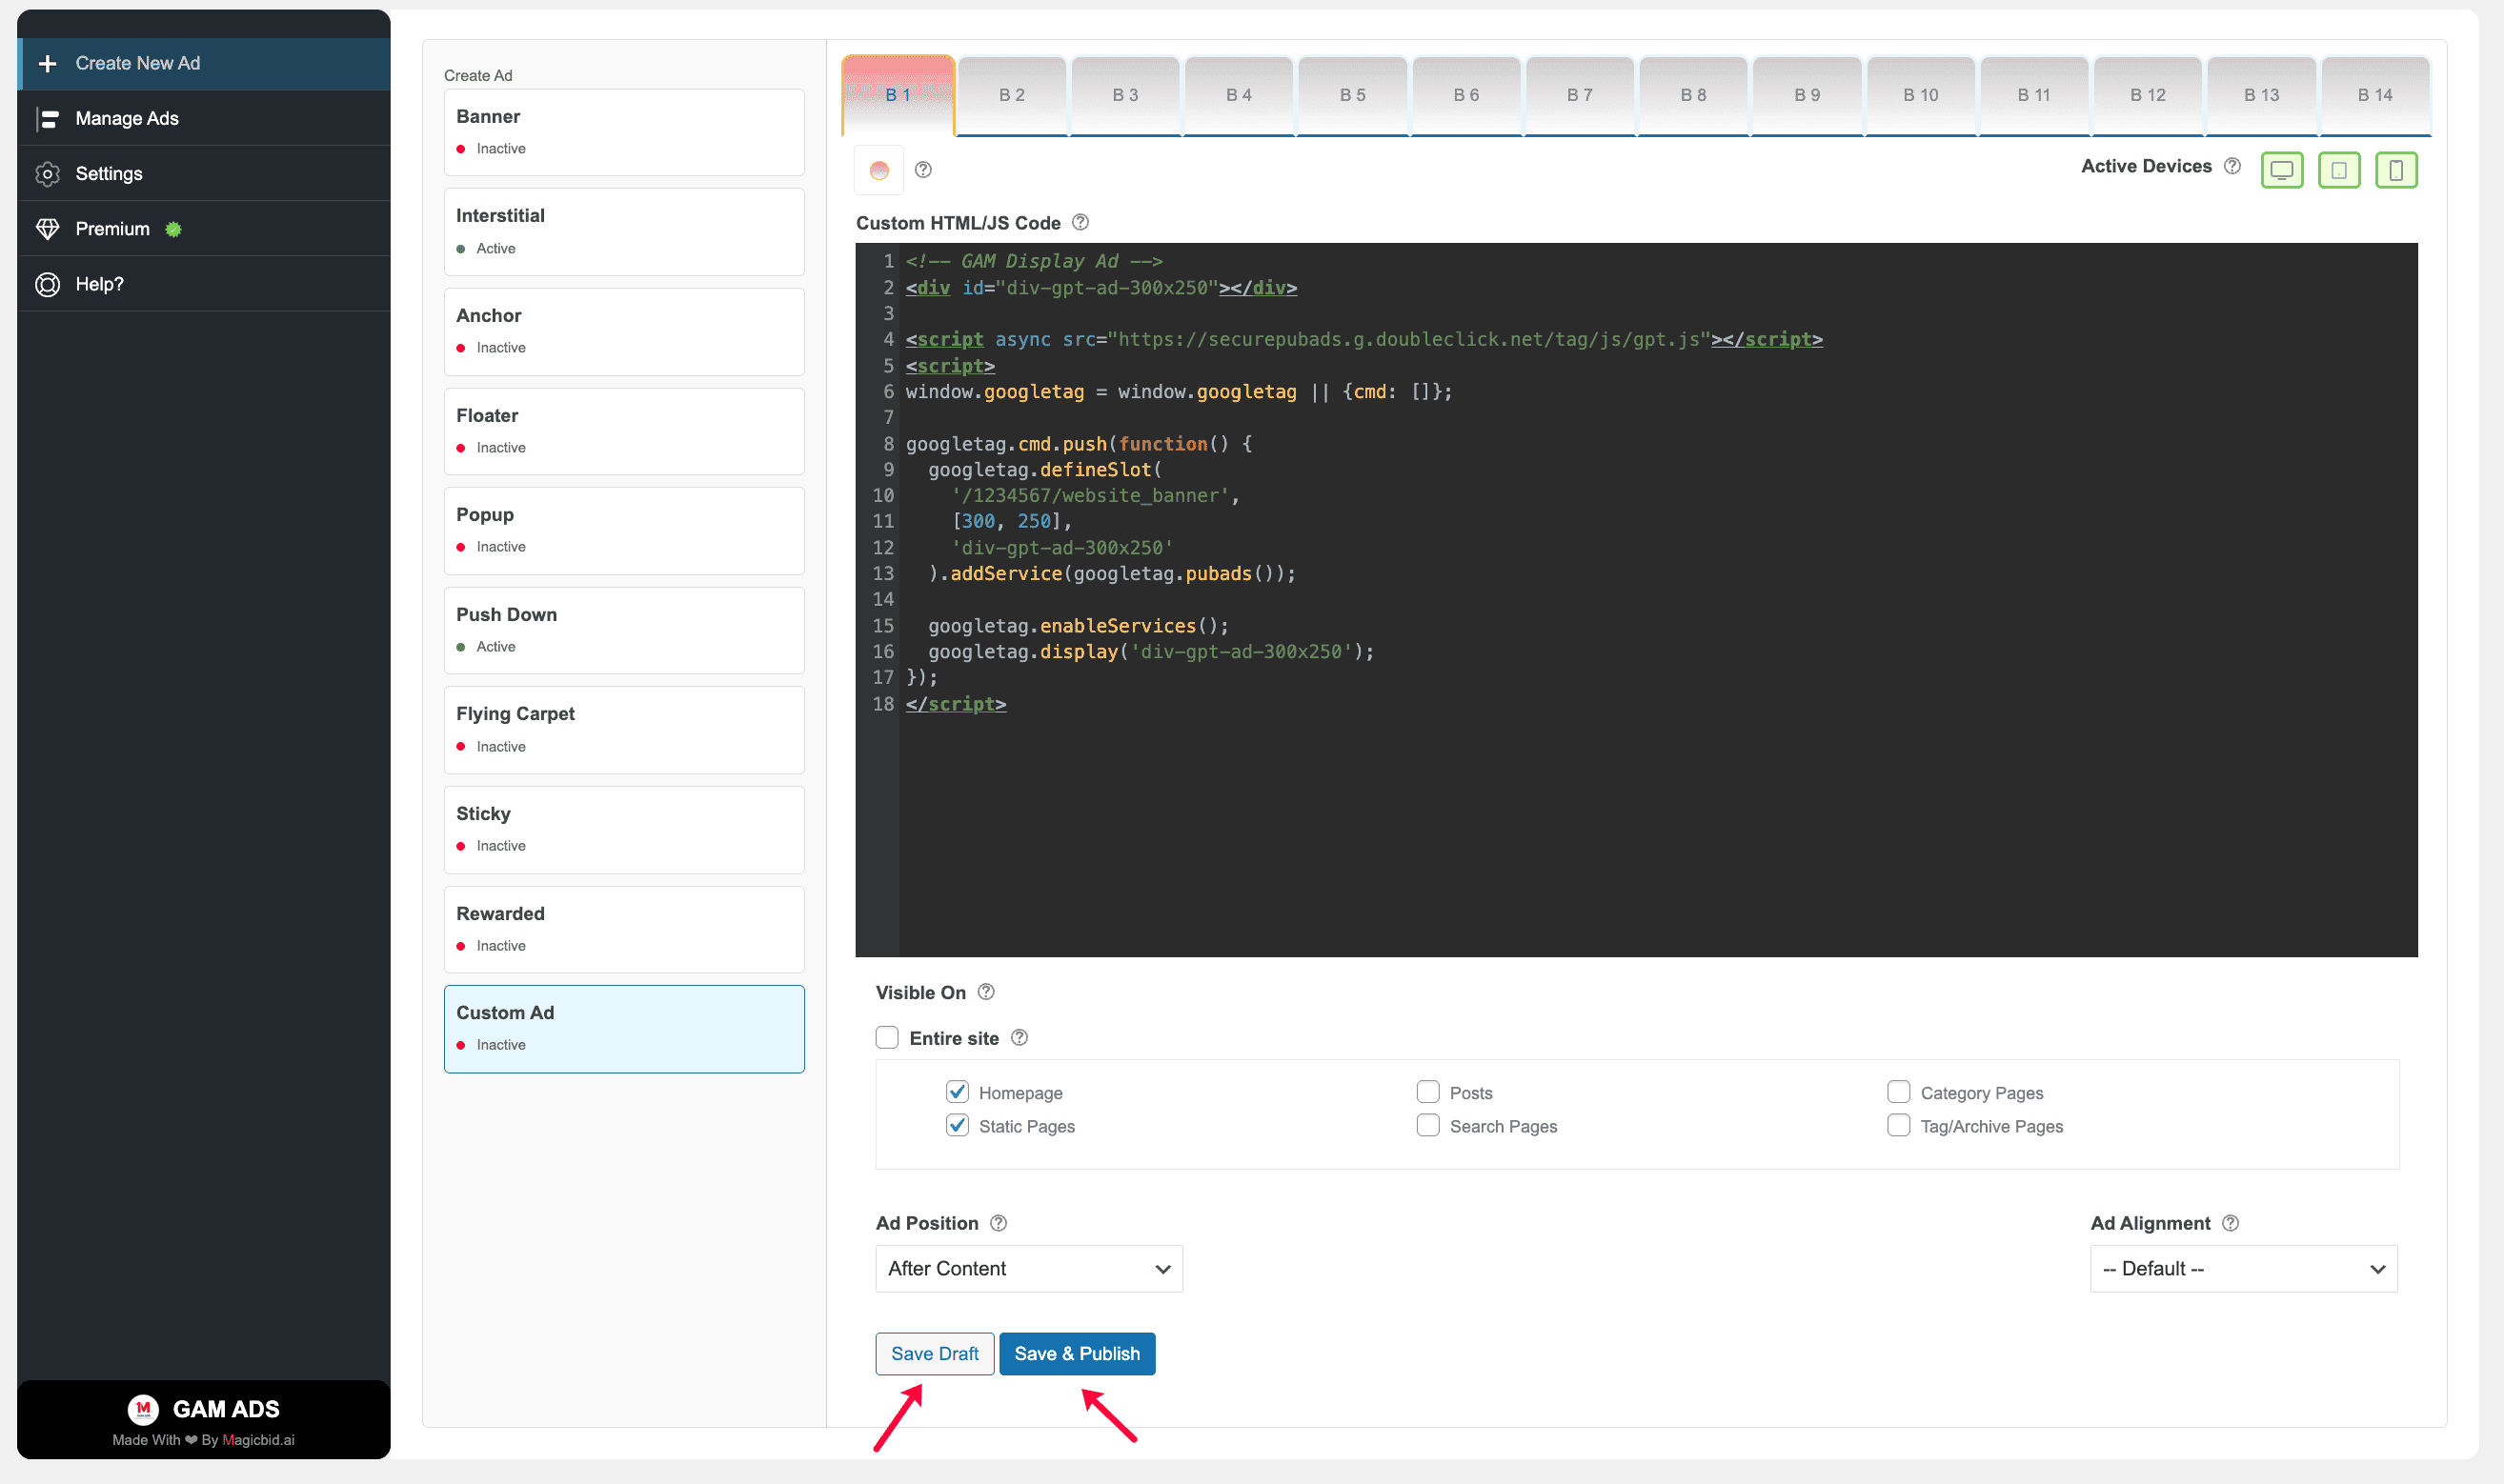
Step 7: Save Your Ad
Save Draft: Saves the ad without publishing it.
Save & Publish: Saves the ad and makes it live immediately.
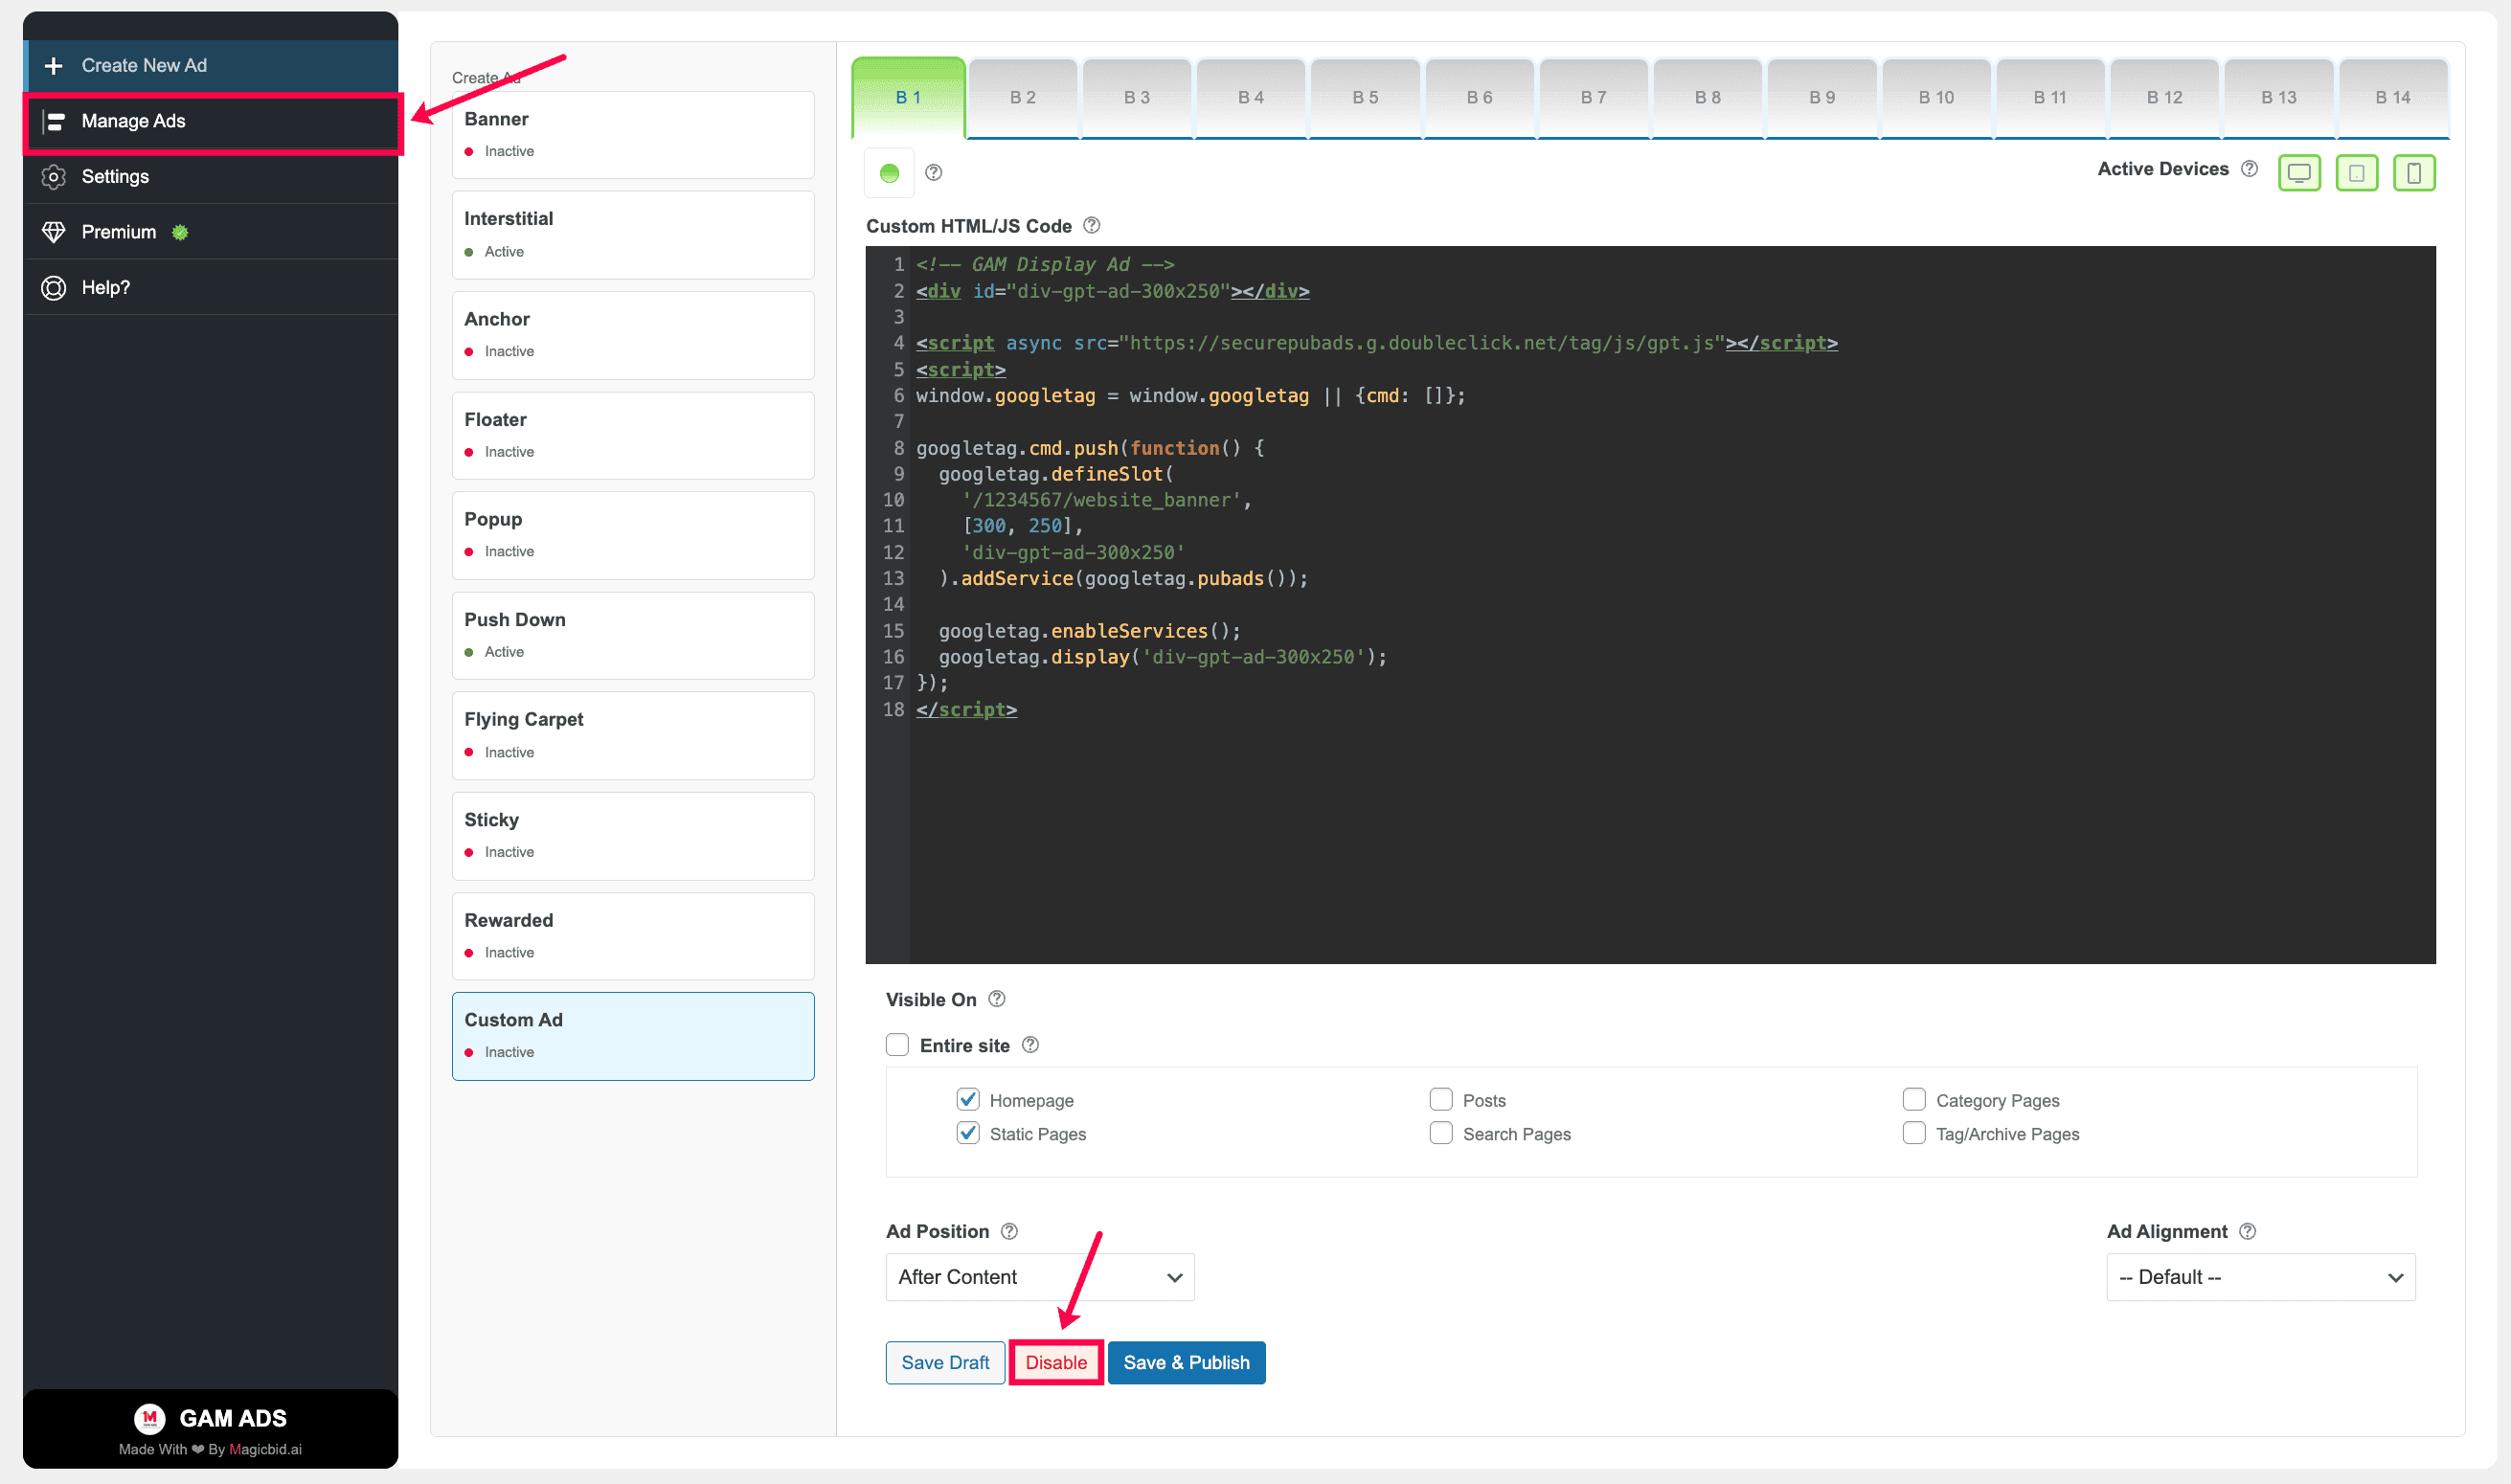
Step 8: Manage Ad Status
After publishing, you can manage the ad status:
- Disable: Pause the ad anytime
- Save & Publish: Apply changes and keep the ad live
You can manage all ads later from: GAM ADS → Manage Ads
Manage Ads
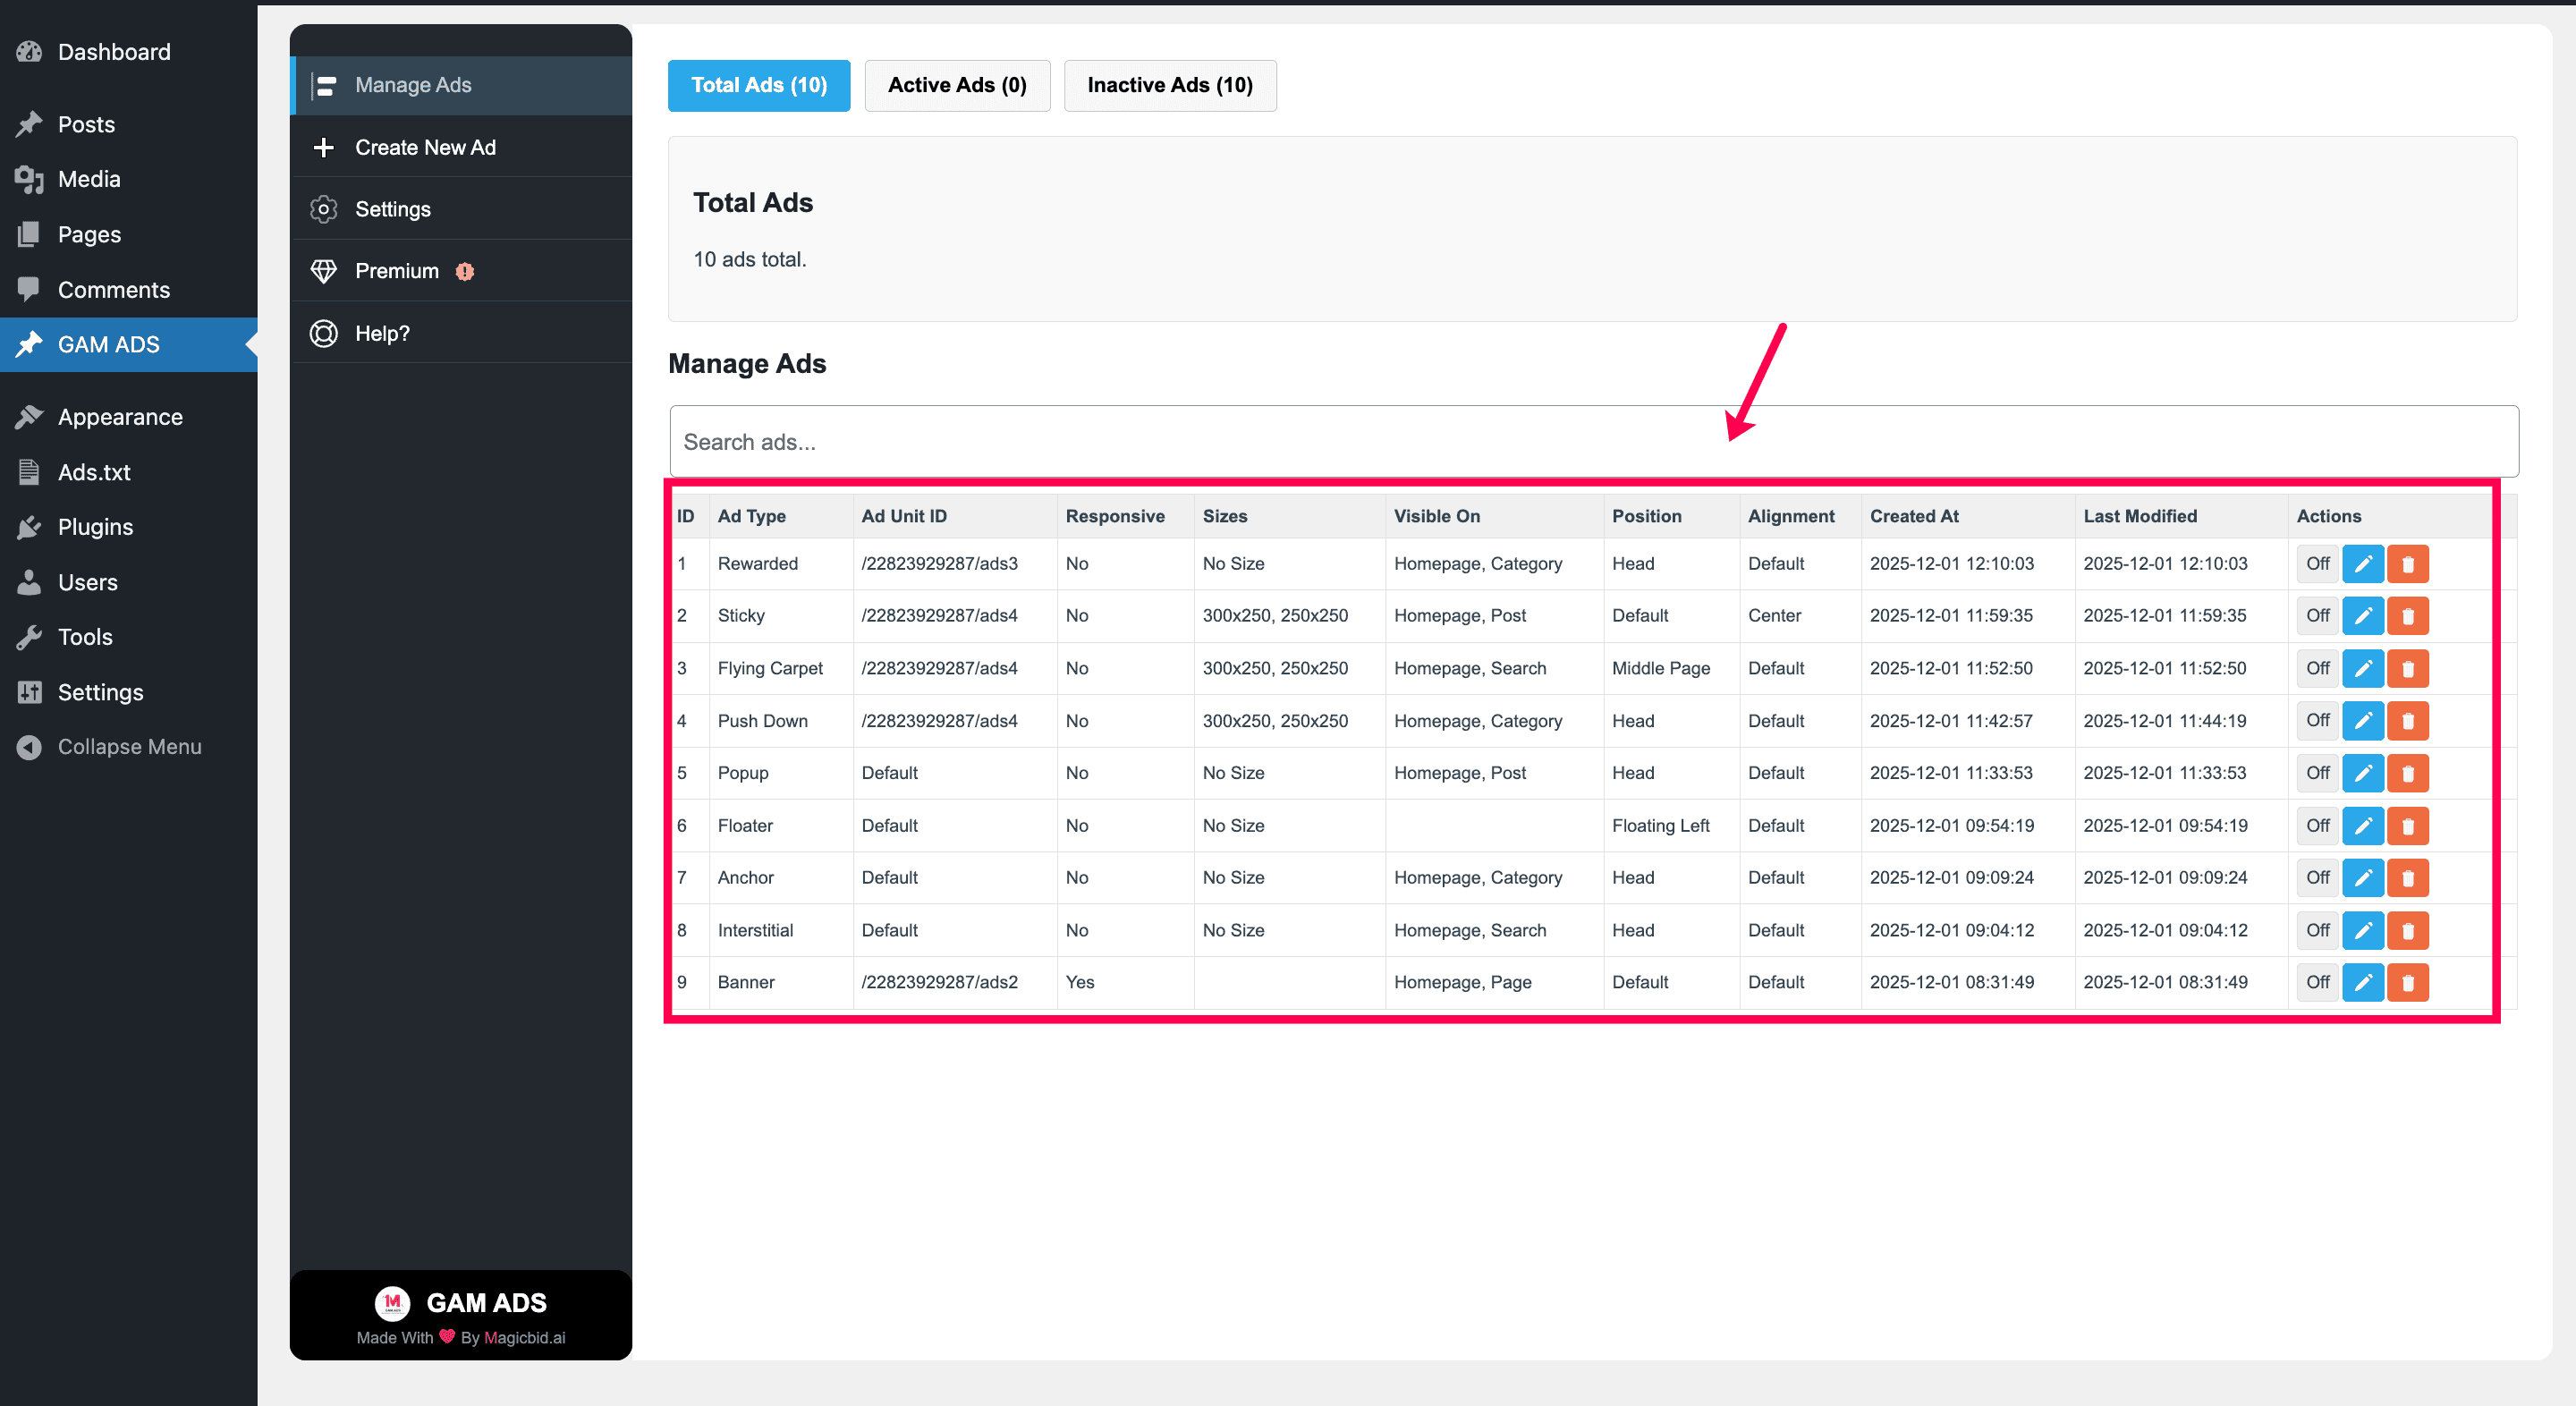
Once ads are created, you can control and manage them from the Manage Ads section.
Here You Can:
- View all ads in one place (Total, Active, Inactive)
- Quickly review each ad’s setup (type, ad unit, placement, size, refresh)
- Turn ads On or Off instantly
- Edit or delete ads when needed
- Search ads by type or ad unit
How to Purchase and Activate Your Premium Plan
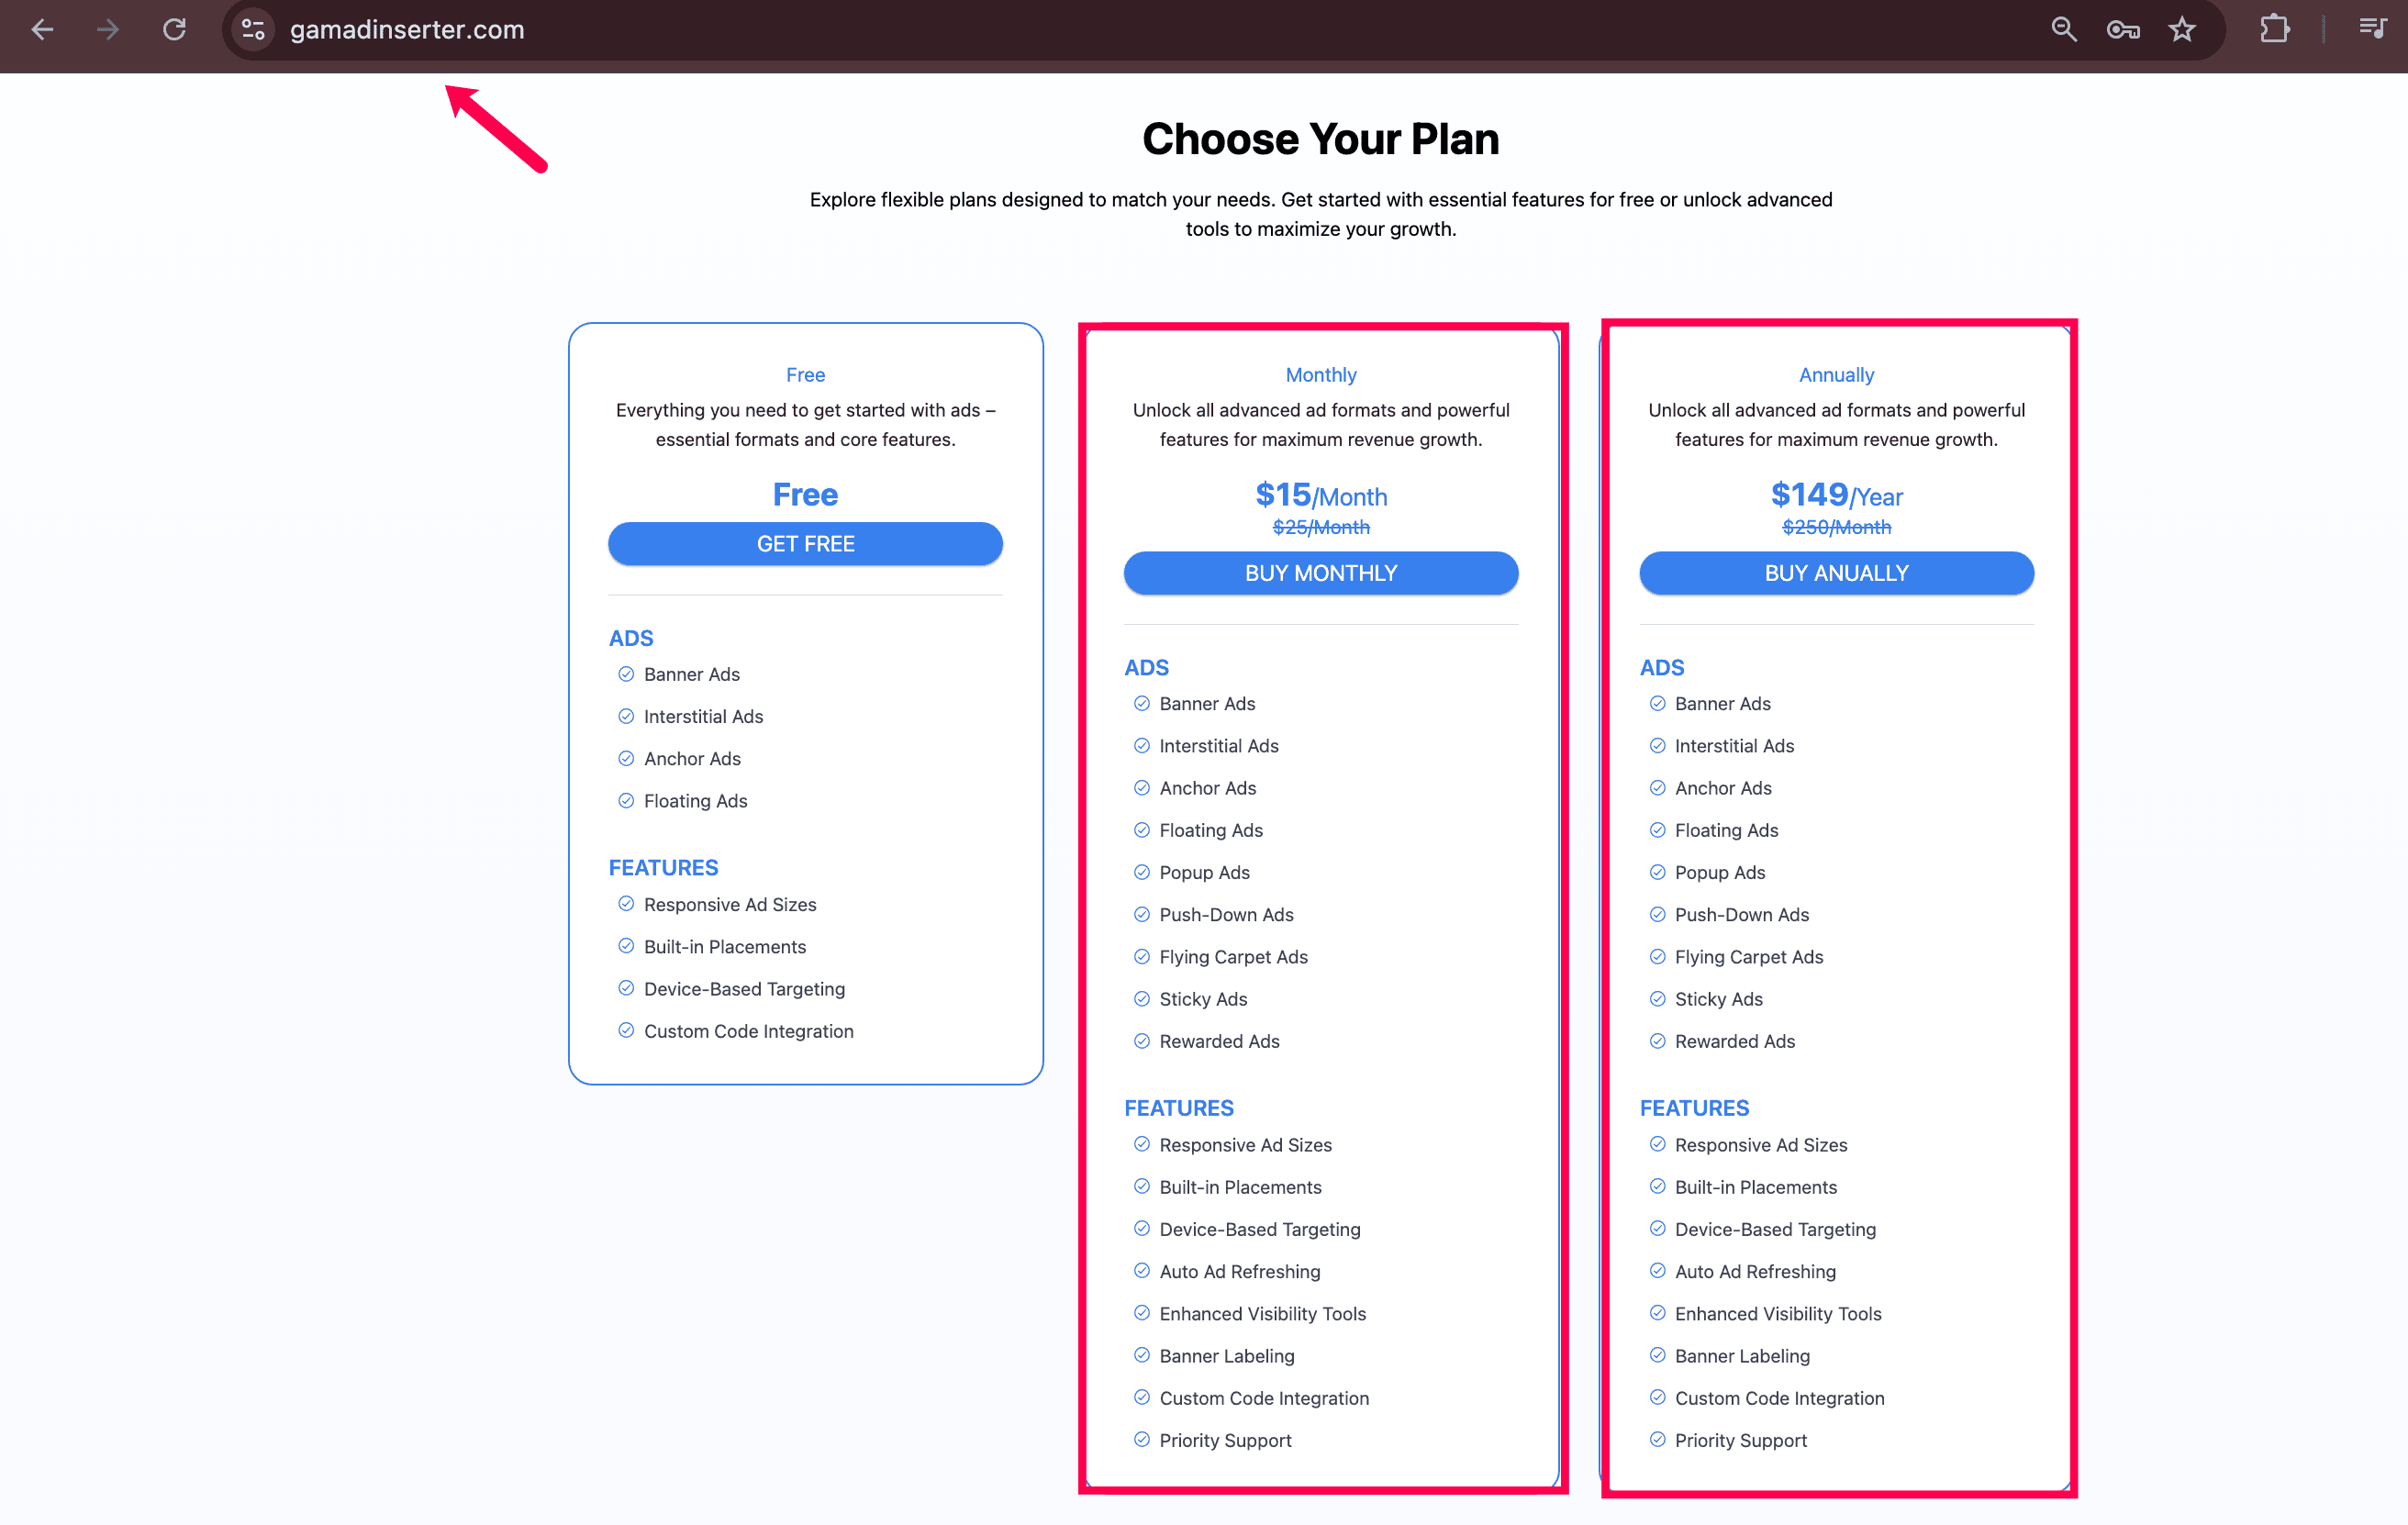
Step 1: Visit GAM Ad Inserter Website
Step 2: Select Subscription Plan
Choose the subscription plan you prefer:
- Monthly Plan
- Yearly Plan
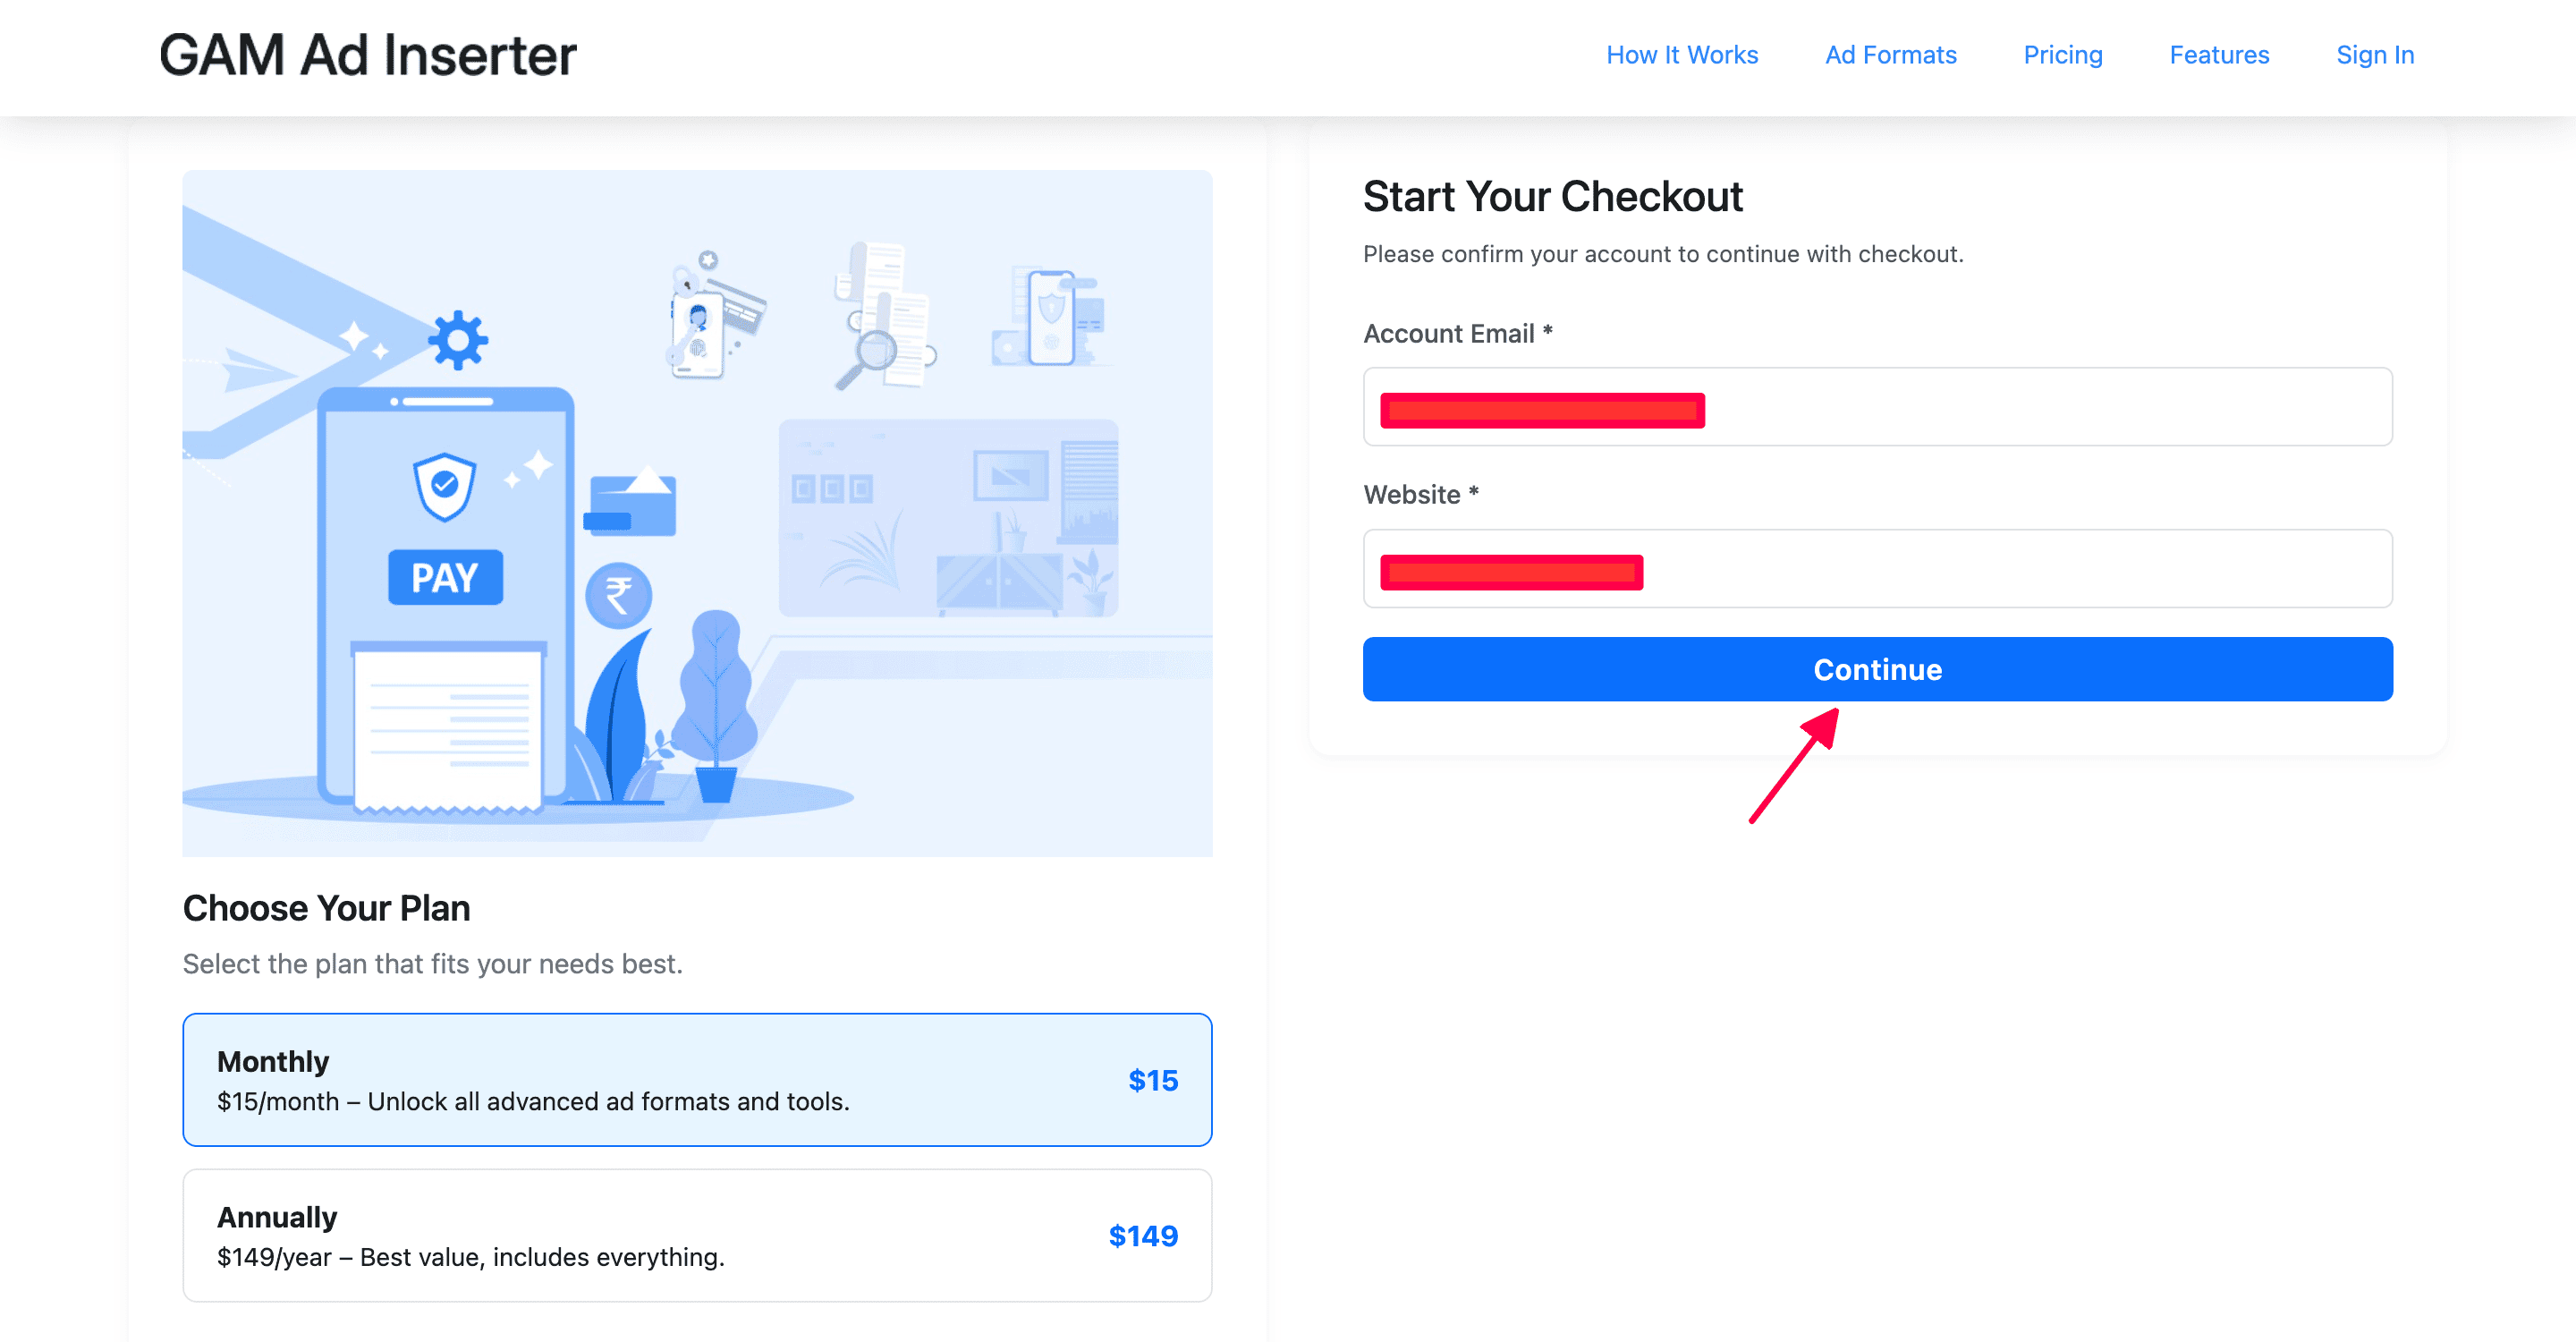
Step 3: Create Your Account
Enter your Email ID and Website URL, then click Continue.
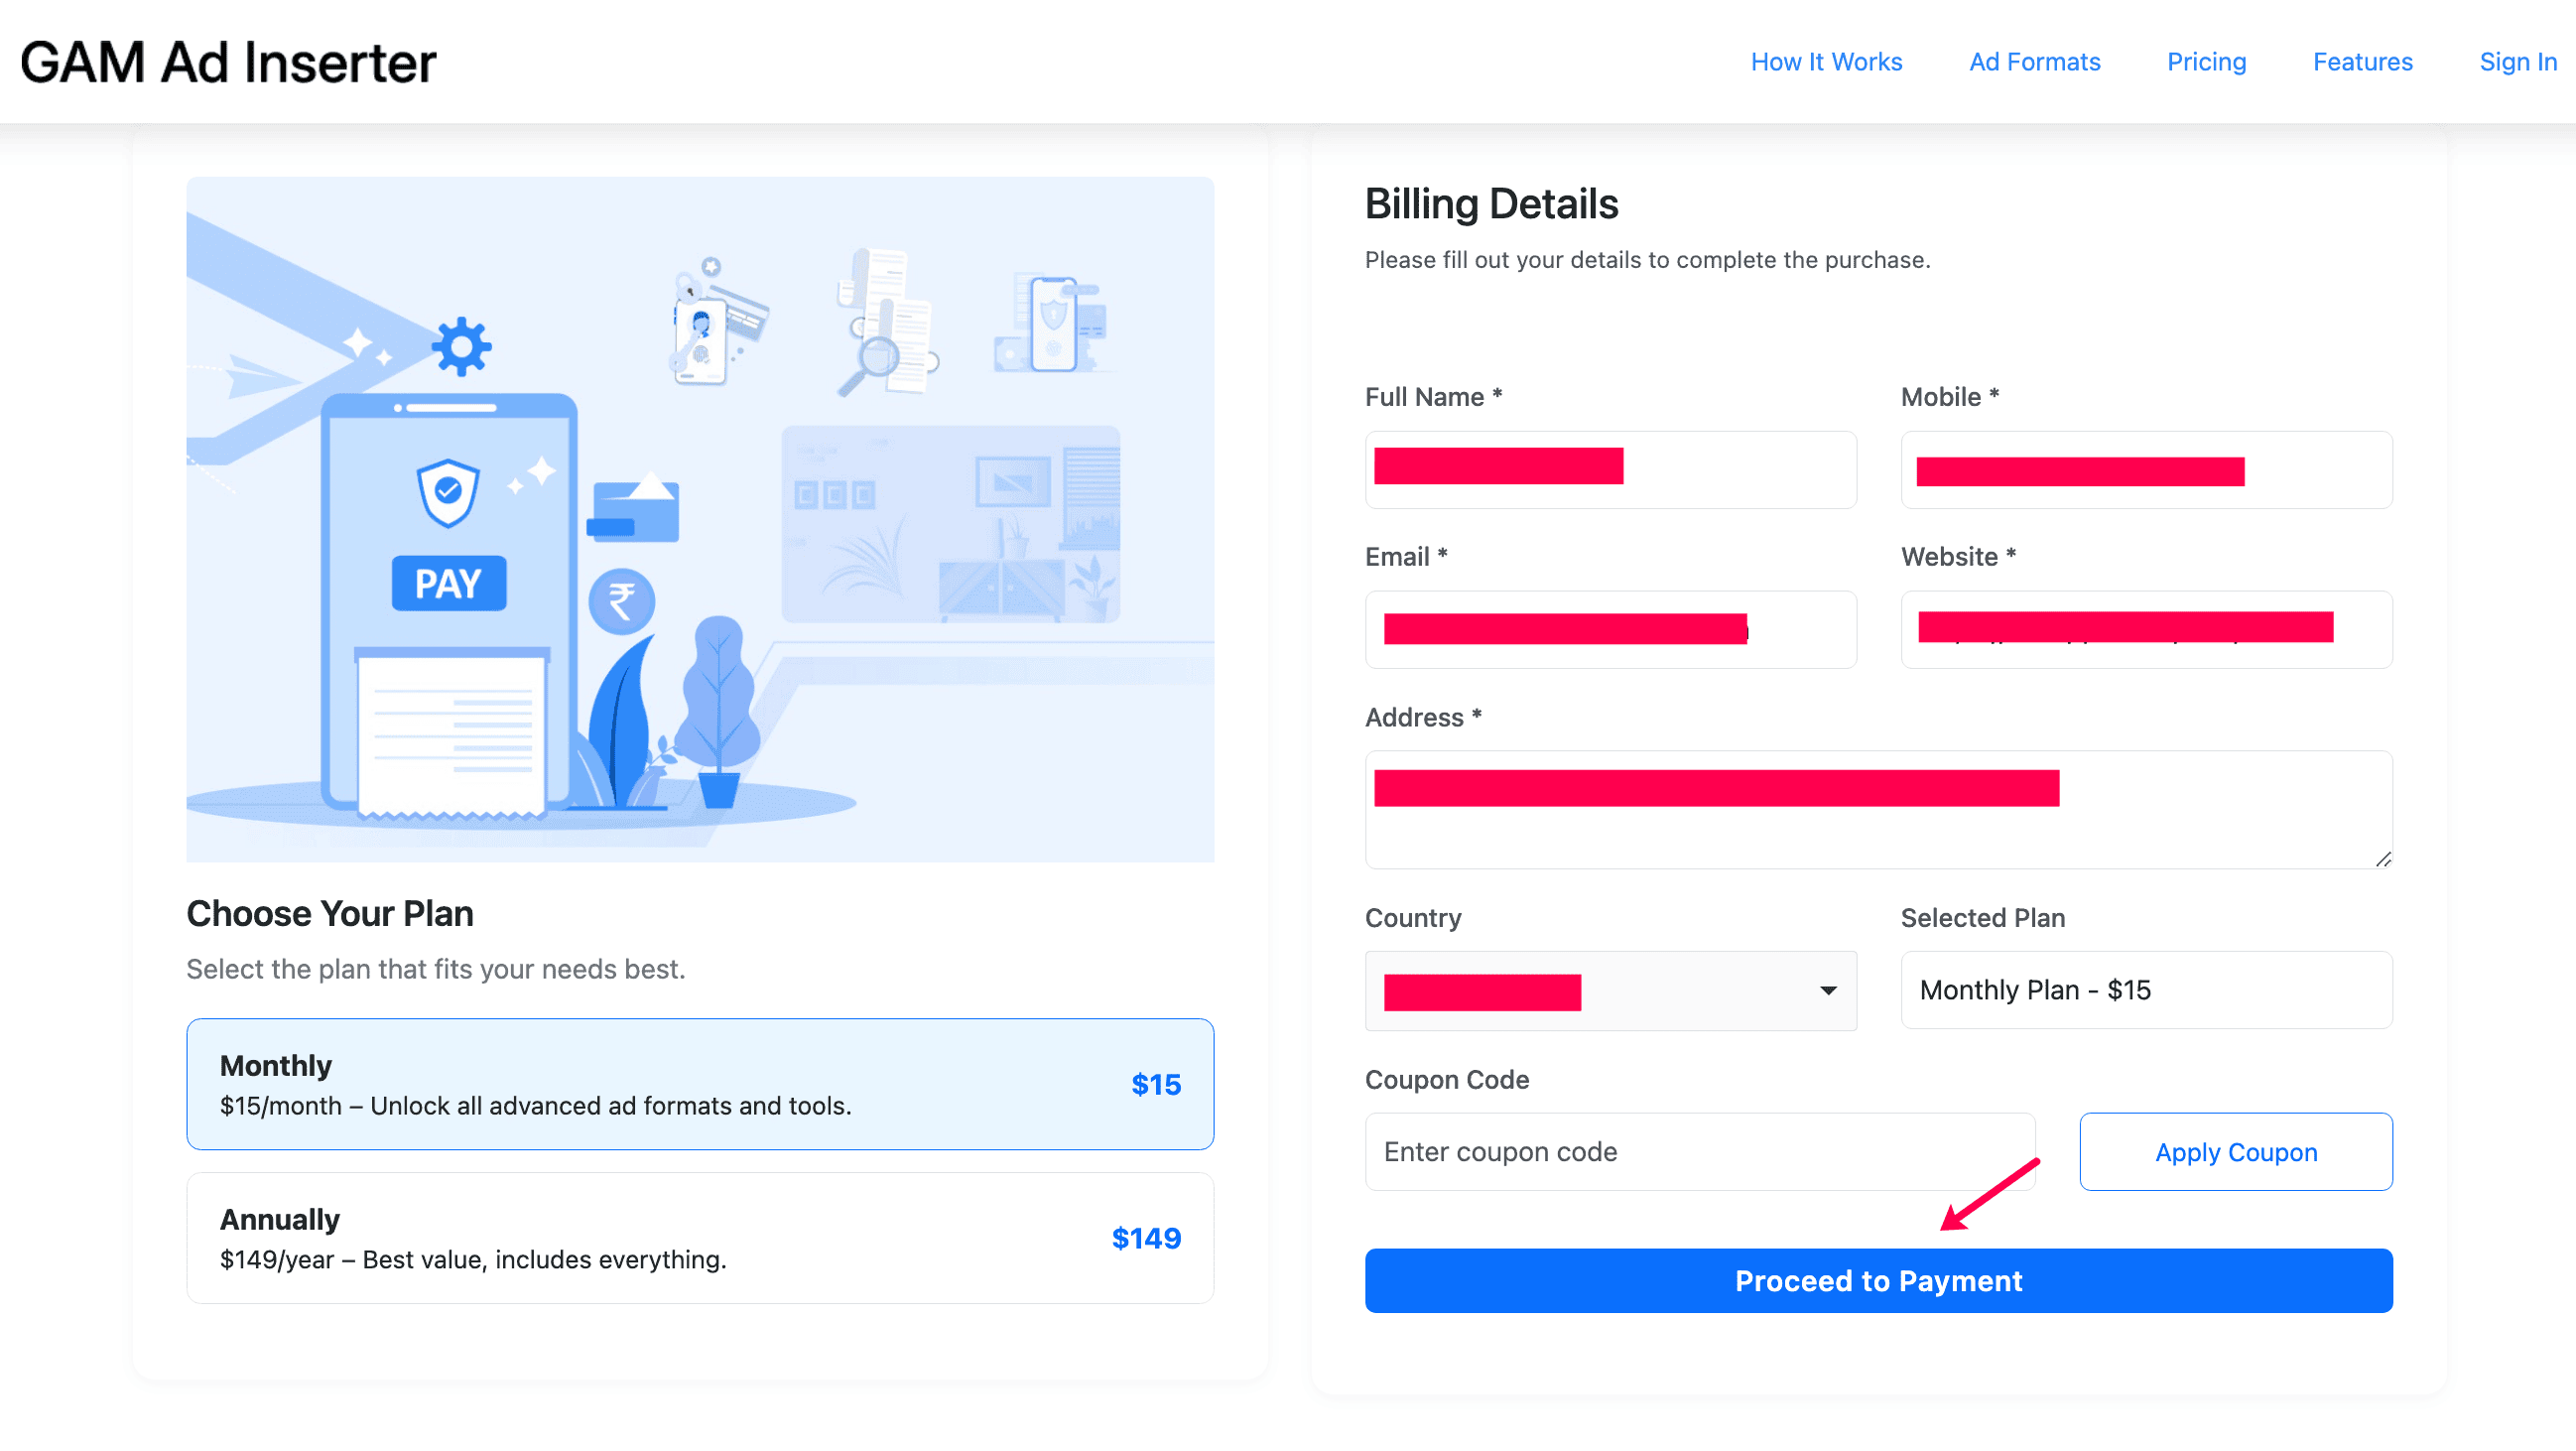
Step 4:Fill in Billing Details
Complete the required billing information, then click Proceed to Payment.
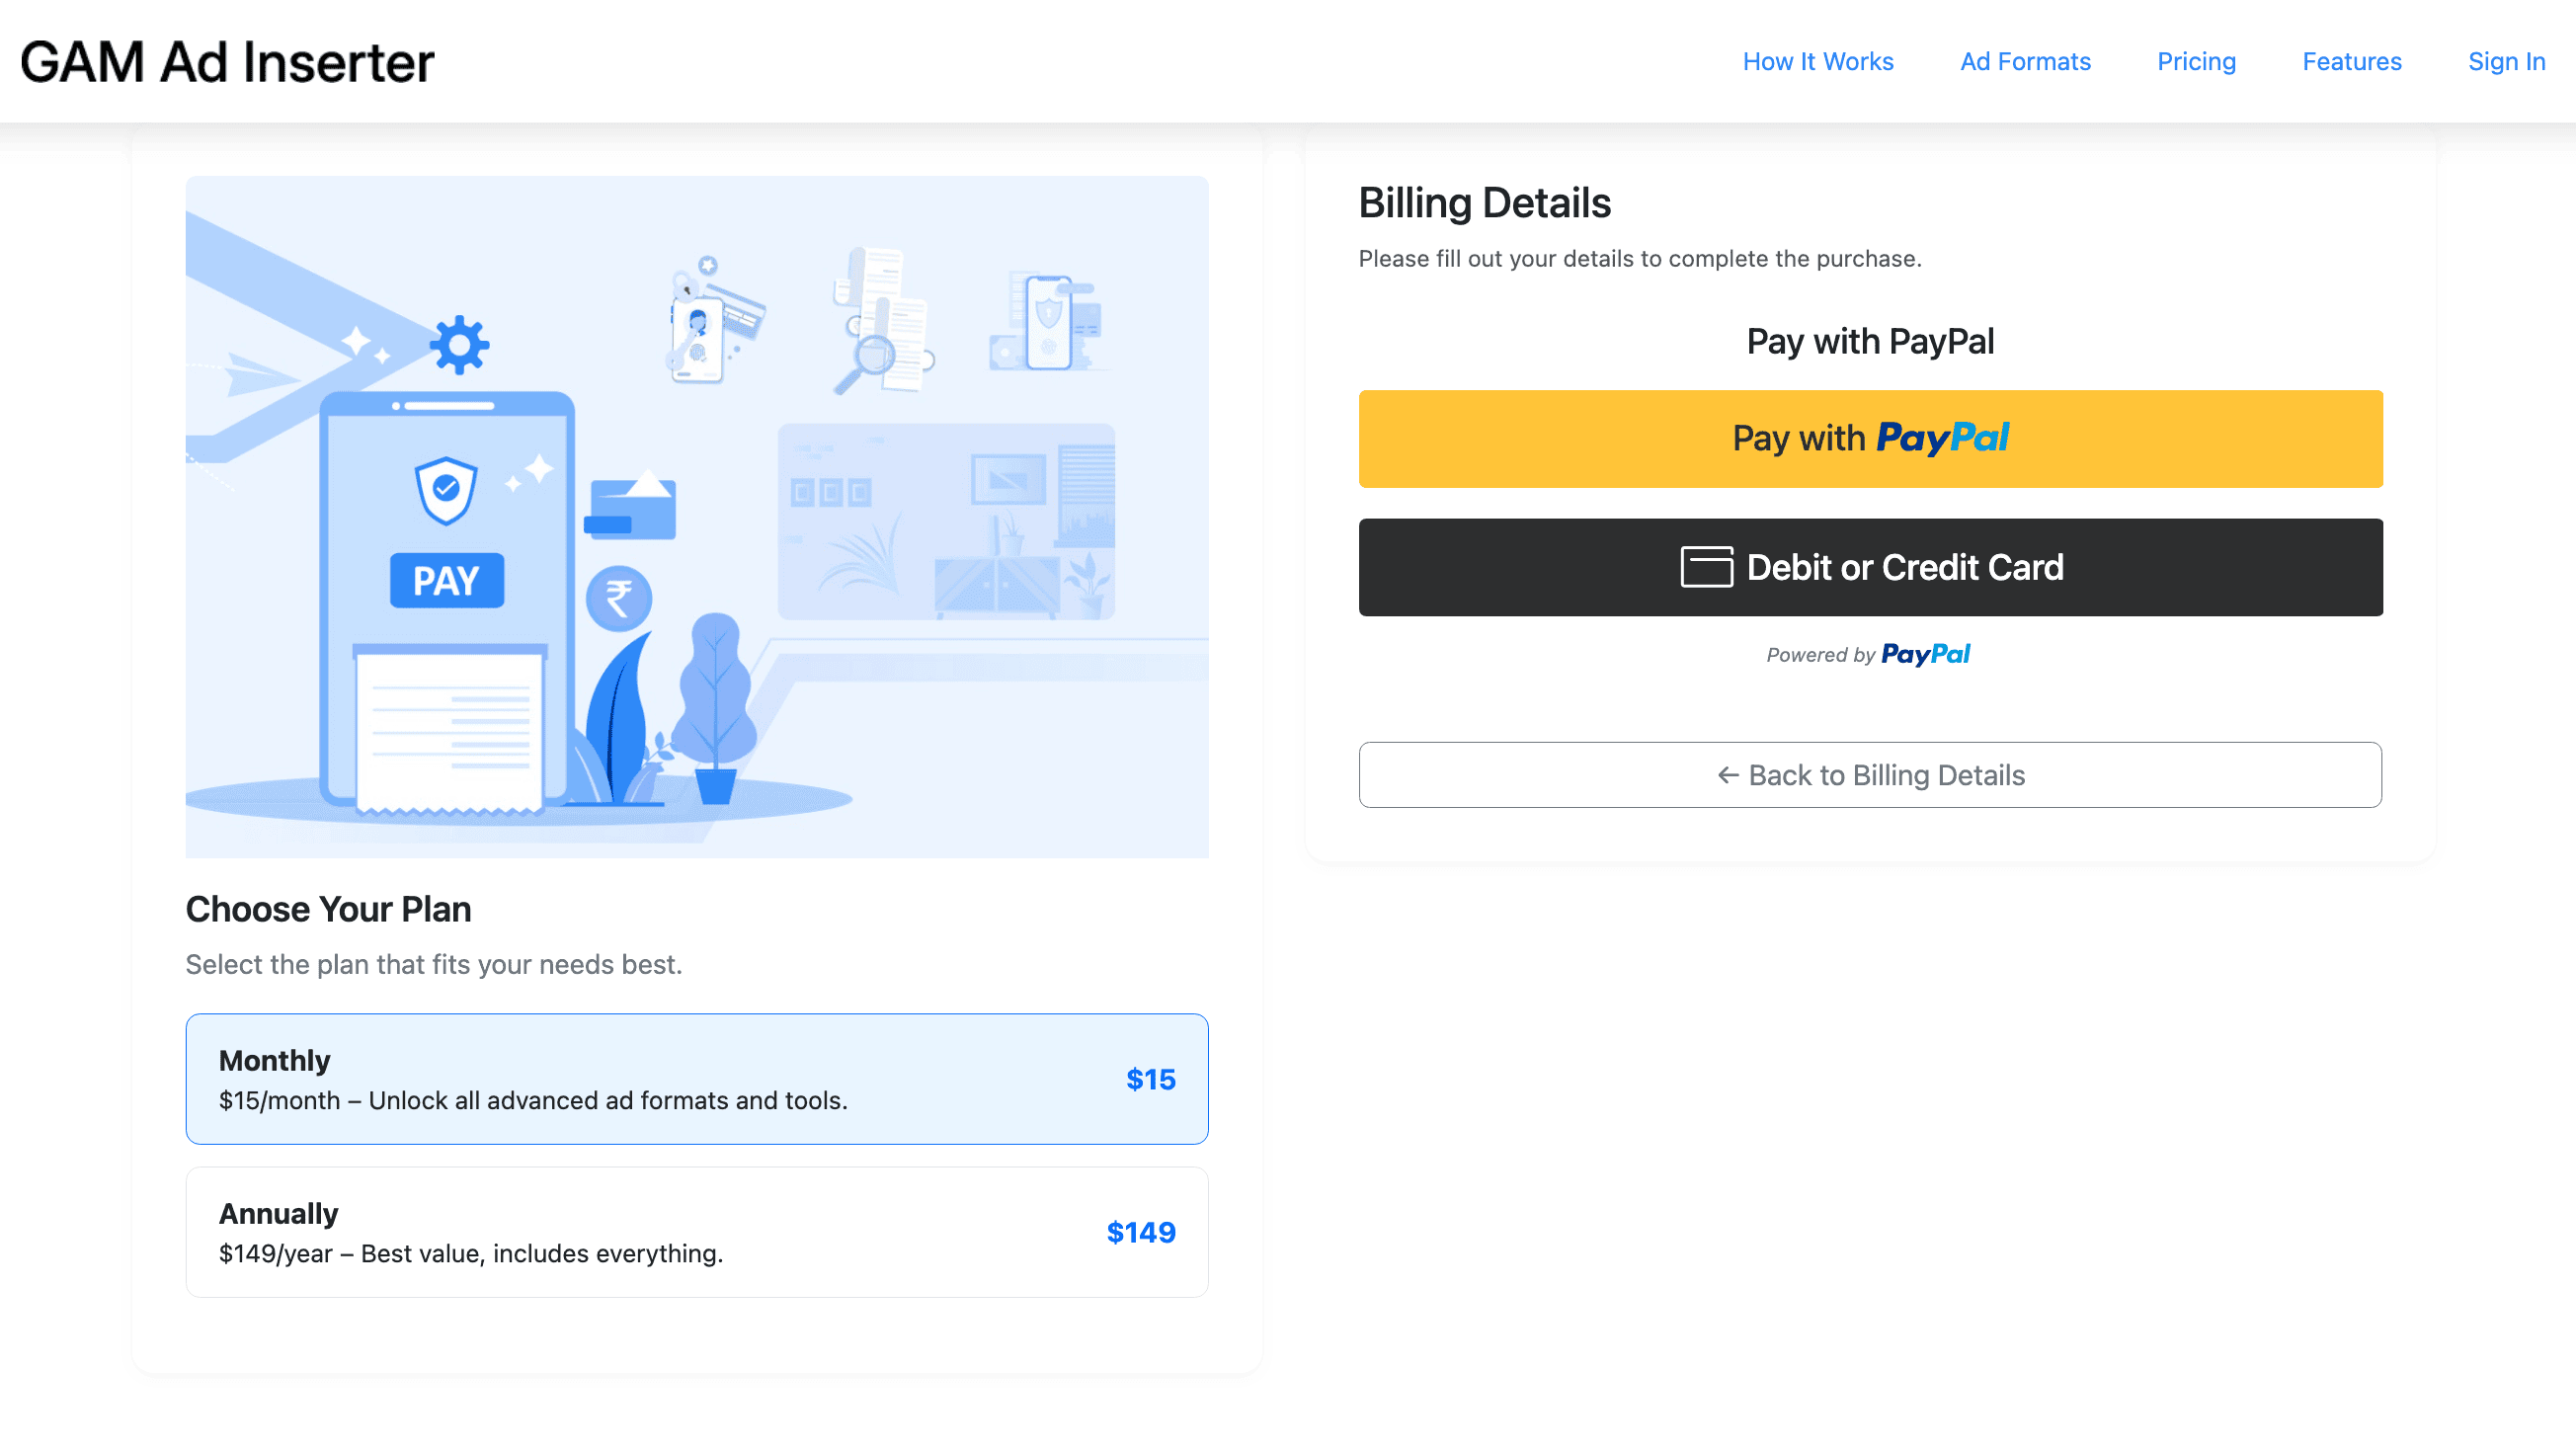
Step 5:Choose Payment Method
Choose your preferred Payment Method and complete checkout.
Once payment is successful, your account will be automatically upgraded.
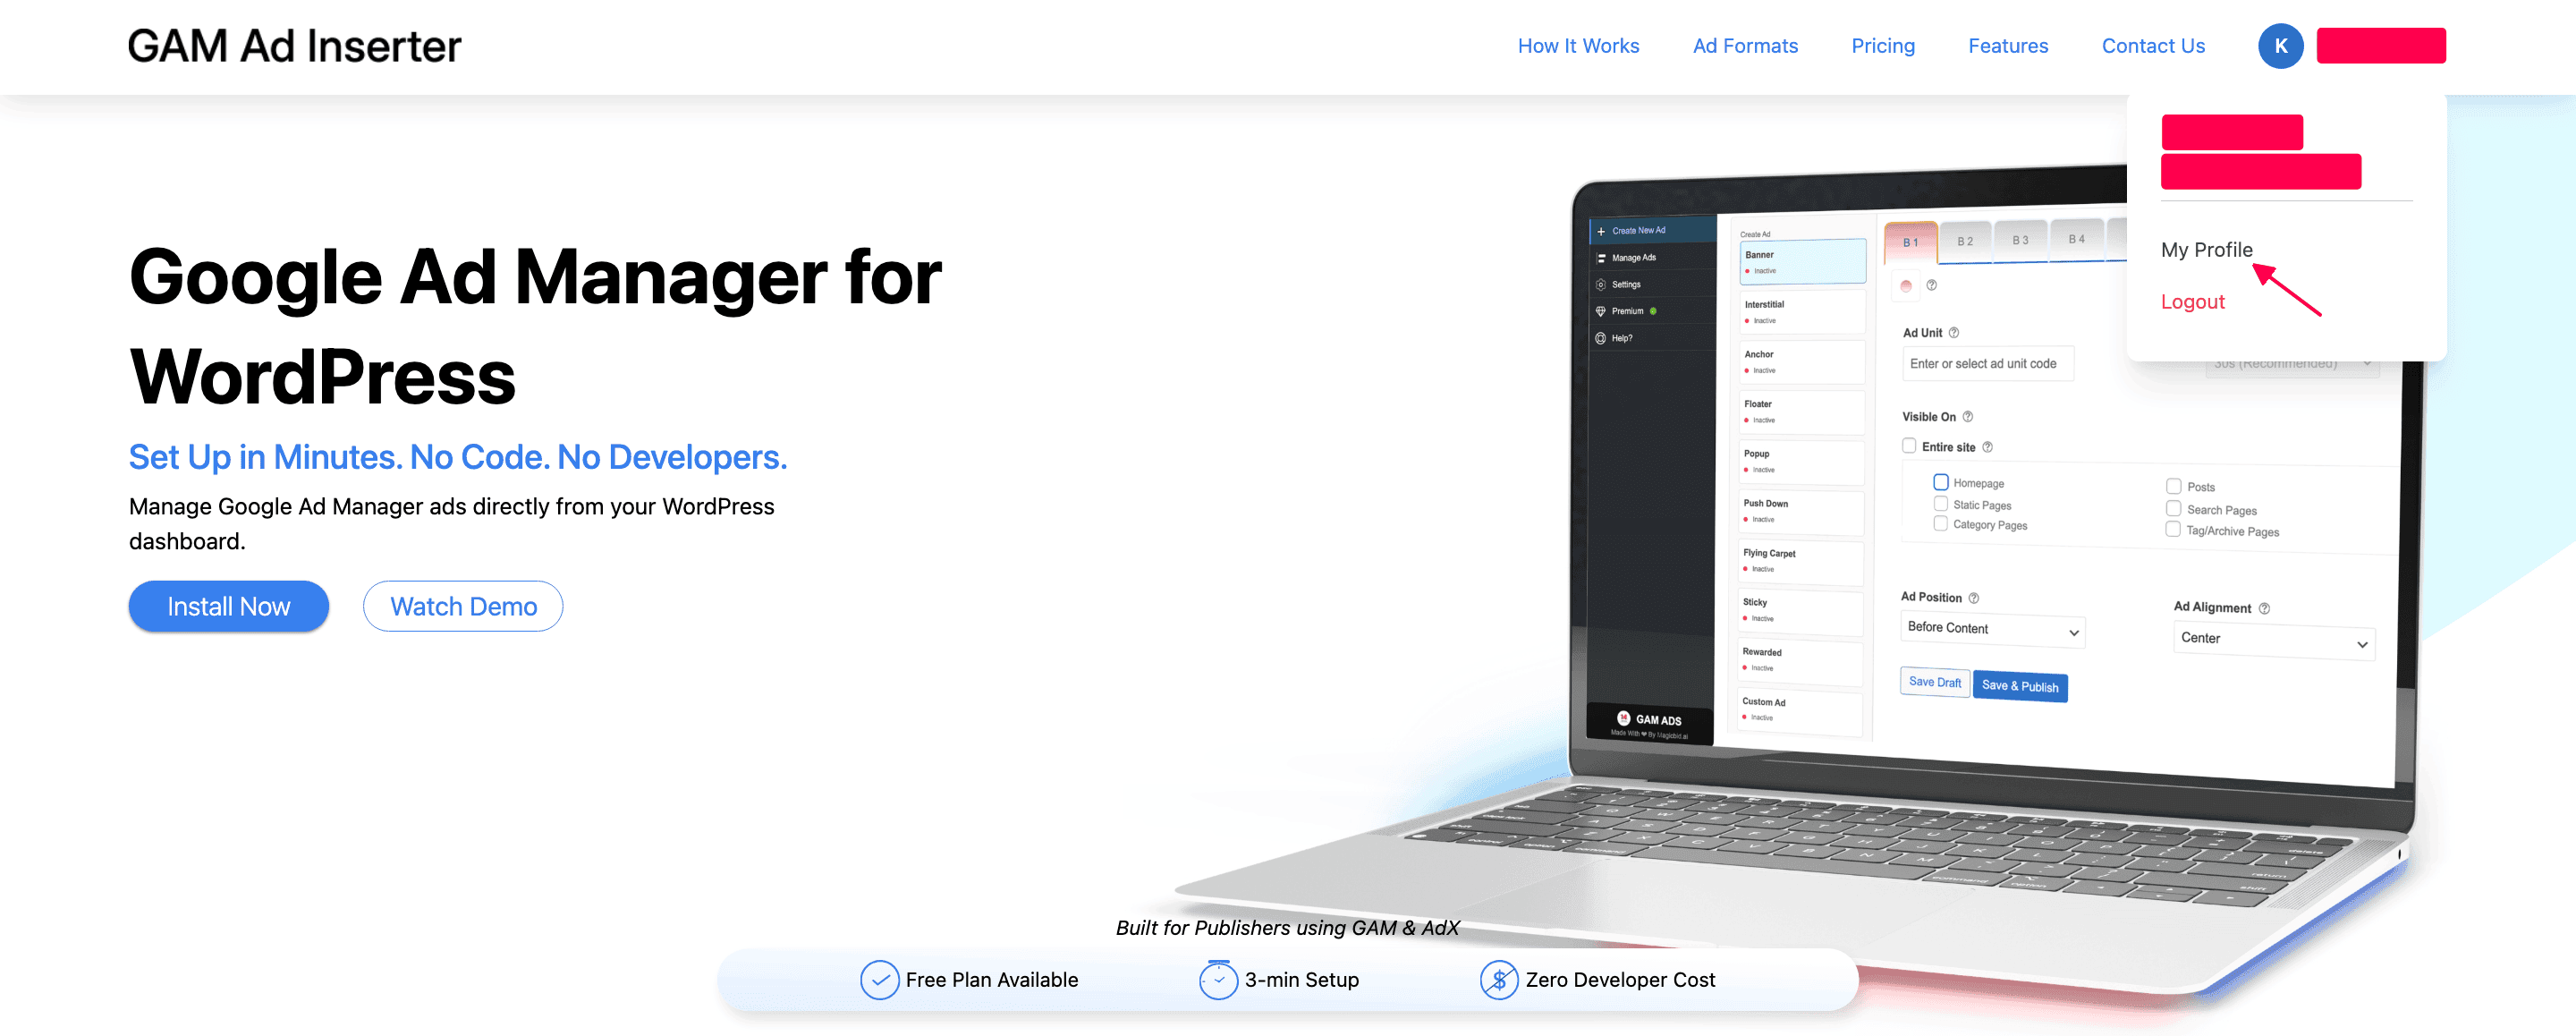
Step 6: Open My Profile
Log in to your GAM ADS account dashboard and go to: My Profile.
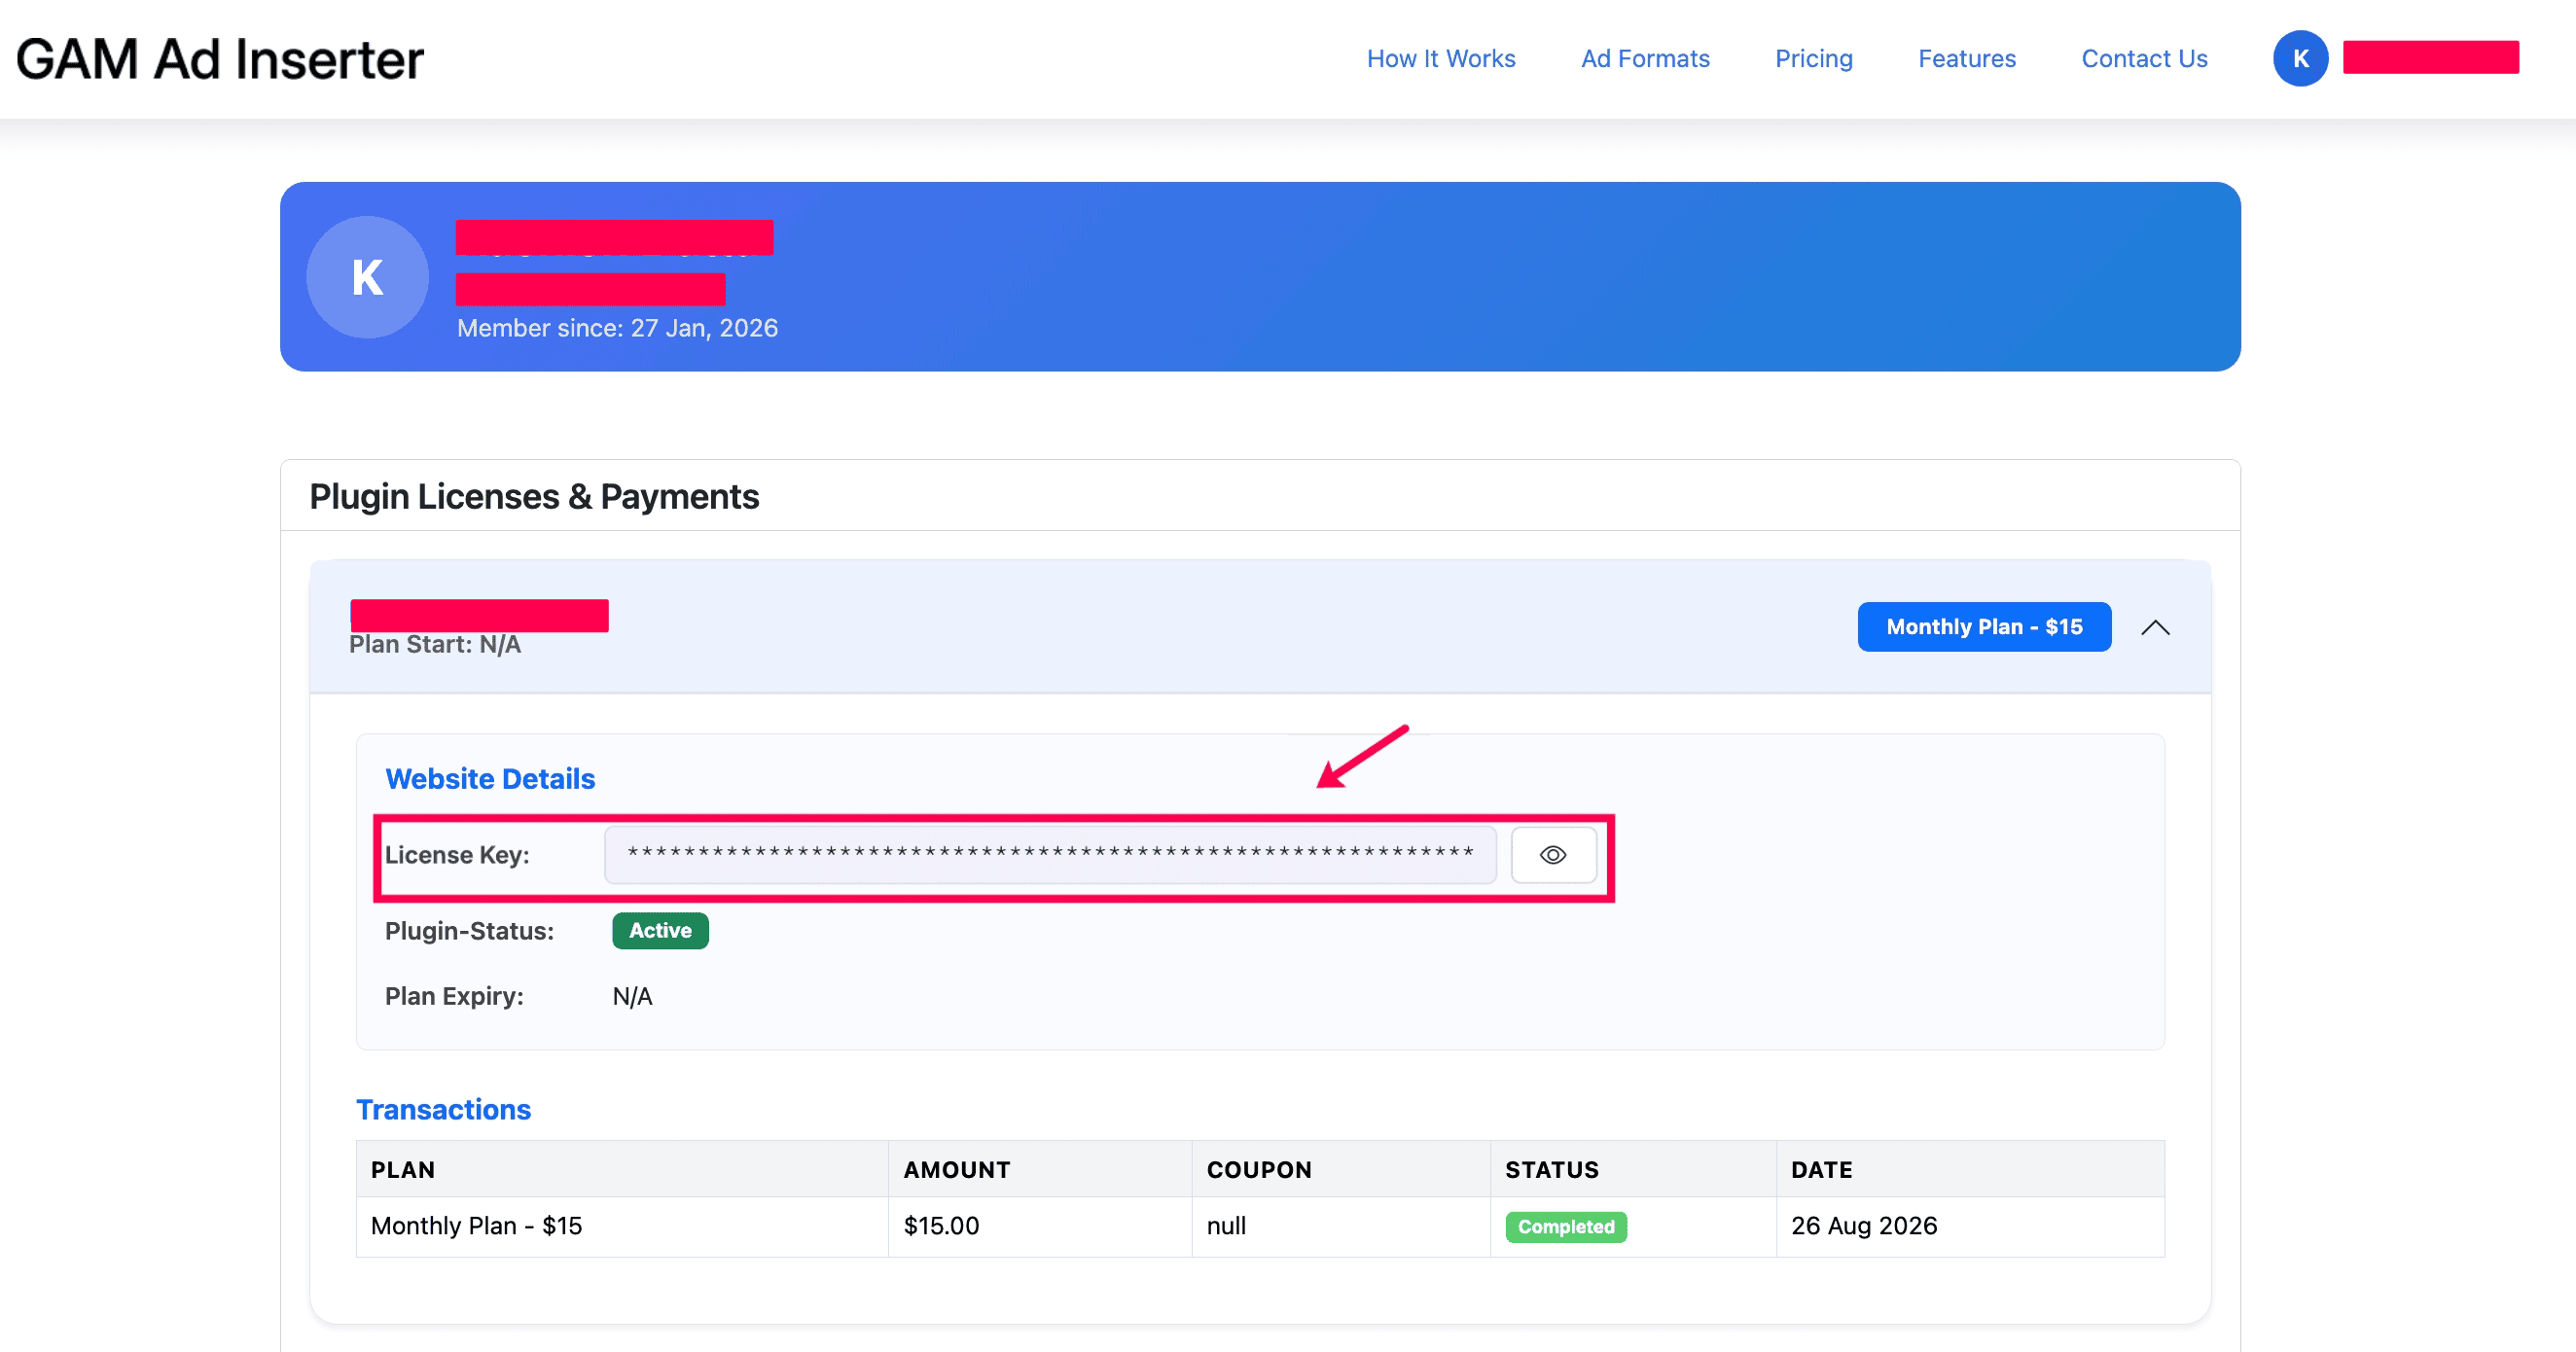
Step 7: Copy License Key
Copy your License Key from your profile page.
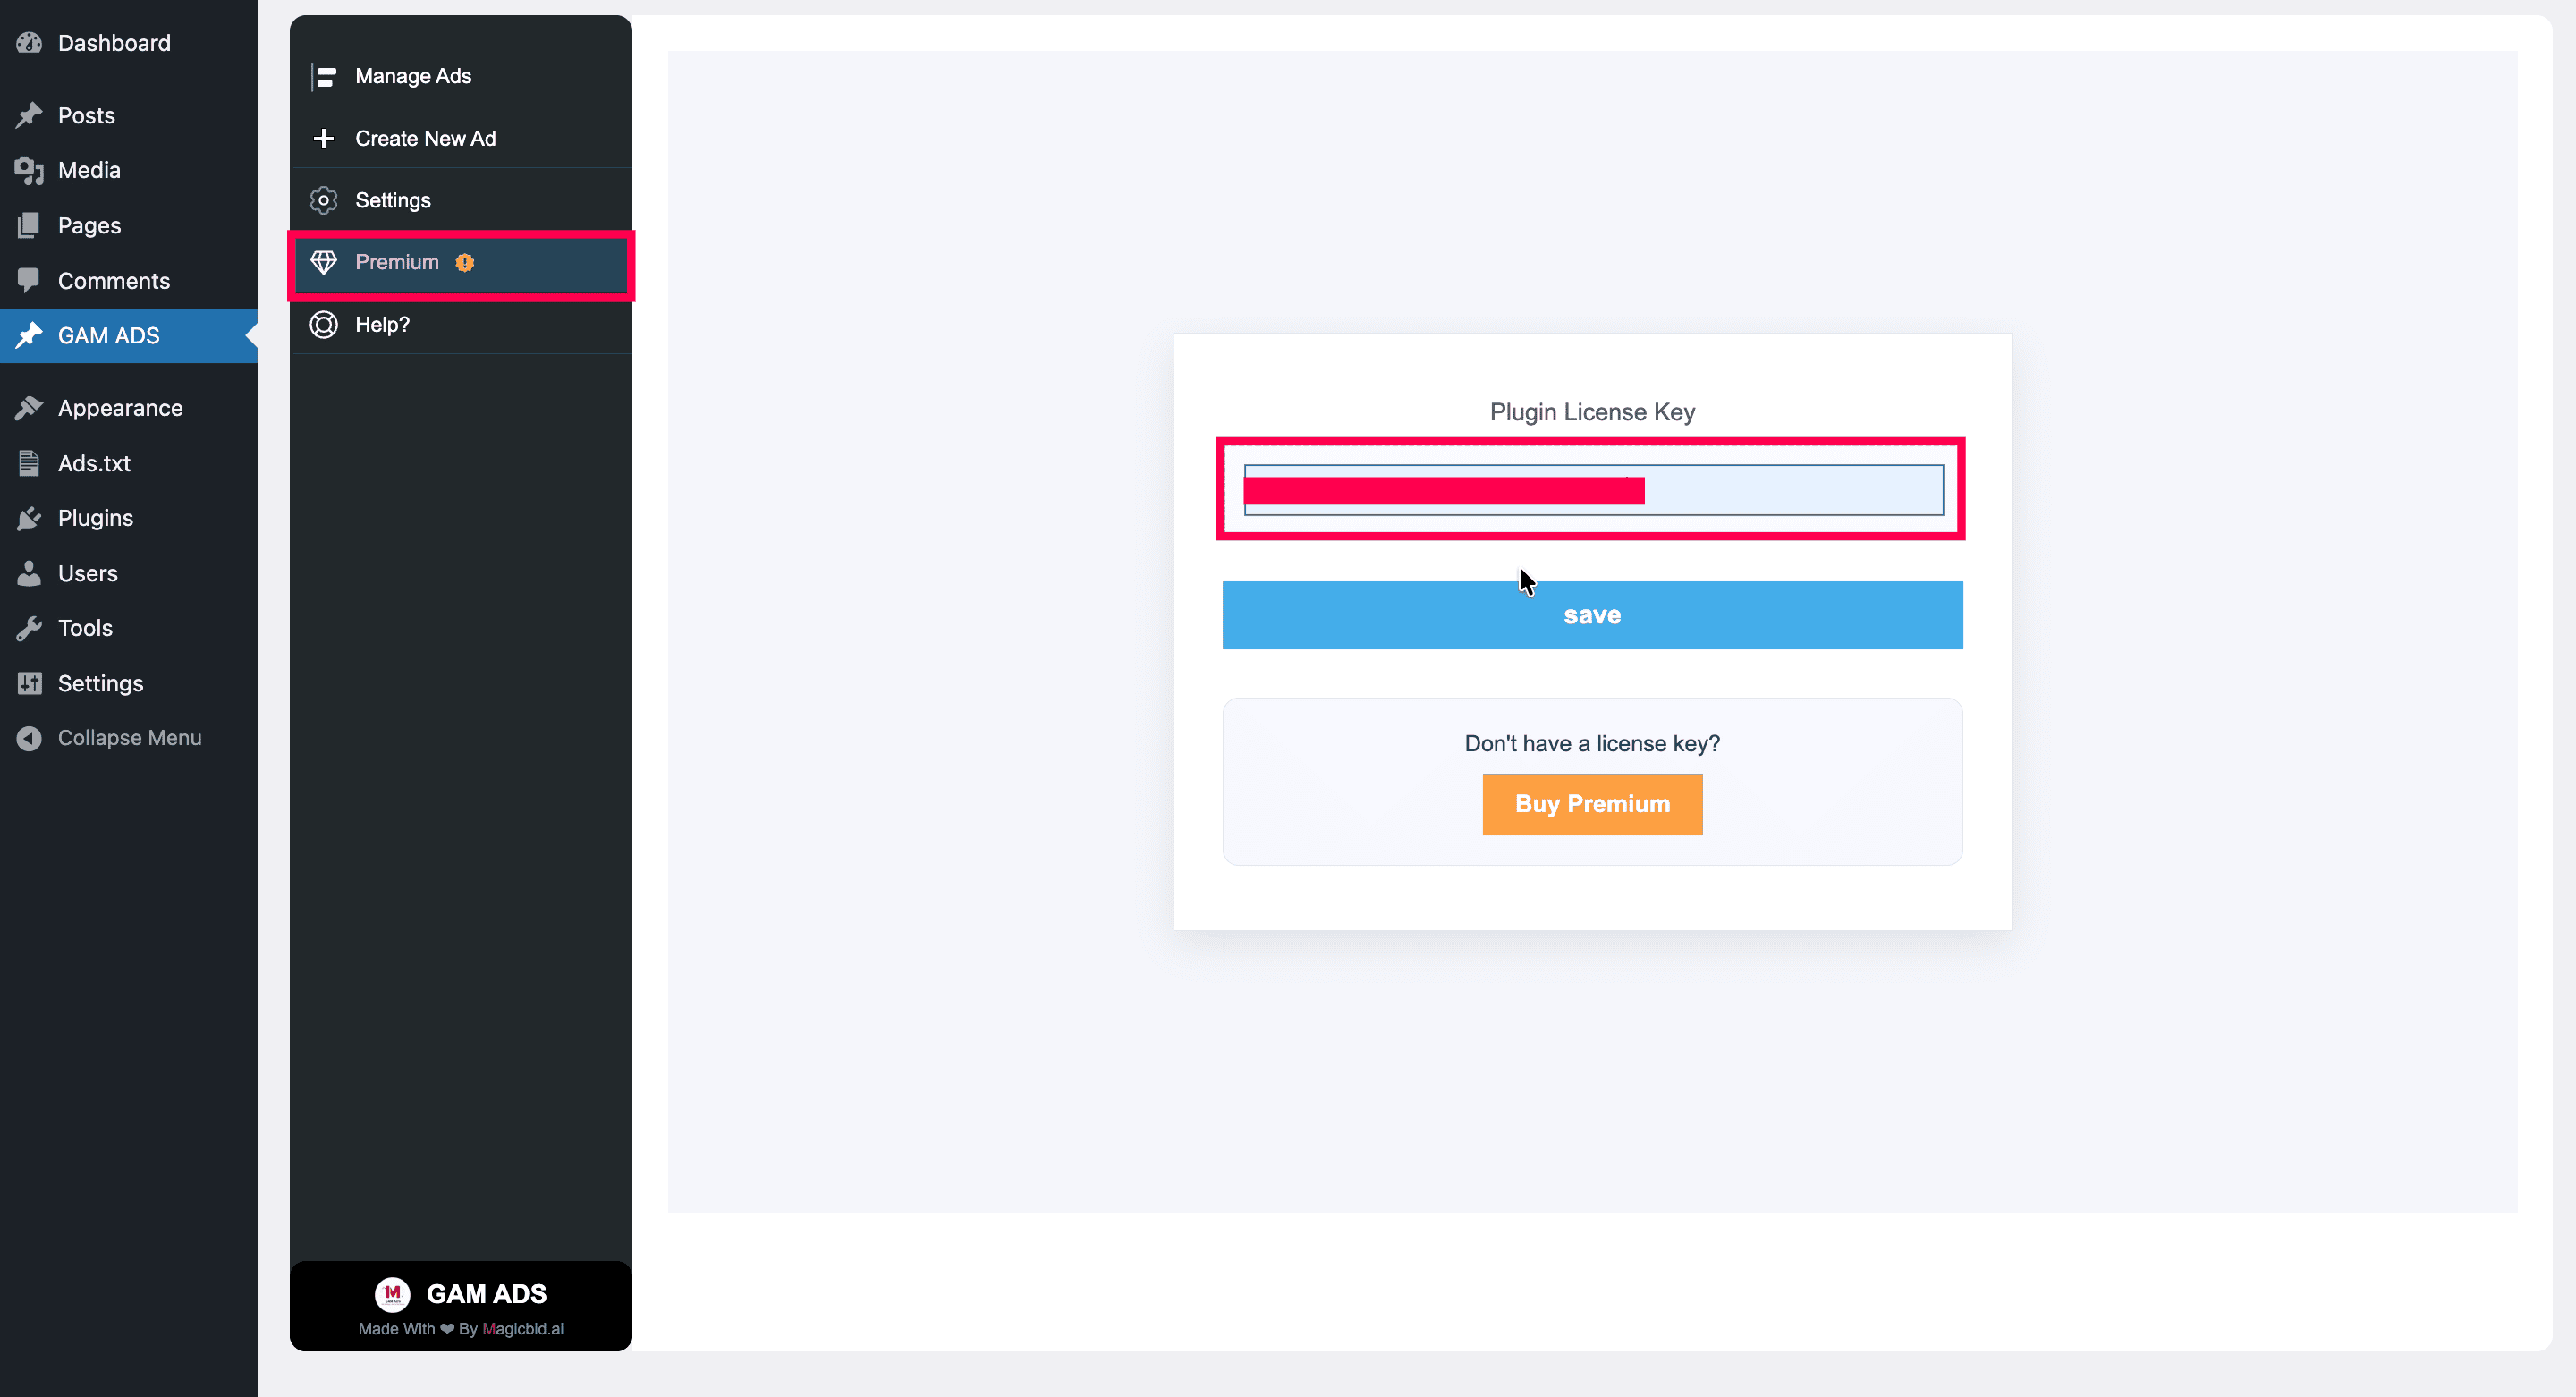
Step 8: Activate License in Plugin
Open your WordPress dashboard and go to:
GAM ADS → Premium
Paste your copied License Key and click Save.
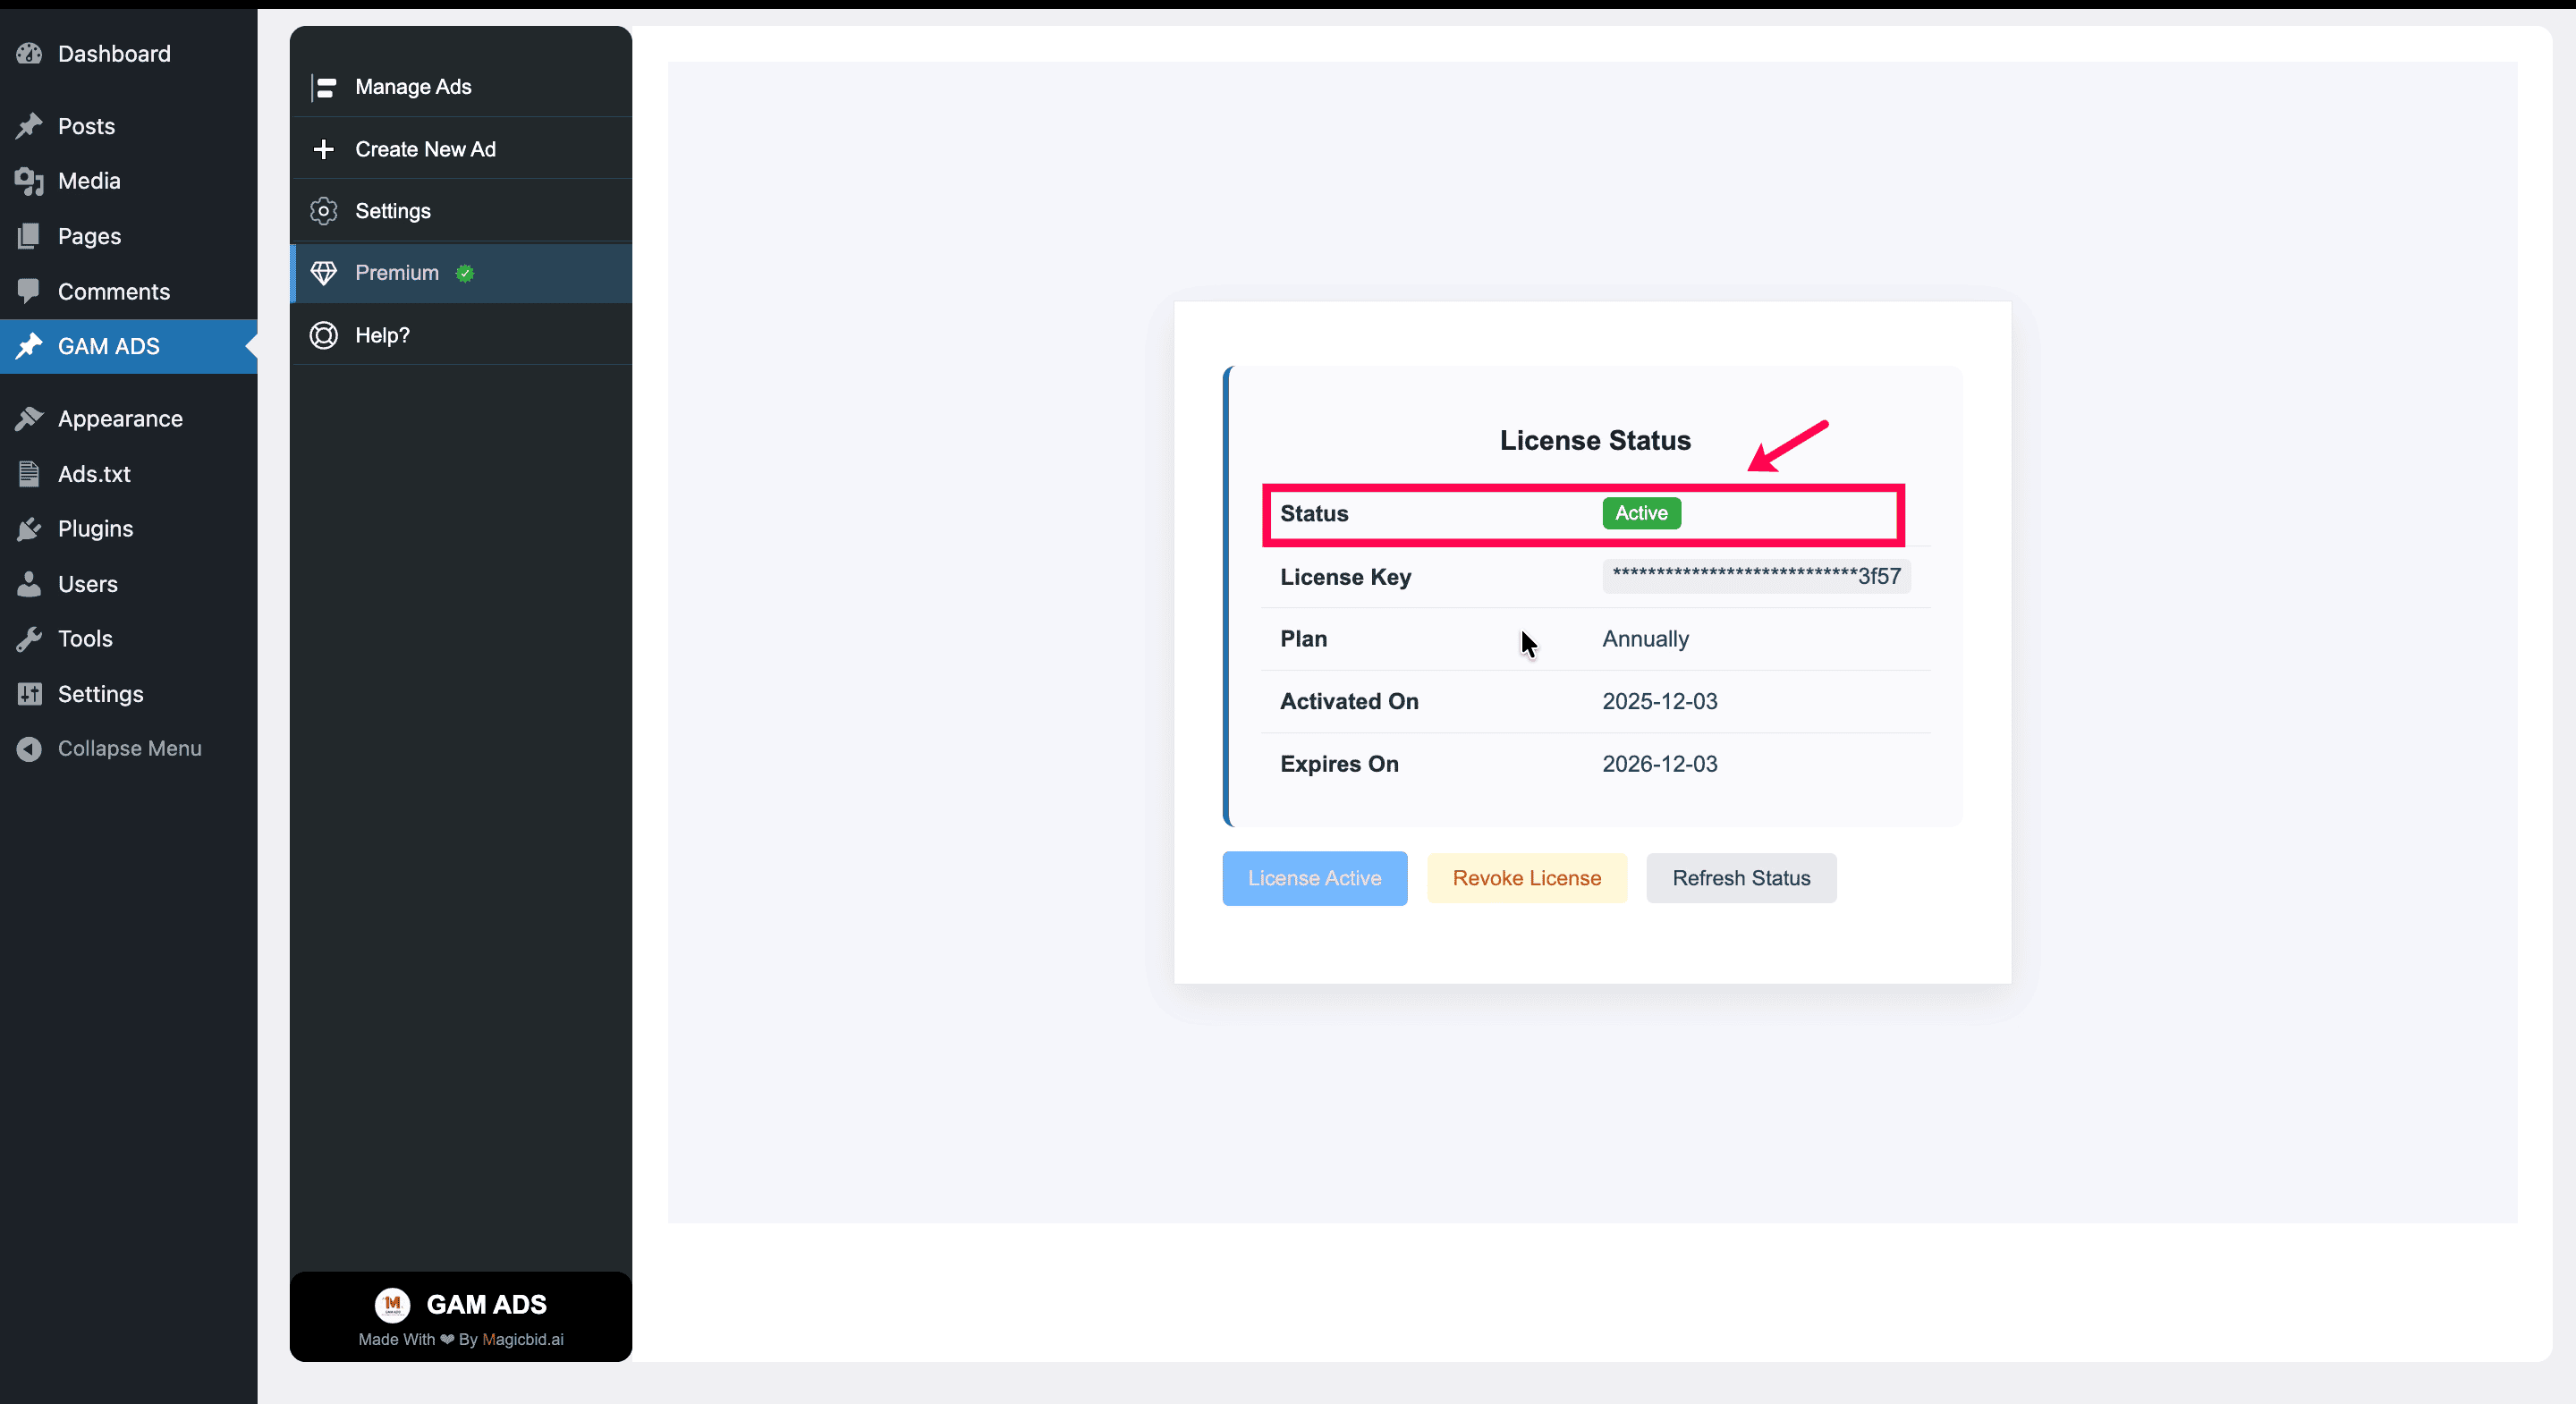
Step 9: Premium Activated
Your Premium Plan is now successfully activated.
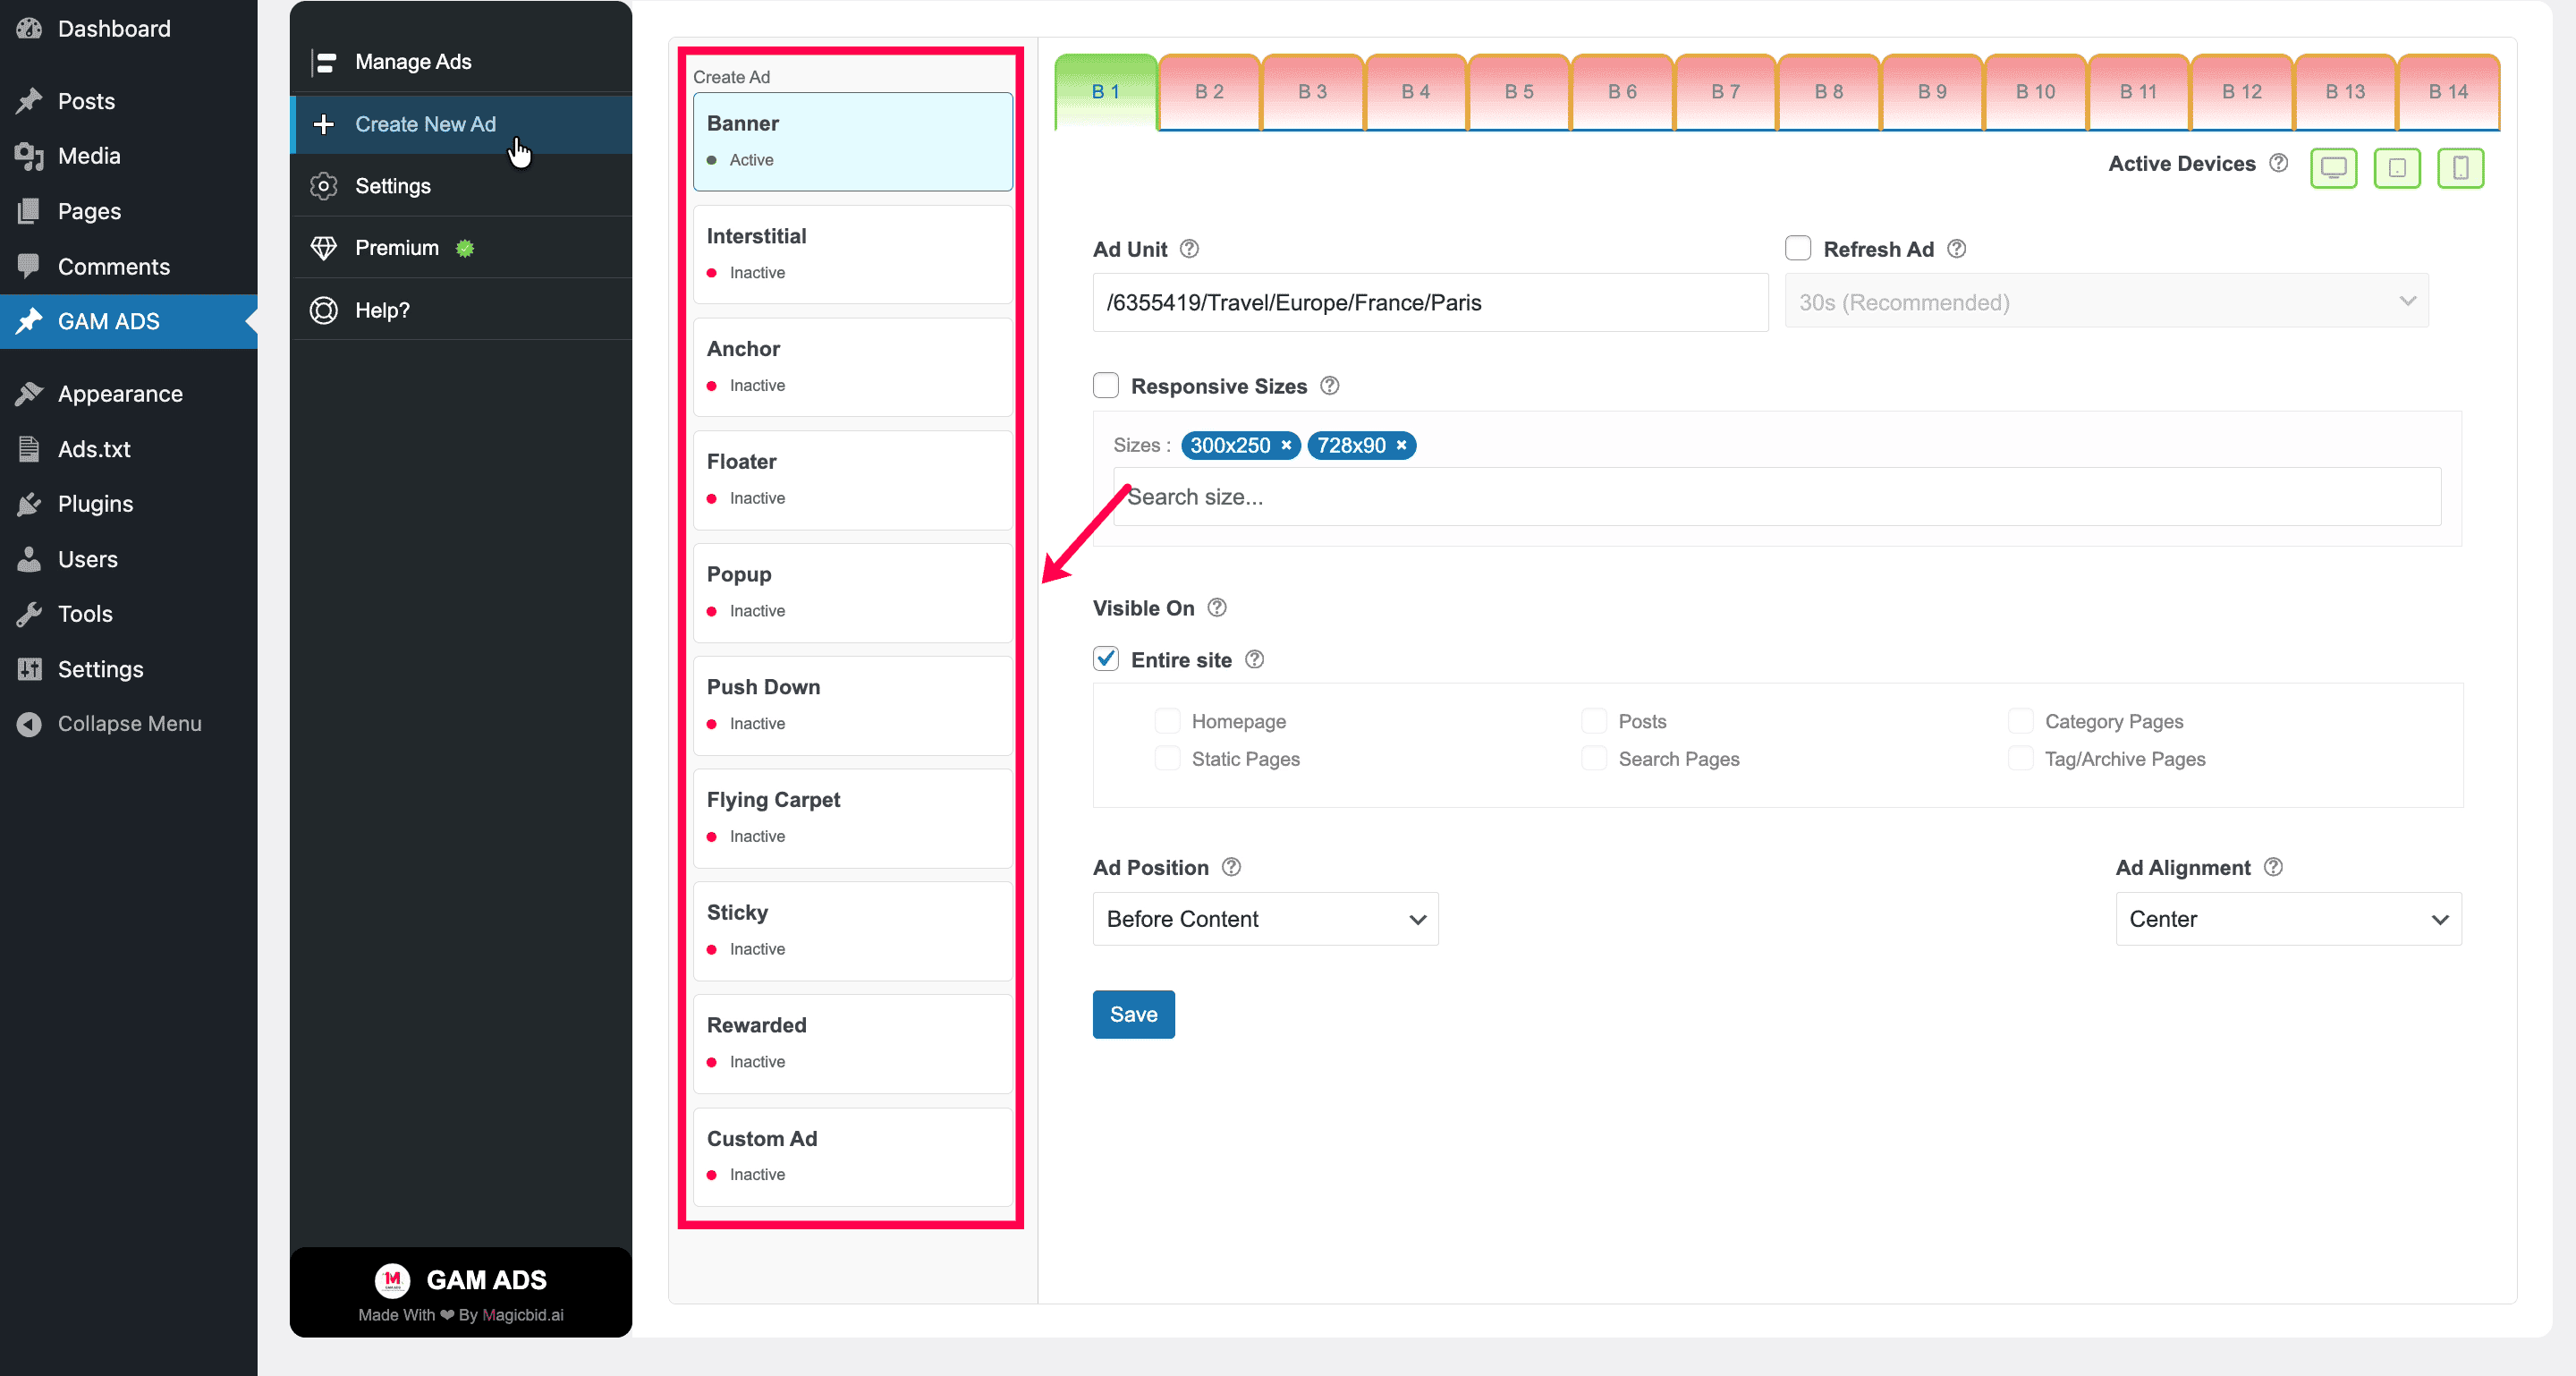
Step 10: Access Premium Features
All premium ad types and advanced features are now unlocked and ready to use.